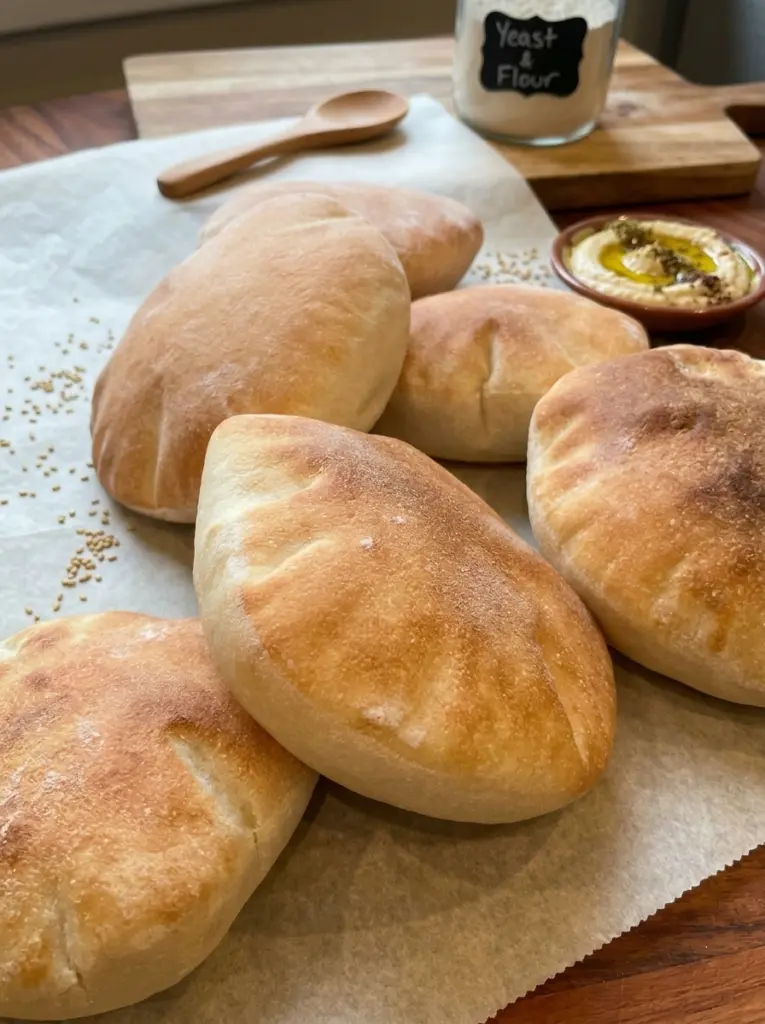
If you’ve ever wondered how to make bakery-quality pita bread in your own kitchen, this Homemade Pita Bread recipe is exactly what you need. Soft, fluffy, and flexible, this simple yeast dough transforms into golden, pillowy rounds that dramatically puff up in the oven, forming the signature pocket that makes pita so perfect for stuffing, dipping, and wrapping. It’s far easier to make than most people expect, and the results are absolutely worth the effort.
There’s something incredibly satisfying about watching a flat disc of dough balloon up in the oven right before your eyes. That dramatic puff isn’t magic — it’s science, and this recipe walks you through exactly how to achieve it every single time, whether you’re baking in the oven or cooking on the stovetop.
Whether you’re building the ultimate chicken shawarma, stuffing falafel and fresh vegetables into a warm pocket, scooping up creamy hummus, or simply tearing off a piece to dip into olive oil and za’atar, homemade pita bread elevates any meal. In this article, you’ll find a complete breakdown of the ingredients, step-by-step instructions, the secrets to getting a perfect pocket every time, expert tips, flavor variations, serving ideas, storage information, and answers to the most frequently asked questions about making pita bread at home.
What Is Homemade Pita Bread?
Pita bread is a soft, round flatbread that originated in the Middle East and Mediterranean regions and has become a beloved staple in cuisines around the world. What makes pita truly unique is its ability to form a hollow pocket when baked at high heat, a result of steam rapidly building up inside the thin dough and separating it into two distinct layers.
This recipe uses a simple, straightforward dough made from all-purpose flour, instant yeast, sugar or honey, salt, warm water, and olive oil. After kneading and a proper rise, the dough is divided into portions, rolled into thin rounds, and baked on a very hot surface — either a pizza stone, baking steel, or heavy baking sheet in the oven, or a hot cast-iron skillet on the stovetop. The intense, direct heat is what causes the dramatic puff that creates the pocket, making pita bread ideal for stuffing with your favorite fillings.
Unlike store-bought pita, which can sometimes be dense, dry, or lacking in that classic pocket, homemade pita bread comes out soft, tender, and perfectly pliable when made correctly. Once you master the technique, you’ll likely find yourself making a batch on a regular basis.
Why You’ll Love This Recipe
- Simple, pantry-staple ingredients — no specialty items required.
- Dramatically puffs into a pocket — perfect for stuffing with your favorite fillings.
- Two cooking methods — bake in the oven or cook on the stovetop, whichever suits you best.
- Soft, fluffy, and flexible texture — far superior to many store-bought versions.
- Freezer-friendly — make a big batch and freeze extras for later.
- Endlessly versatile — perfect for shawarma, gyros, falafel, dips, and more.
Ingredients You’ll Need
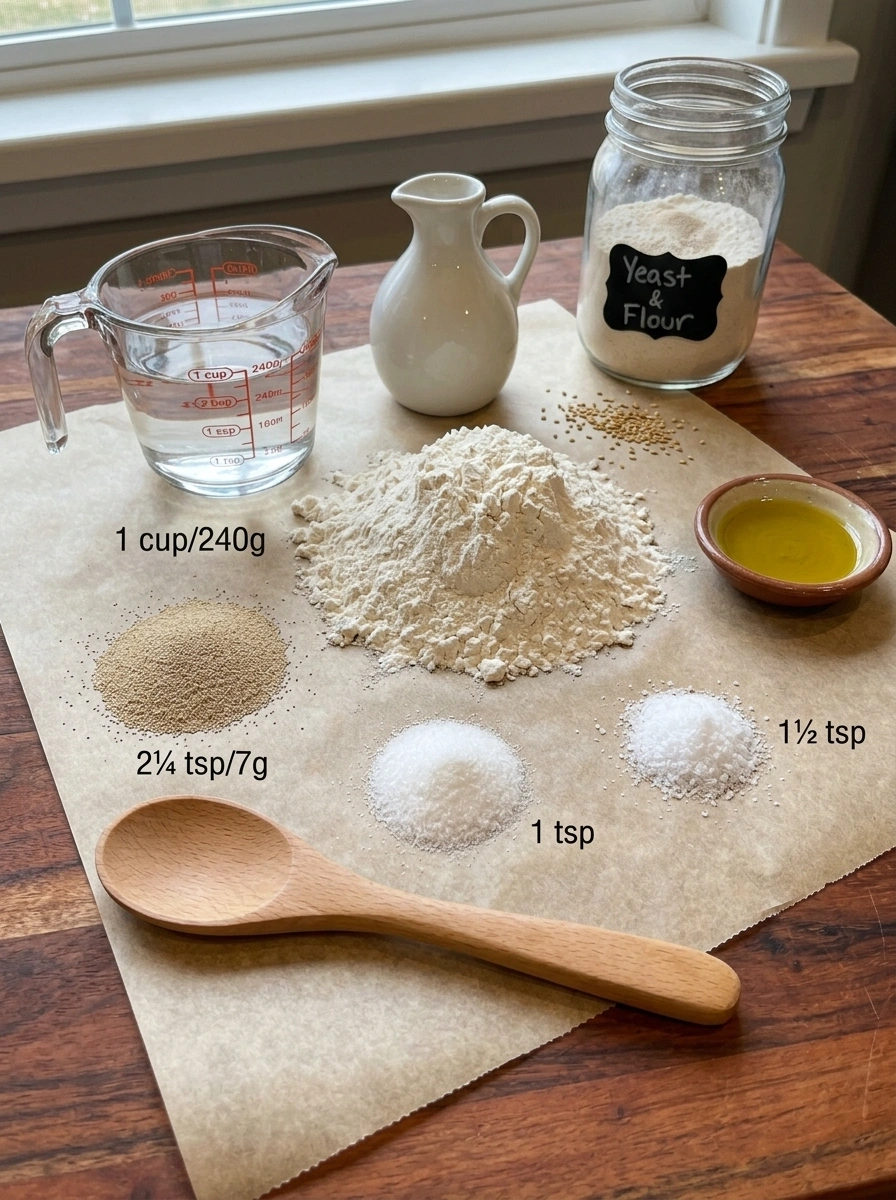
For the Dough
- 3 cups (360 g) all-purpose flour — the base of the dough, providing structure and chew.
- 2¼ tsp (7 g) instant yeast — leavens the dough and helps create the air pockets needed for puffing.
- 1 tsp granulated sugar or honey — feeds the yeast and adds a subtle touch of sweetness.
- 1½ tsp fine sea salt — essential for flavor and for controlling the yeast’s activity.
- 1 cup (240 g) warm water — hydrates the dough and activates the yeast.
- 2 tbsp extra-virgin olive oil — adds richness and helps create a soft, tender crumb.
For Finishing
- Extra flour, for rolling — prevents sticking as you shape the dough.
- Olive oil or melted butter, optional — for brushing over warm pitas if desired.
Step-by-Step Instructions
Step 1: Mix the Dough
Add the flour, instant yeast, sugar, and salt to a large mixing bowl and whisk until evenly combined. Add the warm water and olive oil, then mix until a shaggy dough forms.
Step 2: Knead
Transfer the dough to a lightly floured work surface and knead for approximately 7–10 minutes, until the dough becomes smooth, soft, and elastic. It should feel slightly tacky but shouldn’t stick heavily to your hands. If necessary, add extra flour 1 tablespoon at a time until the texture is right.
Step 3: First Rise 🫧
Place the dough in a lightly oiled bowl, cover, and let it rise at room temperature for approximately 1–1½ hours, or until roughly doubled in size.
Step 4: Divide the Dough
Turn the risen dough onto a clean work surface and divide it into 8 equal pieces, approximately 75–80 g each. Shape each piece into a smooth ball.
Step 5: Rest the Dough
Cover the dough balls with a clean kitchen towel and let them rest for 15–20 minutes. This relaxes the gluten and makes the dough much easier to roll without shrinking back.
Step 6: Roll Into Pitas 🫓
Lightly flour your work surface and roll each dough ball into a round approximately 6–7 inches wide and about ⅛–¼ inch thick. Try to keep the thickness as even as possible — uneven areas can prevent the pita from forming a complete pocket.
Step 7: Rest Again
Cover the rolled pita rounds and let them rest for approximately 10–15 minutes while the oven finishes heating. Be sure not to let the surfaces dry out during this time.
Step 8: Heat the Oven Very Hot 🔥
Preheat the oven to 475°F (245°C). Place a pizza stone, baking steel, or heavy baking sheet inside the oven while it preheats, and let the baking surface become thoroughly hot. This intense initial heat is one of the biggest secrets to creating a proper pita pocket.
Step 9: Bake the Pitas
Carefully place 1–2 pita rounds onto the hot baking surface and bake for approximately 2–4 minutes. Within the first couple of minutes, the pita should begin dramatically inflating like a balloon. Once puffed and lightly golden in spots, remove it from the oven. Be careful not to overbake, or the pita can become dry and crispy instead of soft and pliable.
Step 10: Keep Them Soft
Immediately place the hot pitas inside a clean kitchen towel and cover them. The trapped steam helps keep them soft, flexible, and tender while the remaining pitas finish baking.
Stovetop Method 🍳
Pita can also be cooked in a very hot cast-iron skillet if you prefer not to use the oven. Heat the dry skillet over medium-high to high heat, then place one rolled pita in the hot pan. Cook for approximately 1–2 minutes, until bubbles begin to appear, then flip and cook the second side. Flip once more if necessary, and the pita should begin puffing just as it would in the oven. Keep finished pitas covered with a towel to maintain softness as you work through the batch.
The Secret to a Big Pocket 🫓💨
For pita that inflates properly every time, keep these key points in mind:
- Preheat the baking surface thoroughly before adding the dough.
- Use a very hot oven — high heat is essential for the dramatic puff.
- Roll the dough evenly, avoiding thin or thick spots.
- Don’t make the center dramatically thinner than the edges.
- Don’t tear the surface while rolling, as tears prevent steam from being trapped evenly.
- Keep rolled dough covered so it doesn’t dry out before baking.
- Don’t overbake, or the pita will dry out and lose its soft, pliable texture.
The intense heat rapidly creates steam inside the dough, separating the top and bottom layers and forming the classic pocket that makes pita bread so versatile.
Expert Tips for the Best Homemade Pita
- Use instant yeast for convenience. Instant yeast can be mixed directly into the dry ingredients without proofing separately, streamlining the process.
- Don’t skip the resting steps. Both the initial rise and the resting periods before and after rolling are essential for relaxed, easy-to-shape dough.
- Roll evenly for the best pocket. Uneven thickness is one of the most common reasons pita fails to puff properly.
- Preheat your baking surface thoroughly. A stone, steel, or heavy baking sheet needs adequate time to reach full heat — don’t rush this step.
- Work quickly once baking begins. Have your rolled pitas ready to go so each one goes into the oven while it’s still at peak heat.
- Cover baked pitas immediately. Trapping the steam under a kitchen towel keeps the bread soft rather than letting it dry out and become brittle.
- Watch closely to avoid overbaking. Pita bakes quickly, and just a minute or two too long can turn a soft, pliable bread dry and crisp.
Flavor Variations ✨
Once you’ve mastered the basic recipe, try these delicious variations:
- Whole Wheat Pita: Replace 1 cup of all-purpose flour with whole wheat flour for a heartier, nuttier flavor.
- Garlic Herb: Add garlic powder and dried herbs directly to the dough for a savory twist.
- Za’atar Pita: Brush the warm pita lightly with olive oil and sprinkle generously with za’atar for a fragrant, herby finish.
- Sesame Pita: Add sesame seeds to the dough or sprinkle them on top before baking for extra texture and flavor.
- Mini Pitas: Divide the dough into 12–16 pieces instead of 8 for appetizer-sized pita pockets, perfect for dips and small bites.
Serving Ideas 🥙
Homemade pita bread is incredibly versatile and pairs beautifully with a wide range of dishes. Use it for:
- Chicken shawarma
- Beef or lamb gyros
- Falafel
- Kofta
- Grilled chicken
- Hummus
- Baba ganoush
- Labneh
- Chicken salad
- Pita pizzas
Its soft, pliable texture and sturdy pocket make it equally suited to being stuffed, wrapped, or torn and used as a scoop for dips and spreads.
Storage Information
Once completely cooled, store the pita in an airtight bag or container at room temperature for about 2–3 days. For longer storage, freeze the pitas with a piece of parchment paper between each one to prevent sticking, then thaw or reheat directly from frozen when ready to use.
Tip: If your pita tastes good but doesn’t form a pocket, the most likely problems are insufficient heat or uneven rolling. A thoroughly preheated surface plus a uniformly rolled dough round gives you the best chance of getting that satisfying, full, balloon-like puff.
Recipe Card
Homemade Pita Bread
Soft, fluffy, flexible pita bread that puffs up beautifully in the oven, forming the signature pocket perfect for stuffing and dipping.
- Prep Time: 30 minutes
- Rise/Rest Time: approximately 1 hour 45 minutes to 2 hours
- Cook Time: 20–30 minutes (in batches)
- Total Time: approximately 2 hours 30 minutes to 3 hours
- Servings: 8 pitas
Ingredients: See full ingredient list above.
Instructions: See full step-by-step instructions above.
Frequently Asked Questions
1. Why didn’t my pita puff up into a pocket? The most common causes are an oven or baking surface that wasn’t hot enough, or dough that was rolled unevenly. Make sure your baking surface is thoroughly preheated and your dough rounds are rolled to a consistent thickness.
2. Can I make this dough ahead of time? Yes, you can prepare the dough, let it complete its first rise, then refrigerate it for up to 24 hours. Let it come closer to room temperature before dividing, rolling, and baking.
3. Do I need a pizza stone to make pita bread? A pizza stone or baking steel helps retain and transfer heat efficiently, but a heavy, sturdy baking sheet preheated thoroughly in the oven can also work well.
4. Can I make this recipe with active dry yeast instead of instant yeast? Yes, though active dry yeast typically needs to be dissolved in the warm water first and allowed to sit for about 5–10 minutes until foamy before being added to the flour mixture.
5. Why is my pita bread tough or dense? This is often caused by over-kneading, using too much flour during rolling, or not allowing the dough enough time to rise properly. Be sure to knead just until smooth and elastic, and give the dough adequate rise and rest time.
6. Can I freeze homemade pita bread? Yes, pita freezes very well. Let the pitas cool completely, then freeze them with parchment paper between each one to prevent sticking.
7. What’s the best way to reheat pita bread? Reheat pita in a dry skillet over medium heat for about 30–60 seconds per side, or wrap it in foil and warm it in a 350°F (175°C) oven for a few minutes.
8. Can I make whole wheat pita bread with this recipe? Yes, simply replace 1 cup of the all-purpose flour with whole wheat flour, as noted in the flavor variations section, for a heartier version of the classic pita.
9. Is the stovetop method as effective as baking in the oven? Yes, a very hot, dry cast-iron skillet can create the same steam-driven puffing effect as an oven, making it a great option if you don’t want to heat up your whole oven.
Final Thoughts
This Homemade Pita Bread recipe proves that soft, fluffy, perfectly pocketed pita is well within reach for home bakers of any skill level. With a simple dough, a few key techniques, and either an oven or a stovetop skillet, you can create bakery-quality pita bread that puts store-bought versions to shame. Whether you’re stuffing it with shawarma, scooping up hummus, or simply enjoying it warm with olive oil, this recipe is sure to become a regular in your kitchen.
Give this recipe a try, and don’t forget to share how your pitas turned out. Tag us with your creations!
Print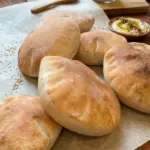
Homemade Pita Bread
Ingredients
For the Dough
- 3 cups (360 g) all-purpose flour — the base of the dough, providing structure and chew.
- 2¼ tsp (7 g) instant yeast — leavens the dough and helps create the air pockets needed for puffing.
- 1 tsp granulated sugar or honey — feeds the yeast and adds a subtle touch of sweetness.
- 1½ tsp fine sea salt — essential for flavor and for controlling the yeast’s activity.
- 1 cup (240 g) warm water — hydrates the dough and activates the yeast.
- 2 tbsp extra-virgin olive oil — adds richness and helps create a soft, tender crumb.
For Finishing
- Extra flour, for rolling — prevents sticking as you shape the dough.
- Olive oil or melted butter, optional — for brushing over warm pitas if desired.
Instructions
Add the flour, instant yeast, sugar, and salt to a large mixing bowl and whisk until evenly combined. Add the warm water and olive oil, then mix until a shaggy dough forms.
Transfer the dough to a lightly floured work surface and knead for approximately 7–10 minutes, until the dough becomes smooth, soft, and elastic. It should feel slightly tacky but shouldn’t stick heavily to your hands. If necessary, add extra flour 1 tablespoon at a time until the texture is right.
Place the dough in a lightly oiled bowl, cover, and let it rise at room temperature for approximately 1–1½ hours, or until roughly doubled in size.
Turn the risen dough onto a clean work surface and divide it into 8 equal pieces, approximately 75–80 g each. Shape each piece into a smooth ball.
Cover the dough balls with a clean kitchen towel and let them rest for 15–20 minutes. This relaxes the gluten and makes the dough much easier to roll without shrinking back.
Lightly flour your work surface and roll each dough ball into a round approximately 6–7 inches wide and about ⅛–¼ inch thick. Try to keep the thickness as even as possible — uneven areas can prevent the pita from forming a complete pocket.
Cover the rolled pita rounds and let them rest for approximately 10–15 minutes while the oven finishes heating. Be sure not to let the surfaces dry out during this time.
Preheat the oven to 475°F (245°C). Place a pizza stone, baking steel, or heavy baking sheet inside the oven while it preheats, and let the baking surface become thoroughly hot. This intense initial heat is one of the biggest secrets to creating a proper pita pocket.
Carefully place 1–2 pita rounds onto the hot baking surface and bake for approximately 2–4 minutes. Within the first couple of minutes, the pita should begin dramatically inflating like a balloon. Once puffed and lightly golden in spots, remove it from the oven. Be careful not to overbake, or the pita can become dry and crispy instead of soft and pliable.
Immediately place the hot pitas inside a clean kitchen towel and cover them. The trapped steam helps keep them soft, flexible, and tender while the remaining pitas finish baking.