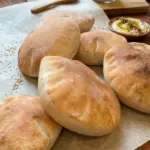
Ingredients
For the Dough
- 3 cups (360 g) all-purpose flour — the base of the dough, providing structure and chew.
- 2¼ tsp (7 g) instant yeast — leavens the dough and helps create the air pockets needed for puffing.
- 1 tsp granulated sugar or honey — feeds the yeast and adds a subtle touch of sweetness.
- 1½ tsp fine sea salt — essential for flavor and for controlling the yeast’s activity.
- 1 cup (240 g) warm water — hydrates the dough and activates the yeast.
- 2 tbsp extra-virgin olive oil — adds richness and helps create a soft, tender crumb.
For Finishing
- Extra flour, for rolling — prevents sticking as you shape the dough.
- Olive oil or melted butter, optional — for brushing over warm pitas if desired.
Instructions
Add the flour, instant yeast, sugar, and salt to a large mixing bowl and whisk until evenly combined. Add the warm water and olive oil, then mix until a shaggy dough forms.
Transfer the dough to a lightly floured work surface and knead for approximately 7–10 minutes, until the dough becomes smooth, soft, and elastic. It should feel slightly tacky but shouldn’t stick heavily to your hands. If necessary, add extra flour 1 tablespoon at a time until the texture is right.
Place the dough in a lightly oiled bowl, cover, and let it rise at room temperature for approximately 1–1½ hours, or until roughly doubled in size.
Turn the risen dough onto a clean work surface and divide it into 8 equal pieces, approximately 75–80 g each. Shape each piece into a smooth ball.
Cover the dough balls with a clean kitchen towel and let them rest for 15–20 minutes. This relaxes the gluten and makes the dough much easier to roll without shrinking back.
Lightly flour your work surface and roll each dough ball into a round approximately 6–7 inches wide and about ⅛–¼ inch thick. Try to keep the thickness as even as possible — uneven areas can prevent the pita from forming a complete pocket.
Cover the rolled pita rounds and let them rest for approximately 10–15 minutes while the oven finishes heating. Be sure not to let the surfaces dry out during this time.
Preheat the oven to 475°F (245°C). Place a pizza stone, baking steel, or heavy baking sheet inside the oven while it preheats, and let the baking surface become thoroughly hot. This intense initial heat is one of the biggest secrets to creating a proper pita pocket.
Carefully place 1–2 pita rounds onto the hot baking surface and bake for approximately 2–4 minutes. Within the first couple of minutes, the pita should begin dramatically inflating like a balloon. Once puffed and lightly golden in spots, remove it from the oven. Be careful not to overbake, or the pita can become dry and crispy instead of soft and pliable.
Immediately place the hot pitas inside a clean kitchen towel and cover them. The trapped steam helps keep them soft, flexible, and tender while the remaining pitas finish baking.