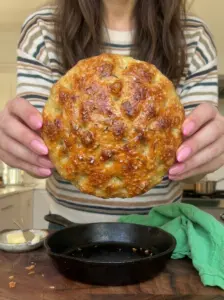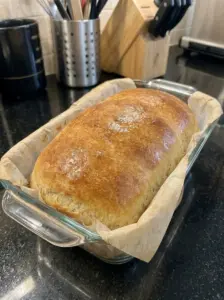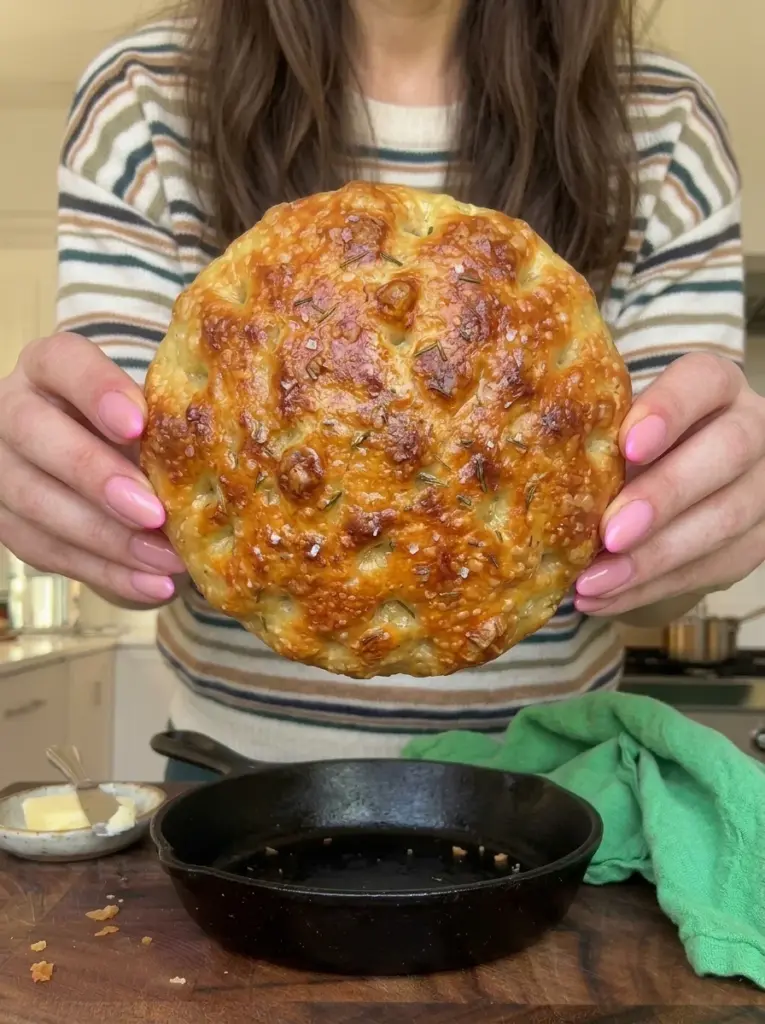
Fresh bread does not have to mean a large loaf or an afternoon spent kneading. This small-batch skillet bread mixes with a spoon, rises in a bowl, and bakes in a lightly oiled oven-safe skillet. The result is a small rustic loaf with a golden crust and a soft center, ready to serve with soup, salad, eggs, or a simple spread of butter.
Olive oil adds flavor and a little tenderness, while a teaspoon of honey or sugar gives a subtle balance without making the bread noticeably sweet. A small skillet helps support the dough and gives the bottom direct contact with a warm baking surface.
This is a same-day yeast bread, so it still needs two rising periods. It is a good fit when you want a modest amount of bread and have a couple of hours for the dough to rise and bake, followed by a short cooling period.
Recipe at a Glance
- Hands-on preparation: About 10 minutes
- First rise: About 60–90 minutes
- Second rise: About 20–30 minutes
- Bake time: About 22–30 minutes
- Cooling time: About 30–45 minutes
- Total time: About 2½–3½ hours, including cooling
- Yield: One small loaf, about 4–6 slices
- Equipment: Medium bowl, sturdy spoon, dough scraper or spatula, and a 6–8-inch oven-safe skillet
Why You’ll Love This Bread
- A manageable batch: It makes one small loaf rather than a full-size sandwich bread.
- No mixer or traditional kneading: Mix firmly with a spoon and shape gently.
- Everyday ingredients: Flour, yeast, water, salt, sweetener, and olive oil form the dough.
- Flexible serving: Cut into wedges for dinner or slices for toast.
- A useful skillet bake: The pan supports the shape and helps color the base.
- Easy leftovers: Freeze individual slices if you do not finish the loaf quickly.
What Kind of Bread Is This?
This is a small, yeast-raised skillet loaf with a little olive oil. It is not a long-fermented artisan bread and does not require a covered Dutch oven. Expect a soft, fairly close crumb with some irregular holes rather than a guaranteed open, lacy interior.
No-knead means there is no repeated hand-kneading stage. You still need to mix thoroughly so the flour hydrates and the dough becomes cohesive. The resting periods allow the dough to develop and expand before baking.
Skillet size changes the shape. A 6-inch pan produces a thicker loaf; an 8-inch pan allows a flatter, wider bread. Both can work, but they will not have identical heights or necessarily finish at the same time.
Ingredients
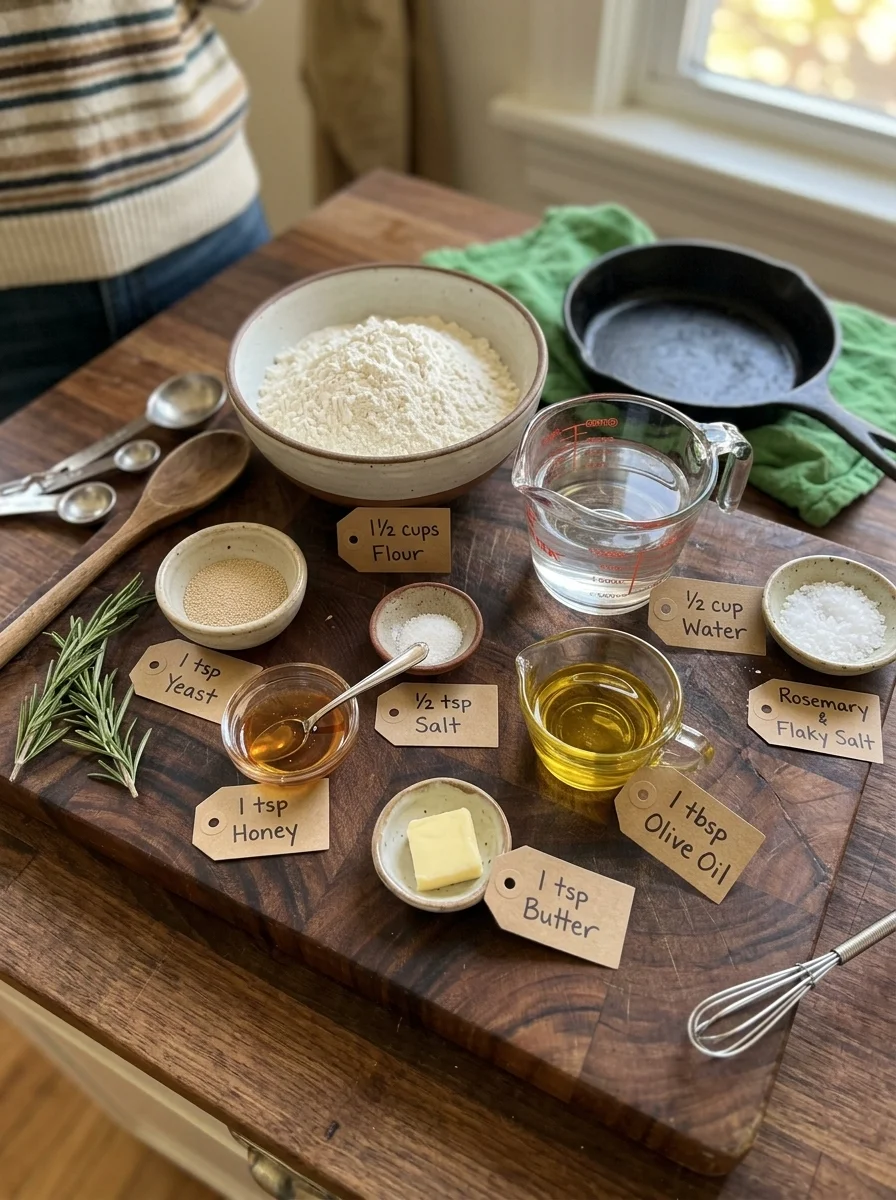
- 1½ cups all-purpose flour, spooned and leveled
- ½ cup lukewarm water, plus 1–2 tablespoons more only as needed
- 1 teaspoon instant yeast
- ½ teaspoon fine salt
- 1 teaspoon honey or granulated sugar
- 1 tablespoon olive oil, plus a little for greasing the skillet
- 1 teaspoon butter, optional, for brushing after baking
Ingredient Notes
Flour: Use all-purpose flour for the basic version. Spoon it into the measuring cup and level the top rather than scooping firmly from the bag. Bread flour can be used, but it may absorb more water and give a chewier result. Self-rising flour is not a direct substitute because this is a yeast-raised recipe with measured salt.
Water: The supplied half cup is a starting amount. With 1½ cups flour, it can produce a firmer dough than the sticky no-knead description suggests. Hold an extra tablespoon or two nearby and add gradually if the dough is dry or difficult to combine. Aim for a soft, tacky dough that holds together rather than a stiff ball or a pourable batter.
Instant yeast: This can be mixed directly with the ingredients. It does not require a separate foaming stage. Follow the product’s storage and freshness guidance. Lukewarm water, roughly 90–100°F, is a useful starting point unless the manufacturer advises otherwise.
Honey or sugar: Either provides a small amount of sweetness. The honey changes the liquid very slightly, but not enough to require a large automatic adjustment in this small quantity.
Olive oil: A tablespoon goes into the dough; the small amount used for the skillet is additional. Oil in the pan supports browning, but a thick pool is unnecessary.
Butter: Brushing after baking gives a softer crust and buttery flavor. Skip the brushing if a drier, crisper surface is your priority.
Choosing a Skillet
Use a skillet with a handle and any other components rated for 400°F. Cast iron is a useful choice because it holds heat well. A different oven-safe pan can work, but the bottom may brown differently.
Measure across the interior cooking area as well as checking the labeled size. A pan sold as 8 inches across the rim may have a smaller base.
The basic method starts with an unheated, lightly greased skillet. Let the shaped dough complete its second rise in that pan, then place it in the preheated oven. This keeps shaping and proofing straightforward and avoids transferring risen dough into hot cookware.
Do not preheat an empty nonstick pan unless the manufacturer explicitly permits it. A hot-pan method also requires separate proofing and careful transfer, so it is not part of the main instructions here.
How to Make Small-Batch No-Knead Skillet Bread
1. Mix the Dough
Combine the half cup of lukewarm water, instant yeast, and honey or sugar in a medium bowl. Add the flour, salt, and olive oil.
Stir with a sturdy spoon until no dry flour remains, scraping the bowl. Continue stirring firmly for about a minute so the mixture comes together evenly.
If it is dry, crumbly, or too stiff to stir, add the reserved water one teaspoon at a time. You may need one or two tablespoons overall, depending on flour measurement and absorption. Stop when the dough is soft and tacky, with a cohesive shaggy appearance.
If it looks sticky, do not immediately add more flour. A brief rest allows the flour to absorb water and can make the dough easier to handle.
2. Let It Rise
Cover the bowl to prevent the surface from drying. Leave in a mildly warm, draft-free place for about 60–90 minutes, until noticeably expanded and approaching double its original size.
Some bubbles may be visible, but they are not the only sign to watch. A firmer batch may not show large surface bubbles. In a cool kitchen, allow more time rather than moving the bowl into strong direct heat.
3. Prepare the Skillet
Lightly grease the base and lower sides of the room-temperature skillet with olive oil. Have a small amount of flour ready for your hands and work surface.
The pan should be large enough to let the dough expand, with space below the rim. If your skillet is unusually shallow, use a suitable deeper oven-safe pan instead.
4. Shape Gently
Ease the risen dough onto a lightly floured surface with a scraper. With lightly floured hands, gather the edges underneath to form a rough round.
Avoid kneading or pressing it repeatedly. Place the round in the skillet with the gathered side down. It does not need to fill the entire pan immediately; it will spread and rise during proofing and baking.
5. Allow a Second Rise
Cover loosely and let stand for about 20–30 minutes, or until visibly puffy. It may need longer in a cool room.
Meanwhile, preheat the oven to 400°F with a rack near the center. The oven should be fully heated before the bread goes in.
6. Bake Until Golden and Set
Remove the cover and place the skillet in the oven. Bake for about 22–30 minutes, checking toward the earlier end, particularly in a wider pan.
The top should be golden, and the center should be baked through. A thermometer inserted into the center can provide a useful check: approximately 195–205°F is a practical doneness range for this small loaf. A hollow sound when tapped is an additional cue, but should not be the only test.
If the top browns before the center is ready, tent loosely with foil and continue baking. A thicker loaf in a 6-inch pan may need longer.
7. Remove from the Pan and Cool
Use thick oven mitts to remove the skillet. Keep the hot handle protected and remember that it stays hot after the pan leaves the oven.
Brush the bread with the optional butter if you want a softer crust. After about 5 minutes, carefully transfer the loaf to a wire rack so steam does not collect underneath.
Let cool for about 30–45 minutes, longer if the center still feels very warm. Cutting after only 10–15 minutes can compress the interior and make it appear gummy. Use a serrated knife and a gentle sawing motion.
Tips for the Best Result
Adjust water before adding extra flour. This formula can start relatively firm. A soft dough is more consistent with the intended no-knead method than a dry ball.
Mix thoroughly. A spoon-mixed dough still needs every pocket of flour hydrated. Scrape the bottom carefully.
Keep shaping gentle. A rough round is enough. Excess handling and flour can make the small loaf heavier.
Watch the dough’s expansion. The time ranges assume a reasonably warm kitchen. Cool ingredients and a cool room can extend both rises.
Match expectations to the skillet. A wider bread will naturally be flatter. Use a smaller suitable pan if you want thicker slices, then check the center carefully.
Cool on a rack. Leaving the loaf in the skillet can trap steam and soften the bottom, even if it was well browned in the oven.
Troubleshooting
| Problem | Likely cause | Helpful adjustment |
|---|---|---|
| Dough is dry and stiff | Flour packed into cups or insufficient water | Add water a teaspoon at a time until soft and tacky. |
| Dough sticks during shaping | Soft dough and unfloured hands | Use a scraper and lightly flour hands rather than adding much flour to the dough. |
| Dough rises slowly | Cool room, cool water, or weak yeast | Allow more time in mild warmth and check yeast freshness. |
| Bread is dense | Firm dough, limited rise, or excess handling | Keep dough soft, allow expansion, and shape gently. |
| Loaf is flatter than expected | Wide skillet or very soft dough | Use a smaller pan for more height and avoid excess water. |
| Bottom browns quickly | Strong heat through the skillet | Move the pan higher if necessary and check early; use the center rack next time. |
| Center seems gummy | Underbaking or early slicing | Check the center and allow a longer cooling period. |
| Bottom loses crispness | Steam trapped in the pan | Transfer to a rack after a short rest. |
Variations
Rosemary and Flaky Salt
Sprinkle a little chopped rosemary and flaky salt over the proofed dough before baking. Keep the salt garnish light because the dough already contains salt.
Garlic Herb Serving Oil
Serve slices with olive oil flavored with herbs and freshly prepared garlic, or use a suitable prepared garlic oil. This gives a strong finishing flavor without changing the dough’s moisture balance.
Sesame-Topped Bread
Brush the risen surface lightly with water and sprinkle with sesame seeds before baking. Be gentle to preserve the dough’s puffiness.
Cheese Accent
Add a modest sprinkle of shredded cheese over the top during the final few minutes of baking. Cheese can brown quickly, so watch closely and avoid extending baking solely to darken it.
Whole-Wheat Blend
A small partial substitution can give a heartier flavor, but it absorbs water differently and may make the crumb denser. An all-whole-wheat version needs separate adjustments.
Serving Ideas
Serve wedges with soup, stew, or a large salad. The small size is convenient when you want bread for a meal without a large amount left over.
For breakfast, toast slices and add butter, jam, eggs, or avocado. A thicker slice can support a savory topping, while thinner slices work as an accompaniment.
Day-old bread is useful for croutons or toast. Warm only what you need rather than repeatedly reheating the entire loaf.
Storage and Freezing
Cool completely before placing in a bread bag or airtight container. Keep at room temperature for up to 2 days in a cool, dry kitchen. If your kitchen is warm or humid, freeze portions sooner.
Refrigeration tends to speed bread staling, so freezing is generally better for longer storage. Slice, wrap well, and freeze for up to 2 months for best quality.
Toast slices directly from frozen or thaw wrapped portions at room temperature. To refresh the whole small loaf, warm it in a 300°F oven for about 8–12 minutes, checking for your preferred warmth. Time varies with its size and starting temperature. A brief warming restores some texture but does not make stale bread permanently fresh.
Discard bread if mold appears rather than trimming away just the visible spot.
Frequently Asked Questions
Can I use active dry yeast?
Follow your product’s directions for dissolving or adding it. Use some of the measured water for any dissolving step rather than adding extra liquid. Rising time may differ.
Do I need to proof instant yeast first?
No. Mixing it with the liquid is convenient here, but a separate foaming wait is not required. Follow the manufacturer’s directions if your product specifies a different approach.
Is half a cup of water enough?
It may be for some flour measurements, but it can also make a firmer dough than intended. Keep up to two tablespoons extra available and add gradually until the dough is soft and tacky. Do not make it pourable.
Can I bake it without cast iron?
Yes, in a suitable oven-safe skillet or small pan. Check the manufacturer’s temperature rating, including the handle. Pan material affects browning and bake time.
Should I preheat the skillet?
The main method uses an unheated skillet for the second rise, then bakes it in the preheated oven. A hot-pan method requires a different transfer process and is unnecessary for this version.
Can I skip the second rise?
It helps the shaped dough become puffy before baking. Skipping it can produce a tighter, heavier loaf, so include it and judge by the dough rather than only the clock.
Can I double the recipe?
Yes, but use two suitable pans or adjust the pan and baking method for a larger loaf. Doubling the ingredients does not mean doubling the baking time.
How many calories are in a slice?
Using typical ingredient values, the batch contains roughly 820–850 calories before extra skillet oil and the optional butter. That is about 205–215 calories for each of four portions or 135–145 for each of six. These are estimates; flour measurement, oil, and slice size affect the total.
Recipe Card
Small-Batch No-Knead Skillet Bread
A small olive-oil yeast loaf mixed with a spoon and baked in a skillet, with a golden crust and soft center.
Prep: 10 minutes | Rise: 1 hour 20 minutes–2 hours | Bake: 22–30 minutes | Cool: 30–45 minutes
Total: About 2½–3½ hours, including cooling
Yield: One small loaf, 4–6 slices
Ingredients
- 1½ cups all-purpose flour, spooned and leveled
- ½ cup lukewarm water, plus 1–2 tablespoons more as needed
- 1 teaspoon instant yeast
- ½ teaspoon fine salt
- 1 teaspoon honey or sugar
- 1 tablespoon olive oil, plus a little for the skillet
- 1 teaspoon butter, optional, for finishing
Instructions
- Combine the half cup water, yeast, and honey or sugar in a bowl. Add flour, salt, and olive oil.
- Stir until no dry flour remains, then mix firmly for about a minute. Add extra water a teaspoon at a time if needed for a soft, tacky dough.
- Cover and rise for 60–90 minutes, until noticeably expanded and approaching double.
- Lightly grease a room-temperature 6–8-inch oven-safe skillet. Gently shape the dough into a round with lightly floured hands and place in the pan.
- Cover loosely and rise for 20–30 minutes, or until puffy. Preheat the oven to 400°F.
- Bake uncovered for 22–30 minutes, allowing longer for a thicker loaf if needed. Check for a set center, with approximately 195–205°F as a thermometer guide.
- Remove carefully, protecting the hot handle. Brush with optional butter, rest about 5 minutes, then transfer to a rack.
- Cool for about 30–45 minutes before slicing.
Notes
- The added water allowance clarifies the soft-dough texture intended by the supplied recipe; flour absorption varies.
- A 6-inch pan gives a thicker loaf than an 8-inch pan.
- The main method does not preheat the empty skillet.
- Store cooled bread wrapped for up to 2 days or freeze slices for up to 2 months for best quality.
- Approximate calories before finishing butter and extra skillet oil: 205–215 per quarter loaf or 135–145 per sixth. Calculate from your ingredients for greater precision.
Final Thoughts
A small skillet and a soft, thoroughly mixed dough are the starting points for this loaf. Allow both rises, check the center rather than just the crust, and cool on a rack before slicing. It is a simple way to make a modest amount of fresh bread for dinner, breakfast, or toast the next day.
Print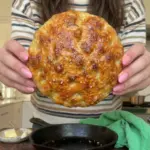
Small-Batch No-Knead Skillet Bread
- Total Time: About 2½–3½ hours, including cooling
Ingredients
- 1½ cups all-purpose flour, spooned and leveled
- ½ cup lukewarm water, plus 1–2 tablespoons more as needed
- 1 teaspoon instant yeast
- ½ teaspoon fine salt
- 1 teaspoon honey or sugar
- 1 tablespoon olive oil, plus a little for the skillet
- 1 teaspoon butter, optional, for finishing
Instructions
- Combine the half cup water, yeast, and honey or sugar in a bowl. Add flour, salt, and olive oil.
- Stir until no dry flour remains, then mix firmly for about a minute. Add extra water a teaspoon at a time if needed for a soft, tacky dough.
- Cover and rise for 60–90 minutes, until noticeably expanded and approaching double.
- Lightly grease a room-temperature 6–8-inch oven-safe skillet. Gently shape the dough into a round with lightly floured hands and place in the pan.
- Cover loosely and rise for 20–30 minutes, or until puffy. Preheat the oven to 400°F.
- Bake uncovered for 22–30 minutes, allowing longer for a thicker loaf if needed. Check for a set center, with approximately 195–205°F as a thermometer guide.
- Remove carefully, protecting the hot handle. Brush with optional butter, rest about 5 minutes, then transfer to a rack.
- Cool for about 30–45 minutes before slicing.
- Prep Time: 10 minutes | Rise: 1 hour 20 minutes–2 hours
- Cook Time: Bake: 22–30 minutes | Cool: 30–45 minutes