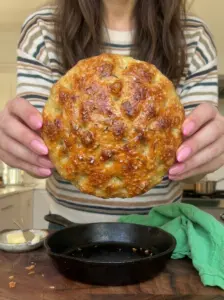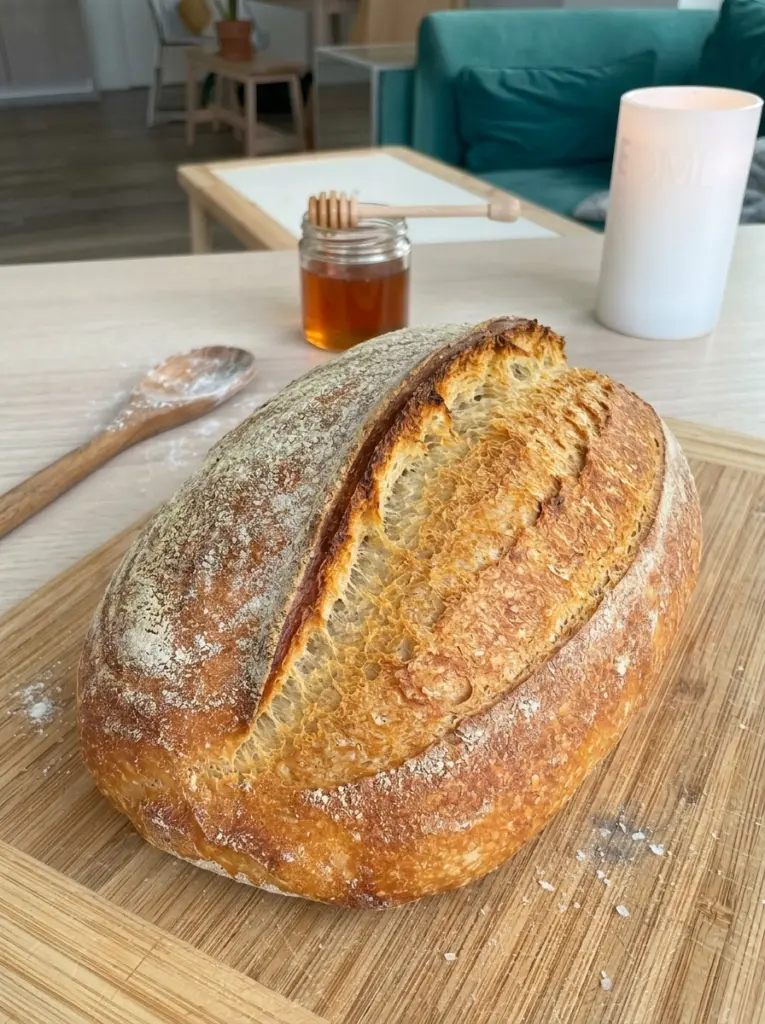
If you’ve been dreaming of pulling a beautifully golden, rustic loaf of bread out of your own oven, this Farmhouse Loaf recipe will help you get there. With a lightly chewy, golden crust and a soft, tender crumb inside, this loaf is built on the simplest possible foundation — flour, water, yeast, and salt — proving once again that traditional bread baking doesn’t require a long ingredient list to deliver incredible results.
This is the kind of bread that fills your kitchen with warmth and the unmistakable aroma of fresh-baked dough. It’s rustic in the best sense of the word: a little imperfect, deeply satisfying, and endlessly versatile. Whether you’re slicing it warm with a pat of melting butter, using it to soak up the last bit of soup in your bowl, or turning it into the base for a hearty sandwich, this Farmhouse Loaf delivers homemade bread at its most comforting.
In this article, you’ll find a complete ingredient breakdown, step-by-step instructions for both Dutch oven and sheet pan baking methods, expert tips, flavor variations, serving ideas, storage information, and answers to the most frequently asked questions about baking the perfect farmhouse-style loaf.
What Is a Farmhouse Loaf?
A Farmhouse Loaf is a classic, rustic style of bread built on a simple, traditional formula — bread flour, water, instant yeast, salt, a touch of honey, and a bit of olive oil. Unlike enriched breads that rely on eggs, butter, or milk for a soft, cake-like texture, a farmhouse loaf leans into a leaner dough that develops a chewy, substantial crust and a tender, satisfying interior through careful kneading, proper proofing, and high-heat baking.
The process begins with mixing and resting the dough, allowing the flour to fully hydrate before kneading develops the gluten structure needed for a good rise and chew. After a proper first rise, the dough is shaped into a tight, rustic round or oval loaf, given a second proof, scored with a sharp blade, and baked at high heat — either in a covered Dutch oven or on a sheet pan with added steam. Both methods aim to trap moisture around the loaf during the early part of baking, which keeps the crust flexible long enough for the bread to fully expand before setting into that signature golden, crackly exterior.
The result is a loaf with old-world charm: a deeply golden crust, a soft and airy crumb, and a flavor that’s simple, wholesome, and deeply comforting — the kind of bread that feels like it belongs on a farmhouse table.
Why You’ll Love This Recipe
- Simple, traditional ingredients — just flour, water, yeast, salt, honey, and olive oil.
- Beautiful golden crust — achieved through steam and high-heat baking.
- Soft, tender crumb — the perfect balance of rustic chew and softness.
- Two baking methods — bake in a Dutch oven or on a sheet pan, whichever you have on hand.
- Freezer-friendly — slice and freeze for bread whenever you need it.
- A stunning centerpiece — the rustic shape and golden crust make it beautiful for any table.
Ingredients You’ll Need
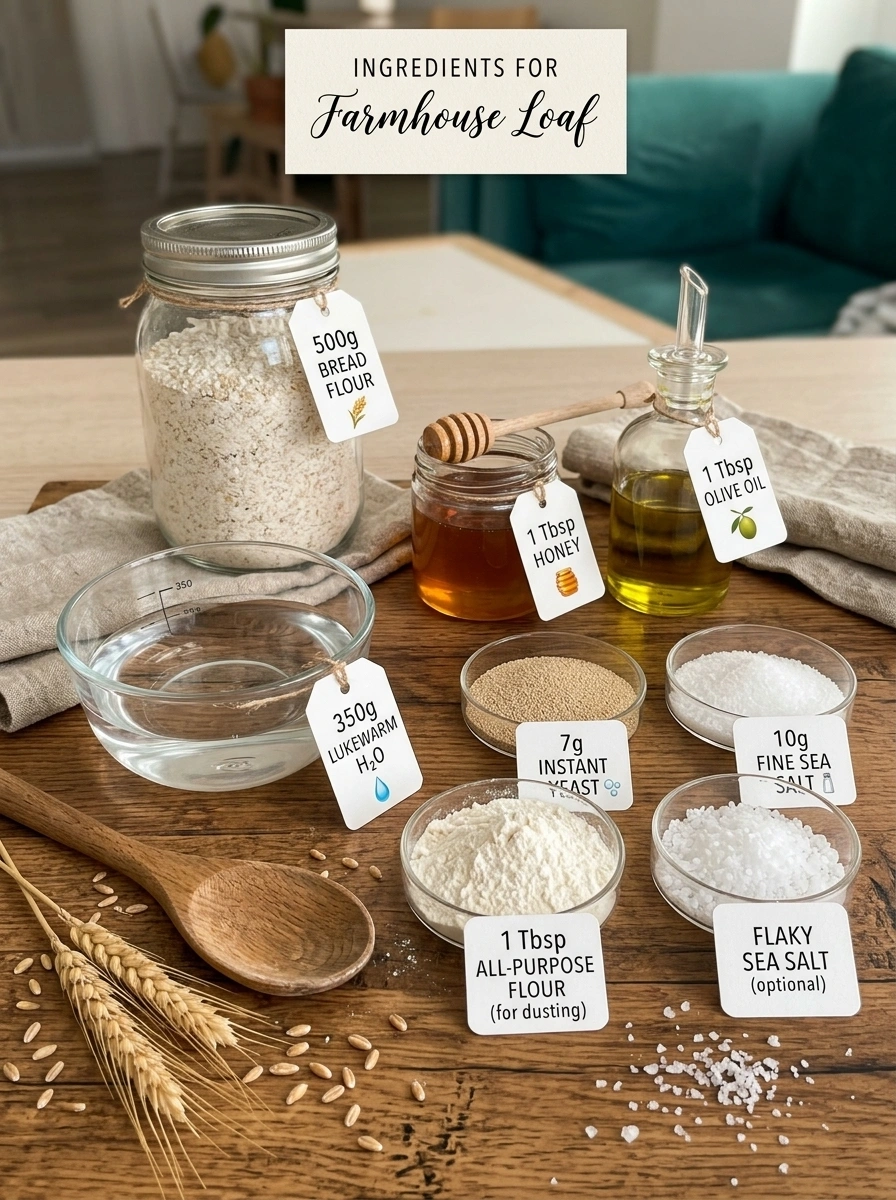
For the Dough 🍞
- 500 g bread flour — provides the structure and chew characteristic of a farmhouse-style loaf.
- 350 g lukewarm water — hydrates the dough and activates the yeast.
- 7 g instant yeast — leavens the dough, creating the rise needed for a light, airy crumb.
- 10 g fine sea salt — essential for flavor and for regulating the yeast’s activity.
- 1 tbsp honey — feeds the yeast and adds a subtle depth of flavor.
- 1 tbsp olive oil — contributes to a tender crumb and helps the dough handle more easily.
For Finishing 🌾
- 1 tbsp all-purpose flour, for dusting — used to dust the loaf for a rustic, bakery-style finish.
- 1 tsp olive oil, optional — can be brushed on for extra shine.
- Flaky sea salt, optional — for a beautiful, salty finishing touch.
Step-by-Step Instructions
Step 1: Mix the Dough
Add the bread flour, instant yeast, salt, and honey to a large mixing bowl. Pour in the lukewarm water and olive oil, then mix with a wooden spoon or your hands until a shaggy dough forms and no large patches of dry flour remain.
Step 2: Rest the Dough
Cover the bowl with a clean kitchen towel or plastic wrap and allow the dough to rest for approximately 20 minutes. This resting period gives the flour time to fully absorb the water, making the dough much easier to develop during kneading.
Step 3: Knead the Dough 🥖
Transfer the dough to a lightly floured work surface and knead for approximately 8–10 minutes, until it becomes smooth, elastic, and slightly tacky. If you’re using a stand mixer, knead with the dough hook for approximately 6–8 minutes on low to medium speed. Try to avoid adding excessive flour during this process, as a properly hydrated dough is key to a tender crumb.
Step 4: First Rise 🫧
Place the dough into a lightly greased bowl, cover, and allow it to rise at room temperature for approximately 1½–2 hours, or until it’s noticeably puffy and nearly doubled in size. Keep in mind that a warmer kitchen may shorten the rising time.
Step 5: Shape the Loaf 🌾
Turn the dough onto a lightly floured surface and gently press it into a rough rectangle without completely deflating it. Fold the top third toward the center, then fold the bottom third upward. Roll the dough into a tight loaf and pinch the seam closed, then gently shape it into a round or slightly oval farmhouse-style loaf.
Step 6: Prepare for the Final Proof
Place the shaped loaf seam-side down on a parchment-lined baking sheet, or alternatively place it into a well-floured proofing basket. Dust the surface lightly with flour for that classic rustic look.
Step 7: Final Proof
Cover the loaf loosely and allow it to proof for approximately 45–60 minutes. It should become noticeably puffy by the end of this time. To check if it’s ready, gently press the dough with one fingertip — the indentation should slowly spring back, indicating proper proofing.
Step 8: Preheat the Oven 🔥
About 30 minutes before baking, preheat the oven to 450°F (230°C). If you’re using a Dutch oven, place it inside the oven while it preheats so it becomes thoroughly hot. A well-heated baking surface is essential for helping the loaf develop a beautiful, golden crust.
Step 9: Score the Loaf 🔪
Using a sharp bread lame or knife, make one deep slash across the top of the loaf. You can also create a simple cross, a wheat pattern, or three diagonal cuts for a classic, rustic farmhouse appearance.
Step 10: Bake in a Dutch Oven 🥖
If using a Dutch oven, carefully transfer the loaf inside, cover with the lid, and bake for approximately 20 minutes. Remove the lid and continue baking for another 20–25 minutes, until the loaf is deeply golden brown.
Step 11: Bake Without a Dutch Oven
If baking directly on a sheet pan, place the loaf in the preheated oven and add a small oven-safe pan of hot water to the bottom rack to create steam. Bake for approximately 35–40 minutes, until the crust is deeply golden and the loaf sounds hollow when tapped on the bottom.
Step 12: Check for Doneness
The finished loaf should have a rich, golden-brown crust. If you’re using a thermometer, the center of the loaf should reach approximately 200–205°F (93–96°C).
Step 13: Cool Completely ❄️
Transfer the loaf to a wire rack and allow it to cool for at least 1 hour before slicing. Cutting into the bread too early can compress the tender crumb and make the center seem gummy, so patience here really pays off.
Expert Tips for the Best Farmhouse Loaf
- Don’t skip the resting period after mixing. This short rest makes the dough significantly easier to knead and develop.
- Avoid adding too much extra flour. A slightly tacky dough is normal and leads to a more tender finished crumb.
- Watch for the doubled-in-size cue during the first rise. This is your best indicator that the dough is ready to shape, rather than relying strictly on time.
- Use the fingertip test before baking. A slowly springing-back indentation means your loaf has proofed properly and is ready for the oven.
- Create steam if you’re not using a Dutch oven. Adding a pan of hot water to the oven mimics the moist environment a Dutch oven naturally creates, helping the crust develop fully.
- Score with confidence. A deep, decisive slash helps control how the bread expands in the oven and contributes to that classic rustic look.
- Let the loaf cool completely before slicing. Cutting into hot bread traps steam inside and can leave the crumb gummy — full cooling ensures the best texture.
Flavor Variations ✨
Once you’ve mastered the basic loaf, try these delicious variations:
- Honey Oat Farmhouse Loaf: Replace 50 g of the bread flour with finely ground oat flour and sprinkle rolled oats over the top before baking.
- Rosemary Garlic: Add 1 tablespoon of chopped fresh rosemary and 1 roasted garlic clove for a fragrant, savory twist.
- Whole Wheat Farmhouse: Replace up to 150 g of the bread flour with whole wheat flour for a heartier, nuttier loaf.
- Seeded Farmhouse: Add sunflower seeds, pumpkin seeds, sesame seeds, or flaxseeds for extra texture and flavor.
- Cheddar Herb: Fold in ¾ cup shredded sharp cheddar and 1 tablespoon of chopped fresh herbs for a savory, cheesy variation.
- Rustic Sourdough: Replace the instant yeast with active sourdough starter and use a longer fermentation for a naturally tangy loaf.
Serving Ideas 🍽️
This versatile loaf pairs beautifully with countless meals and toppings. Try it:
- Warm with salted butter
- With homemade jam
- With honey
- Toasted with avocado
- Alongside soups and stews
- With chili
- As sandwich bread
- With scrambled eggs
- With cheese and cured meats
- Toasted with garlic butter
- With olive oil and balsamic vinegar
Storage Information 🫙
Store the completely cooled loaf in a bread bag or loosely wrapped kitchen towel at room temperature for approximately 2–3 days. For longer storage, slice the loaf and freeze it in an airtight freezer bag for up to 2–3 months. Individual slices can be toasted directly from frozen, making it easy to enjoy fresh-tasting bread anytime.
Avoid refrigerating the bread unless necessary, as refrigeration can actually cause homemade bread to go stale more quickly than storing it at room temperature or in the freezer.
Tip: For the best farmhouse crust, create plenty of steam during the first part of baking. Steam keeps the outer surface flexible, allowing the loaf to expand fully before the crust sets, resulting in a beautiful golden crust with a soft, airy interior.
Recipe Card
Farmhouse Loaf
A rustic, hearty loaf with a golden, lightly chewy crust and a soft, tender crumb — made from simple, traditional bread-baking ingredients.
- Prep Time: 30 minutes
- Rise/Proof Time: approximately 2 hours 15 minutes to 3 hours
- Bake Time: 35–45 minutes
- Cool Time: at least 1 hour
- Total Time: approximately 4 hours to 5 hours
- Servings: 1 loaf (approximately 12 slices)
Ingredients: See full ingredient list above.
Instructions: See full step-by-step instructions above.
Frequently Asked Questions
1. Do I need a Dutch oven to make this bread? No, a Dutch oven helps create a beautifully golden crust by trapping steam, but you can also achieve great results by baking on a sheet pan and adding a pan of hot water to the oven to create steam.
2. Why is my crumb dense instead of airy? This is often caused by under-kneading the dough, insufficient proofing time, or adding too much extra flour during kneading. Be sure the dough is properly developed and has doubled in size before shaping.
3. How do I know when the loaf has finished baking? The crust should be deeply golden brown, the loaf should sound hollow when tapped on the bottom, and if using a thermometer, the center should read approximately 200–205°F (93–96°C).
4. Can I use all-purpose flour instead of bread flour? Bread flour is recommended for its higher protein content, which gives the loaf better structure and chew. All-purpose flour can be used in a pinch, though the texture may be slightly softer.
5. Why do I need to let the bread cool completely before slicing? Cutting into the bread while it’s still hot traps steam inside, which can make the crumb seem gummy or underbaked. Cooling for at least an hour allows the crumb to fully set.
6. Can I freeze this bread? Yes, this loaf freezes very well. Slice it before freezing so you can toast individual slices directly from frozen whenever you’d like.
7. What can I use instead of honey? Granulated sugar or maple syrup can be used as a substitute for honey, though the flavor will be slightly different.
8. Why did my loaf not rise very much during the final proof? This can happen if the kitchen is too cool or if the dough was over-proofed during the first rise. Try proofing in a warmer spot and use the fingertip test to check readiness before baking.
9. Can I add mix-ins like seeds or herbs to this dough? Yes, this recipe is very adaptable. See the flavor variations section above for ideas like seeded, herbed, and cheese-studded versions of the classic farmhouse loaf.
Final Thoughts
This Farmhouse Loaf recipe proves that a beautifully rustic, golden-crusted bread is well within reach using nothing more than a handful of simple, traditional ingredients. With careful kneading, proper proofing, and a bit of steam during baking, you’ll end up with a loaf that has a satisfying chew, a soft interior, and old-world charm in every slice. Whether you enjoy it warm with butter, alongside a bowl of soup, or sliced for sandwiches, this bread is guaranteed to become a staple in your home baking rotation.
Give this recipe a try, and don’t forget to share how your loaf turned out. Tag us with your creations!
Print
Farmhouse Loaf
Ingredients
For the Dough 🍞
- 500 g bread flour — provides the structure and chew characteristic of a farmhouse-style loaf.
- 350 g lukewarm water — hydrates the dough and activates the yeast.
- 7 g instant yeast — leavens the dough, creating the rise needed for a light, airy crumb.
- 10 g fine sea salt — essential for flavor and for regulating the yeast’s activity.
- 1 tbsp honey — feeds the yeast and adds a subtle depth of flavor.
- 1 tbsp olive oil — contributes to a tender crumb and helps the dough handle more easily.
For Finishing 🌾
- 1 tbsp all-purpose flour, for dusting — used to dust the loaf for a rustic, bakery-style finish.
- 1 tsp olive oil, optional — can be brushed on for extra shine.
- Flaky sea salt, optional — for a beautiful, salty finishing touch.
Instructions
Add the bread flour, instant yeast, salt, and honey to a large mixing bowl. Pour in the lukewarm water and olive oil, then mix with a wooden spoon or your hands until a shaggy dough forms and no large patches of dry flour remain.
Cover the bowl with a clean kitchen towel or plastic wrap and allow the dough to rest for approximately 20 minutes. This resting period gives the flour time to fully absorb the water, making the dough much easier to develop during kneading.
Transfer the dough to a lightly floured work surface and knead for approximately 8–10 minutes, until it becomes smooth, elastic, and slightly tacky. If you’re using a stand mixer, knead with the dough hook for approximately 6–8 minutes on low to medium speed. Try to avoid adding excessive flour during this process, as a properly hydrated dough is key to a tender crumb.
Place the dough into a lightly greased bowl, cover, and allow it to rise at room temperature for approximately 1½–2 hours, or until it’s noticeably puffy and nearly doubled in size. Keep in mind that a warmer kitchen may shorten the rising time.
Turn the dough onto a lightly floured surface and gently press it into a rough rectangle without completely deflating it. Fold the top third toward the center, then fold the bottom third upward. Roll the dough into a tight loaf and pinch the seam closed, then gently shape it into a round or slightly oval farmhouse-style loaf.
Place the shaped loaf seam-side down on a parchment-lined baking sheet, or alternatively place it into a well-floured proofing basket. Dust the surface lightly with flour for that classic rustic look.
Cover the loaf loosely and allow it to proof for approximately 45–60 minutes. It should become noticeably puffy by the end of this time. To check if it’s ready, gently press the dough with one fingertip — the indentation should slowly spring back, indicating proper proofing.
About 30 minutes before baking, preheat the oven to 450°F (230°C). If you’re using a Dutch oven, place it inside the oven while it preheats so it becomes thoroughly hot. A well-heated baking surface is essential for helping the loaf develop a beautiful, golden crust.
Using a sharp bread lame or knife, make one deep slash across the top of the loaf. You can also create a simple cross, a wheat pattern, or three diagonal cuts for a classic, rustic farmhouse appearance.
If using a Dutch oven, carefully transfer the loaf inside, cover with the lid, and bake for approximately 20 minutes. Remove the lid and continue baking for another 20–25 minutes, until the loaf is deeply golden brown.
If baking directly on a sheet pan, place the loaf in the preheated oven and add a small oven-safe pan of hot water to the bottom rack to create steam. Bake for approximately 35–40 minutes, until the crust is deeply golden and the loaf sounds hollow when tapped on the bottom.
The finished loaf should have a rich, golden-brown crust. If you’re using a thermometer, the center of the loaf should reach approximately 200–205°F (93–96°C).
Transfer the loaf to a wire rack and allow it to cool for at least 1 hour before slicing. Cutting into the bread too early can compress the tender crumb and make the center seem gummy, so patience here really pays off.