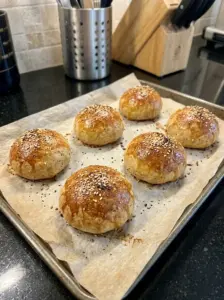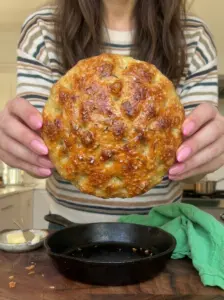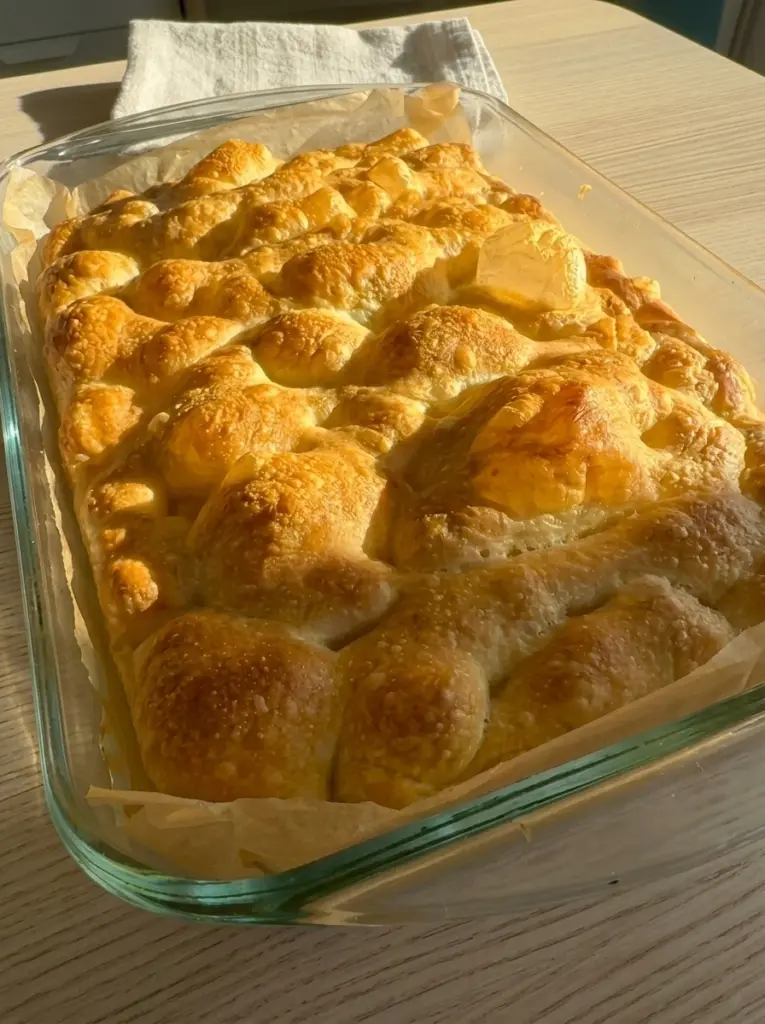
If you’ve ever wanted to master a truly authentic Italian focaccia at home, this Basic Focaccia recipe will walk you through exactly how to achieve it. Wonderfully airy, chewy, and golden, this bread features a crisp, olive-oil-rich crust and a soft, bubbly interior full of the signature pockets that make great focaccia so irresistible. It’s a foundational recipe that, once mastered, opens the door to endless variations and toppings.
This recipe relies on a technique-driven approach rather than a long ingredient list. With just five basic ingredients for the dough, the real magic happens through a series of gentle stretch-and-fold sessions and patient resting periods, all designed to build strength and structure in a very wet, high-hydration dough. That wetness is intentional and essential; it’s exactly what creates focaccia’s light, airy crumb and beautiful bubbles throughout the bread.
Whether you’re tearing off a warm piece to dip in olive oil, building the ultimate Italian sandwich, or serving it alongside a bowl of soup or a fresh salad, this Basic Focaccia delivers bakery-quality results from your own kitchen. In this article, you’ll find a complete ingredient breakdown, step-by-step instructions, expert tips, flavor variations, serving ideas, storage information, and answers to the most frequently asked questions about making perfect focaccia at home.
What Is Basic Focaccia?
Focaccia is a classic Italian flatbread known for its rich olive oil flavor, deeply golden crust, and signature dimpled surface. What sets truly great focaccia apart from an ordinary flatbread is its high-hydration dough, meaning the ratio of water to flour is significantly higher than in many other bread recipes. This wetness is what allows the dough to develop those large, irregular air pockets throughout the crumb, along with a light, almost cloud-like texture.
This particular recipe uses instant yeast, lukewarm water, olive oil, strong bread flour, and salt to create a dough that starts out extremely wet and sticky. Rather than kneading in the traditional sense, the dough is built through multiple rounds of stretching and folding, interspersed with rest periods that allow the gluten to relax and develop naturally. After its final proof in a well-oiled pan, the dough is deeply dimpled by hand, generously drizzled with olive oil, sprinkled with flaky sea salt, and baked at high heat until deeply golden and crisp at the edges.
The result is a loaf with old-world Italian character: a substantial, olive-oil-rich crust, a soft and impossibly airy interior, and a flavor that’s simple yet deeply satisfying — the foundation for countless focaccia variations.
Why You’ll Love This Recipe
- Authentic, bakery-style texture — airy, bubbly crumb with a crisp, golden crust.
- Simple, minimal ingredients — just yeast, water, olive oil, flour, and salt.
- No traditional kneading required — gentle stretch-and-folds do all the work.
- A true foundational recipe — master this, then customize with endless toppings.
- Freezer-friendly — wrap and freeze individual portions for later.
- Perfect for any occasion — from casual snacking to elegant dinner parties.
Ingredients You’ll Need
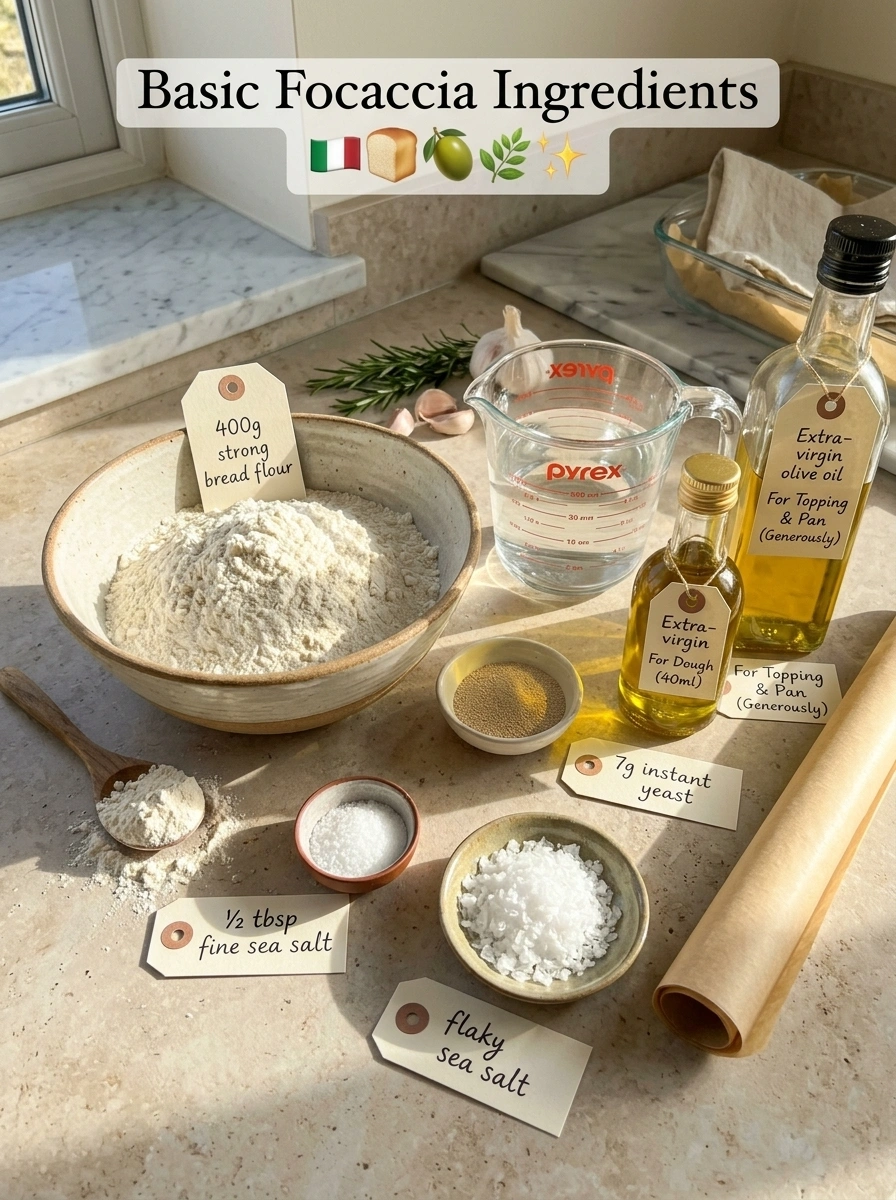
For the Dough 🍞
- 7 g instant yeast — leavens the dough and helps create the airy, bubbly texture focaccia is known for.
- 350 ml lukewarm water — hydrates the dough; the high water content is essential to focaccia’s signature crumb.
- 40 ml extra-virgin olive oil — adds richness and helps create a tender, flavorful dough.
- 400 g strong bread flour — provides the structure and chew characteristic of a great focaccia.
- ½ tbsp fine sea salt — essential for flavor and for regulating the yeast’s activity.
For the Topping 🫒
- Extra-virgin olive oil, generously — the finishing touch that gives focaccia its signature richness and crisp crust.
- Flaky sea salt, to taste — enhances the flavor and adds a satisfying crunch.
For the Pan
- Extra-virgin olive oil, for greasing — prevents sticking and helps create a crisp, golden bottom crust.
- Extra olive oil, for handling and dimpling — keeps the sticky dough manageable throughout shaping.
- Parchment paper — lines the pan for easy removal once baked.
Step-by-Step Instructions
Step 1: Mix the Water & Yeast
Add the lukewarm water and instant yeast to a large mixing bowl and whisk until the yeast is evenly distributed. Add the olive oil and whisk again until combined.
Step 2: Add the Flour & Salt
Add the strong bread flour and salt to the bowl. Mix thoroughly with a wooden spoon or spatula until all the flour has been incorporated. The dough will be extremely wet and sticky — don’t worry, this high-hydration dough is exactly what creates the light, airy focaccia texture. Use a dough scraper or spatula to scrape down the sides of the bowl.
Step 3: First Rest 🫧
Cover the bowl and allow the dough to rest for approximately 30 minutes. The dough will begin developing strength while remaining very soft and sticky.
Step 4: Prepare for Stretch & Folds
Place a small bowl of water beside your work surface. You’ll use the water to wet your hands before handling the dough, which prevents sticking while allowing you to work with the high-hydration mixture without adding unnecessary flour.
Step 5: First Stretch & Fold
After the first 30-minute rest, wet your hands. Grab one side of the dough, gently stretch it upward, and fold it toward the center. Turn the bowl slightly and repeat. Complete 6 stretch-and-fold movements, turning the bowl between each fold, then cover the dough again.
Step 6: Second Rest
Allow the dough to rest for another 30 minutes. During this time, the dough will begin to become smoother and stronger.
Step 7: Repeat the Stretch & Fold 🫧
After the second 30-minute rest, repeat the stretch-and-fold process. Again, use wet hands and complete approximately 6 folds, turning the bowl between each one. Cover and allow the dough to rest for another 45 minutes.
Step 8: Prepare the Baking Dish 🫒
While the dough is resting, generously grease your baking dish with olive oil. This helps prevent the parchment from moving around when the dough is added. Line the dish with parchment paper, cutting the corners so it fits snugly inside, then drizzle a generous layer of olive oil over the parchment-covered base.
Step 9: Transfer the Dough
Once the dough has finished its final rest, gently pour or scrape it into the prepared dish. Be patient and allow the dough to release naturally rather than aggressively pulling it from the bowl. Once transferred, gently fold each end of the dough over itself, turn the dough 90 degrees, and carefully flip it over.
Step 10: Stretch the Dough
Coat your hands with olive oil and gently stretch the dough from underneath, encouraging it toward the edges of the dish. Don’t force it if it resists. Cover the dish and allow the dough to rest for another 45 minutes.
Step 11: Preheat the Oven 🔥
Preheat the oven to 410°F (210°C), positioning the rack around the middle-lower portion of the oven.
Step 12: Dimple the Focaccia 👆
Once the dough has finished its final proof, generously coat your hands with olive oil and press your fingertips deeply into the dough, creating dimples across the entire surface. Don’t be afraid to press down firmly. Gently massage the dough with your fingertips as you dimple to encourage the formation of those beautiful air bubbles.
Step 13: Add the Toppings 🫒
Drizzle the surface generously with extra-virgin olive oil and sprinkle evenly with flaky sea salt. Make sure the olive oil settles into some of the dimples for maximum flavor.
Step 14: Bake 🔥
Place the focaccia on the middle-lower oven shelf and bake for approximately 25–30 minutes, until the surface is deeply golden brown and the edges are crisp. Keep an eye on it during the final few minutes, as baking times can vary between ovens.
Step 15: Crisp the Bottom
For an especially crisp bottom, move the dish to the bottom of the oven during the final 10 minutes of baking. Watch carefully to prevent the top from becoming too dark.
Step 16: Remove & Cool
Once beautifully golden and baked through, carefully remove the focaccia from the dish and transfer it to a wire rack. Allow it to cool before slicing. Removing it from the dish while warm prevents the bottom from becoming soggy from trapped steam.
Expert Tips for the Best Focaccia
- Embrace the wet, sticky dough. This is intentional and essential — resist the urge to add extra flour, no matter how sticky it feels.
- Keep your hands wet or oiled throughout. This is the key to handling high-hydration dough without adding unwanted flour.
- Don’t rush the stretch-and-fold process. These gentle folds build strength and structure gradually, without deflating the dough the way traditional kneading might.
- Be patient with the resting periods. Each rest allows the gluten to relax and strengthen, setting up the dough for a better final texture.
- Dimple firmly and generously. Deep dimples not only create focaccia’s signature look but also help distribute olive oil throughout the dough as it bakes.
- Don’t skimp on the olive oil. Both the pan and the topping benefit from a generous amount, which is central to focaccia’s flavor and crisp texture.
- Remove from the pan while still warm. This simple step prevents the bottom crust from steaming and becoming soggy as the bread cools.
Flavor Variations ✨
Once you’ve mastered this foundational recipe, try these delicious variations:
- Rosemary Focaccia: Add fresh rosemary before baking for a fragrant, herby classic.
- Garlic Herb: Scatter roasted garlic and fresh thyme over the dimples for a savory, aromatic twist.
- Tomato Focaccia: Press halved cherry tomatoes gently into the dough for bursts of juicy sweetness.
- Olive Focaccia: Add Kalamata or green olives before baking for a briny, Mediterranean-inspired flavor.
- Caramelized Onion: Top with thinly sliced caramelized onions and fresh thyme for a sweet, savory finish.
- Parmesan Herb: Finish with finely grated Parmesan and fresh rosemary for a salty, nutty variation.
Serving Ideas 🍽️
This versatile bread pairs beautifully with a wide range of dishes. Try it:
- Warm with extra-virgin olive oil
- With balsamic vinegar
- Alongside soups
- With pasta
- With fresh salads
- As sandwich bread
- For Italian panini
- With cheese and cured meats
- As an appetizer
- Toasted with garlic butter
- Alongside roasted vegetables
Storage Information 🫙
Store completely cooled focaccia in an airtight container or bread bag at room temperature for approximately 2–3 days. For longer storage, wrap individual portions tightly and freeze for up to 2–3 months. Reheat frozen pieces in a 350°F (175°C) oven until warm and crisp.
Avoid refrigerating focaccia unless necessary, as refrigeration can cause the bread to lose its soft texture more quickly than storing it at room temperature or in the freezer.
Tip: The dough is supposed to be very wet and sticky. Resist the temptation to add extra flour. Instead, keep your hands wet or well coated with olive oil during the stretch-and-fold and shaping stages. That high hydration is what helps create the signature light, airy crumb and gorgeous bubbles in homemade focaccia.
Recipe Card
Basic Focaccia
Airy, chewy, golden Italian focaccia with a crisp olive-oil-rich crust and a soft, bubbly interior.
- Prep Time: 25 minutes
- Rise/Rest Time: approximately 3 hours
- Bake Time: 25–30 minutes
- Total Time: approximately 3 hours 30 minutes to 4 hours
- Servings: 10–12
Ingredients: See full ingredient list above.
Instructions: See full step-by-step instructions above.
Frequently Asked Questions
1. Why is my focaccia dough so wet and sticky? This is completely intentional. Focaccia relies on a high-hydration dough, which is what creates its signature airy, bubbly crumb. Resist the urge to add extra flour, even though it may feel unusual at first.
2. What does “strong bread flour” mean? Strong bread flour refers to flour with a higher protein content, which helps build the gluten structure needed for focaccia’s chew and rise. Standard bread flour typically works well for this purpose.
3. Can I use all-purpose flour instead of bread flour? Bread flour is recommended for the best structure and chew, but all-purpose flour can be used in a pinch, though the texture may be slightly softer.
4. Why do I need to wet or oil my hands during the stretch-and-fold process? Wet or oiled hands prevent the sticky dough from clinging to your skin, allowing you to work with the high-hydration dough without needing to add extra flour, which could affect the final texture.
5. How do I know when the dough has proofed enough before baking? The dough should look puffy and feel airy to the touch after its final 45-minute rest in the pan, and it should have visibly expanded toward the edges of the dish.
6. Can I freeze this focaccia? Yes, focaccia freezes very well. Wrap individual portions tightly and freeze for up to 2–3 months, then reheat directly in the oven for the best texture.
7. Why did my focaccia turn out dense instead of airy? This is often caused by adding too much extra flour during mixing or handling, insufficient resting time between folds, or under-proofing before baking. Be sure the dough gets its full resting periods.
8. Can I add toppings before baking? Yes, this basic recipe is designed to be a foundation for countless toppings. See the flavor variations section above for ideas like rosemary, garlic, tomatoes, and olives.
9. What’s the best way to reheat leftover focaccia? Reheat pieces in a 350°F (175°C) oven for a few minutes until warm and crisp, which helps restore the texture of both the crust and the interior.
Final Thoughts
This Basic Focaccia recipe proves that truly authentic, bakery-style Italian bread is well within reach for home bakers willing to embrace a wet, sticky dough and a little patience. With gentle stretch-and-folds, proper resting, and generous olive oil, you’ll end up with a loaf that has a crisp, golden crust and a light, airy interior every single time. Once you’ve mastered this foundational recipe, the possibilities for toppings and variations are nearly endless.
Give this recipe a try, and don’t forget to share how your focaccia turned out. Tag us with your creations!
Print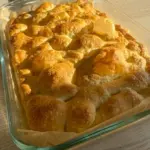
Basic Focaccia 🇮🇹
Ingredients
For the Dough 🍞
- 7 g instant yeast — leavens the dough and helps create the airy, bubbly texture focaccia is known for.
- 350 ml lukewarm water — hydrates the dough; the high water content is essential to focaccia’s signature crumb.
- 40 ml extra-virgin olive oil — adds richness and helps create a tender, flavorful dough.
- 400 g strong bread flour — provides the structure and chew characteristic of a great focaccia.
- ½ tbsp fine sea salt — essential for flavor and for regulating the yeast’s activity.
For the Topping 🫒
- Extra-virgin olive oil, generously — the finishing touch that gives focaccia its signature richness and crisp crust.
- Flaky sea salt, to taste — enhances the flavor and adds a satisfying crunch.
For the Pan
- Extra-virgin olive oil, for greasing — prevents sticking and helps create a crisp, golden bottom crust.
- Extra olive oil, for handling and dimpling — keeps the sticky dough manageable throughout shaping.
- Parchment paper — lines the pan for easy removal once baked.
Instructions
Add the lukewarm water and instant yeast to a large mixing bowl and whisk until the yeast is evenly distributed. Add the olive oil and whisk again until combined.
Add the strong bread flour and salt to the bowl. Mix thoroughly with a wooden spoon or spatula until all the flour has been incorporated. The dough will be extremely wet and sticky — don’t worry, this high-hydration dough is exactly what creates the light, airy focaccia texture. Use a dough scraper or spatula to scrape down the sides of the bowl.
Cover the bowl and allow the dough to rest for approximately 30 minutes. The dough will begin developing strength while remaining very soft and sticky.
Place a small bowl of water beside your work surface. You’ll use the water to wet your hands before handling the dough, which prevents sticking while allowing you to work with the high-hydration mixture without adding unnecessary flour.
After the first 30-minute rest, wet your hands. Grab one side of the dough, gently stretch it upward, and fold it toward the center. Turn the bowl slightly and repeat. Complete 6 stretch-and-fold movements, turning the bowl between each fold, then cover the dough again.
Allow the dough to rest for another 30 minutes. During this time, the dough will begin to become smoother and stronger.
After the second 30-minute rest, repeat the stretch-and-fold process. Again, use wet hands and complete approximately 6 folds, turning the bowl between each one. Cover and allow the dough to rest for another 45 minutes.
While the dough is resting, generously grease your baking dish with olive oil. This helps prevent the parchment from moving around when the dough is added. Line the dish with parchment paper, cutting the corners so it fits snugly inside, then drizzle a generous layer of olive oil over the parchment-covered base.
Once the dough has finished its final rest, gently pour or scrape it into the prepared dish. Be patient and allow the dough to release naturally rather than aggressively pulling it from the bowl. Once transferred, gently fold each end of the dough over itself, turn the dough 90 degrees, and carefully flip it over.
Coat your hands with olive oil and gently stretch the dough from underneath, encouraging it toward the edges of the dish. Don’t force it if it resists. Cover the dish and allow the dough to rest for another 45 minutes.
Preheat the oven to 410°F (210°C), positioning the rack around the middle-lower portion of the oven.
Once the dough has finished its final proof, generously coat your hands with olive oil and press your fingertips deeply into the dough, creating dimples across the entire surface. Don’t be afraid to press down firmly. Gently massage the dough with your fingertips as you dimple to encourage the formation of those beautiful air bubbles.
Drizzle the surface generously with extra-virgin olive oil and sprinkle evenly with flaky sea salt. Make sure the olive oil settles into some of the dimples for maximum flavor.
Place the focaccia on the middle-lower oven shelf and bake for approximately 25–30 minutes, until the surface is deeply golden brown and the edges are crisp. Keep an eye on it during the final few minutes, as baking times can vary between ovens.
For an especially crisp bottom, move the dish to the bottom of the oven during the final 10 minutes of baking. Watch carefully to prevent the top from becoming too dark.
Once beautifully golden and baked through, carefully remove the focaccia from the dish and transfer it to a wire rack. Allow it to cool before slicing. Removing it from the dish while warm prevents the bottom from becoming soggy from trapped steam.