Ingredients
For the Dough 🍞
- 7 g instant yeast — leavens the dough and helps create the airy, bubbly texture focaccia is known for.
- 350 ml lukewarm water — hydrates the dough; the high water content is essential to focaccia’s signature crumb.
- 40 ml extra-virgin olive oil — adds richness and helps create a tender, flavorful dough.
- 400 g strong bread flour — provides the structure and chew characteristic of a great focaccia.
- ½ tbsp fine sea salt — essential for flavor and for regulating the yeast’s activity.
For the Topping 🫒
- Extra-virgin olive oil, generously — the finishing touch that gives focaccia its signature richness and crisp crust.
- Flaky sea salt, to taste — enhances the flavor and adds a satisfying crunch.
For the Pan
- Extra-virgin olive oil, for greasing — prevents sticking and helps create a crisp, golden bottom crust.
- Extra olive oil, for handling and dimpling — keeps the sticky dough manageable throughout shaping.
- Parchment paper — lines the pan for easy removal once baked.
Instructions
Add the lukewarm water and instant yeast to a large mixing bowl and whisk until the yeast is evenly distributed. Add the olive oil and whisk again until combined.
Add the strong bread flour and salt to the bowl. Mix thoroughly with a wooden spoon or spatula until all the flour has been incorporated. The dough will be extremely wet and sticky — don’t worry, this high-hydration dough is exactly what creates the light, airy focaccia texture. Use a dough scraper or spatula to scrape down the sides of the bowl.
Cover the bowl and allow the dough to rest for approximately 30 minutes. The dough will begin developing strength while remaining very soft and sticky.
Place a small bowl of water beside your work surface. You’ll use the water to wet your hands before handling the dough, which prevents sticking while allowing you to work with the high-hydration mixture without adding unnecessary flour.
After the first 30-minute rest, wet your hands. Grab one side of the dough, gently stretch it upward, and fold it toward the center. Turn the bowl slightly and repeat. Complete 6 stretch-and-fold movements, turning the bowl between each fold, then cover the dough again.
Allow the dough to rest for another 30 minutes. During this time, the dough will begin to become smoother and stronger.
After the second 30-minute rest, repeat the stretch-and-fold process. Again, use wet hands and complete approximately 6 folds, turning the bowl between each one. Cover and allow the dough to rest for another 45 minutes.
While the dough is resting, generously grease your baking dish with olive oil. This helps prevent the parchment from moving around when the dough is added. Line the dish with parchment paper, cutting the corners so it fits snugly inside, then drizzle a generous layer of olive oil over the parchment-covered base.
Once the dough has finished its final rest, gently pour or scrape it into the prepared dish. Be patient and allow the dough to release naturally rather than aggressively pulling it from the bowl. Once transferred, gently fold each end of the dough over itself, turn the dough 90 degrees, and carefully flip it over.
Coat your hands with olive oil and gently stretch the dough from underneath, encouraging it toward the edges of the dish. Don’t force it if it resists. Cover the dish and allow the dough to rest for another 45 minutes.
Preheat the oven to 410°F (210°C), positioning the rack around the middle-lower portion of the oven.
Once the dough has finished its final proof, generously coat your hands with olive oil and press your fingertips deeply into the dough, creating dimples across the entire surface. Don’t be afraid to press down firmly. Gently massage the dough with your fingertips as you dimple to encourage the formation of those beautiful air bubbles.
Drizzle the surface generously with extra-virgin olive oil and sprinkle evenly with flaky sea salt. Make sure the olive oil settles into some of the dimples for maximum flavor.
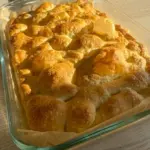
Place the focaccia on the middle-lower oven shelf and bake for approximately 25–30 minutes, until the surface is deeply golden brown and the edges are crisp. Keep an eye on it during the final few minutes, as baking times can vary between ovens.
For an especially crisp bottom, move the dish to the bottom of the oven during the final 10 minutes of baking. Watch carefully to prevent the top from becoming too dark.
Once beautifully golden and baked through, carefully remove the focaccia from the dish and transfer it to a wire rack. Allow it to cool before slicing. Removing it from the dish while warm prevents the bottom from becoming soggy from trapped steam.