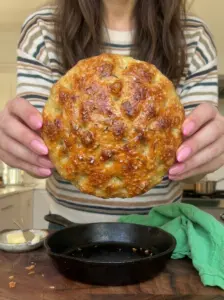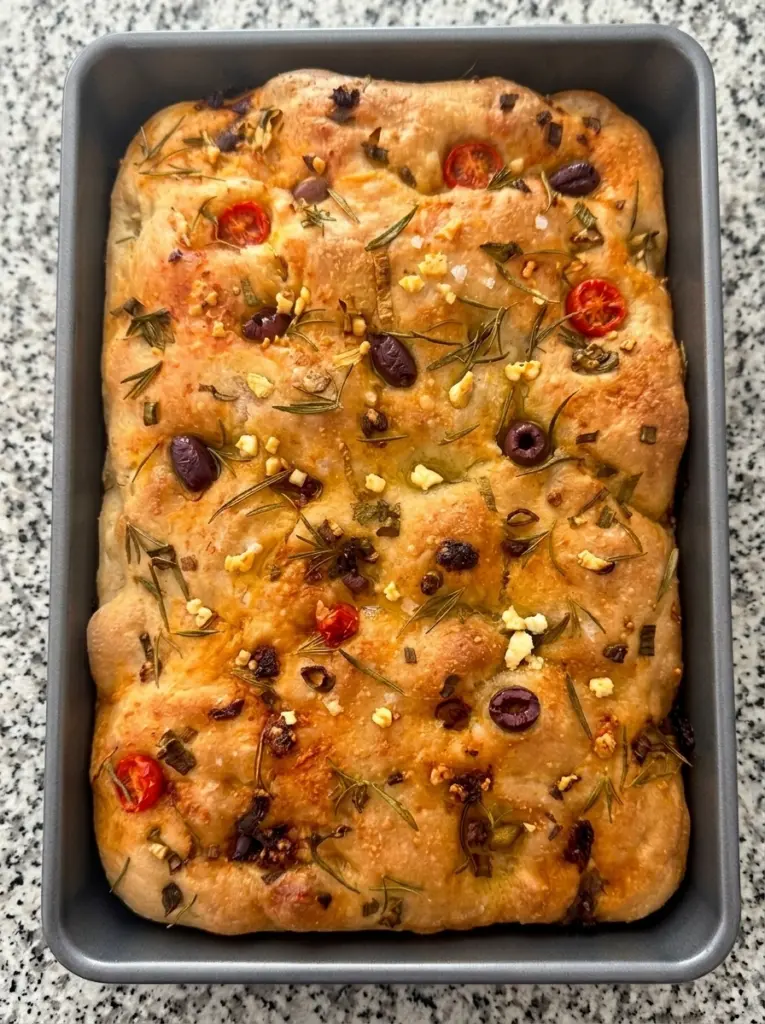
If you’ve always wanted to bake homemade bread but felt intimidated by complicated techniques and special equipment, this Easiest Homemade Focaccia Recipe is exactly where you should start. This is everything you want in a homemade bread: golden and crispy around the edges, beautifully soft and airy in the center, and infused with plenty of rich olive oil throughout. Best of all, it comes together with basic pantry ingredients and surprisingly minimal hands-on work.
There’s no complicated shaping here, no fancy equipment required, and absolutely no bread-making experience necessary. This recipe breaks the process down into simple, approachable steps: mix, rest, stretch, dimple, and bake. That’s really all it takes to produce a loaf with a beautifully crisp, golden crust and a light, bubbly interior that rivals anything you’d find at a bakery.
Whether you’re serving it alongside a bowl of tomato soup, building the ultimate Italian sandwich, setting it out for a casual brunch, or simply tearing off a warm piece to dip into olive oil, this focaccia is endlessly versatile and satisfying. In this article, you’ll find a complete ingredient breakdown, step-by-step instructions, a variety of easy topping ideas, expert pro tips, serving ideas, storage information, and answers to the most frequently asked questions about making this beginner-friendly focaccia.
What Makes This the Easiest Homemade Focaccia?
While focaccia has a reputation for being an intimidating bread to bake, this recipe strips the process down to its essentials, making it approachable for even first-time bread bakers. Rather than requiring careful shaping or specialized tools, this method relies on a simple stretch-and-fold technique to build the dough’s structure, followed by a slow rise, a gentle stretch into the pan, and a final proof before baking.
The dough itself is intentionally soft, wet, and sticky, which is exactly what creates focaccia’s signature airy crumb. There’s no need to knead the dough by hand in the traditional sense; instead, a series of gentle folds develops the gluten gradually while preserving the air bubbles that give focaccia its light, open texture. Once the dough has risen and been stretched into a generously oiled pan, it’s deeply dimpled by hand, a simple but essential step that creates pockets for olive oil and toppings while giving the finished bread its iconic look.
This straightforward approach, combined with a generous amount of olive oil, results in a loaf with a beautifully crisp, golden crust, a soft and tender interior, and rich, unmistakable flavor, proving that truly great homemade bread doesn’t have to be complicated.
Why You’ll Love This Recipe
- Beginner-friendly — no complicated shaping, equipment, or bread-baking experience required.
- Minimal hands-on time — most of the process is simply waiting for the dough to rest and rise.
- Crispy edges, soft center — the perfect textural contrast in every slice.
- Infused with rich olive oil flavor — generous oil throughout creates incredible depth of flavor.
- Endlessly customizable — top it with your favorite herbs, cheeses, or vegetables.
- Freezer-friendly — wrap and freeze for up to 3 months for bread whenever you need it.
Ingredients You’ll Need
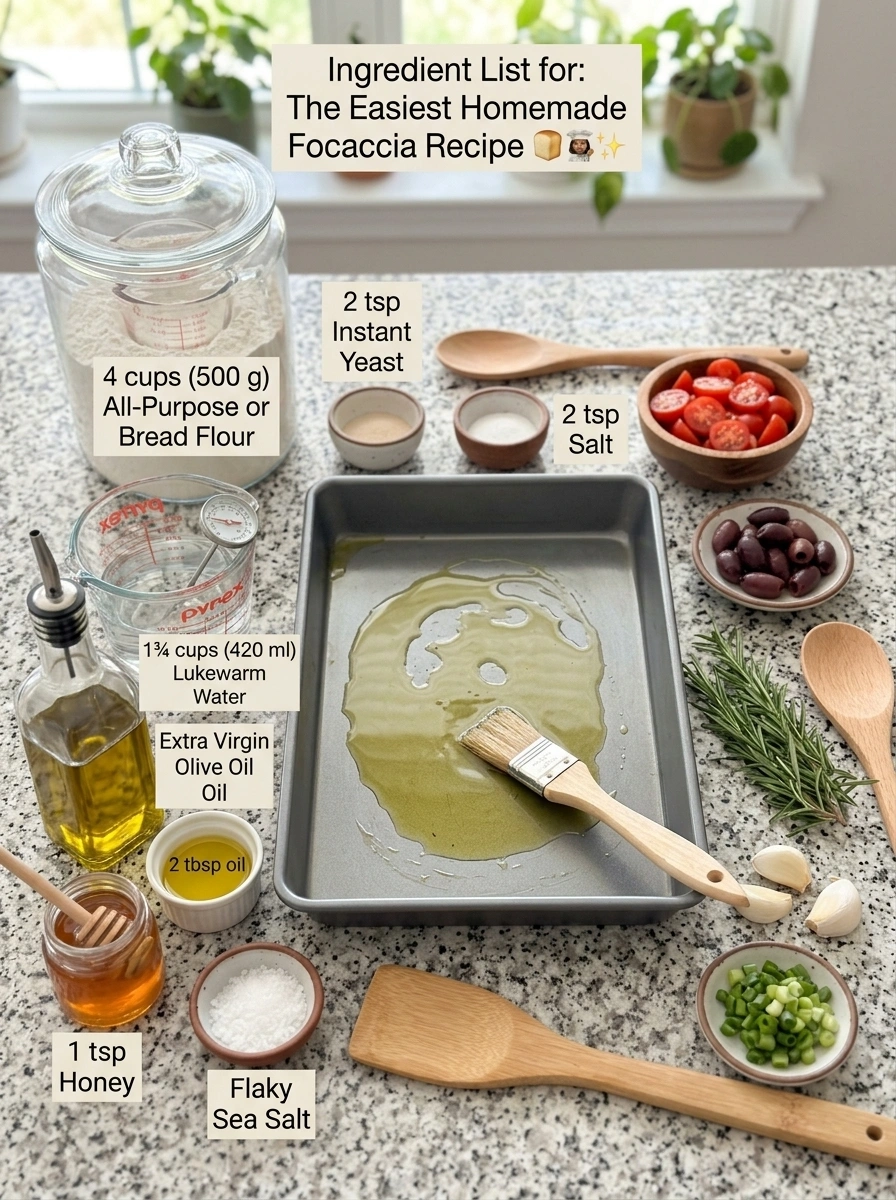
- 4 cups (500 g) all-purpose or bread flour — provides the structure for the dough; either flour works well in this recipe.
- 2 tsp instant yeast — leavens the dough and helps create the light, airy texture focaccia is known for.
- 2 tsp salt — essential for flavor and for regulating the yeast’s activity.
- 1¾ cups (420 ml) lukewarm water — hydrates the dough; the generous water content is key to focaccia’s signature texture.
- 2 tbsp extra virgin olive oil, plus more for the pan and topping — adds richness and contributes to the crispy, golden crust.
- 1 tsp honey or sugar — feeds the yeast and adds a subtle touch of sweetness.
- Flaky sea salt, for topping — enhances the flavor and adds a satisfying crunch to the finished bread.
- Fresh rosemary, optional — the classic focaccia topping, adding a fragrant, herby flavor.
Step-by-Step Instructions
Step 1: Make the Dough
Add the lukewarm water, honey, and yeast to a large mixing bowl. Stir briefly, then add the flour, salt, and olive oil. Mix with a wooden spoon or spatula until a very sticky, shaggy dough forms. Don’t worry about making it smooth — focaccia dough should be soft and wet.
Step 2: First Rest
Cover the bowl with plastic wrap or a clean kitchen towel and let the dough rest at room temperature for approximately 20 minutes.
Step 3: Stretch & Fold
With wet or lightly oiled hands, grab one side of the dough, stretch it upward, and fold it over itself. Turn the bowl and repeat around the dough several times. Cover and rest for another 20 minutes, then repeat the stretch-and-fold process 2–3 more times. As the dough develops, it should become smoother, stronger, and more elastic with each round.
Step 4: Let the Dough Rise 🥣
Cover the bowl and allow the dough to rise at room temperature for approximately 1–2 hours, or until noticeably puffy and roughly doubled in size. For more flavor, you can refrigerate the dough overnight instead.
Step 5: Prepare the Pan 🫒
Generously coat a 9 × 13-inch baking pan with extra virgin olive oil. Don’t be shy with the oil — it’s one of the secrets to those delicious crispy focaccia edges.
Step 6: Transfer the Dough
Gently tip the risen dough into the prepared pan and drizzle the top with more olive oil. Using lightly oiled fingertips, carefully stretch the dough toward the corners. If it resists, let it rest for 10–15 minutes and try again — don’t force it.
Step 7: Final Proof
Cover the pan loosely and let the dough rest for another 30–60 minutes, until it becomes light, airy, and puffy.
Step 8: Dimple the Dough 👆
Preheat your oven to 425°F (220°C). Drizzle more olive oil over the surface, then press your fingertips straight down into the dough to create those classic deep focaccia dimples. Don’t deflate the dough completely — you’re simply creating pockets for the olive oil and toppings.
Step 9: Add the Toppings 🌿
Sprinkle the surface generously with flaky sea salt, adding fresh rosemary if desired. You can also add sliced garlic, cherry tomatoes, olives, onions, or other favorite toppings. Finish with another generous drizzle of olive oil.
Step 10: Bake 🔥
Bake for approximately 20–25 minutes, or until the focaccia is deeply golden on top and crisp around the edges. For extra color, bake for a few additional minutes while watching carefully.
Step 11: Cool & Serve
Remove the focaccia from the pan and transfer it to a wire rack. Let it cool for approximately 10–15 minutes before slicing. Serve warm or at room temperature.
Easy Focaccia Topping Ideas ✨
One of the best things about this recipe is how easily it adapts to your favorite flavors. Try these delicious topping combinations:
- Classic Rosemary: Fresh rosemary + flaky sea salt + olive oil.
- Garlic Parmesan: Minced garlic + Parmesan + Italian herbs.
- Tomato Basil: Cherry tomatoes + fresh basil + Parmesan.
- Olive & Herb: Kalamata olives + rosemary + oregano.
- Jalapeño Cheese: Sliced jalapeños + Cheddar or Monterey Jack.
- Caramelized Onion: Sweet caramelized onions + thyme + Parmesan.
- Everything Bagel: Everything bagel seasoning + flaky salt.
- Mediterranean: Feta + olives + sun-dried tomatoes + oregano.
Serving Ideas 🍽️
This focaccia is delicious served with:
- Olive oil and balsamic vinegar
- Tomato soup
- Pasta
- Italian salad
- Roasted vegetables
- Grilled chicken
- Charcuterie boards
- Marinated vegetables
You can also slice it horizontally and use it to make incredible sandwiches, taking advantage of its sturdy yet airy texture.
Storage Information 🫙
Store cooled focaccia in an airtight container or bread bag at room temperature for 2–3 days. For longer storage, wrap tightly and freeze for up to 3 months. Reheat in a 350°F (175°C) oven until warm and crisp, which helps restore both the crust and the soft interior.
Pro Tips 🌟
- Use plenty of olive oil. Focaccia gets its signature crispy bottom and golden crust from generous olive oil, both in the pan and on top.
- Don’t add too much flour. Sticky dough creates a lighter, airier focaccia. Resist the urge to keep adding flour, even if it feels unusual.
- Be gentle with the dough. Preserve as many air bubbles as possible during shaping and dimpling for the best texture.
- Let it proof properly. The dough should look noticeably puffy before baking, which is a sign it’s ready for the oven.
- Dimple generously. Deep dimples create those classic pockets that fill with olive oil and become beautifully crisp during baking.
- Don’t slice immediately. Giving the focaccia a short cooling period helps the interior finish setting while keeping it wonderfully soft.
Recipe Card
The Easiest Homemade Focaccia
Golden and crispy around the edges, soft and airy in the center, and infused with rich olive oil — made with basic pantry ingredients and minimal hands-on work.
- Prep Time: 20 minutes
- Rise/Proof Time: approximately 2 hours to 3 hours
- Bake Time: 20–25 minutes
- Total Time: approximately 2 hours 45 minutes to 3 hours 45 minutes
- Servings: 10–12
Ingredients: See full ingredient list above.
Instructions: See full step-by-step instructions above.
Frequently Asked Questions
1. Do I need any special equipment to make this focaccia? No, this recipe is designed to be beginner-friendly and doesn’t require a stand mixer, dough hook, or any specialized bread-baking tools — just a mixing bowl, a spoon or spatula, and a baking pan.
2. Why is the dough so sticky? Focaccia relies on a wet, high-hydration dough, which is exactly what creates its light, airy texture. Resist the urge to add extra flour, even though it may feel unusual at first.
3. Can I make the dough ahead of time? Yes, you can refrigerate the dough overnight after the first rise begins, which also deepens the bread’s flavor. Let it come closer to room temperature before shaping and proofing in the pan.
4. What if my dough keeps shrinking back when I try to stretch it? This means the gluten needs more time to relax. Let the dough rest for 10–15 minutes, then try stretching it toward the corners of the pan again.
5. Can I use all-purpose flour instead of bread flour? Yes, this recipe works well with either all-purpose or bread flour, so use whichever you have on hand.
6. Why didn’t my focaccia turn out very airy? This is often caused by adding too much extra flour during mixing, under-proofing the dough, or handling it too roughly during the dimpling step. Be sure the dough looks puffy before baking.
7. Can I freeze this focaccia? Yes, focaccia freezes very well. Wrap it tightly and freeze for up to 3 months, then reheat directly in the oven for the best texture.
8. What toppings work best for this recipe? This recipe is highly customizable — see the Easy Focaccia Topping Ideas section above for a variety of combinations, from classic rosemary to Mediterranean-inspired flavors.
9. How do I know when the dough has proofed enough before baking? The dough should look noticeably puffy, light, and airy after its final 30–60 minute proof in the pan, which is a good sign it’s ready for dimpling and baking.
Final Thoughts
This Easiest Homemade Focaccia Recipe proves that truly great homemade bread is well within reach, even for complete beginners. With a simple mix-rest-stretch-dimple-bake process and plenty of good olive oil, you’ll end up with a loaf that has a beautifully crisp, golden crust and a soft, airy interior every single time. Once you realize how easy this homemade focaccia is, you’ll want to bake it constantly.
Give this recipe a try, and don’t forget to share how your focaccia turned out. Tag us with your creations!
Print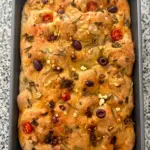
The Easiest Homemade Focaccia Recipe
Ingredients
- 4 cups (500 g) all-purpose or bread flour — provides the structure for the dough; either flour works well in this recipe.
- 2 tsp instant yeast — leavens the dough and helps create the light, airy texture focaccia is known for.
- 2 tsp salt — essential for flavor and for regulating the yeast’s activity.
- 1¾ cups (420 ml) lukewarm water — hydrates the dough; the generous water content is key to focaccia’s signature texture.
- 2 tbsp extra virgin olive oil, plus more for the pan and topping — adds richness and contributes to the crispy, golden crust.
- 1 tsp honey or sugar — feeds the yeast and adds a subtle touch of sweetness.
- Flaky sea salt, for topping — enhances the flavor and adds a satisfying crunch to the finished bread.
- Fresh rosemary, optional — the classic focaccia topping, adding a fragrant, herby flavor.
Instructions
Add the lukewarm water, honey, and yeast to a large mixing bowl. Stir briefly, then add the flour, salt, and olive oil. Mix with a wooden spoon or spatula until a very sticky, shaggy dough forms. Don’t worry about making it smooth — focaccia dough should be soft and wet.
Cover the bowl with plastic wrap or a clean kitchen towel and let the dough rest at room temperature for approximately 20 minutes.
With wet or lightly oiled hands, grab one side of the dough, stretch it upward, and fold it over itself. Turn the bowl and repeat around the dough several times. Cover and rest for another 20 minutes, then repeat the stretch-and-fold process 2–3 more times. As the dough develops, it should become smoother, stronger, and more elastic with each round.
Cover the bowl and allow the dough to rise at room temperature for approximately 1–2 hours, or until noticeably puffy and roughly doubled in size. For more flavor, you can refrigerate the dough overnight instead.
Generously coat a 9 × 13-inch baking pan with extra virgin olive oil. Don’t be shy with the oil — it’s one of the secrets to those delicious crispy focaccia edges.
Gently tip the risen dough into the prepared pan and drizzle the top with more olive oil. Using lightly oiled fingertips, carefully stretch the dough toward the corners. If it resists, let it rest for 10–15 minutes and try again — don’t force it.
Cover the pan loosely and let the dough rest for another 30–60 minutes, until it becomes light, airy, and puffy.
Preheat your oven to 425°F (220°C). Drizzle more olive oil over the surface, then press your fingertips straight down into the dough to create those classic deep focaccia dimples. Don’t deflate the dough completely — you’re simply creating pockets for the olive oil and toppings.
Sprinkle the surface generously with flaky sea salt, adding fresh rosemary if desired. You can also add sliced garlic, cherry tomatoes, olives, onions, or other favorite toppings. Finish with another generous drizzle of olive oil.
Bake for approximately 20–25 minutes, or until the focaccia is deeply golden on top and crisp around the edges. For extra color, bake for a few additional minutes while watching carefully.
Remove the focaccia from the pan and transfer it to a wire rack. Let it cool for approximately 10–15 minutes before slicing. Serve warm or at room temperature.