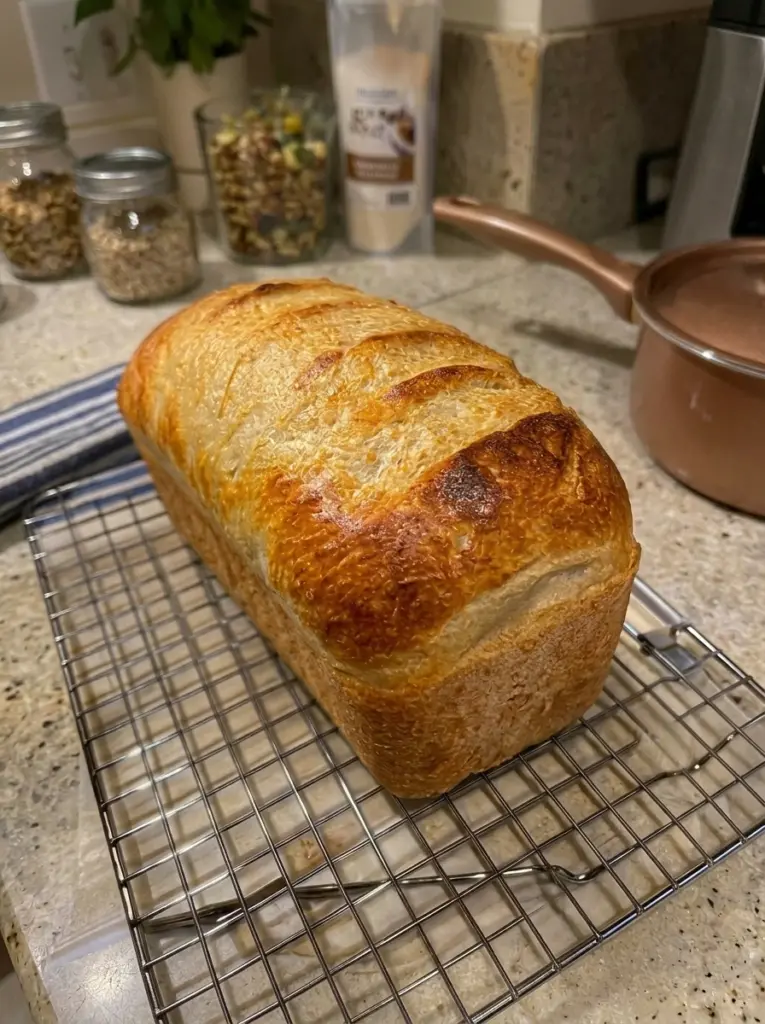
If you love the tangy depth of sourdough but want something softer and more sandwich-friendly than a crusty artisan loaf, this Soft Sourdough Sandwich Bread is exactly what you need. It has all the flavor complexity that comes from a naturally fermented starter, paired with a tender, fluffy crumb that’s soft enough for everyday sandwiches, toast, and grilled cheese.
Unlike a classic rustic sourdough boule with its thick, chewy crust, this recipe is enriched with milk, butter, honey, and egg, which softens both the texture and the crust. The result is a tall, golden, beautifully domed loaf that slices cleanly and stays soft for days. This guide walks you through every step, from mixing the dough to getting that deep golden color on top, along with tips for troubleshooting fermentation, shaping, and slicing.
Why You’ll Love This Recipe
- Soft, sandwich-friendly texture. Milk, butter, and egg create a tender crumb that’s much softer than traditional artisan sourdough.
- Real sourdough flavor. Using an active starter instead of commercial yeast gives this bread a subtle tang and more complex flavor.
- Beautiful golden loaf. The egg wash and enriched dough produce a deeply golden, glossy crust with a tall, rounded top.
- Versatile. Great for sandwiches, toast, French toast, grilled cheese, or simply buttered and eaten warm.
- No commercial yeast needed. This recipe relies entirely on your sourdough starter for leavening.
Ingredients for Soft Sourdough Sandwich Bread
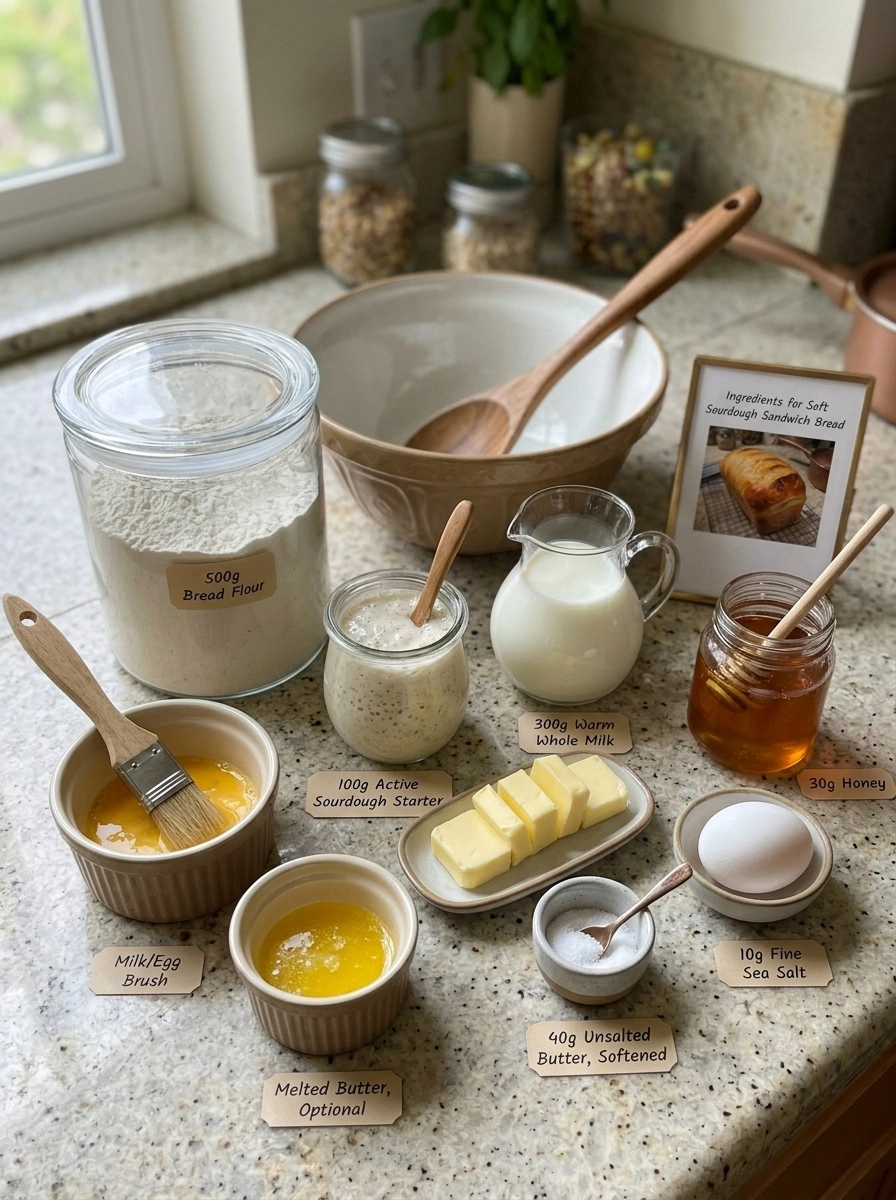
- 100 g active sourdough starter, bubbly and at or near peak
- 300 g warm whole milk
- 30 g honey
- 40 g unsalted butter, softened
- 500 g bread flour
- 10 g fine sea salt
- 1 large egg
For the Top
- 1 tablespoon milk or beaten egg, for brushing before baking
- 1 tablespoon melted butter, for brushing after baking (optional)
Ingredient Notes
Sourdough starter. Your starter should be active and bubbly, ideally at or near its peak rise, before you use it in this recipe. A sluggish or underfed starter will lead to slow, unreliable fermentation and a denser loaf. If you’re not sure whether your starter is ready, do the float test: drop a small spoonful into a glass of water — if it floats, it’s active enough to use.
Whole milk. Whole milk adds richness and helps create a soft, tender crumb. Warm milk (not hot) also helps activate the starter’s fermentation a bit more quickly than cold milk would.
Honey. Beyond adding a touch of sweetness, honey helps keep the crumb moist and contributes to the deep golden color of the crust as it bakes.
Butter. Softened butter enriches the dough, making the crumb softer and more tender than a lean sourdough dough. Adding it gradually during kneading (rather than all at once at the start) helps it incorporate evenly without slowing down gluten development.
Bread flour. Bread flour has a higher protein content than all-purpose flour, which gives this enriched dough enough structure to rise tall in the loaf pan despite the added fat and liquid.
Egg. The egg adds richness, helps bind the dough, and contributes to the tender texture and golden color of the finished loaf.
Substitutions and Variations
- Milk substitute: You can use 2% milk in place of whole milk, though the crumb will be slightly less rich. Non-dairy milk can also work, but expect a small difference in texture and browning.
- Honey substitute: Maple syrup or granulated sugar can be used in place of honey in a similar amount, though honey contributes the most to the golden crust color.
- Whole wheat version: You can substitute up to about 25% of the bread flour with whole wheat flour for a heartier flavor, though the dough may need slightly more hydration since whole wheat flour absorbs more liquid.
- Egg-free version: The egg can be omitted, though the crumb will be slightly less rich and the crust slightly less golden. If omitting, you may want to increase the milk brush before baking for better color.
- Enriched vs. lean dough: If you prefer a more traditional, less enriched sourdough sandwich loaf, you can reduce the butter by about half, though the crumb will be a bit less soft.
Kitchen Equipment
- Large mixing bowl
- Kitchen scale (for accurate measurements, since this recipe uses weight-based measurements)
- Stand mixer with dough hook, or your hands, for kneading
- 9 x 5-inch loaf pan
- Sharp bread lame or razor blade, for scoring
- Pastry brush
- Wire cooling rack
How to Make Soft Sourdough Sandwich Bread
This recipe follows the classic sourdough process: mix, ferment, shape, proof, and bake. Because it relies on natural fermentation rather than commercial yeast, timing will vary depending on your starter’s strength and your kitchen’s temperature, so pay closer attention to how the dough looks and feels than to the clock.
Step 1: Mix the Dough
In a large bowl, combine the active sourdough starter, warm milk, honey, and egg, and stir until mostly combined. Add the bread flour and salt, and mix until a rough, shaggy dough forms. Let the dough rest for about 20 to 30 minutes. This rest, often called an autolyse-style pause, gives the flour time to hydrate and makes the dough easier to knead afterward.
Step 2: Add the Butter and Knead
Add the softened butter gradually while kneading, allowing each addition to incorporate before adding more. Knead for approximately 8 to 10 minutes, until the dough becomes smooth, elastic, and slightly tacky. The finished dough should feel soft but shouldn’t be extremely sticky — if it’s sticking heavily to your hands or the bowl after a full knead, add flour a tablespoon at a time.
Step 3: Bulk Fermentation
Place the dough in a lightly greased bowl and cover it. Let it ferment at warm room temperature for approximately 4 to 7 hours, depending on the strength of your starter and the temperature of your kitchen. Rather than relying only on the clock, watch the dough itself. It’s ready when it looks noticeably puffier, smoother, and airier, and has increased in size by roughly 50 to 75%. You don’t necessarily need to wait for it to fully double, since enriched sourdough doughs often rise more slowly and less dramatically than lean doughs.
Step 4: Shape the Sandwich Loaf
Turn the dough out onto a lightly floured surface. Gently press it into a rectangle roughly as wide as your loaf pan. Roll the dough tightly into a log, starting from one short side, then pinch the seam closed. Place the shaped dough seam-side down into a greased 9 x 5-inch loaf pan.
Step 5: Final Proof
Cover the pan loosely and let the dough rise for approximately 2 to 4 hours. It’s ready to bake when it looks noticeably puffy and the center has risen roughly 1 inch above the rim of the pan. Try to avoid letting it dramatically overproof, since an overproofed enriched dough can collapse or bake up dense rather than airy.
Step 6: Score and Brush
Preheat the oven to 375°F (190°C). Using a very sharp bread lame or razor blade, make about 5 to 6 shallow diagonal slashes across the top of the loaf. Scoring not only creates an attractive finish, it also gives the loaf controlled points to expand during baking, called oven spring. Brush the surface lightly with milk or beaten egg — egg wash produces a darker, shinier crust, while milk creates a softer, slightly less glossy finish.
Step 7: Bake
Bake at 375°F (190°C) for 35 to 40 minutes, until the loaf is deeply golden brown. If the top is browning too quickly before the inside finishes baking, loosely tent it with aluminum foil for the final 10 to 15 minutes. For the most reliable results, check doneness with an instant-read thermometer inserted into the center of the loaf — it should read approximately 190°F to 200°F (88°C to 93°C).
Step 8: Finish and Cool
Remove the loaf from the pan and transfer it to a wire cooling rack. For an especially soft sandwich-bread crust, brush the hot top immediately with a thin layer of melted butter. Let the loaf cool for at least 1 to 2 hours before slicing — cutting into it too early can result in a gummy texture, since the interior crumb is still setting as it cools.
Expert Tips for the Best Results
- Use a kitchen scale. This recipe is written in grams for a reason: weight measurements are far more accurate than cups for bread baking, and even small flour discrepancies can affect hydration and texture.
- Make sure your starter is truly active. A weak or unfed starter is the most common reason sourdough bread turns out dense. Feed your starter 4 to 12 hours before baking, and use it once it’s visibly bubbly and has roughly doubled.
- Judge fermentation by look and feel, not just time. Kitchen temperature has a big effect on fermentation speed, so use the visual and textural cues in the recipe as your main guide.
- Don’t skip the resting step after mixing. The 20- to 30-minute rest before kneading makes the dough noticeably easier to work with, since the flour has time to fully hydrate.
- Let the loaf cool fully before slicing. Cutting into warm bread can compress the crumb and make it seem gummy, even if it’s fully baked.
Common Mistakes to Avoid
Using an inactive or underfed starter. If your starter hasn’t been fed recently or isn’t visibly bubbly and active, fermentation will be slow and unpredictable, and the loaf may not rise properly.
Overproofing the dough. Letting the dough rise too far, especially during the final proof, can cause the loaf to collapse or bake up dense instead of light and airy. Watch for the dough rising about an inch above the pan rim as your cue to bake, rather than letting it climb much higher.
Slicing too soon. Cutting into the loaf before it has fully cooled can make the crumb seem gummy or underbaked, even when it’s perfectly done.
Adding butter too quickly. Dumping in all the softened butter at once, instead of incorporating it gradually while kneading, can make the dough greasy and harder to develop properly.
Skipping the internal temperature check. Because ovens vary, relying only on baking time can lead to an underbaked center. Checking for an internal temperature of about 190°F to 200°F is the most reliable way to confirm doneness.
How to Serve Soft Sourdough Sandwich Bread
This loaf’s soft crumb and mild tang make it a natural all-purpose bread. Slice it for:
- Everyday sandwiches
- Buttered toast
- Grilled cheese
- French toast
- Simply warm with butter and honey
Make-Ahead Instructions
You can prepare the dough through bulk fermentation and refrigerate it overnight if you’d like to break the process into two days — simply let the dough finish its bulk rise in the refrigerator instead of at room temperature, then bring it to room temperature before shaping. Keep in mind that cold fermentation will slow the rise, so plan for extra time before shaping and baking.
Storage Instructions
Room Temperature
Once fully cooled, store the loaf in an airtight bag or container at room temperature for up to 4 days.
Refrigerating
Refrigeration isn’t necessary for this bread and can actually dry it out faster, so room temperature or freezer storage is generally preferable.
Freezing
To freeze, slice the cooled loaf and store it in a freezer-safe bag for up to 3 months. Freezing pre-sliced makes it easy to pull out individual pieces as needed.
Reheating
Frozen slices can go straight into a toaster. For a whole loaf, thaw at room temperature, then warm briefly in a 300°F (150°C) oven if you’d like to refresh the crust.
Frequently Asked Questions
Can I make this bread without a stand mixer? Yes. The dough can be kneaded by hand; it will simply take a bit more effort and time to reach the same smooth, elastic texture.
Why didn’t my dough rise much during bulk fermentation? This is most often due to a weak or underfed starter, or a cooler kitchen temperature. Make sure your starter is active and near its peak before mixing, and be patient, since fermentation time can vary significantly.
Can I use all-purpose flour instead of bread flour? You can, but the loaf will likely be slightly less tall and have a softer structure, since bread flour’s higher protein content gives more support to this enriched dough.
How do I know when the dough has proofed enough before baking? Look for the dough rising to about 1 inch above the rim of the loaf pan and appearing visibly puffy. Avoid waiting for it to rise dramatically higher, as this can lead to overproofing.
Why is my loaf dense instead of fluffy? Dense sourdough sandwich bread is usually caused by an inactive starter, underproofing, or overproofing. Make sure your starter is active, and use the visual cues in the recipe rather than fixed times, since fermentation speed varies by kitchen.
How long does this bread stay fresh? Stored properly at room temperature, it stays fresh for up to 4 days, or up to 3 months in the freezer.
Can I make this into rolls instead of a loaf? Yes. Divide the dough into equal pieces after shaping, place them in a baking pan, and reduce the bake time, checking for the same internal temperature of about 190°F to 200°F.
Final Recipe Summary
This Soft Sourdough Sandwich Bread combines the deep flavor of naturally fermented sourdough with the soft, tender crumb of an enriched loaf. With milk, butter, honey, and egg, it bakes up tall, golden, and perfect for slicing into sandwiches, toast, or grilled cheese. While it takes patience through two rounds of fermentation, most of that time is hands-off, making this a rewarding bake for both sourdough beginners and experienced bakers alike.
Prep Time: 30–45 minutes (active) Fermentation Time: 6–11 hours (bulk fermentation and final proof combined) Bake Time: 35–40 minutes Total Time: Approximately 7–12 hours, depending on starter activity and kitchen temperature Yield: 1 loaf (about 12–14 slices)
Print
Soft Sourdough Sandwich Bread
Ingredients
- 100 g active sourdough starter, bubbly and at or near peak
- 300 g warm whole milk
- 30 g honey
- 40 g unsalted butter, softened
- 500 g bread flour
- 10 g fine sea salt
- 1 large egg
For the Top
- 1 tablespoon milk or beaten egg, for brushing before baking
- 1 tablespoon melted butter, for brushing after baking (optional)
Instructions
This recipe follows the classic sourdough process: mix, ferment, shape, proof, and bake. Because it relies on natural fermentation rather than commercial yeast, timing will vary depending on your starter’s strength and your kitchen’s temperature, so pay closer attention to how the dough looks and feels than to the clock.
In a large bowl, combine the active sourdough starter, warm milk, honey, and egg, and stir until mostly combined. Add the bread flour and salt, and mix until a rough, shaggy dough forms. Let the dough rest for about 20 to 30 minutes. This rest, often called an autolyse-style pause, gives the flour time to hydrate and makes the dough easier to knead afterward.
Add the softened butter gradually while kneading, allowing each addition to incorporate before adding more. Knead for approximately 8 to 10 minutes, until the dough becomes smooth, elastic, and slightly tacky. The finished dough should feel soft but shouldn’t be extremely sticky — if it’s sticking heavily to your hands or the bowl after a full knead, add flour a tablespoon at a time.
Place the dough in a lightly greased bowl and cover it. Let it ferment at warm room temperature for approximately 4 to 7 hours, depending on the strength of your starter and the temperature of your kitchen. Rather than relying only on the clock, watch the dough itself. It’s ready when it looks noticeably puffier, smoother, and airier, and has increased in size by roughly 50 to 75%. You don’t necessarily need to wait for it to fully double, since enriched sourdough doughs often rise more slowly and less dramatically than lean doughs.
Turn the dough out onto a lightly floured surface. Gently press it into a rectangle roughly as wide as your loaf pan. Roll the dough tightly into a log, starting from one short side, then pinch the seam closed. Place the shaped dough seam-side down into a greased 9 x 5-inch loaf pan.
Cover the pan loosely and let the dough rise for approximately 2 to 4 hours. It’s ready to bake when it looks noticeably puffy and the center has risen roughly 1 inch above the rim of the pan. Try to avoid letting it dramatically overproof, since an overproofed enriched dough can collapse or bake up dense rather than airy.
Preheat the oven to 375°F (190°C). Using a very sharp bread lame or razor blade, make about 5 to 6 shallow diagonal slashes across the top of the loaf. Scoring not only creates an attractive finish, it also gives the loaf controlled points to expand during baking, called oven spring. Brush the surface lightly with milk or beaten egg — egg wash produces a darker, shinier crust, while milk creates a softer, slightly less glossy finish.
Bake at 375°F (190°C) for 35 to 40 minutes, until the loaf is deeply golden brown. If the top is browning too quickly before the inside finishes baking, loosely tent it with aluminum foil for the final 10 to 15 minutes. For the most reliable results, check doneness with an instant-read thermometer inserted into the center of the loaf — it should read approximately 190°F to 200°F (88°C to 93°C).
Remove the loaf from the pan and transfer it to a wire cooling rack. For an especially soft sandwich-bread crust, brush the hot top immediately with a thin layer of melted butter. Let the loaf cool for at least 1 to 2 hours before slicing — cutting into it too early can result in a gummy texture, since the interior crumb is still setting as it cools.