
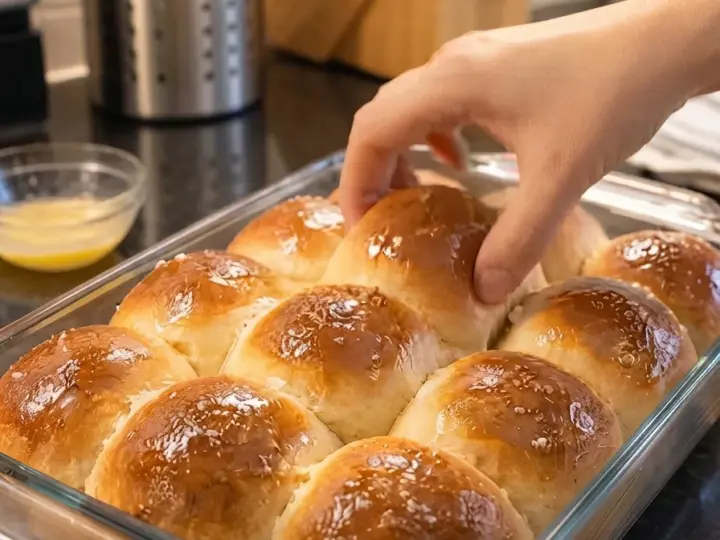
Soft & Buttery No-Knead Dinner Bread is a simple pan loaf made for slicing beside a family meal. Milk, an egg, and melted butter give the dough a tender crumb, while a little sugar rounds out the flavor without making the bread taste like dessert. A light brushing of butter after baking softens the top and adds a warm, buttery finish.
The dough comes together in a bowl with a sturdy spoon. There is no mixer or traditional kneading session: you stir thoroughly, let the dough rise, transfer it to a loaf pan, and allow it to become puffy again before baking. The pan supports the soft dough, making it a practical choice when you want homemade dinner bread without working a smooth, tightly shaped loaf by hand.
Serve it with soup, roast chicken, pasta, or a bowl of stew. Once completely cool, the remaining slices are useful for toast and simple sandwiches. Expect a gently golden crust and a soft interior with small, slightly irregular air pockets rather than a crusty artisan loaf.
Development note: This is an untested proposed recipe created for the requested title. The ingredient balance, timing, and pan yield need a home-kitchen test before publication as a tested recipe. Use the dough and baking cues below alongside the suggested schedule.
What “No-Knead” Means Here
No-knead does not mean barely mixing the ingredients. The flour still needs to be fully hydrated, and the dough needs enough stirring to become cohesive. The resting time then gives it a chance to develop structure without a separate kneading stage.
This is a soft, enriched dough rather than a dry ball that cleans the bowl immediately. It should feel sticky and remain somewhat rough after mixing. Adding enough flour to make it easy to handle like a conventional dough would change the intended formula.
The method uses two rises. The first lets the mixed dough expand in its bowl; the second lets it recover and become puffy in the loaf pan. Neither has an exact universal duration because temperature and yeast activity vary.
Ingredients
For the Dough
- 3 cups all-purpose flour, spooned into the cup and leveled, approximately 12 3/4 ounces by weight
- 2 1/4 teaspoons instant yeast
- 2 tablespoons granulated sugar
- 1 1/4 teaspoons fine salt
- 1 cup whole milk, lukewarm
- 1 large egg
- 4 tablespoons unsalted butter, melted and cooled until lukewarm
For the Pan and Finish
- A little softened butter or nonstick spray for greasing
- 1 tablespoon unsalted butter, melted, for brushing after baking
- A small pinch of flaky salt, optional
Yield: One 9-by-5-inch loaf, approximately 12 slices.
Use a metal loaf pan for the intended starting point. Have all the ingredients measured before mixing, and keep the finishing tablespoon of butter separate from the four tablespoons used in the dough.
Ingredient Notes
All-Purpose Flour
All-purpose flour keeps the bread relatively tender. Measure by weight if possible, since a packed cup can contain considerably more flour than a lightly spooned and leveled cup.
If measuring by volume, fluff the flour, spoon it into the measuring cup, and level the surface. Do not scoop tightly from the bag and press the flour down. Excess flour is a common reason a soft bread turns out heavy.
Bread flour can be tried as a variation, but it may absorb more liquid and produce a chewier crumb. Whole-wheat flour is not an equivalent full replacement because its bran and absorption change the dough. Test the plain version before making substantial flour changes.
Instant Yeast
Instant yeast can be mixed directly with the flour. Check the package to confirm the product type and make sure it is within its useful storage period.
This recipe uses a standard packet-sized quantity, but the amount does not eliminate the need to watch the dough. A cold kitchen can slow the rise, and a hot environment can make it move faster than expected.
If using active dry yeast instead, dissolve it in the lukewarm milk with a little of the measured sugar according to its package directions before combining. That changes the sequence, and the rising schedule may differ.
Whole Milk
Milk contributes moisture and a softer, richer flavor than water alone. Warm it until comfortably lukewarm, approximately 100–110°F. Check with a thermometer rather than guessing from steam or the temperature of the pan.
Hot milk can damage yeast. The melted butter should also be cooled so the wet ingredients do not become excessively hot when combined.
Lower-fat milk may work with a somewhat different richness. A plant-based milk substitution changes the ingredients and is not verified in this proposed formula.
Egg
One large egg enriches the dough and helps give the crumb color and structure. Use the stated size for the first test rather than adding an extra egg for softness.
You can use the egg directly from the refrigerator; it may cool the wet mixture slightly and lengthen the rise. There is no need to leave it on the counter for a prolonged period.
Butter
Melt the four tablespoons for the dough, then let the butter cool until lukewarm. It should remain liquid without feeling hot.
The separate finishing butter is brushed onto the baked loaf. That small amount softens the crust and supplies a buttery aroma right at the surface.
If using salted butter, the bread will have additional salt. For a repeatable first batch, use unsalted butter and the measured fine salt.
Sugar and Salt
Two tablespoons of sugar provide gentle sweetness and help browning. This is dinner bread rather than a sweet breakfast loaf.
Fine salt measures differently from coarse kosher salt. Use the specified fine salt or calculate an equivalent by weight rather than substituting a large-crystal product spoon-for-spoon.
Salt is not just a garnish here. It seasons the crumb and influences dough behavior, so do not omit it in the first test.
Equipment
You will need a large mixing bowl, sturdy spoon or dough whisk, spatula, measuring tools, a 9-by-5-inch metal loaf pan, a clean cover, and a cooling rack.
A digital kitchen scale and instant-read thermometer make the process easier to assess, especially during the first bake. A bowl scraper is helpful for transferring the sticky dough without adding flour to the counter.
Parchment can be used as a sling along the long sides of the pan, but grease the uncovered corners as well. Avoid letting a large amount of paper fold over the dough and interfere with the loaf’s shape.
How to Make the Bread
1. Prepare the Wet Ingredients
Warm the milk until lukewarm, then check its temperature. Melt the butter separately and let it cool.
Whisk the egg into the milk, then whisk in the cooled melted butter. The mixture should feel gently warm or neutral rather than hot.
You do not need to whip the egg into a foam. The aim is an evenly mixed liquid that will hydrate the flour without leaving streaks of egg or separate pools of butter.
2. Mix the Dry Ingredients
In the large bowl, whisk together the flour, instant yeast, sugar, and fine salt. Distribute the ingredients evenly before adding liquid.
Make a well in the center and pour in the milk mixture. Stir until all the dry flour has been incorporated, scraping the bottom and sides carefully.
3. Stir Thoroughly
Continue stirring firmly for about 1 to 2 minutes after the dough first comes together. Lift and turn the dough with the spoon so it becomes more cohesive.
It should be soft, sticky, and thick enough to hold together rather than pour like cake batter. It may look rough and stretch unevenly when lifted. That is expected at this point.
Do not add extra flour simply because it clings to the spoon. First give the flour time to absorb the liquid. If the dough seems dramatically unlike the description, recheck the ingredient quantities before improvising.
4. Let the Dough Rise
Scrape the sides of the bowl, cover, and place in a comfortably warm, draft-free spot. Allow approximately 60 to 90 minutes, or until the dough has expanded substantially and is close to doubled.
Look for a rounded, puffy surface and some visible bubbles rather than watching only the clock. In a cool room, allow more time. Avoid placing the bowl on a hot burner or inside an oven that is switched on.
Because the dough contains milk and egg, use this room-temperature rise only for the time needed to proof. If your schedule changes, refrigerate the covered dough rather than leaving it warm for many hours.
5. Prepare the Pan
Grease the 9-by-5-inch pan thoroughly. Add a parchment sling if desired.
Once the dough has risen, stir or fold it gently a few times with the spatula to release the largest gas pockets. Do not beat it aggressively until it returns to a tight paste.
Scrape it into the pan. The dough is transferred and smoothed rather than shaped into a firm log on a heavily floured surface.
6. Smooth the Surface
Use a lightly buttered spatula or damp fingers to ease the dough into the corners and make the top reasonably even.
Avoid pressing repeatedly or trying to create a perfectly polished surface. A soft pan dough can settle during the second rise.
Check that the pan is not overloaded. If your measurements or pan dimensions produce dough already near the rim before proofing, reserve the excess for a separately monitored small bake rather than risking overflow.
7. Allow the Second Rise
Cover loosely so the cover does not stick to the top. Let rise for approximately 30 to 60 minutes, until the dough is visibly puffy and approaches the rim of the pan.
The exact height depends on the pan’s true dimensions. Do not insist on a large dome above the rim if the dough already looks fragile or overexpanded.
A gentle touch should leave a slight impression that slowly relaxes. Dough that springs back immediately may need more time; dough that collapses or holds a deep dent may have proofed too far.
Begin preheating the oven to 350°F during this rise so it is fully heated when the dough is ready.
8. Bake
Uncover and place the pan on a center oven rack. Bake for approximately 35 to 45 minutes, beginning checks toward the earlier end.
The top should be golden, the sides should look set, and the center should not feel loose. As an additional check, the center of a soft enriched loaf often reaches about 190–195°F when baked. Use that alongside appearance and structure, not as a substitute for assessing an obviously wet center.
If the top browns before the loaf is done, tent loosely with foil and continue baking. Avoid opening the oven repeatedly during the early part of the bake.
9. Add the Buttery Finish
Brush the hot top with the separate tablespoon of melted butter. Add a very small pinch of flaky salt only if you want a salted finish.
Let the loaf rest in the pan for about 10 minutes, then remove it carefully and transfer to a rack. Leaving it in the pan until cold can trap steam around the sides and bottom.
The crust will soften as the loaf cools. That is part of this recipe’s intended character, so do not expect a crackling artisan crust.
10. Cool Before Slicing
Let cool for at least 45 to 60 minutes after removing it from the pan, and preferably until only slightly warm before making sandwich slices.
Cutting immediately can compress the soft crumb and make the interior look gummy. A serrated knife and gentle sawing motion help preserve the slices.
For dinner, a slightly warm slice is pleasant, but allow enough cooling that the loaf supports itself. Save very thin slicing for a fully cooled loaf.
Understanding the Timing
A typical schedule includes about 15 minutes of mixing, 60–90 minutes for the first rise, 30–60 minutes for the second rise, 35–45 minutes baking, and roughly 55–70 minutes resting and cooling.
That gives a total of approximately 3 hours 15 minutes to 4 hours 40 minutes, depending on the room and your cooling preference. The active work is much shorter than the elapsed time.
Do not force the dough to match the shortest estimate by using excessive heat. A properly risen loaf is more useful than a fast schedule that leaves the center dense or the top overproofed.
Tips for a Tender Loaf
Measure flour carefully. Excess flour changes both handling and texture.
Keep the milk and butter lukewarm. Yeast needs suitable conditions, not a hot mixture.
Stir thoroughly at the beginning. No kneading still requires complete mixing.
Watch both rises. Dense bread can come from insufficient proofing, while collapse can follow excessive proofing.
Use the pan size given. A larger pan produces a lower loaf, and a smaller pan can overflow or bake unevenly.
Cool on a rack and slice gently. Soft bread needs time for its interior to settle.
Serving Ideas
Serve thick slices with roast chicken, meatballs, pasta, or a vegetable soup. The mild flavor works well with savory sauces without competing with them.
For a simple table bread, offer softened butter separately rather than brushing multiple additional layers onto the whole loaf. The recipe already has butter in the dough and on the crust.
Toast cooled slices for breakfast with jam or honey, or use them for an egg sandwich. A fully cooled loaf is easier to slice evenly for sandwiches than one still steaming from the oven.
For garlic toast, spread a slice with a little garlic butter and toast until lightly golden. Prepare only the amount you plan to eat so the remaining loaf keeps its plain, versatile flavor.
Make-Ahead Options
For a slower schedule, refrigerate the covered dough after mixing rather than beginning a long warm rise. Allow approximately 8 to 12 hours for an overnight test, leaving plenty of expansion space in the container.
The next day, assess the dough rather than assuming it has doubled. Transfer to the prepared pan and allow it to become puffy before baking. Cold dough may need considerably longer than the standard second-rise range.
This overnight route is a proposed variation and has not been tested for this formula. It is best to try the same-day method first so you know what the dough normally looks like.
You can also bake the loaf ahead, cool completely, and freeze it. For predictable dinner timing, reheating a fully baked loaf is often simpler than trying to estimate a cold dough’s rise.
Storage and Reheating
Once completely cool, store the plain baked loaf in a sealed bag or covered bread container at room temperature for about two days for best quality. This guidance is for fully baked, unfilled bread, not raw dough or bread with a perishable filling.
Refrigeration tends to make bread stale faster. If you will not finish the loaf promptly, freeze it instead. In a very warm or humid kitchen, make a smaller amount or freeze portions earlier.
Slice before freezing if you want individual servings. Separate slices as needed and pack in a freezer-safe bag for up to two months for best quality.
Toast slices from frozen, or thaw a wrapped loaf before warming. To refresh a small loaf, wrap loosely in foil and warm at 300°F until heated through, checking rather than relying on a fixed time for every loaf size.
Discard moldy bread rather than cutting away a visible spot. Do not return buttered table slices or bread exposed to other foods to the main storage bag.
Variations to Test
Gentle Herb Flavor
Add about one teaspoon dried Italian herbs to the flour mixture. Keep the first addition modest so it complements the butter.
Garlic Butter Finish
Mix a small pinch of garlic powder into the finishing butter. This is easier to distribute than pieces of raw garlic on the soft crust.
Sesame Top
Sprinkle a light layer of sesame seeds over the dough before baking. A heavy topping is unnecessary and may fall off as the loaf is sliced.
Honey-Sweetened Version
Honey changes the liquid balance and sweetness, so it is not a precise volume-for-volume equivalent to granulated sugar. If you develop that version, record the amount and evaluate the dough rather than assuming identical behavior.
Avoid loading the first batch with wet vegetables, large quantities of cheese, or sweet fillings. Those changes affect moisture, proofing, baking, and storage.
Troubleshooting
The Dough Does Not Rise
Check yeast age, liquid temperature, and room temperature. Cold conditions slow fermentation, while overly hot liquid can damage yeast. Allow more time if the dough is active but moving slowly.
The Bread Is Dense
Possible causes include too much flour, insufficient initial stirring, or underproofing. Use the volume cues and a careful flour measurement rather than adding flour until the dough stops sticking.
The Loaf Collapses
It may have overproofed, been too wet, or needed more baking. Record the dough height before baking and assess the center at the end of the bake.
The Middle Looks Gummy
It may be underbaked or sliced too soon. Give the loaf sufficient baking and cooling time. A browned top does not prove that a deep center is ready.
The Crust Is Dark
Milk and sugar encourage browning. Tent with foil once the top is golden and verify that the oven is not running hot.
Frequently Asked Questions
Is This a Dinner Roll Recipe?
It is written as one pan loaf. Dividing it into rolls would change the shaping, pan arrangement, proofing, and baking time and needs its own test.
Does It Need Kneading at Any Stage?
No traditional kneading is included. Thorough stirring and the resting periods provide the intended method.
Can I Make It Without Egg?
The egg contributes structure, moisture, and richness. An egg-free formula needs rebalancing rather than simply leaving it out.
Can I Use a Smaller Pan?
A smaller pan increases dough depth and overflow risk. Use the specified 9-by-5-inch pan for the first bake.
Is It Sweet Bread?
It is gently sweetened dinner bread. The two tablespoons of sugar should round out the flavor rather than dominate it.
Print
Soft & Buttery No-Knead Dinner Bread
Description
Yield: One 9-by-5-inch loaf, about 12 slices
Active prep: Approximately 15 minutes
First rise: 60–90 minutes
Second rise: 30–60 minutes
Bake: 35–45 minutes
Rest and cooling: Approximately 55–70 minutes
Total: Approximately 3 hours 15 minutes to 4 hours 40 minutes
Status: Untested proposed recipe
Ingredients
For the Dough
- 3 cups all-purpose flour, spooned into the cup and leveled, approximately 12 3/4 ounces by weight
- 2 1/4 teaspoons instant yeast
- 2 tablespoons granulated sugar
- 1 1/4 teaspoons fine salt
- 1 cup whole milk, lukewarm
- 1 large egg
- 4 tablespoons unsalted butter, melted and cooled until lukewarm
For the Pan and Finish
- A little softened butter or nonstick spray for greasing
- 1 tablespoon unsalted butter, melted, for brushing after baking
- A small pinch of flaky salt, optional
Yield: One 9-by-5-inch loaf, approximately 12 slices.
Use a metal loaf pan for the intended starting point. Have all the ingredients measured before mixing, and keep the finishing tablespoon of butter separate from the four tablespoons used in the dough.
Instructions
- Whisk 1 cup lukewarm milk, 1 egg, and 4 tablespoons melted, cooled butter.
- Mix 3 cups carefully measured all-purpose flour, 2 1/4 teaspoons instant yeast, 2 tablespoons sugar, and 1 1/4 teaspoons fine salt.
- Add the wet mixture and stir thoroughly, continuing about 1–2 minutes after the flour disappears. Expect sticky, cohesive dough.
- Cover and rise until close to doubled, about 60–90 minutes.
- Gently deflate, scrape into a greased 9-by-5-inch metal pan, and smooth.
- Cover loosely and rise until puffy and approaching the pan rim, about 30–60 minutes. Heat the oven to 350°F.
- Bake 35–45 minutes, until golden and baked through, tenting if necessary.
- Brush with 1 tablespoon melted butter. Rest in the pan 10 minutes, then cool on a rack before slicing.
Storage: Keep completely cooled plain bread covered at room temperature for about two days for best quality, or freeze slices for up to two months.
Estimated nutrition: Approximately 175–195 calories and 4–5 grams protein per slice when divided into 12, including the finishing butter but excluding extra spreads. These are rough ingredient-based estimates, not a verified analysis.