
Introduction
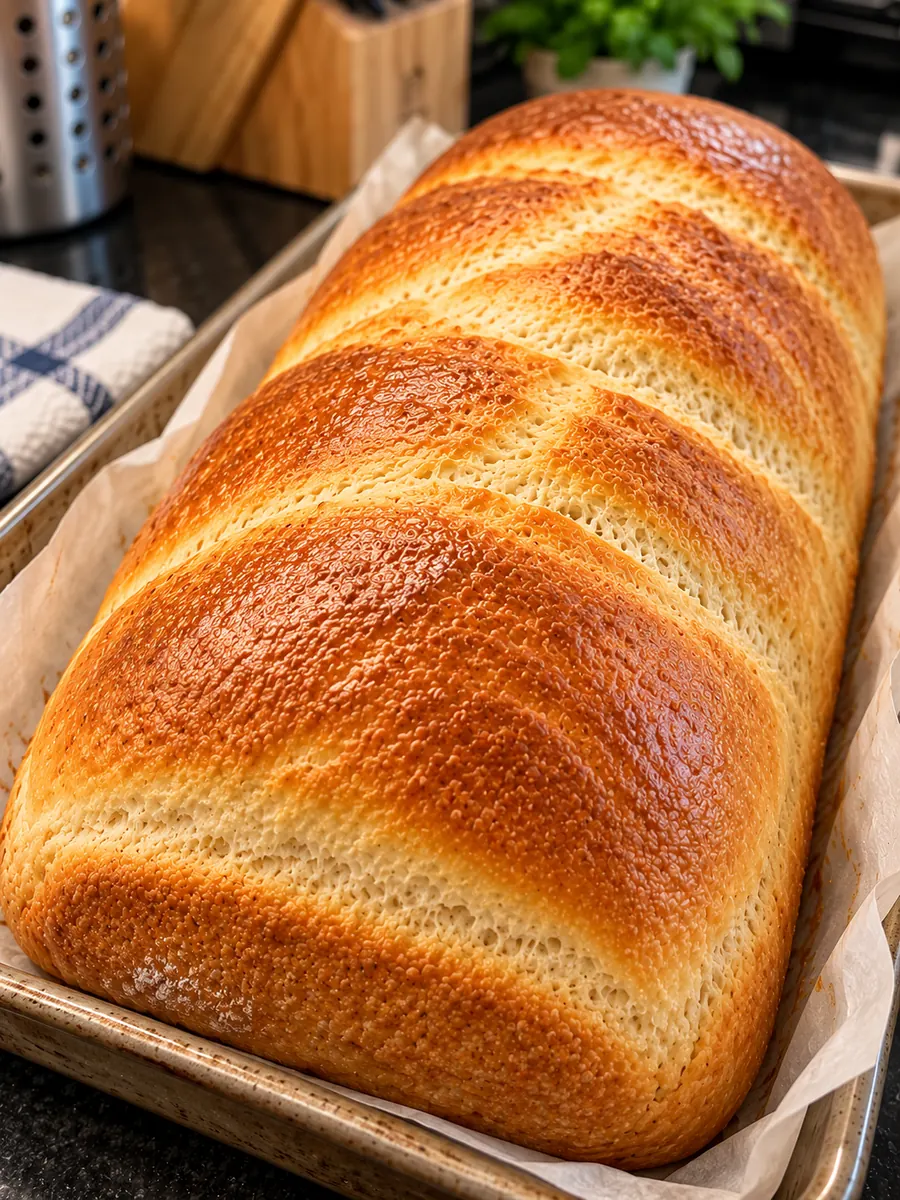
Soft & Fluffy Homemade Italian Bread Loaf brings the gentle flavor of an American Italian bakery loaf into a practical sandwich shape. A little olive oil keeps the interior tender, while bread flour gives each slice enough strength for butter, toasted cheese, or a generous swipe of tomato sauce. The crust is thin and golden, with a softer bite than a lean, steam-baked loaf.
This version uses a loaf pan to support an even rise and make shaping approachable. There is no starter, egg wash, or steam setup to manage. Plan on about 5 hours and 15 minutes from measuring to slicing, including 30 minutes of active preparation. Most of that schedule belongs to rising and cooling; dough readiness may shift with the temperature of your kitchen.
Why You’ll Love This Recipe
The crumb is close enough for everyday sandwiches but still light and springy. Rolling the dough into a snug log encourages even slices without requiring complicated shaping or decorative scoring.
Olive oil adds tenderness without making the bread taste buttery or rich. That mild flavor works with savory fillings, breakfast toast, and the last spoonful of sauce on a dinner plate.
The ingredient list stays short and familiar. Instant yeast goes directly into the flour, and the same measured olive oil supplies both the dough and the pan coating.
One loaf makes 12 servings, with one slice per serving. Freeze a portion after cooling so you can pull out individual slices for quick lunches.
Ingredients
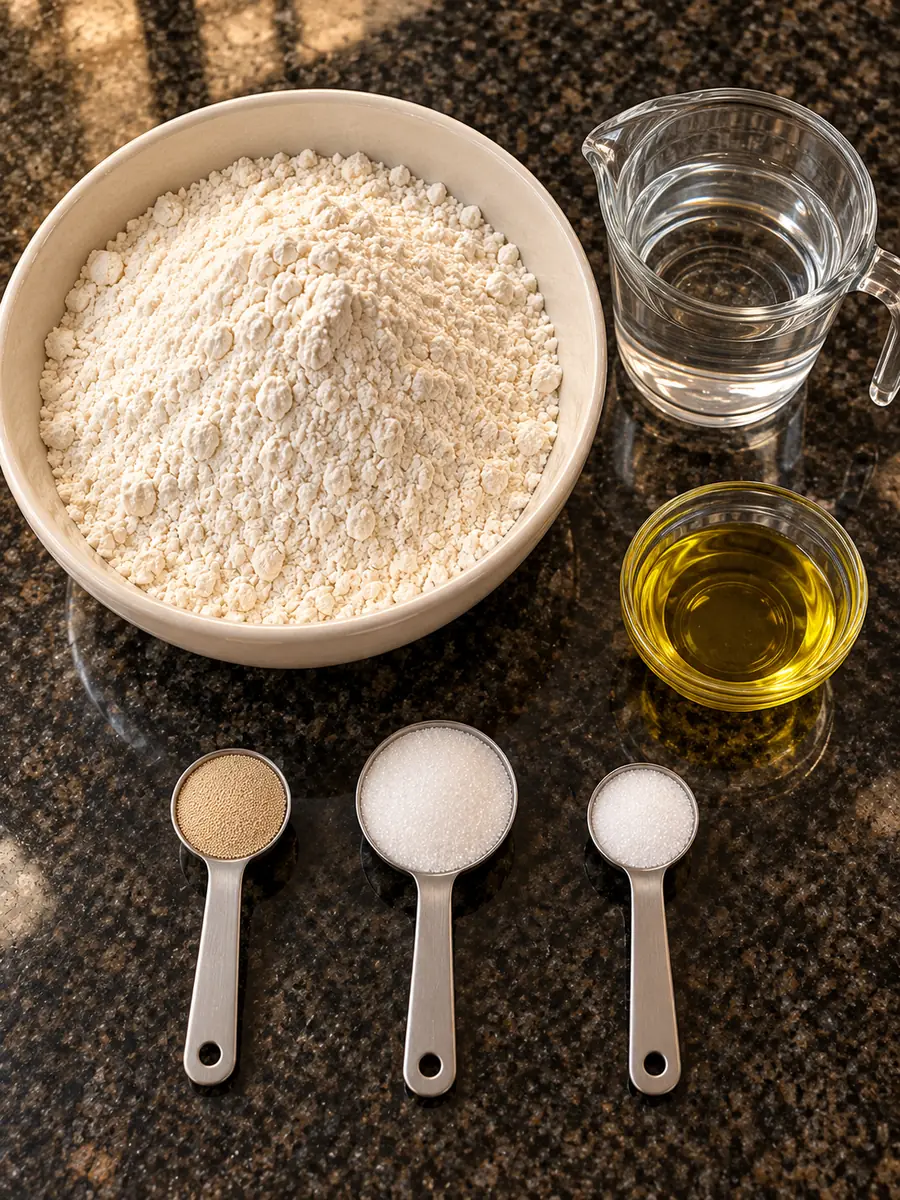
Measure everything before starting, especially the divided olive oil. Set aside the pan portion before adding the rest to the dough.
A scale helps keep flour measurements consistent. For cups, spoon in the flour and level without packing. Use fine table salt for the stated spoon measurement; coarse salt occupies a different volume.
- 3 3/4 cups bread flour (450 g), spooned and leveled
- 1 cup plus 3 tablespoons warm water (280 g), about 100°F
- 2 1/4 teaspoons instant yeast (7 g)
- 1 tablespoon granulated sugar (12 g)
- 1 1/2 teaspoons fine table salt (9 g)
- 2 tablespoons plus 1 teaspoon olive oil (32 g), divided: 1 teaspoon (5 g) for the pan and remaining 27 g for the dough
Ingredient Notes and Substitutions
Bread flour supplies the strength needed for a light loaf that slices cleanly. All-purpose flour is a cautious substitute by equal weight, but its lower protein content may produce a softer dough and a less resilient crumb. Keep the initial water amount unchanged and judge the dough after kneading.
Instant yeast needs no separate activation step. Active dry yeast is a cautious alternative at the same weight: dissolve it in the recipe’s warm water before mixing, following its package guidance. Rising may take longer, so use the expansion cues.
Choose a mild olive oil if you want a neutral sandwich loaf. Strong extra-virgin oil will be more noticeable. A neutral liquid oil is a cautious replacement by weight, though the finished flavor will change.
The small sugar addition supports browning without making this a sweet bread. Honey is not an exact swap because it adds moisture. Avoid changing both the flour and sweetener on your first attempt; multiple changes make dough behavior harder to interpret.
How to Make Soft & Fluffy Homemade Italian Bread Loaf
- Prepare a rectangular 9-by-5-inch metal loaf pan by spreading 1 teaspoon (5 g) olive oil across its bottom and sides. Set aside. Measure the remaining ingredients before mixing, and choose a warm, draft-free place for the covered dough to rise.
- Whisk the bread flour, instant yeast, granulated sugar, and fine table salt in a large bowl. Add the warm water and remaining 27 g olive oil. Stir firmly until no dry flour remains and a shaggy dough forms, scraping the bowl thoroughly.
- Knead on a clean, unfloured counter for 8–10 minutes, using a dough scraper as needed. The dough should become smooth, supple, and slightly tacky, with enough elasticity to stretch a small piece into a thin membrane before it tears.
- Let rise for 90 minutes, or until approximately doubled, in the mixing bowl, tightly covered. Begin checking after 60 minutes in a warm kitchen. Look for an expanded, rounded surface and visible aeration rather than relying solely on the clock.
- Rest for 10 minutes, covered, after gently pressing the dough into a squat rectangle. Then pat it into an 8 1/2-by-11-inch rectangle. Roll from an 8 1/2-inch edge into a snug log, pinch the seam closed, and place seam-side down in the prepared pan.
- Proof for 60 minutes, loosely covered, until the center crowns about 1 inch above the rim and a gentle fingertip indentation returns slowly. Begin checking after 40 minutes. During the last 25 minutes, preheat the oven to 375°F with a rack in the lower-middle position.
- Bake for 35 minutes, until evenly golden and the center registers 195°F. Check after 30 minutes; loosely tent with foil if browning quickly. Remove the loaf from its pan promptly so trapped steam cannot soften the bottom.
- Cool on a wire rack for 90 minutes before slicing. Leave the loaf uncovered so moisture can escape and the crumb can set. Cut with a serrated knife into 12 slices; each slice is one serving.
Expert Baking Tips
Check water temperature with a thermometer when possible. Water around 100°F takes the chill off mixing without pushing the dough toward an overly warm start. A hot kitchen usually needs less help than a cold one.
Give the dough time to organize before deciding it needs flour. Early stickiness often decreases as gluten develops. A bench scraper lets you lift and fold the dough while keeping the formula intact.
Use the stretch check as a supporting cue. A small piece should stretch thinly with a fairly smooth edge. If it snaps immediately, continue kneading briefly, then check another piece without pulling too aggressively.
Keep shaping pressure even across the rectangle. A tight center with loose ends can produce an uneven crown, while an excessively forceful roll may tear the surface and leave weak spots.
Probe through the side toward the center for the temperature check. Avoid touching the pan with the thermometer tip, which can give a misleadingly high reading before the interior is ready.
Common Mistakes to Avoid
Adding handfuls of flour during kneading can turn this moderately hydrated dough stiff. The finished loaf may rise less and feel dry even when baked correctly. Start with accurate weights and use a scraper before reaching for extra flour.
Letting the final rise continue until the dough looks fragile can weaken its structure. If a gentle indentation stays deeply sunken and the surface begins to wrinkle, bake promptly and handle the pan carefully.
Rolling loosely can leave a tunnel beneath the upper crust. Press out large bubbles before shaping, maintain gentle tension as you roll, and pinch the seam securely so the layers stay together.
Slicing while the loaf is hot can compress the crumb into a sticky line. Resist using crust color as the only doneness test, and give the bread its full rack cooling period before judging texture.
Variations and Serving Ideas
For an herb variation, add 1 teaspoon dried Italian herb blend to the flour. This changes the base formula slightly and gives the loaf a more pronounced savory aroma. Avoid adding wet pesto without redevelopment because its oil and moisture alter the dough.
For garlic toast, spread cooled slices with garlic butter and toast until the edges brown. Keep that finishing mixture separate from the bread formula so you can season individual portions.
Serve plain slices beside minestrone, use them for meatball sandwiches, or toast them for breakfast. For especially saucy fillings, toast the cut surfaces first; the drier surface helps delay sogginess without requiring a thicker slice.
Storage and Freezing
Let the loaf cool completely before enclosing it. Store at room temperature in a bread bag or airtight container for up to 3 days, checking for spoilage before serving. A sealed bag softens the crust, which suits this style of bread.
For longer storage, slice the cooled loaf and separate portions with parchment if desired. Seal in a freezer bag, press out excess air, and freeze for up to 2 months for best quality. Label the bag with the date.
Thaw slices in their wrapping at room temperature, or toast directly from frozen. Avoid routine refrigerator storage because it tends to firm the crumb. If any mold appears, discard the whole loaf rather than trimming the visible spot.
Frequently Asked Questions
Is this a traditional crusty Italian loaf?
It is an American Italian-style pan loaf with olive oil and a tender crust. The formula and pan are designed for soft slices rather than a thick, crackly exterior.
Can I knead it in a stand mixer?
Yes. Use a dough hook at the manufacturer’s recommended bread speed, stopping when the dough is smooth and elastic. Mixer timing varies; avoid continuing until the dough feels hot.
Why has my dough barely risen?
A cool room or weakened yeast can slow fermentation. Move the covered bowl somewhere gently warm and allow more time. If there is no expansion, check the yeast’s condition.
Does the loaf need scoring?
No. This pan loaf can bake with its smooth top intact. Careful shaping and a sufficient final rise help it expand without requiring a decorative cut.
Can I use a glass loaf pan?
Metal is specified because glass transfers heat differently and may brown the edges sooner. A glass substitution needs closer observation and may require changes to the baking schedule.
Why did the loaf sink after baking?
Possible causes include an excessive final rise or an underbaked center. Use the proofing cues and check the center temperature before removing the bread from the oven.
WP Tasty Recipe Card
PrintSoft & Fluffy Homemade Italian Bread Loaf
- Total Time: 315 minutes
Ingredients
3 3/4 cups bread flour (450 g), spooned and leveled
1 cup plus 3 tablespoons warm water (280 g), about 100°F
2 1/4 teaspoons instant yeast (7 g)
1 tablespoon granulated sugar (12 g)
1 1/2 teaspoons fine table salt (9 g)
2 tablespoons plus 1 teaspoon olive oil (32 g), divided: 1 teaspoon (5 g) for the pan and remaining 27 g for the dough
Instructions
Prepare a rectangular 9-by-5-inch metal loaf pan by spreading 1 teaspoon (5 g) olive oil across its bottom and sides. Set aside. Measure the remaining ingredients before mixing, and choose a warm, draft-free place for the covered dough to rise.
Whisk the bread flour, instant yeast, granulated sugar, and fine table salt in a large bowl. Add the warm water and remaining 27 g olive oil. Stir firmly until no dry flour remains and a shaggy dough forms, scraping the bowl thoroughly.
Knead on a clean, unfloured counter for 8–10 minutes, using a dough scraper as needed. The dough should become smooth, supple, and slightly tacky, with enough elasticity to stretch a small piece into a thin membrane before it tears.
Let rise for 90 minutes, or until approximately doubled, in the mixing bowl, tightly covered. Begin checking after 60 minutes in a warm kitchen. Look for an expanded, rounded surface and visible aeration rather than relying solely on the clock.
Rest for 10 minutes, covered, after gently pressing the dough into a squat rectangle. Then pat it into an 8 1/2-by-11-inch rectangle. Roll from an 8 1/2-inch edge into a snug log, pinch the seam closed, and place seam-side down in the prepared pan.
Proof for 60 minutes, loosely covered, until the center crowns about 1 inch above the rim and a gentle fingertip indentation returns slowly. Begin checking after 40 minutes. During the last 25 minutes, preheat the oven to 375°F with a rack in the lower-middle position.
Bake for 35 minutes, until evenly golden and the center registers 195°F. Check after 30 minutes; loosely tent with foil if browning quickly. Remove the loaf from its pan promptly so trapped steam cannot soften the bottom.
Cool on a wire rack for 90 minutes before slicing. Leave the loaf uncovered so moisture can escape and the crumb can set. Cut with a serrated knife into 12 slices; each slice is one serving.
- Prep Time: 30 minutes
- Cook Time: 35 minutes