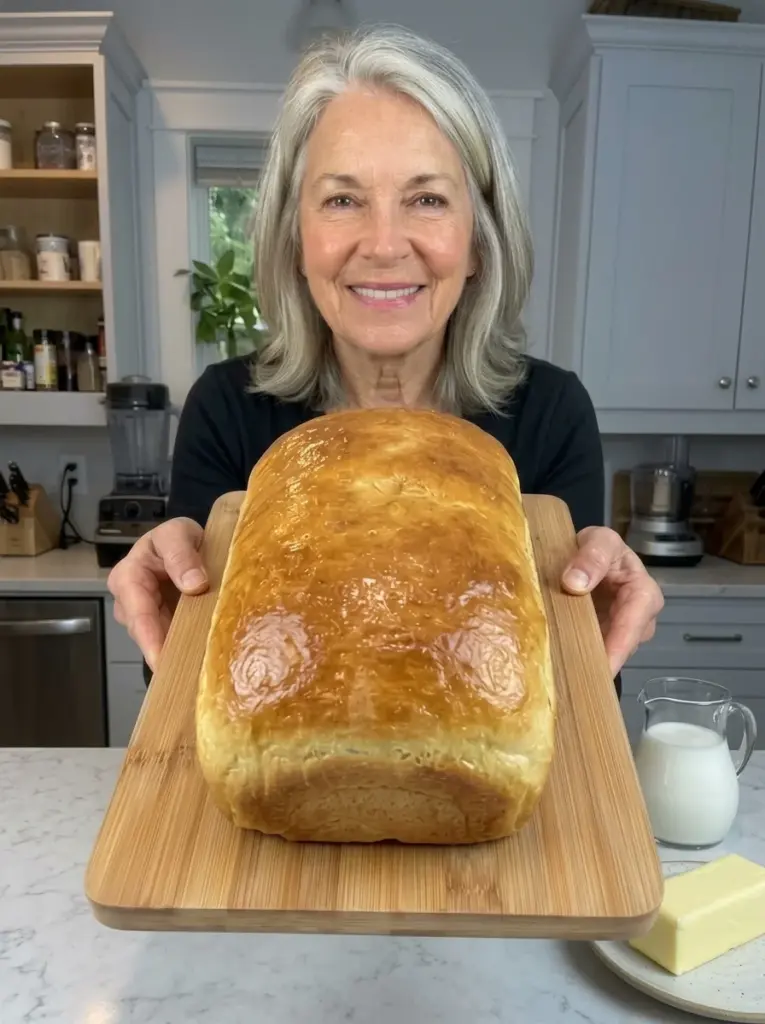
A golden loaf cooling on the counter can make even an ordinary day feel a little warmer. This Homemade No-Knead Buttery Milk Bread brings together whole milk, melted butter, and a little sugar for a tender sandwich loaf with a soft crust and gentle sweetness.
The dough comes together with a sturdy spoon instead of a stand mixer. Two rises give it time to develop structure, and a simple roll-and-tuck shaping method helps it bake into a loaf that is easy to slice. Enjoy it toasted for breakfast, filled with your favorite sandwich ingredients, or served alongside soup.
This is a suggested recipe formula and has not been kitchen-tested. Flour absorption, room temperature, and loaf pans vary, so use the dough descriptions and doneness cues alongside the suggested times.
Recipe at a Glance
- Yield: 1 loaf, approximately 12 slices
- Pan: 9 × 5-inch metal loaf pan
- Active preparation: About 20 minutes
- First rise: 60–90 minutes, or longer in a cool kitchen
- Second rise: 35–60 minutes
- Baking: 35–40 minutes
- Cooling: About 90 minutes
- Total time: Approximately 4–5 hours, depending on the rises
- Oven temperature: 350°F
Why You’ll Love This Bread
- No mixer or kneading required. Thorough stirring and resting do most of the work.
- A soft, tender crumb. Milk, egg, and butter enrich the dough.
- Useful for everyday meals. The loaf suits sandwiches, toast, French toast, and bread pudding.
- Simple shaping. A gently rolled log fits neatly into a standard loaf pan.
- Freezer-friendly portions. Slice the cooled loaf and freeze what you won’t use soon.
What Makes This a Milk Bread?
Milk bread is a broad description for bread made with milk as part of its liquid. Here, whole milk contributes flavor and richness, while butter makes the finished loaf more tender. A small amount of sugar adds mild sweetness without turning the bread into a dessert loaf.
This recipe uses a straightforward enriched dough. It does not include a cooked flour paste, or tangzhong, and its texture should not be assumed to match a carefully developed Japanese milk bread recipe. Expect a soft homemade sandwich loaf with a fine but slightly rustic crumb.
“No-knead” also does not mean barely mixed. You still need to stir firmly until the flour is completely incorporated. Resting and fermentation then give the dough time to become more cohesive.
Ingredients
For the Dough
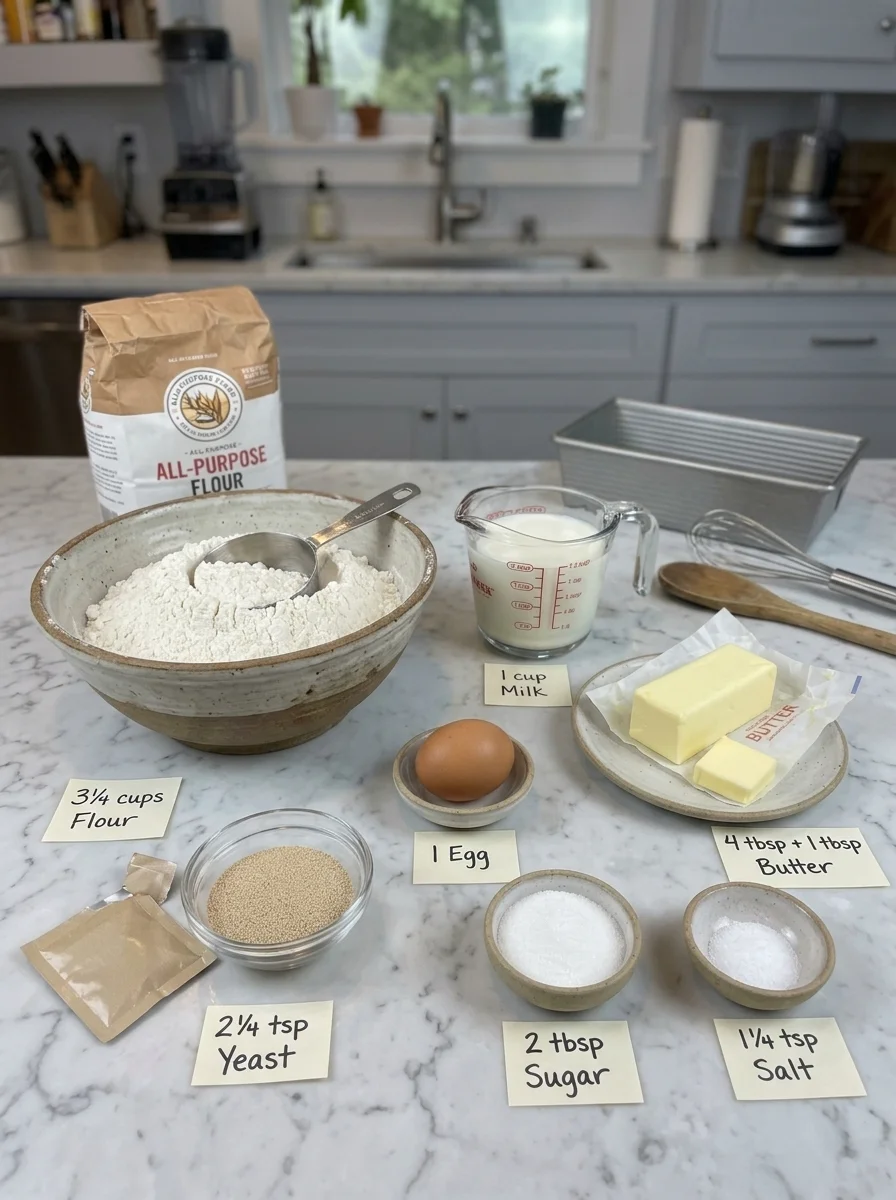
- 3¼ cups all-purpose flour, spooned into the measuring cup and leveled, plus a little for shaping
- 2¼ teaspoons instant yeast, or 1 standard packet
- 2 tablespoons granulated sugar
- 1¼ teaspoons fine salt
- 1 cup whole milk, lukewarm
- 1 large egg, at room temperature
- 4 tablespoons unsalted butter, melted and cooled until just warm
Optional Finishing Butter
- 1 tablespoon unsalted butter, melted, for brushing the baked loaf
For the Pan
- A little softened butter or neutral oil, for greasing
Ingredient Notes and Substitutions
All-Purpose Flour
All-purpose flour keeps the loaf tender and is a practical starting point for this formula. Measure it lightly: fluff the flour, spoon it into the cup, and level the top. Scooping directly from a tightly packed bag can add enough extra flour to make the dough stiff.
Bread flour can be used, but it may produce a chewier loaf and absorb liquid differently. If the dough seems unusually firm, add milk a teaspoon at a time during mixing rather than forcing the dry flour into a stiff mass.
Do not substitute self-rising flour. Its added leavening and salt are not designed for this yeast dough. Whole wheat flour and gluten-free flour blends also require changes beyond a simple equal-volume swap.
Whole Milk
Whole milk gives a richer result, although 2% milk is a reasonable alternative. Warm it until comfortably lukewarm, around 95–105°F. It should never feel hot when combined with the yeast.
Cold milk will slow fermentation. Very hot milk can damage the yeast. A cool kitchen is manageable; it simply means the dough may take longer to rise.
Instant Yeast
Instant yeast can be mixed directly with the flour. Check the package date and storage instructions, especially if it has been open for a while.
If using active dry yeast, follow the package’s hydration directions. You can generally dissolve it in the recipe’s lukewarm milk with a little of the measured sugar before mixing, but rising times may differ.
Butter
Use unsalted butter so the salt level is easier to control. Let melted butter cool before mixing it with the egg and yeast mixture.
Four tablespoons enrich the dough without requiring a separate butter-incorporation step. The optional finishing butter is brushed onto the baked crust rather than mixed into the dough.
Egg, Sugar, and Salt
The egg adds richness and structure. Let it lose its refrigerator chill briefly while you prepare the other ingredients.
The sugar gives the bread a mild sweetness. Reducing it substantially changes the intended balance, so keep the listed amount for a first attempt.
Fine salt distributes readily throughout the dough. Coarse salts vary in volume, so do not assume a spoonful of every salt will season the loaf equally.
Equipment You’ll Need
A large mixing bowl, sturdy spoon or dough whisk, flexible spatula, clean cover, and 9 × 5-inch metal loaf pan are enough for preparing the loaf. A wire rack is useful for cooling, and an instant-read thermometer can help assess the center.
A bench scraper is convenient for handling sticky dough, but it is optional. Grease the pan well, including the corners. A parchment sling can make removal easier if your pan tends to stick.
How to Make Homemade No-Knead Buttery Milk Bread
1. Prepare the Milk and Butter
Warm the milk gently until lukewarm. Melt the butter separately and allow it to cool until just warm.
Avoid heating the milk and butter until piping hot and immediately adding the yeast. Give the mixture time to cool if necessary.
2. Combine the Dry Ingredients
In a large bowl, stir together the flour, instant yeast, sugar, and salt. Mix well so the yeast and salt are distributed rather than concentrated in one spot.
3. Add the Wet Ingredients
Whisk the egg into the lukewarm milk, then stir in the melted butter. Pour this mixture into the dry ingredients.
Stir firmly with a sturdy spoon for 2–3 minutes, scraping the bottom and sides of the bowl. Continue until no dry pockets remain. The dough should be soft, sticky, and thick enough to hold together as one mass. It should not pour like cake batter.
If the mixture looks dry, let it rest for 10 minutes before deciding whether to add more milk. If dry flour still will not incorporate, add milk a teaspoon at a time. If the dough is very loose, allow the same rest before adding flour a tablespoon at a time.
The goal is a soft dough, not a clean, dry bowl achieved by adding large amounts of flour.
4. Allow the First Rise
Cover the bowl so the surface cannot dry out. Leave it in a comfortably warm, draft-free spot for approximately 60–90 minutes, until roughly doubled.
Look for a puffier dough with small bubbles and a surface that moves slightly when you gently shake the bowl. In a cool kitchen, the first rise may take considerably longer. Judge its expansion rather than moving ahead because a timer has sounded.
Avoid placing the bowl against a hot heater or in an oven that is actively heating.
5. Prepare the Pan and Shape the Loaf
Grease a 9 × 5-inch loaf pan. Lightly flour your work surface and hands, then scrape the dough onto the surface.
Gently press it into a rough rectangle about 8 inches wide. Fold the sides inward if needed, then roll it into a short log, starting at an edge that will keep the finished log slightly shorter than the pan.
Pinch the seam gently and place the dough seam-side down in the pan. This is a brief shaping step, not an extended kneading session. If the dough sticks, use a scraper and a light dusting of flour rather than repeatedly working more flour into it.
6. Let the Loaf Rise Again
Cover the pan loosely. Let the dough rise for approximately 35–60 minutes, until puffy and the center is near the rim or slightly above it.
The exact height depends on the shape of your pan and how you measured the flour. A light fingertip indentation should return slowly rather than springing back immediately. If the dough looks fragile, deeply inflated, or begins to collapse, bake promptly.
During the latter part of this rise, preheat the oven to 350°F with a rack in the lower-middle position.
7. Bake Until Golden and Set
Uncover the pan and bake for approximately 35–40 minutes. The top should become golden brown and feel set.
If the crust is coloring too quickly before the center is done, loosely tent it with foil. An internal temperature around 190–200°F can be a useful doneness guide for this enriched loaf, alongside an evenly baked exterior and a center that is no longer doughy.
Check the middle of the loaf rather than touching the thermometer probe to the hot pan. Ovens and pan materials vary, so allow extra baking time if the center needs it.
8. Brush and Cool
Brush the hot crust with the optional tablespoon of melted butter. Let the loaf rest in the pan for about 10 minutes, then turn it out onto a wire rack.
Allow it to cool for approximately 90 minutes, or until no longer warm in the center, before slicing. Cutting too early can compress the tender crumb and make it seem gummy even when the loaf is baked through.
Tips for a Softer, Better-Shaped Loaf
Keep the dough soft. Extra flour makes handling easier, but too much can produce a heavier loaf. Use only what you need to keep the dough manageable.
Mix thoroughly at the beginning. A spoonful of hidden dry flour will not disappear simply because the dough rises.
Protect the surface during both rises. A dry skin can restrict expansion and create uneven patches on the crust.
Use the loaf pan size listed. A larger pan produces a shorter loaf; a smaller pan may overflow or need a different baking time.
Give the oven time to preheat. Put the dough into an oven that has reached the intended temperature.
Cool outside the pan. Leaving the loaf in a hot pan for too long can trap condensation around the sides and bottom.
Troubleshooting
| Problem | Possible cause | What to do |
|---|---|---|
| Dough barely rises | Cool conditions, inactive yeast, or liquid that was too hot | Allow more time if the kitchen is cool; check yeast freshness and liquid temperature next time. |
| Dough feels stiff | Packed flour or too little liquid | Let it hydrate, then add milk a teaspoon at a time if needed. |
| Dough is difficult to shape | Soft dough, extra liquid, or insufficient first rise | Use a scraper and lightly floured hands; check the dough’s expansion before shaping. |
| Loaf is short and dense | Too much flour, insufficient rising, or weak yeast | Measure flour lightly and follow rise cues instead of the clock alone. |
| Top sinks | Overproofing or an underbaked center | Avoid letting the second rise become fragile; confirm the center is baked through. |
| Crust browns early | Oven runs hot or the pan encourages browning | Tent loosely with foil and continue baking the center. |
| Center seems gummy | Sliced warm or underbaked | Cool completely and check doneness carefully on the next loaf. |
Variations
Honey Milk Bread
Replace the 2 tablespoons of sugar with 2 tablespoons of honey. Honey adds moisture as well as sweetness, so assess the dough after its short hydration rest before adding any extra milk.
Lightly Sweet Cinnamon Loaf
Add 1 teaspoon ground cinnamon to the dry ingredients. This gives gentle cinnamon flavor without adding the moisture and shaping challenges of a filling. Cinnamon can also slow yeast activity, so allow extra time if needed.
Herb and Butter Bread
Add 1 teaspoon dried Italian herbs to the flour. Serve with tomato soup or use for toasted cheese sandwiches. Keep wet additions modest to avoid changing the dough’s consistency.
Seeded Top
Just before baking, brush the risen loaf very lightly with milk and sprinkle with sesame seeds. Work gently so you do not deflate the dough.
These are suggested variations, not separately tested formulas. For your first loaf, the plain version makes it easier to learn the dough’s expected texture.
Serving Suggestions
Toast a slice and spread it with butter and jam, or use it for egg sandwiches and grilled cheese. Its mild flavor also pairs well with turkey, tuna salad, and roasted vegetables.
For French toast, slightly stale slices hold their shape better than very fresh, warm bread. If you have several slices left, cut them into cubes for bread pudding or dry them for homemade breadcrumbs.
Slice only after cooling, then choose the thickness for the meal. Thinner slices suit sandwiches, while thicker pieces work well for toast and French toast.
Storage and Freezing
Room Temperature
Store the completely cooled, plain baked loaf in a bread bag or airtight container for approximately 2–3 days in a cool, dry kitchen. Warm or humid conditions can shorten its keeping quality. If you notice mold, discard the loaf rather than removing only the visible patch.
Refrigerator
Refrigeration can make bread stale faster, so freezing is generally a better option for portions you will not eat soon. Once you add perishable sandwich fillings or toppings, store the assembled food according to those ingredients’ needs.
Freezer
Slice the cooled loaf and freeze in a well-sealed freezer bag for up to 2–3 months for best quality. Separate slices with parchment if you want to remove them individually. Press out excess air without crushing the bread.
Reheating
Toast slices directly from frozen, or thaw wrapped slices at room temperature. To warm a portion of the loaf, wrap it loosely in foil and heat in a 300°F oven until warm. Avoid prolonged heating, which can dry the crumb.
Frequently Asked Questions
Does this recipe need stretch-and-folds?
The suggested method relies on thorough initial mixing and two rises. If the dough is unusually slack after resting, a few gentle folds in the bowl can help organize it, but repeated kneading is not part of the method.
Can I skip the egg?
Removing the egg changes both the liquid balance and structure. An egg-free loaf needs an adjusted formula rather than simply leaving it out.
Can I use a glass loaf pan?
A glass pan can bake differently from metal and may brown the sides before the center is finished. Follow the pan manufacturer’s guidance and watch doneness closely. The times here are intended for a metal pan.
Why did my rise take longer than listed?
Room temperature, yeast activity, ingredient temperature, and the richness of the dough all affect fermentation. If the dough is expanding steadily, give it more time instead of adding extra yeast partway through.
Can I make it with buttermilk?
Buttermilk changes the flavor and acidity. Use a recipe developed for buttermilk rather than assuming it behaves exactly like whole milk in this formula.
Can I make rolls instead?
The dough could be divided into smaller portions, but pan size, proofing cues, and baking time would change. The instructions here are for one sandwich loaf.
Is this bread sweet?
It has gentle sweetness rather than a dessert flavor. Butter and milk are the main flavor notes.
Why should I wait so long before slicing?
The crumb continues to settle as steam escapes. Cooling helps the loaf hold clean slices and keeps its soft center from being compressed by the knife.
Recipe Card: Homemade No-Knead Buttery Milk Bread
Yield: 1 loaf, about 12 slices
Pan: 9 × 5-inch metal loaf pan
Preparation: About 20 minutes
Rising: 95–150 minutes, or longer in a cool kitchen
Baking: 35–40 minutes
Cooling: About 90 minutes
Total: Approximately 4–5 hours
Ingredients
- 3¼ cups all-purpose flour, spooned and leveled, plus a little for shaping
- 2¼ teaspoons instant yeast
- 2 tablespoons granulated sugar
- 1¼ teaspoons fine salt
- 1 cup whole milk, lukewarm
- 1 large egg, at room temperature
- 4 tablespoons unsalted butter, melted and cooled until just warm
- 1 tablespoon melted butter for finishing, optional
- A little butter or neutral oil for the pan
Instructions
- Stir the flour, yeast, sugar, and salt together in a large bowl.
- Whisk the milk, egg, and melted butter together. Add to the dry ingredients and stir firmly for 2–3 minutes, until no dry flour remains. The dough should be soft and sticky. Let it rest briefly before making small liquid or flour adjustments if needed.
- Cover and let rise until roughly doubled, about 60–90 minutes or longer in cool conditions.
- Grease the loaf pan. Transfer the dough to a lightly floured surface, gently press into a rectangle, and roll into a log. Place seam-side down in the pan.
- Cover loosely and let rise until puffy and near or slightly above the rim, approximately 35–60 minutes. Preheat the oven to 350°F.
- Bake for 35–40 minutes, tenting with foil if needed. The center should be baked through; approximately 190–200°F is a useful internal temperature guide.
- Brush with optional finishing butter. Rest in the pan for 10 minutes, then transfer to a rack and cool completely before slicing.
Approximate Nutrition
For 12 slices, estimate 185–205 calories and 4–5 grams of protein per slice, depending on the flour, milk, and whether you use finishing butter. These are approximate ingredient-based estimates; slice thickness and brands change the result. Sandwich fillings and spreads are additional.
Notes
- This suggested formula has not been kitchen-tested.
- Measure flour lightly and resist adding large amounts during shaping.
- Rising times are guides; follow the dough’s expansion and texture.
- Total time includes cooling. Allow additional time in a cold kitchen.
Final Thoughts
Milk, butter, and a little patience give this simple loaf its appeal. Thorough mixing, a soft dough, and enough time for both rises are the main priorities. Let the baked bread cool fully, and you’ll be ready to slice it for breakfast toast, sandwiches, and the meals that follow.
Print
Homemade No-Knead Buttery Milk Bread
- Total Time: Approximately 4–5 hours
- Yield: 1 loaf, about 12 slices 1x
Ingredients
- 3¼ cups all-purpose flour, spooned and leveled, plus a little for shaping
- 2¼ teaspoons instant yeast
- 2 tablespoons granulated sugar
- 1¼ teaspoons fine salt
- 1 cup whole milk, lukewarm
- 1 large egg, at room temperature
- 4 tablespoons unsalted butter, melted and cooled until just warm
- 1 tablespoon melted butter for finishing, optional
- A little butter or neutral oil for the pan
Instructions
- Stir the flour, yeast, sugar, and salt together in a large bowl.
- Whisk the milk, egg, and melted butter together. Add to the dry ingredients and stir firmly for 2–3 minutes, until no dry flour remains. The dough should be soft and sticky. Let it rest briefly before making small liquid or flour adjustments if needed.
- Cover and let rise until roughly doubled, about 60–90 minutes or longer in cool conditions.
- Grease the loaf pan. Transfer the dough to a lightly floured surface, gently press into a rectangle, and roll into a log. Place seam-side down in the pan.
- Cover loosely and let rise until puffy and near or slightly above the rim, approximately 35–60 minutes. Preheat the oven to 350°F.
- Bake for 35–40 minutes, tenting with foil if needed. The center should be baked through; approximately 190–200°F is a useful internal temperature guide.
- Brush with optional finishing butter. Rest in the pan for 10 minutes, then transfer to a rack and cool completely before slicing.
- Prep Time: About 20 minutes
- Cook Time: Rising: 95–150 minutes, or longer in a cool kitchen Baking: 35–40 minutes Cooling: About 90 minutes