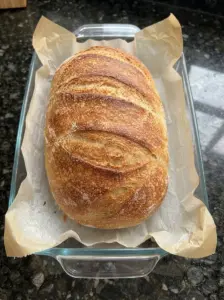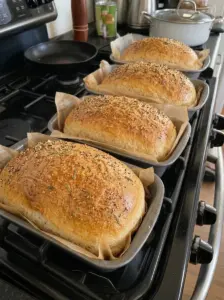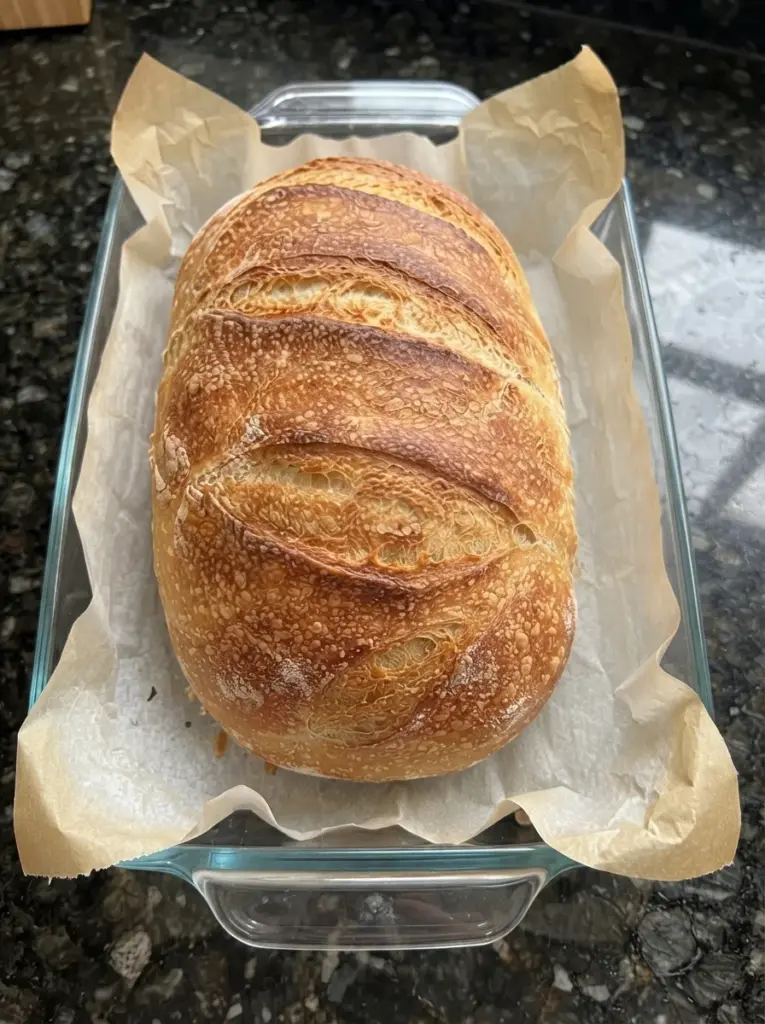
A golden crust, a tender interior, and a mild wheat flavor make homemade Italian-style bread useful for everything from soup to sandwiches. This loaf uses flour, water, yeast, salt, and a little olive oil. There is no special starter or mixer required.
The dough is kneaded until elastic, given two rises, and shaped into a broad oval loaf. A hot oven sets the crust, while cooling uncovered keeps steam from softening it too quickly. Inside, the bread should remain tender and slightly chewy rather than dry or crumbly.
Italian breads vary widely by region. This is a general Italian-style household loaf, not a claim to reproduce one specific regional bread. Because the title did not include a formula, the recipe below is a suggested starting point and has not been independently kitchen-tested.
What to Expect
The bread should have a crisp crust when fresh, with a soft center that holds together after cooling. The crumb is intended to have small and medium irregular holes rather than the very open structure of a high-hydration ciabatta.
A little olive oil adds tenderness without turning the loaf into a rich sandwich bread. There is no milk, egg, or butter in the dough.
The crust will soften somewhat during storage, especially in a sealed bag. That is normal for bread containing moisture. A short oven refresh can restore some crispness.
Recipe Overview
| Detail | Suggested guide |
|---|---|
| Yield | 1 broad oval loaf, about 12 slices |
| Preparation and kneading | Approximately 20–25 minutes |
| First rise | About 60–90 minutes |
| Shaped proof | About 35–60 minutes |
| Baking | Approximately 25–35 minutes |
| Cooling | At least 1 hour, preferably until fully cool |
| Total | Approximately 3½–5 hours |
| Oven | 425°F |
| Equipment | Bowl, baking sheet, parchment, sharp blade, cooling rack |
Rise times depend on temperature and yeast activity. Use expansion and dough feel rather than treating the shortest time as a deadline.
Ingredients
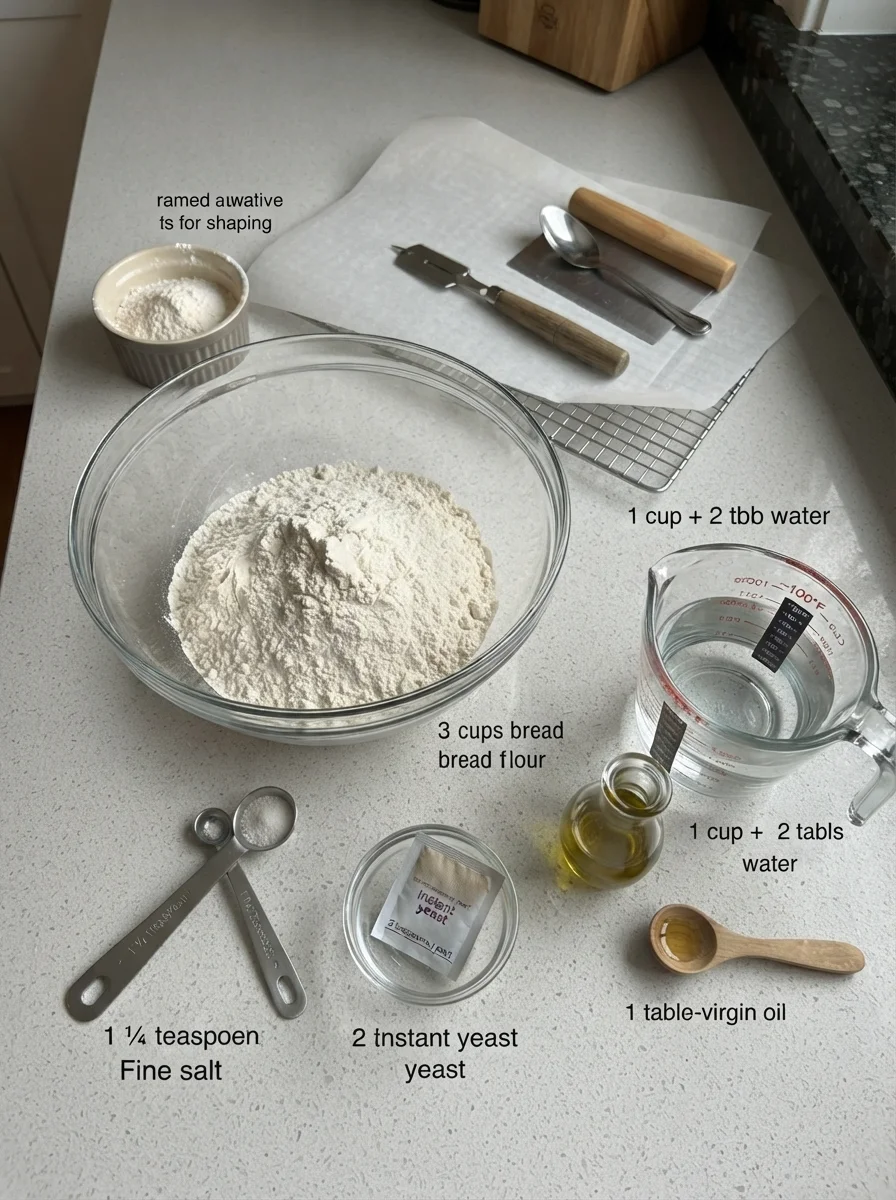
- 3 cups bread flour, spooned and leveled, plus a little for shaping
- 1 cup plus 2 tablespoons lukewarm water, with 1–2 additional tablespoons only if needed
- 2 teaspoons instant yeast
- 1¼ teaspoons fine salt
- 1 tablespoon olive oil
Use a little additional oil for the rising bowl if desired. A light flour dusting for the work surface is separate from the measured dough flour.
Ingredient Notes
Bread flour
Bread flour helps create an elastic dough and a slightly chewy center. Measure gently by spooning flour into the cup and leveling rather than pressing or scooping tightly.
All-purpose flour can be an adaptation, though protein content and water absorption vary. Hold back extra water until you see how the dough feels.
This is not a formula for self-rising flour. It already contains yeast and measured salt, so self-rising flour adds ingredients that change the balance.
Water
Use lukewarm water, approximately 95–105°F. Hot water can damage yeast.
The dough should be soft and slightly tacky, with enough structure to shape. Begin with the listed 1 cup plus 2 tablespoons, then add extra water gradually only if dry flour remains or the dough feels unusually stiff.
Do not assume a dry, nonsticky dough is the goal. Excess flour can make the center heavy and dry.
Instant yeast
Instant yeast can be mixed directly into the flour. A separate activation step is not necessary.
Active dry yeast can be used according to its package guidance, with possible timing differences. If hydrating it first, use water already counted in the recipe rather than adding an unmeasured extra portion.
Salt
Fine salt seasons the loaf and affects dough behavior. Coarse salts differ by volume, so use the specified type for a more consistent result.
Do not omit salt and expect an identical dough or flavor. If reducing it for a specific reason, understand that fermentation and taste may change.
Olive oil
A tablespoon adds mild richness and tenderness. A robust extra-virgin oil contributes more flavor than a neutral-tasting olive oil.
Do not brush the finished crust with butter if crispness is your priority. A butter finish is useful for soft bread, but this loaf is intended to cool with a drier exterior.
Equipment
Use a large bowl, sturdy spoon, work surface, baking sheet, parchment rated for the oven temperature, and a cooling rack. A bench scraper helps move the dough without adding excess flour.
A sharp bread lame or suitable sharp blade makes a clean score. Handle carefully and follow the tool’s directions.
A baking stone or steel is optional, not required. If using one, follow its manufacturer’s preheating and handling guidance rather than assuming it behaves like a thin baking sheet.
How to Make the Bread
1. Mix the dough
Stir flour, instant yeast, and salt together in the bowl. Add water and olive oil and mix until no dry flour remains.
The mixture may look rough. Let it rest for 5–10 minutes before kneading if it feels tight; the flour continues absorbing water during that short pause.
Add extra water only in small amounts if the dough is dry. If it feels sticky but cohesive, proceed rather than immediately adding more flour.
2. Knead until elastic
Turn onto a lightly floured surface and knead approximately 8–10 minutes. Push and fold with controlled movements, rotating occasionally.
The dough should become smoother and stretchier. It may still feel slightly tacky but should hold together rather than smear like batter.
If using a mixer, knead with a dough hook according to the appliance’s guidance, often approximately 5–7 minutes. Stop and assess rather than assuming every machine needs the same speed or time.
3. First rise
Place in a lightly oiled bowl and turn once to coat. Cover and let rise in a comfortably warm place until approximately doubled, often 60–90 minutes.
A cooler room can require longer. Avoid direct heat or a hot oven, which can warm the dough unevenly.
Look for a puffy appearance and visible expansion. Shaping an underdeveloped dough simply because the timer rings can lead to a dense loaf.
4. Pre-shape and rest
Turn the dough onto a lightly floured surface. Press gently to release large gas pockets and gather into a loose oval.
Cover and rest 10 minutes. This makes final shaping easier and reduces resistance when lengthening the dough.
5. Shape a broad oval
Pat into a rough rectangle. Fold the upper edge toward the middle, then fold again to form a short log. Seal the seam gently and roll just enough to create an even oval about 10–12 inches long.
The surface should have a little tension without tearing. Avoid rolling it extremely thin or squeezing out every air bubble.
Place seam-side down on parchment on the baking sheet. Leave room for expansion.
6. Proof the shaped loaf
Cover loosely with a lightly greased cover or suitable cloth that will not stick. Let rise approximately 35–60 minutes, until noticeably puffy.
A light touch with a floured fingertip should leave an indentation that returns slowly. Dough that springs back immediately may need more time; dough that deflates or feels fragile may have proofed too far.
Begin preheating the oven to 425°F before proofing finishes so the loaf does not wait while fully expanded.
7. Score
Uncover the loaf. With a sharp blade, make two or three diagonal cuts across the top, approximately ¼ inch deep.
Use a confident, controlled movement rather than sawing repeatedly. The cuts provide places for expansion as the loaf enters the oven.
Score immediately before baking, not before the final rise. Avoid pressing down enough to flatten the dough.
8. Bake
Bake on the middle rack at 425°F for approximately 25–35 minutes, until deeply golden and the center is baked through. A center temperature around 200–205°F is a useful additional guide for this lean-style loaf.
If the surface darkens too quickly, tent loosely with foil for the remaining cooking. If the bottom browns faster than the top, check rack position and consider a second baking sheet beneath the first as insulation for a future batch.
A hollow sound when tapped can be a supporting clue, but it is not a perfect test on its own. Color, structure, and center temperature together provide a clearer assessment.
9. Cool uncovered
Transfer to a rack and cool at least 1 hour, preferably until fully cool before slicing.
Do not wrap in a towel or seal in plastic while cooling if you want a crisp crust. Steam needs to escape rather than collecting against the surface.
Cut with a serrated knife using a gentle sawing motion. The center is more likely to compress if you cut while hot.
Steam and Crust: A Practical Approach
Early oven moisture can help expansion and crust development, but it is not worth damaging an oven or handling an improvised hot-water setup. The basic recipe can be baked without added steam.
If your oven has a manufacturer-approved bread or steam function, use its instructions. Otherwise, bake as directed and focus on proper preheating, adequate browning, and uncovered cooling.
Do not pour water onto the oven floor, heating elements, glass, or an unsuitable hot pan. Avoid spraying oven lights or door glass. Sudden temperature changes can damage components or cause splashing.
A crisp crust depends on more than steam. A fully baked loaf with enough surface color and good cooling will usually have a better crust than a pale loaf sealed while warm.
Tips for a Crisp Crust and Soft Center
Keep flour additions modest
A little tackiness is normal. Too much flour can make the center dense and dry without improving the crust.
Let the dough rise sufficiently
Adequate fermentation gives the interior a lighter texture. More yeast is not a substitute for allowing the dough time to expand.
Shape evenly
A thick center and very thin ends can bake unevenly. Aim for a broad, consistent oval.
Bake beyond pale gold
A pale crust often softens quickly. Allow a rich golden color while monitoring the center and bottom.
Cool on a rack
Airflow underneath prevents trapped steam from dampening the bottom. Leave the loaf uncovered until cool.
Troubleshooting
| Problem | Possible cause | Adjustment |
|---|---|---|
| Dense center | Dry dough, underproofing, or insufficient development | Measure flour lightly, knead adequately, and allow visible rise |
| Loaf spreads flat | Loose dough, weak shaping, or overproofing | Adjust water cautiously and build gentle surface tension |
| Crust becomes soft | Wrapped warm or moisture migrated during storage | Cool uncovered and refresh briefly in the oven |
| Interior is gummy | Underbaking or slicing too early | Bake through and cool fully |
| Side bursts | Inadequate proofing or scoring | Proof until puffy and score before baking |
| Bottom burns | Strong bottom heat or dark pan | Adjust rack or use a lighter baking sheet |
| Dough will not rise | Cool conditions, weak yeast, or hot mixing water | Allow time and check yeast handling |
| Crust is excessively hard | Overbaking or a very thin loaf | Monitor doneness and shape consistently |
Variations
Sesame topping
Lightly brush the proofed surface with water and scatter sesame seeds before scoring. This changes the topping and allergen profile.
Rosemary loaf
Add 1–2 teaspoons finely chopped fresh rosemary with the flour for a subtle herb variation. Large woody pieces are less pleasant in the crumb.
Part whole-wheat version
Replace ½ cup flour with whole-wheat flour as a cautious first variation. Expect different water needs and a heartier crumb. A full substitution requires further adjustment.
Two smaller loaves
Divide into two equal pieces, shape shorter ovals, and proof until puffy. Start checking earlier during baking because smaller loaves can finish faster.
Garlic bread serving
Bake the plain loaf first, then prepare garlic bread from cooled slices. Fresh garlic butter changes storage needs and is better treated as a serving preparation than a long-term coating for the whole loaf.
Serving Ideas
Serve slices with soup, pasta, or a salad. The mild flavor is useful for sandwiches with cheese, cooked meats, or roasted vegetables.
Toast day-old slices for bruschetta-style toppings. Add juicy tomatoes close to serving so the bread does not soak for a prolonged period.
For breakfast, use toast with butter or jam. Remaining bread can become croutons, breadcrumbs, or a bread salad, provided it is still sound and free of mold.
Make-Ahead and Storage
Same-day serving
The crust is crispest after the loaf cools and before airtight storage. Bake early enough to allow full cooling rather than planning to slice directly from the oven.
Room temperature
Store cooled bread in an airtight bag or container for about 2–3 days in a cool, dry environment, expecting the crust to soften. A paper bag preserves a drier crust for shorter storage but allows the interior to stale faster.
Choose the storage method according to when you will eat it. Do not seal a warm loaf and trap steam.
Freezer
Freeze cooled slices or a well-wrapped loaf for up to 2–3 months for best quality. Separate slices if you want individual portions.
Thaw covered, then refresh the crust in the oven. Freezing is generally more useful than refrigerating plain bread for several days.
Refreshing the crust
Warm an unwrapped loaf or portion in a 350°F oven for approximately 8–12 minutes, adjusting for size and starting temperature. Let stand briefly before slicing.
Watch small portions so they do not dry excessively. Repeatedly reheating the whole loaf can make it stale faster, so warm only what you need.
Discard bread with visible mold rather than trimming only the affected spot.
Nutrition Notes
For approximately 12 slices, a broad estimate is around 120–145 calories and 4–5 grams protein per slice, depending on flour and portion size. Extra oil, butter, cheese, and toppings are separate.
This is wheat bread and is not gluten-free or low-carbohydrate. The basic dough contains no eggs or dairy, though serving additions may introduce both.
For precise tracking, total your ingredient labels and divide by the actual number of portions rather than assuming every slice is equal.
Frequently Asked Questions
Is this a specific regional Italian bread?
No. It is a general Italian-style homemade loaf with a crisp crust and tender center. Regional Italian breads use many different ingredients, shapes, and methods.
Can I use all-purpose flour?
It can work as an adaptation, though absorption and chew differ. Hold back extra water and judge the dough before adding more.
Do I need sugar for the yeast?
Not in this formula. The dough can rise without added sugar.
Do I need a baking stone?
No. The suggested method uses a baking sheet. A stone is optional and needs its own proper preheating and handling.
Why does the crust soften overnight?
Moisture moves from the interior into the crust, especially in sealed storage. A short oven refresh helps restore crispness.
Can I skip kneading?
Not without changing the method. This formula uses kneading to develop structure. A no-knead loaf needs an adapted hydration and resting schedule.
Can I make sandwiches while it is warm?
Let it cool fully for cleaner slices. Warm bread is easier to compress, and hot fillings can create condensation in packed sandwiches.
Why did the scoring drag?
The blade may be dull, the surface too sticky, or the dough overproofed. Use a suitable sharp tool and a controlled movement immediately before baking.
Recipe Card
Homemade Italian Bread with a Crispy Crust & Soft Center
A suggested Italian-style yeast loaf with olive oil, a golden crust, and a tender, lightly chewy crumb.
Yield: 1 loaf, about 12 slices
Prep: 20–25 minutes
First rise: 60–90 minutes
Pre-shape rest: 10 minutes
Proof: 35–60 minutes
Bake: 25–35 minutes
Cool: At least 1 hour
Total: Approximately 3½–5 hours
Oven: 425°F
Ingredients
- 3 cups bread flour, spooned and leveled
- 1 cup plus 2 tablespoons lukewarm water, plus 1–2 tablespoons only if needed
- 2 teaspoons instant yeast
- 1¼ teaspoons fine salt
- 1 tablespoon olive oil
Instructions
- Stir flour, yeast, and salt together. Add measured water and oil. Mix until hydrated, adding extra water gradually only if dry.
- Knead 8–10 minutes by hand until smooth and elastic, keeping the dough slightly tacky.
- Cover in a lightly oiled bowl and rise until approximately doubled, usually 60–90 minutes.
- Gently release large gas pockets, gather into an oval, and rest covered 10 minutes.
- Shape an even 10–12-inch oval, seal the seam, and place seam-side down on a parchment-lined baking sheet.
- Cover loosely and proof 35–60 minutes until puffy. Preheat oven to 425°F before proofing finishes.
- Score two or three diagonal cuts about ¼ inch deep. Bake 25–35 minutes until deeply golden and baked through; a center temperature around 200–205°F is an additional guide.
- Cool uncovered on a rack at least 1 hour, preferably completely, before slicing.
Storage: Keep cooled bread airtight for 2–3 days, expecting a softer crust, or freeze up to 2–3 months for quality. Refresh portions briefly in the oven.
Little tip: Do not wrap the loaf while warm. Letting steam escape on a rack protects the crust and helps the soft center finish setting.
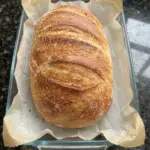
Homemade Italian Bread with a Crispy Crust & Soft Center
Description
A suggested Italian-style yeast loaf with olive oil, a golden crust, and a tender, lightly chewy crumb.
Yield: 1 loaf, about 12 slices
Prep: 20–25 minutes
First rise: 60–90 minutes
Pre-shape rest: 10 minutes
Proof: 35–60 minutes
Bake: 25–35 minutes
Cool: At least 1 hour
Total: Approximately 3½–5 hours
Oven: 425°F
Ingredients
- 3 cups bread flour, spooned and leveled
- 1 cup plus 2 tablespoons lukewarm water, plus 1–2 tablespoons only if needed
- 2 teaspoons instant yeast
- 1¼ teaspoons fine salt
- 1 tablespoon olive oil
Instructions
- Stir flour, yeast, and salt together. Add measured water and oil. Mix until hydrated, adding extra water gradually only if dry.
- Knead 8–10 minutes by hand until smooth and elastic, keeping the dough slightly tacky.
- Cover in a lightly oiled bowl and rise until approximately doubled, usually 60–90 minutes.
- Gently release large gas pockets, gather into an oval, and rest covered 10 minutes.
- Shape an even 10–12-inch oval, seal the seam, and place seam-side down on a parchment-lined baking sheet.
- Cover loosely and proof 35–60 minutes until puffy. Preheat oven to 425°F before proofing finishes.
- Score two or three diagonal cuts about ¼ inch deep. Bake 25–35 minutes until deeply golden and baked through; a center temperature around 200–205°F is an additional guide.
- Cool uncovered on a rack at least 1 hour, preferably completely, before slicing.
Storage: Keep cooled bread airtight for 2–3 days, expecting a softer crust, or freeze up to 2–3 months for quality. Refresh portions briefly in the oven.
Little tip: Do not wrap the loaf while warm. Letting steam escape on a rack protects the crust and helps the soft center finish setting.