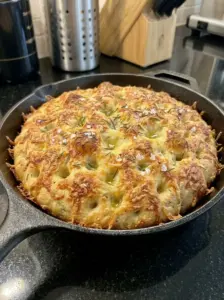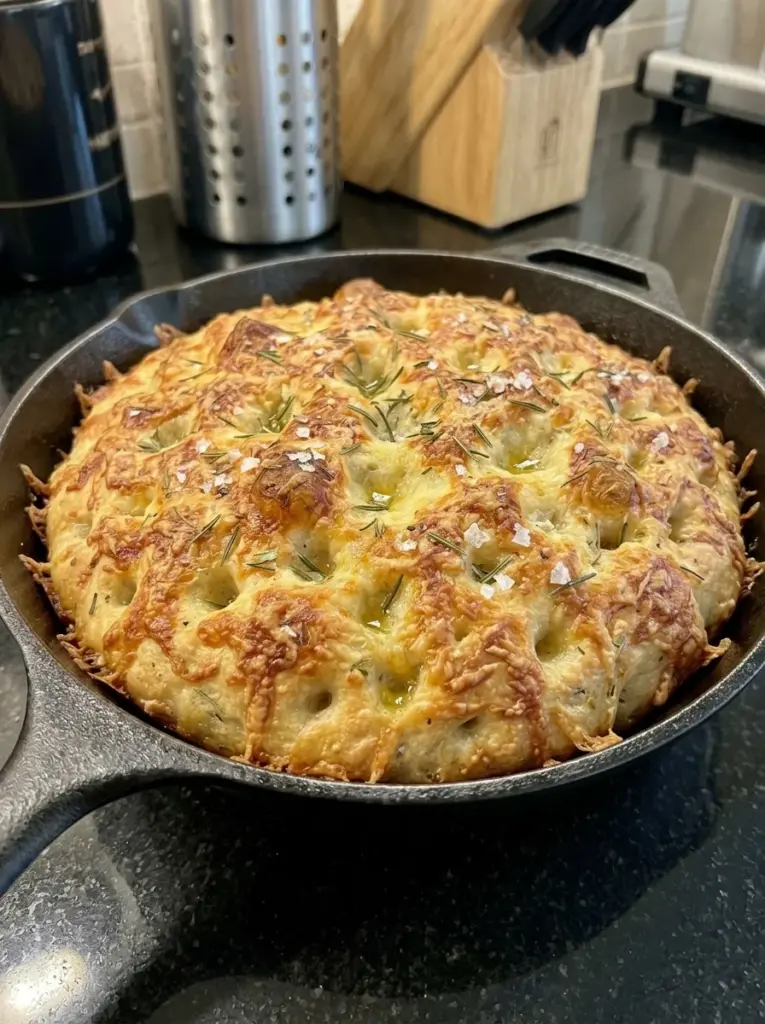
Golden and crisp around the edges, fluffy and airy in the center, and covered with savory Parmesan and rosemary, this Small-Batch Cast Iron Parmesan Focaccia delivers everything you love about classic focaccia in a smaller, more manageable loaf.
The no-knead dough is intentionally soft and sticky, allowing it to develop a light, chewy interior filled with beautiful air pockets. A buttered and olive-oiled 8-inch cast-iron skillet creates an especially crisp bottom, while Parmesan sprinkled underneath the dough melts and browns against the hot pan to form a delicious cheesy crust.
More Parmesan goes over the top along with fresh rosemary, garlic powder, flaky sea salt, and extra-virgin olive oil. After baking at high heat, the focaccia emerges deeply golden with crisp edges, a tender center, and plenty of savory cheese flavor.
It’s the perfect small-batch bread for serving alongside pasta, soup, salads, or a cozy dinner for a smaller household.
Why You’ll Love This Small-Batch Parmesan Focaccia
This recipe gives you bakery-style focaccia without producing a full sheet pan of bread.
Perfect small batch. An 8-inch skillet makes just enough focaccia for approximately six servings.
Completely no-knead. Simply stir the ingredients together and let time and yeast develop the dough.
Crispy Parmesan bottom. Parmesan underneath the dough melts against the hot cast iron and creates a flavorful cheese crust.
Soft and airy center. The wet dough produces a tender, chewy crumb with plenty of air pockets.
Crispy golden edges. Butter, olive oil, and cast iron work together to create beautifully browned edges.
Loaded with Parmesan. Cheese is incorporated both underneath and over the focaccia for flavor in every bite.
Savory rosemary flavor. Fresh rosemary complements the Parmesan, olive oil, and garlic beautifully.
Versatile. Serve it as a side dish, appetizer, snack, or dipping bread.
What Makes This Small-Batch Focaccia So Airy?
One of the most important characteristics of this recipe is its very soft, high-moisture dough.
With approximately 225 grams of water for 250 grams of flour, the dough will be noticeably wetter and stickier than standard sandwich bread dough.
That’s intentional.
The extra moisture helps create the soft, open interior and irregular air pockets associated with good focaccia.
Instead of adding additional flour and kneading until smooth, the dough is simply mixed until everything is hydrated. It then receives a long 2 to 3-hour first rise, allowing the yeast to create plenty of gas and structure.
After being gently transferred to the skillet, the dough receives another 45 to 60-minute rise.
Gentle handling is important during these stages. The goal is to preserve as much of the air created during fermentation as possible.
Finally, baking at 450°F (230°C) rapidly sets the airy structure while creating a deeply browned exterior.
Ingredients for Small-Batch Cast Iron Parmesan Focaccia
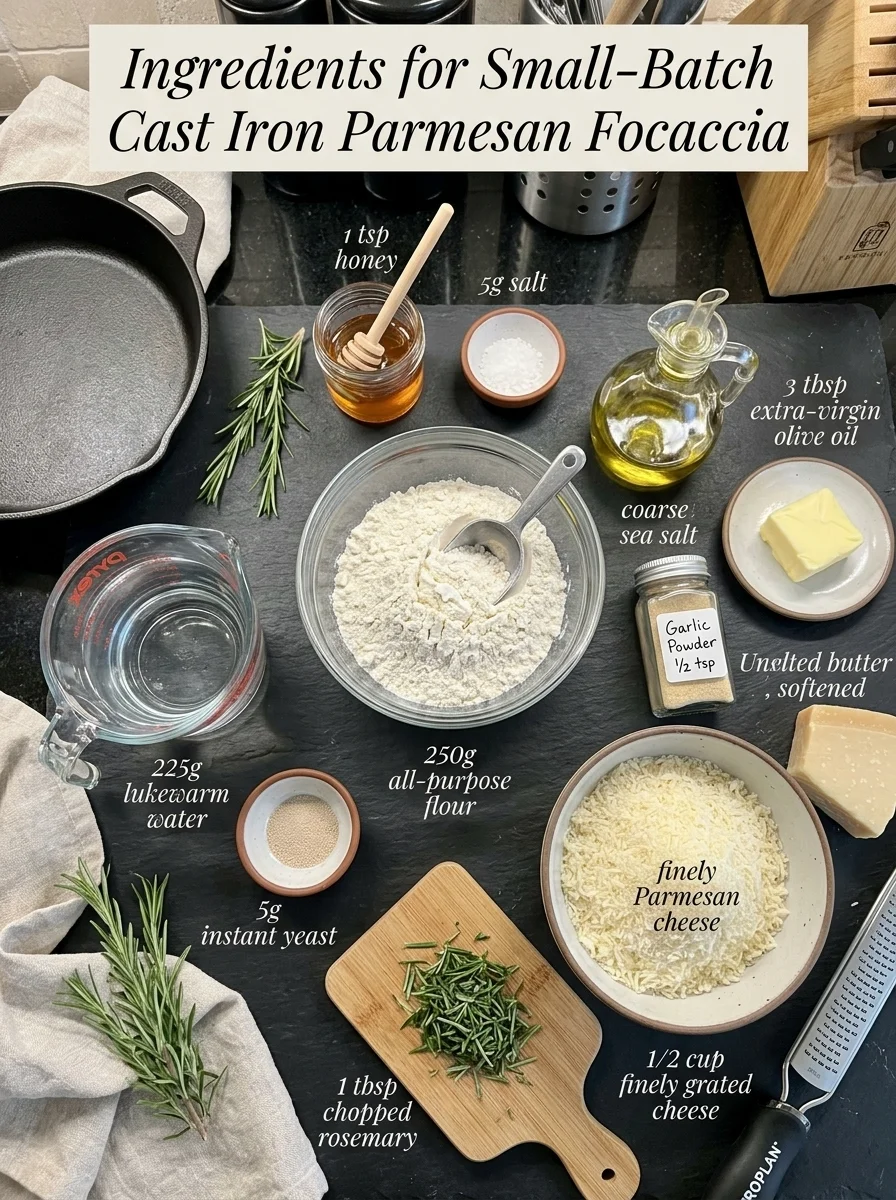
For the Focaccia
- 250 g (about 2 cups) all-purpose flour
- 225 g (about 3/4 cup + 2 tbsp) lukewarm water
- 5 g (1 1/2 tsp) instant yeast
- 5 g (about 3/4 tsp) salt
- 1 tsp honey
- 3 tbsp extra-virgin olive oil, divided
- 1 tbsp unsalted butter, for the pan
- 1/2 cup finely grated Parmesan cheese, divided
- 1 tbsp fresh rosemary, finely chopped
- 1/2 tsp garlic powder
- Flaky sea salt, for topping
Ingredient Notes
All-purpose flour: Provides enough gluten structure to support the airy crumb while keeping the finished focaccia tender and chewy.
Lukewarm water: The relatively high amount of water is essential for creating the soft, sticky dough and airy interior. It should feel comfortably warm rather than hot.
Instant yeast: Allows the dough to rise efficiently without requiring a separate activation step.
Salt: Seasons the dough itself and balances the rich Parmesan and olive oil.
Honey: A small amount adds subtle sweetness while complementing the savory Parmesan and rosemary.
Extra-virgin olive oil: Essential for both flavor and texture. It’s used on the dough, in the skillet, and over the surface before baking.
Unsalted butter: Generously coating the cast-iron skillet with butter adds richness and helps create a flavorful golden crust.
Parmesan cheese: Parmesan is used both beneath and over the dough. The bottom layer becomes crisp and deeply savory against the skillet, while the top layer melts and browns in the oven.
Fresh rosemary: Adds aromatic, woodsy flavor that pairs naturally with Parmesan and olive oil.
Garlic powder: Distributes garlic flavor evenly across the surface without adding extra moisture.
Flaky sea salt: Adds little bursts of saltiness and classic focaccia texture to the finished crust.
How to Make Small-Batch Cast Iron Parmesan Focaccia
Step 1: Combine the Dry Ingredients
Add the all-purpose flour, instant yeast, and salt to a large mixing bowl.
Stir or whisk until evenly combined.
This helps distribute the yeast and salt throughout the flour before the liquid ingredients are added.
Step 2: Add the Water and Honey
Pour in the lukewarm water and add the honey.
Use a wooden spoon or sturdy spatula to stir everything together.
Continue mixing until no large pockets of dry flour remain and a soft, very sticky dough forms.
The dough will look much wetter than traditional bread dough.
Do not add extra flour simply to make it easier to handle.
Step 3: Add the First Tablespoon of Olive Oil
Drizzle 1 tablespoon extra-virgin olive oil over the dough.
Gently turn the dough several times to lightly coat its surface with oil.
There is no kneading required.
Step 4: Let the Dough Rise
Cover the bowl with plastic wrap or a clean kitchen towel.
Place it in a warm, draft-free location.
Let the dough rise for approximately 2 to 3 hours.
By the end of the first rise, it should look noticeably expanded, puffy, and bubbly.
The exact rising time can vary depending on room temperature, so pay attention to the appearance of the dough rather than relying entirely on the clock.
Prepare the Cast-Iron Skillet
Generously coat an 8-inch cast-iron skillet with 1 tablespoon unsalted butter.
Make sure both the bottom and lower sides are well coated.
Drizzle 1 tablespoon olive oil into the skillet and spread it evenly across the bottom.
The combination of butter and olive oil helps create the rich, crisp exterior that makes cast-iron focaccia especially delicious.
Create the Parmesan Crust 🧀
Sprinkle approximately 2 tablespoons of the finely grated Parmesan evenly across the bottom of the prepared skillet.
This Parmesan will sit directly underneath the dough.
As the focaccia bakes, the cheese melts and browns against the hot skillet, creating an extra-savory bottom crust.
Transfer the Dough
Lightly oil your hands.
Gently loosen the risen dough from the bowl.
Fold the dough over itself a few times, being careful not to aggressively squeeze out all the trapped air.
Transfer the dough to the prepared skillet.
Use your oiled fingertips to gently encourage it toward the edges.
What If the Dough Won’t Stretch?
Don’t force it.
If the dough keeps shrinking back toward the center, let it rest in the skillet for 5 to 10 minutes.
This short rest allows the gluten to relax.
Return and gently stretch the dough again. It should become much easier to spread toward the edges.
Let the Focaccia Rise Again
Cover the skillet loosely with plastic wrap or a clean kitchen towel.
Allow the dough to rise for another 45 to 60 minutes.
It should become noticeably puffy and airy.
You may also see bubbles developing beneath the surface.
Toward the end of the second rise, preheat your oven to 450°F (230°C).
Allow the oven to become fully preheated before baking.
Dimple the Focaccia
Drizzle the final 1 tablespoon extra-virgin olive oil over the surface.
Coat your fingertips with a little oil.
Press your fingers deeply into the dough, creating dimples across the entire surface.
You want pronounced indentations, but avoid aggressively pressing all the air out of the dough.
Some olive oil will naturally collect inside the dimples, creating flavorful pockets during baking.
Add the Parmesan and Seasonings
Sprinkle the remaining finely grated Parmesan evenly over the surface.
Follow with:
- 1 tablespoon finely chopped fresh rosemary
- 1/2 teaspoon garlic powder
- A light sprinkle of flaky sea salt
Try to distribute the Parmesan and seasonings evenly so every piece gets some of the savory topping.
Bake Until Deeply Golden 🍞🔥
Transfer the skillet to the preheated 450°F (230°C) oven.
Bake for approximately 20 to 25 minutes.
The finished focaccia should be:
- Deeply golden across the surface
- Crisp around the edges
- Puffy and baked through in the center
- Covered with melted, browned Parmesan
- Golden and crisp underneath
If you want an especially crisp cheese crust, continue baking for another 2 to 3 minutes if necessary, watching carefully to prevent excessive browning.
Cool Before Removing
Remove the skillet from the oven.
Let the focaccia cool in the pan for approximately 10 minutes.
This brief cooling period allows the bread and cheese crust to set slightly, making the focaccia easier to remove.
Run a thin spatula carefully around the edges.
Gently lift the focaccia from the skillet and transfer it to a cutting board.
Slice into wedges or squares and serve warm.
Time and Yield
Prep time: 15 minutes
First rise: 2 to 3 hours
Second rise: 45 to 60 minutes
Cook time: 20 to 25 minutes
Total time: approximately 3 1/2 to 4 1/2 hours
Servings: 6
Estimated calories: approximately 300 calories per serving
The exact total time will depend primarily on the temperature of your kitchen and how quickly the dough rises.
Tips for the Best Parmesan Focaccia
Don’t add unnecessary flour. The dough is supposed to be very sticky. Adding enough flour to make it resemble standard bread dough can produce a denser focaccia.
Use lukewarm water. Water that’s comfortably warm helps create a good environment for the yeast without being excessively hot.
Watch the dough, not just the clock. Rising time varies depending on room temperature. Look for visible puffiness and bubbles.
Oil your hands. Lightly oiled fingers make sticky focaccia dough much easier to handle.
Handle the dough gently. After the first rise, avoid aggressively squeezing or flattening it.
Let resistant dough rest. If it springs back when stretched, give it 5 to 10 minutes before trying again.
Don’t rush the second rise. The dough should look visibly puffy before dimpling.
Dimple deeply but gently. You want deep pockets for the olive oil without completely deflating the bread.
Use finely grated Parmesan. Fine shreds distribute more evenly and create a more uniform cheese crust.
Butter the skillet generously. This adds flavor and helps the focaccia release after baking.
Bake until truly golden. Pale focaccia will not have the same crisp exterior or deep flavor.
Why Bake Focaccia in Cast Iron?
Cast iron retains and distributes heat extremely well, which makes it especially useful for creating a crisp focaccia crust.
As the skillet heats in the oven, the butter, olive oil, and Parmesan beneath the dough begin browning.
That creates a flavorful bottom crust while the relatively small 8-inch skillet keeps the focaccia thick enough to remain fluffy and airy inside.
The result is a particularly satisfying contrast:
Crisp and cheesy underneath.
Golden around the edges.
Soft, chewy, and airy in the middle.
Why Put Parmesan Under the Dough?
The Parmesan underneath the dough isn’t just for additional cheese flavor.
As the skillet heats, the finely grated cheese melts into the butter and olive oil.
It then begins browning against the hot cast iron, creating a thin savory layer attached to the bottom crust.
For the best result, distribute the cheese relatively evenly rather than leaving it in thick piles.
Allowing the focaccia to rest for about 10 minutes after baking also gives this cheese crust a little time to set before you remove the bread.
What to Serve With Parmesan Focaccia
This small-batch focaccia works beautifully as a side for a variety of meals.
Pasta: Serve warm wedges alongside marinara, creamy pasta, baked pasta, or spaghetti.
Soup: Dip the focaccia into tomato soup, vegetable soup, chicken soup, or a hearty stew.
Salads: Parmesan and rosemary make the bread a flavorful companion for crisp green salads.
Grilled meats: Serve it alongside grilled chicken, steak, pork, or other savory mains.
Olive oil: Tear the warm focaccia into pieces and dip them directly into good extra-virgin olive oil.
Appetizer boards: Cut it into small pieces and pair with cheeses, vegetables, olives, and spreads.
Sandwiches: Once completely cooled, slice pieces horizontally and use them for small focaccia sandwiches.
Parmesan Focaccia Variations
The basic dough can support several simple variations without changing the core method.
Extra-Parmesan focaccia: Add a little more finely grated Parmesan over the finished bread while it’s still warm.
Rosemary-forward focaccia: Sprinkle additional fresh rosemary over the surface before baking.
Garlic Parmesan focaccia: Increase the garlic flavor slightly if you prefer a more pronounced garlic profile.
Extra-crispy Parmesan focaccia: Allow the bread to develop a deeply golden cheese crust rather than removing it from the oven while still pale.
Simple Parmesan focaccia: Keep the topping focused on Parmesan, olive oil, and flaky sea salt for a simpler flavor profile.
Troubleshooting Common Focaccia Problems
Why is my dough so sticky?
That’s normal.
The recipe uses a high proportion of water specifically to create an airy focaccia.
Instead of adding more flour, use lightly oiled hands when handling the dough.
Why isn’t my dough rising?
Your kitchen may be cooler than expected, or the yeast may need additional time.
Place the covered dough in a comfortably warm location and allow it to continue rising until it becomes visibly puffy and bubbly.
Why is my focaccia dense?
Common causes include adding too much flour, insufficient rising time, or aggressively deflating the dough during shaping.
Make sure the dough becomes puffy during both rises.
Why does the dough keep shrinking back?
The gluten needs time to relax.
Let the dough rest in the skillet for 5 to 10 minutes, then gently stretch it again.
Why doesn’t my focaccia have large air bubbles?
The dough may need additional rising time, or too much gas may have been pressed out during transfer and shaping.
Handle the risen dough gently and allow it to become noticeably puffy before baking.
Why is my focaccia pale?
The oven may not have been fully preheated, or the bread may simply need additional baking time.
At 450°F, the finished focaccia should develop a distinctly golden exterior.
Why isn’t the bottom crispy?
Make sure the skillet is generously buttered and contains the specified olive oil.
Also allow the oven to fully preheat before baking.
Why did the Parmesan stick to my skillet?
Parmesan can become very crisp when baked directly against cast iron.
Generously buttering and oiling the skillet helps with release. Let the focaccia cool for about 10 minutes, then carefully work a thin spatula around and underneath the bread.
Why is the top cheese getting too dark?
Parmesan browns quickly at high temperatures.
Begin checking the focaccia toward the lower end of the baking range and remove it once the crust is deeply golden and the bread is baked through.
Storage and Reheating
Focaccia has its best texture while fresh, but leftovers store well.
Allow the bread to cool completely before storing.
Room temperature: Keep in an airtight container for up to 2 days.
Avoid sealing the focaccia while it’s still warm because trapped steam can soften the crisp crust.
Freezer: Freeze individual pieces in a freezer-safe bag or container for up to 2 months.
Freezing individual portions makes it easier to reheat only what you need.
Reheating: Warm leftover focaccia in a 350°F oven until heated through and crisp around the edges.
The oven is particularly useful for restoring some of the crisp texture lost during storage.
Frequently Asked Questions
Do I need to knead this focaccia dough?
No. This is a no-knead focaccia. Stir the ingredients together until the flour is hydrated and allow the rising periods to develop the dough.
Why is the dough so wet?
The high water content helps create a soft, airy interior with irregular air pockets. Sticky dough is expected.
Can I add extra flour if the dough sticks to my hands?
Try using lightly oiled hands instead. Adding significant extra flour can make the finished focaccia denser.
What size cast-iron skillet should I use?
This recipe is designed for an 8-inch cast-iron skillet.
How do I know when the first rise is finished?
The dough should look noticeably expanded, puffy, and bubbly.
How do I know when the second rise is finished?
The dough should again look puffy and airy in the skillet before you dimple and season it.
Why is Parmesan added underneath the focaccia?
The Parmesan melts and browns against the hot cast iron, helping create a savory, crispy cheese crust beneath the bread.
Can I use dried rosemary?
The recipe specifically calls for 1 tablespoon fresh rosemary, which provides fresh herbal flavor across the surface.
Can I make the focaccia ahead of time?
You can bake it ahead, but focaccia has its best texture when freshly baked. Leftovers can be stored at room temperature for up to 2 days and reheated in the oven.
Can I freeze Parmesan focaccia?
Yes. Freeze individual pieces in a freezer-safe bag for up to 2 months.
What’s the best way to reheat it?
Heat the focaccia at 350°F until warm and crisp.
What should I serve with Parmesan focaccia?
It’s especially good with pasta, soup, salads, grilled meats, or extra-virgin olive oil for dipping.
Final Thoughts
This Small-Batch Cast Iron Parmesan Focaccia combines a soft, airy no-knead dough with one of the best parts of cast-iron baking: an incredibly crisp, golden crust.
Parmesan underneath the dough melts into the butter and olive oil to create a savory cheese crust, while more Parmesan, fresh rosemary, garlic powder, flaky sea salt, and olive oil turn the dimpled surface deeply flavorful and golden.
Best of all, the 8-inch skillet keeps the batch manageable while still giving you that satisfying contrast between crisp edges and a fluffy, chewy center.
Serve it warm with pasta, soup, salads, grilled meats, or a dish of extra-virgin olive oil for dipping. Whether it’s part of dinner or simply eaten warm from the cutting board, this cheesy rosemary focaccia is an easy way to bring bakery-style bread to a small-batch home bake.
Print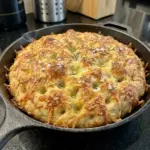
Small-Batch Cast Iron Parmesan Focaccia
Ingredients
For the Focaccia
- 250 g (about 2 cups) all-purpose flour
- 225 g (about 3/4 cup + 2 tbsp) lukewarm water
- 5 g (1 1/2 tsp) instant yeast
- 5 g (about 3/4 tsp) salt
- 1 tsp honey
- 3 tbsp extra-virgin olive oil, divided
- 1 tbsp unsalted butter, for the pan
- 1/2 cup finely grated Parmesan cheese, divided
- 1 tbsp fresh rosemary, finely chopped
- 1/2 tsp garlic powder
- Flaky sea salt, for topping
Instructions
Add the all-purpose flour, instant yeast, and salt to a large mixing bowl.
Stir or whisk until evenly combined.
This helps distribute the yeast and salt throughout the flour before the liquid ingredients are added.
Step 2: Add the Water and Honey
Pour in the lukewarm water and add the honey.
Use a wooden spoon or sturdy spatula to stir everything together.
Continue mixing until no large pockets of dry flour remain and a soft, very sticky dough forms.
The dough will look much wetter than traditional bread dough.
Do not add extra flour simply to make it easier to handle.
Step 3: Add the First Tablespoon of Olive Oil
Drizzle 1 tablespoon extra-virgin olive oil over the dough.
Gently turn the dough several times to lightly coat its surface with oil.
There is no kneading required.
Step 4: Let the Dough Rise
Cover the bowl with plastic wrap or a clean kitchen towel.
Place it in a warm, draft-free location.
Let the dough rise for approximately 2 to 3 hours.
By the end of the first rise, it should look noticeably expanded, puffy, and bubbly.
The exact rising time can vary depending on room temperature, so pay attention to the appearance of the dough rather than relying entirely on the clock.