
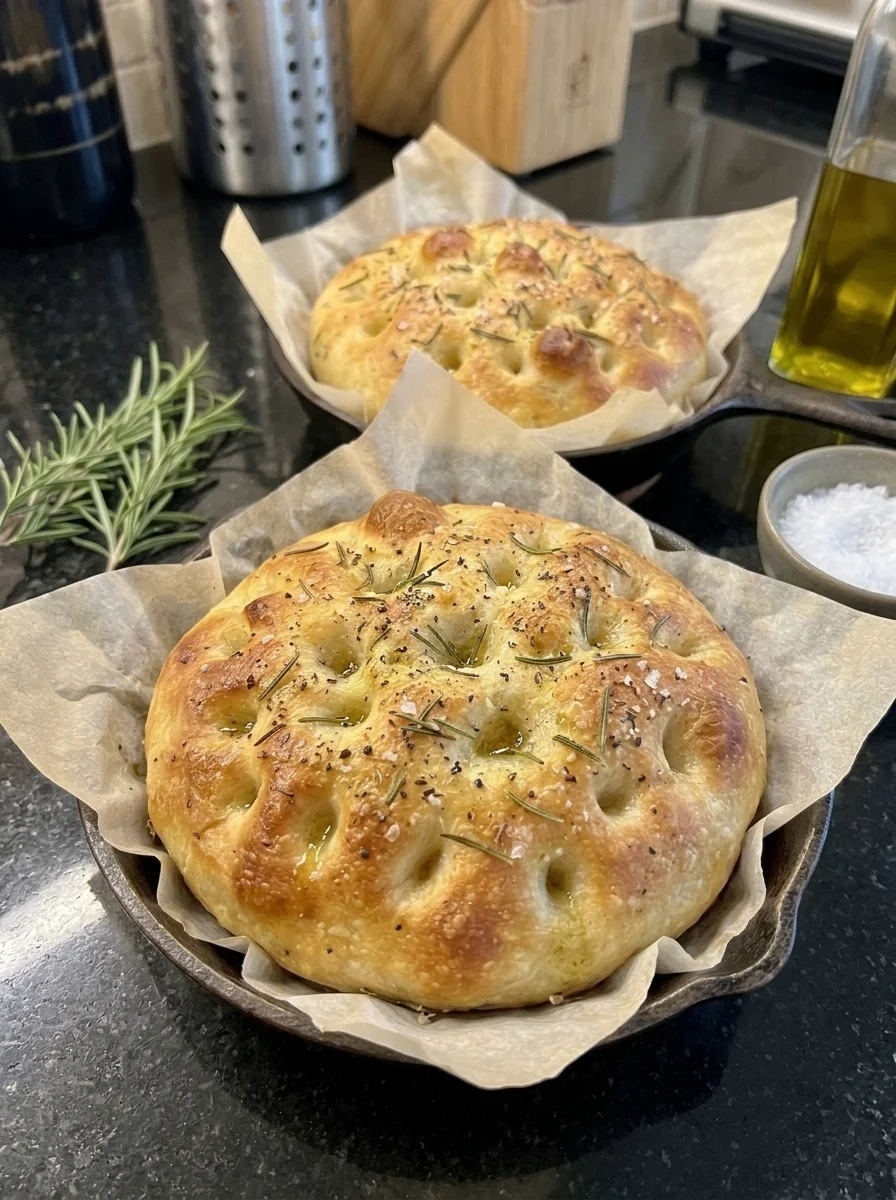
There is something especially inviting about the smell of rosemary and olive oil warming in the oven. These mini focaccia breads bring that bakery-style aroma to your kitchen in a small batch, with golden edges, a tender center, and the familiar dimpled top that catches little pools of olive oil.
The dough is mixed in one bowl and does not need a long kneading session. After two rises, it is divided between two small baking dishes, topped with rosemary and flaky salt, and baked until golden. Serve the breads warm alongside soup, use them for small sandwiches, or tear them into pieces for dipping in olive oil.
This recipe makes just two individual breads, making it a convenient choice when you want homemade focaccia without preparing a large pan. The dough is soft and sticky, so an oiled bowl and lightly oiled fingers make it easier to handle.
Recipe note: This recipe has not been independently tested. Rising and baking times depend on the temperature of your kitchen, the yeast, and the size and material of your baking dishes. Watch the dough for the visual cues below and check the breads for doneness before removing them from the oven.
Why You’ll Love This Recipe
- A small batch: One cup of flour makes two mini breads.
- Simple mixing: Stir the dough together without a long kneading session.
- Fragrant topping: Rosemary, olive oil, and flaky salt add classic focaccia flavor.
- Flexible serving: Enjoy it with soup, salad, pasta, or sandwich fillings.
- Make-ahead options: The baked breads can be frozen and reheated later.
Recipe at a Glance
- Prep time: About 10 minutes
- First rise: 60–90 minutes
- Second rise: 20–30 minutes
- Bake time: 15–20 minutes
- Total time: About 1 hour 45 minutes to 2 hours 30 minutes, plus a few minutes of cooling
- Yield: 2 mini focaccia breads
- Difficulty: Easy
Ingredients
For the Dough
- 1 cup all-purpose flour
- 1/2 teaspoon instant yeast
- 1/4 teaspoon salt
- 1/2 teaspoon honey
- 1/2 cup lukewarm water
- 1 tablespoon extra-virgin olive oil, plus a little for the baking dishes
For the Topping
- 1 tablespoon extra-virgin olive oil
- 1 teaspoon finely chopped fresh rosemary
- 1/4 teaspoon flaky sea salt
- 1/4 teaspoon garlic powder, optional
- Freshly cracked black pepper, optional
Ingredient Notes
All-Purpose Flour
All-purpose flour keeps this small-batch recipe straightforward. Measure carefully: spoon flour into the measuring cup and level it rather than packing it in. An overly full cup can make the dough firmer and less airy.
The dough should be sticky and soft, not a dry, kneadable ball. It may also feel more manageable after the flour has absorbed the water during the first rise. Avoid adding extra flour simply because it sticks to your hands; a little olive oil on your fingers is usually more useful for handling it.
Instant Yeast
Instant yeast can be mixed directly with the flour. Make sure the yeast is within its date and has been stored according to the package instructions. If you use active dry yeast instead, follow the package directions for dissolving it in some of the recipe’s lukewarm water; the dough may take longer to rise.
A warm kitchen can shorten rising time, while a cool kitchen slows it down. The dough’s appearance is a better guide than the clock alone.
Honey
A small amount of honey adds a gentle hint of sweetness and complements the olive oil. If you prefer, substitute an equal amount of sugar. The dough should still rise without the honey, although the flavor and browning may differ slightly.
Olive Oil
Olive oil is used in both the dough and topping. It contributes flavor, helps create tender bread, and coats the surface before baking. A fruity extra-virgin olive oil is especially nice here because its flavor is noticeable in such a simple recipe.
Use a little additional oil to coat the baking dishes. This helps prevent sticking and encourages golden edges. The amount absorbed by the bread depends on how generously the pans are oiled.
Fresh Rosemary
Finely chopped fresh rosemary gives each bread a fragrant, savory topping. Strip the leaves from the woody stem before chopping. If using dried rosemary, begin with about 1/3 teaspoon, crushed between your fingers, and adjust to taste. Dried rosemary can be stronger and more concentrated than fresh.
Flaky Sea Salt
Flaky salt adds a pleasant crunch and a savory finish. Sprinkle it over the top just before baking. If you substitute fine table salt, use less because it packs more densely and can make the bread overly salty.
Choosing Baking Dishes
Two small oven-safe skillets, ramekins, or shallow baking dishes can work, provided they are suitable for 425°F and leave room for the dough to rise and spread. Dishes around 4 to 5 inches across are a useful starting point, though the shape and depth of the finished bread will vary.
If using a single small dish instead, keep the two portions separate with some space between them, or bake the dough as one small focaccia and adjust the baking time as needed. A deeper or narrower dish produces thicker bread that may take longer to bake. Check the center for doneness rather than relying only on the color of the top.
Oil the bottom and sides of the dishes before adding the dough. If you are unsure whether your dishes tend to stick, add a small piece of parchment to the bottom, following the parchment manufacturer’s oven-temperature instructions.
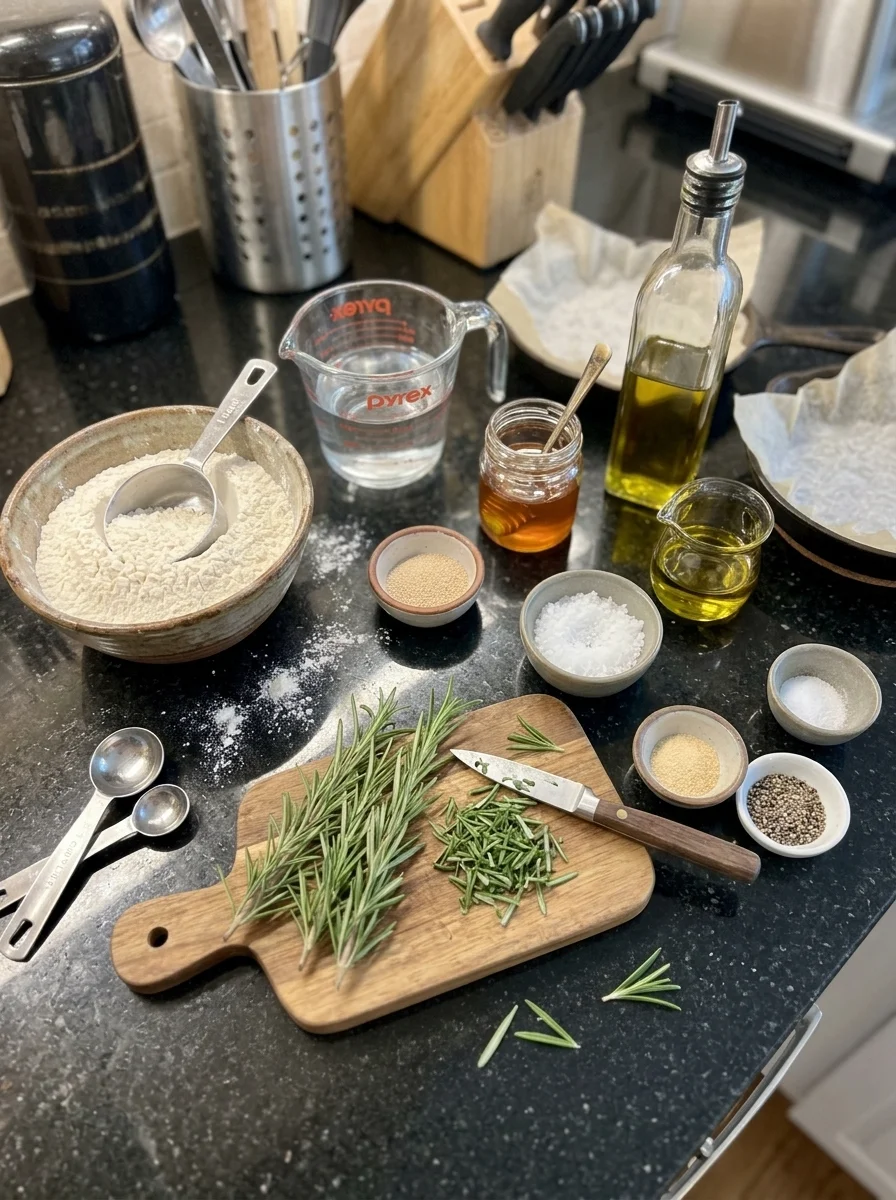
How to Make Mini Rosemary Olive Oil Focaccia
1. Mix the Dry Ingredients
Add the flour, instant yeast, and salt to a medium bowl. Stir until the yeast and salt are evenly distributed. Even mixing helps avoid pockets of salt and gives the yeast a chance to work throughout the dough.
2. Add the Wet Ingredients
Add the honey, lukewarm water, and 1 tablespoon olive oil. Stir with a spoon or flexible spatula until no dry flour remains and a sticky, shaggy dough forms. Scrape the sides of the bowl as needed.
The dough will not look smooth like a kneaded sandwich loaf. It should be soft, slightly loose, and sticky. Make sure there are no dry pockets at the bottom of the bowl, then leave the dough to rise.
3. Let the Dough Rise
Cover the bowl and set it in a warm place for 60–90 minutes, or until the dough is noticeably puffy and has nearly doubled. A kitchen counter away from drafts is often enough. Avoid placing the bowl somewhere excessively hot, which can harm the yeast.
The dough may show bubbles on the surface and look softer and more relaxed after rising. In a cool room, give it more time. If there is no noticeable change after a long rise, the yeast may no longer be active or the dough may be too cold.
4. Divide and Shape
Lightly oil two small oven-safe baking dishes. Oil your hands or a spatula, gently divide the dough into two portions, and transfer one portion to each dish. Ease each piece into a small round or oval without pressing out all the air.
If the dough springs back when you stretch it, let it rest for about 5 minutes, then try again. It does not need to reach the edges perfectly; it will relax and puff during the second rise.
5. Let the Dough Rise Again
Cover the dishes loosely and let the dough rest for 20–30 minutes, until soft and puffy. Start preheating the oven to 425°F during this rise so it is fully hot when the breads are ready to bake.
The second rise gives the dough time to relax after shaping. Look for a noticeable increase in puffiness rather than waiting for it to double again.
6. Add the Topping and Dimples
Mix the remaining 1 tablespoon olive oil with the chopped rosemary and optional garlic powder. Drizzle the mixture evenly over the dough. With lightly oiled fingertips, gently press dimples into each piece of dough. Press down through the soft dough without tearing it or flattening it completely.
Sprinkle the tops with flaky sea salt and optional black pepper. The dimples give the oil and rosemary places to settle, adding flavor across the surface.
7. Bake Until Golden
Bake for 15–20 minutes, until the tops and edges are golden and the centers are cooked through. Baking time depends on the size of the dishes and the thickness of the dough. If the tops are browning before the centers are done, loosely cover them with foil and continue baking briefly.
The breads should feel set rather than wet in the center. If you use an instant-read thermometer, the center of a fully baked yeast bread will generally be around 190–200°F. Remove from the oven and let the breads rest in their dishes for a few minutes.
8. Cool Briefly and Serve
Carefully remove the focaccia from the dishes and place on a wire rack. Let it cool for several more minutes before slicing or tearing so the interior has time to set. Serve warm, with a little extra olive oil if desired.
Tips for Soft, Golden Focaccia
Embrace the Sticky Dough
A focaccia dough can feel wetter than other bread doughs. That moisture helps create a tender result. Use oil on your hands and tools, and resist adding large amounts of flour during shaping. Adding too much extra flour can make the mini breads heavy.
Let the Dough Rise Until Puffy
Rising times are estimates. If your kitchen is cool, the dough may need longer than 90 minutes; if it is warm, it may be ready sooner. Look for a soft, inflated appearance and a noticeable increase in volume.
Don’t Skip the Second Rest
The dough is gently handled when it is divided, which releases some gas. The second rise gives it time to become puffy again before dimpling and baking. If the dough springs back while shaping, a short pause helps it relax.
Oil the Pans
A light coating on the bottom and sides helps the breads release and gives the edges a chance to turn golden. Different pans brown at different rates, so check the first batch a few minutes before the suggested end time.
Dimple Gently
Use the pads of your fingertips rather than poking with your nails. Press into the dough enough to form visible indentations, but avoid aggressively flattening the entire surface. Some of the bubbles may deflate; the dough can still bake up tender.
Flavor Variations
Garlic Rosemary Focaccia
Mix the optional garlic powder into the topping oil as directed. For a milder garlic flavor, start with a pinch. Garlic powder is convenient in this short bake and spreads evenly across the top.
Olive and Rosemary
Add a few thin slices of drained Kalamata olives to each mini focaccia before baking. Gently press them into the dimples so they stay in place. Olives are salty, so reduce the flaky salt if desired.
Parmesan and Black Pepper
Sprinkle a small amount of finely grated Parmesan over the tops with black pepper before baking. Watch the bread near the end, as cheese can brown quickly. Taste before adding the full amount of flaky salt.
Tomato and Herb
Press a few thin, patted-dry cherry tomato halves into the dough along with the rosemary. Avoid overloading the small breads; excess moisture and toppings can make the centers harder to bake through. Refrigerate tomato-topped leftovers promptly rather than treating them like plain bread.
Different Herbs
Try fresh thyme or a small amount of oregano in place of rosemary. Tender fresh herbs can darken in the oven, so reserve a little for sprinkling over the warm bread if you want a fresher flavor.
Plain Olive Oil and Salt
Skip the rosemary and garlic for a simple focaccia that pairs with almost anything. Good olive oil and a light sprinkle of flaky salt give the small breads plenty of character on their own.
What to Serve With Mini Focaccia
A warm mini focaccia is a natural partner for tomato soup, vegetable soup, or a bowl of creamy beans. It is also delicious alongside a crisp green salad, pasta, or a small antipasto plate with olives, cheese, and roasted peppers.
For dipping, pour a little olive oil into a shallow dish and add black pepper or a pinch of dried herbs. If you prefer a sandwich, allow the focaccia to cool until the center is set, then slice it horizontally. Fill it with sliced mozzarella and tomato, roasted vegetables, turkey, or your favorite sandwich ingredients.
These breads are small, so use a light hand with wet fillings to keep the crumb from becoming soggy. Toasting the cut sides first can add a little crunch.
Storage and Reheating
Best fresh: Focaccia is at its softest inside and crispest at the edges on the day it is baked. Let it cool briefly before serving.
Room temperature: Cool plain rosemary focaccia completely, then store it in an airtight container or bag for up to 2 days. Keeping it covered helps prevent drying, although the crust will soften. Perishable toppings can change the storage requirements.
Refrigerator: Plain focaccia can be refrigerated for up to 3 days, but it may firm and stale more quickly. Keep it well wrapped. Refrigerate breads with perishable toppings, such as cheese or fresh tomato, promptly in a covered container.
Freezer: Wrap completely cooled breads well and freeze in a freezer-safe bag for up to 2 months for best quality. Thaw at room temperature, then warm before serving.
Reheat: Warm in a 350°F oven for about 5–8 minutes, or until heated through. A few extra minutes may be needed for a thicker bread. Avoid overheating, which can dry out the crumb.
Troubleshooting
My Dough Is Very Sticky
Sticky dough is expected. Oil your fingers, spoon, and baking dishes rather than adding large quantities of flour. If the dough seems unusually loose, check that the flour and water were measured correctly. Allow it to rest; flour absorbs water as it sits.
My Dough Isn’t Rising
Give it more time if the room is cool. If it remains unchanged after a longer wait, check the yeast’s freshness and the temperature of the water used. Water that is too hot can damage yeast, and old yeast may not be active. Start again with fresh yeast if there is no visible activity.
The Dough Keeps Springing Back
Cover it and allow it to rest for 5–10 minutes. The dough should relax and become easier to stretch gently. Do not force it to fill the dish; it will spread somewhat as it rests and rises.
The Top Is Brown but the Center Is Wet
The dish may be too narrow or deep, or the oven may brown the surface faster than the center cooks. Cover the top loosely with foil and continue baking, checking the center regularly. Next time, use a wider dish or make the bread a little thinner.
The Bread Is Dense
Dense focaccia can result from too much flour, insufficient rising, or pressing most of the gas out while shaping. Measure flour lightly, let the dough become puffy, and handle it gently. Yeast freshness and kitchen temperature also affect the result.
The Bread Stuck to the Pan
Oil the bottom and sides thoroughly next time and let the bread rest for a few minutes before removing it. Run a thin spatula carefully around the edge if needed. A parchment round on the bottom can help with pans that regularly stick.
Frequently Asked Questions
Is focaccia supposed to be sticky before baking?
Yes. Focaccia dough is often soft and sticky because it contains a relatively generous amount of water. This small-batch dough should be stirrable and soft rather than firm enough to knead like a traditional sandwich loaf.
Can I use active dry yeast?
Yes. Follow the yeast package directions for dissolving it in a portion of the recipe’s lukewarm water before mixing. Rising may take longer, so look for a puffy dough rather than relying only on the suggested times.
Can I make one larger focaccia instead of two mini breads?
Yes. Transfer all the dough to a small oiled baking dish and follow the same second-rise and topping steps. The baking time will depend on the dish and thickness. Check that the center is fully baked before removing it from the oven.
Can I use dried rosemary?
Yes. Start with about 1/3 teaspoon dried rosemary in place of 1 teaspoon fresh, crushing it lightly to release its aroma. Adjust to your preference.
Can I double the recipe?
You can double the ingredients to make four mini breads. Use a large enough bowl for the dough to rise, and avoid crowding the baking dishes in the oven. Bake in batches if needed so hot air can circulate.
Can I use the bread for sandwiches?
Yes. Cool the focaccia enough for the crumb to set, then slice it horizontally with a serrated knife. The finished height depends on your dishes, so thicker breads are easiest to split.
How many calories are in each mini focaccia?
The original recipe estimates approximately 300–350 calories per bread. Actual values depend on the flour, the olive oil absorbed from the pans, and any toppings. Divide the values from your ingredient labels by two for an estimate suited to your batch.
Print
Easy Mini Rosemary Olive Oil Focaccia
Description
Prep time: 10 minutes
Rise time: 80–120 minutes
Bake time: 15–20 minutes
Yield: 2 mini focaccia breads
Ingredients
Dough
- 1 cup all-purpose flour
- 1/2 teaspoon instant yeast
- 1/4 teaspoon salt
- 1/2 teaspoon honey
- 1/2 cup lukewarm water
- 1 tablespoon extra-virgin olive oil, plus a little for the dishes
Topping
- 1 tablespoon extra-virgin olive oil
- 1 teaspoon finely chopped fresh rosemary
- 1/4 teaspoon flaky sea salt
- 1/4 teaspoon garlic powder, optional
- Freshly cracked black pepper, optional
Instructions
- In a medium bowl, combine the flour, instant yeast, and salt. Add the honey, lukewarm water, and 1 tablespoon olive oil. Stir until a sticky, shaggy dough forms and no dry flour remains.
- Cover and let rise in a warm place for 60–90 minutes, or until noticeably puffy and nearly doubled.
- Lightly oil two small oven-safe dishes. With oiled hands, divide the dough and gently stretch one portion into each dish. If it springs back, rest it for 5 minutes and try again.
- Cover loosely and let rise for 20–30 minutes, until soft and puffy. Meanwhile, preheat the oven to 425°F.
- Mix the topping oil, rosemary, and optional garlic powder. Drizzle over the dough, then press gentle dimples into the surface with oiled fingertips. Sprinkle with flaky salt and optional black pepper.
- Bake for 15–20 minutes, until golden and cooked through. Rest in the dishes for a few minutes, transfer to a wire rack, and cool briefly before serving.
Storage: Cool completely and store plain focaccia covered at room temperature for up to 2 days, or freeze well wrapped for up to 2 months. Reheat at 350°F for 5–8 minutes. Refrigerate promptly if using perishable toppings.