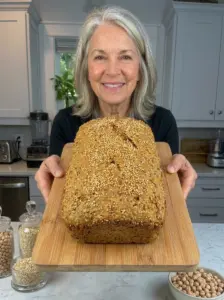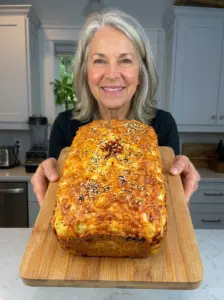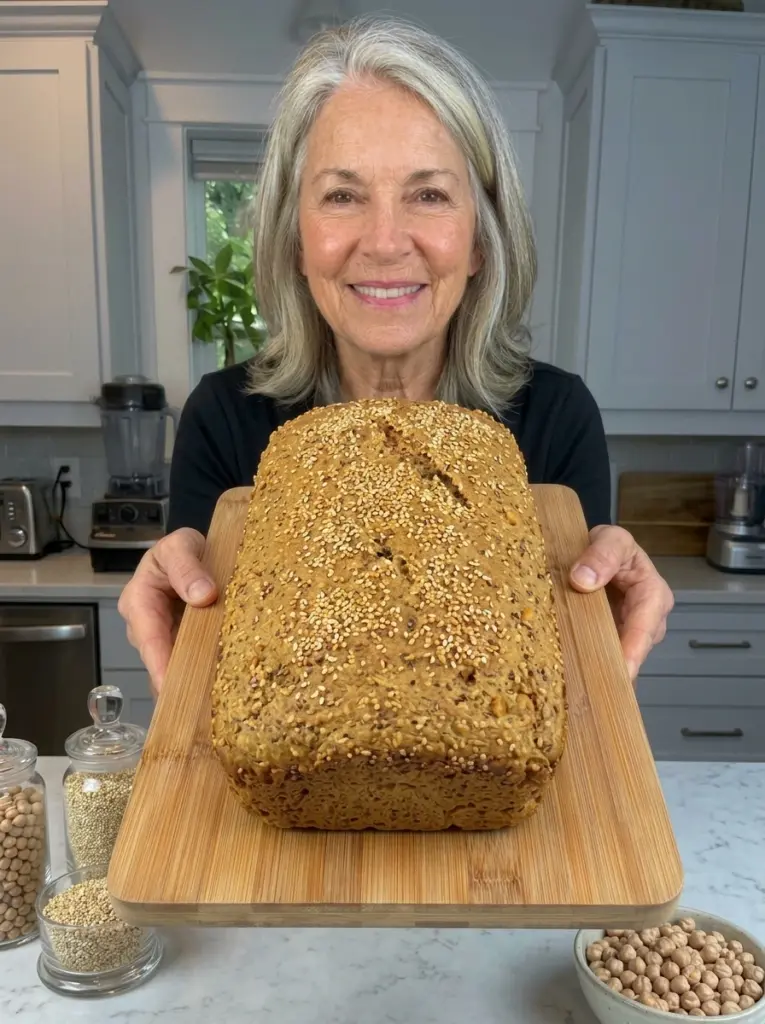
This Quinoa Chickpea Bread is hearty, tender, and packed with wholesome ingredients. Made with soaked chickpeas and nutty quinoa, plus eggs, olive oil, and simple seasonings, it bakes into a satisfying flourless loaf that’s perfect for toast, open-faced sandwiches, or your favorite savory toppings.
Unlike conventional bread, this recipe doesn’t require traditional flour, yeast, kneading, or proofing. The soaked chickpeas and quinoa are blended directly into a thick batter, making the process surprisingly straightforward once the soaking is complete.
Chickpeas provide a hearty base and mild earthy flavor, while quinoa contributes its characteristic nuttiness and helps give the loaf substance. Eggs provide structure, olive oil adds tenderness, and baking powder gives the bread some lift as it bakes.
Once completely cooled, the loaf slices beautifully and is especially delicious toasted with avocado, hummus, eggs, cottage cheese, or other savory toppings.
Let’s dive into everything you need to know to make this easy Quinoa Chickpea Bread.
Why You’ll Love This Quinoa Chickpea Bread
Made with whole chickpeas and quinoa. Instead of traditional flour, the bread begins with soaked chickpeas and quinoa.
Protein-rich ingredients. Chickpeas, quinoa, and eggs all contribute protein to the finished loaf.
No yeast required. Baking powder provides the leavening, so there’s no proofing or waiting for dough to rise.
No kneading. Once the ingredients are soaked, everything gets blended into a batter.
Hearty and satisfying. Chickpeas and quinoa create a substantial loaf that’s particularly good for savory meals.
Excellent toasted. Toasting creates lightly crisp edges while keeping the center tender.
Versatile flavor. The mild, nutty base pairs well with avocado, hummus, eggs, cheese, vegetables, and herbs.
Freezer-friendly. Slice and freeze the cooled loaf for convenient individual portions.
Ingredients You’ll Need
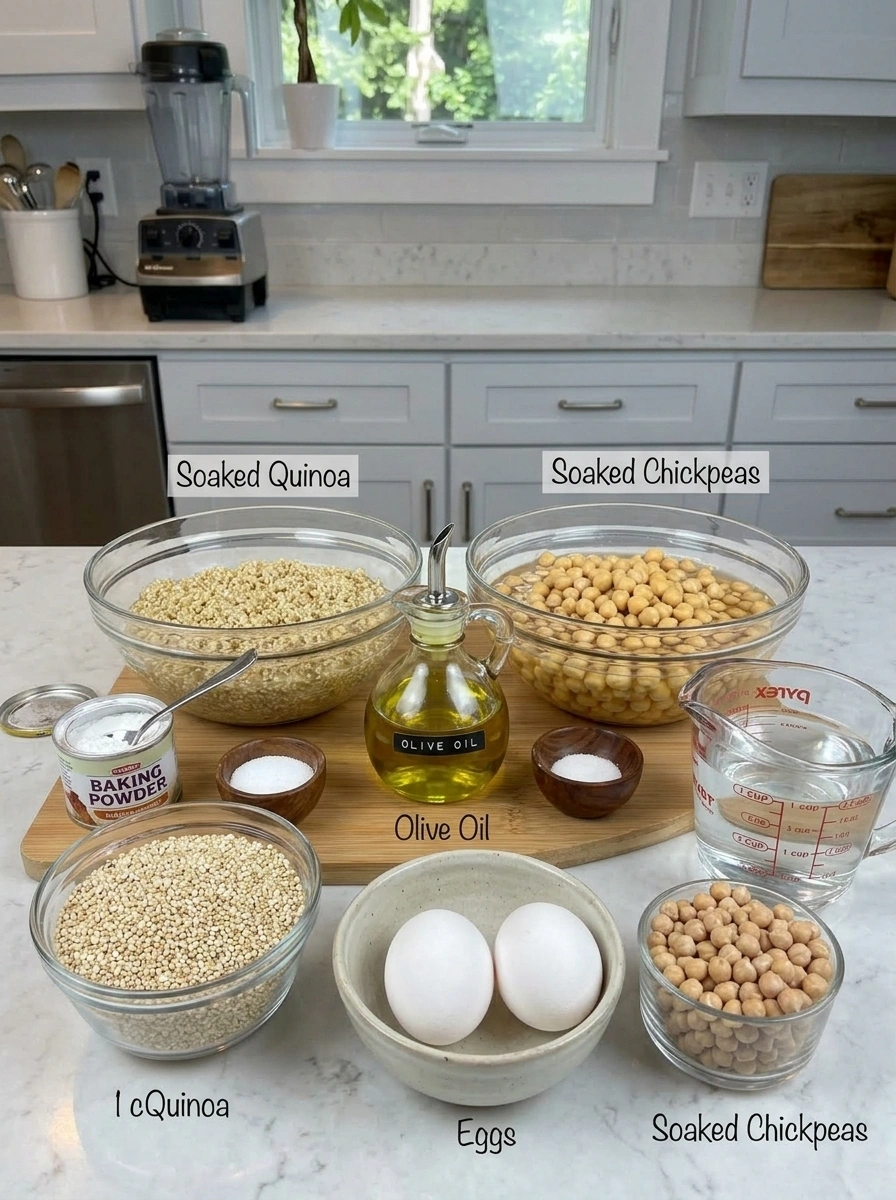
Here’s what you’ll need and why each ingredient matters:
- 1 cup dry chickpeas, soaked overnight — Chickpeas create much of the body and structure while adding an earthy, nutty flavor and plant-based protein.
- 1 cup uncooked quinoa, rinsed and soaked for 4–6 hours — Adds substance, mild nuttiness, and additional protein.
- 1 cup water — Provides the moisture needed to blend the soaked chickpeas and quinoa into a thick batter.
- 2 large eggs — Help bind the ingredients together and provide structure as the bread bakes.
- 1 tablespoon olive oil — Adds richness and helps create a more tender texture.
- 1 teaspoon baking powder — Provides leavening so the loaf isn’t excessively dense.
- ½ teaspoon salt — Enhances the natural flavor of the chickpeas and quinoa.
How to Make Quinoa Chickpea Bread
Step 1: Soak the Chickpeas
Place 1 cup dry chickpeas in a large bowl and cover generously with water.
The chickpeas will expand significantly as they hydrate, so make sure they’re covered by several inches of water.
Soak them overnight.
For this recipe, the soaked chickpeas are drained and blended without first being boiled.
Step 2: Rinse and Soak the Quinoa
Place 1 cup uncooked quinoa in a separate bowl.
Rinse it thoroughly, then cover it with plenty of fresh water.
Allow the quinoa to soak for 4–6 hours.
Rinsing quinoa thoroughly is helpful for removing much of the naturally occurring saponin coating that can contribute bitterness.
Step 3: Drain Thoroughly
Drain the chickpeas and quinoa separately.
Rinse both very well under cool running water.
Allow them to drain thoroughly for several minutes.
This is important because excess soaking water can alter the consistency of the batter.
Step 4: Prepare the Oven and Pan
Preheat your oven to 350°F (175°C).
Line a small loaf pan with parchment paper and lightly grease the exposed sides.
The parchment makes it much easier to remove the finished loaf.
Step 5: Blend the Batter
Add the drained soaked chickpeas and quinoa to a high-speed blender.
Add:
- 1 cup water
- 2 large eggs
- 1 tablespoon olive oil
- 1 teaspoon baking powder
- ½ teaspoon salt
Blend until you have a thick, mostly smooth batter.
Stop the blender and scrape down the sides as necessary.
Continue blending until there are no large pieces of chickpea remaining.
Step 6: Fill the Loaf Pan
Pour the batter into your prepared loaf pan.
Use a spatula to spread it evenly and smooth the surface.
If desired, you can sprinkle seeds over the top before baking.
Step 7: Bake
Bake for 50–60 minutes.
The bread should become firm through the center and lightly colored on top.
Insert a toothpick into the middle. It should come out clean without wet batter attached.
Because loaf pans and ovens vary, begin checking around the 50-minute mark.
Step 8: Cool in the Pan
Remove the bread from the oven and let it rest in the pan for approximately 10–15 minutes.
This gives the loaf time to begin setting before it’s moved.
Step 9: Cool Completely
Carefully remove the loaf from the pan and transfer it to a wire rack.
Allow it to cool completely before slicing.
This step is particularly important with chickpea- and quinoa-based bread because the interior continues to firm as it cools.
Step 10: Slice and Serve
Use a sharp serrated knife to cut the cooled loaf into approximately 10 slices.
Enjoy as-is or toast the slices for a firmer, lightly crisp exterior.
Recipe Notes
Use dry chickpeas: This particular recipe is formulated around dry chickpeas that have been soaked overnight rather than canned chickpeas.
Soak the chickpeas thoroughly: Overnight soaking hydrates and softens them enough for blending.
Rinse the quinoa well: Thorough rinsing helps remove its naturally bitter-tasting saponin coating.
Drain everything thoroughly: The recipe already contains a measured cup of water, so excess soaking liquid can make the batter too wet.
Use a high-speed blender: Chickpeas are firmer than cooked beans, so a powerful blender makes achieving the intended batter much easier.
Blend thoroughly: Large pieces of chickpea can interfere with the texture of the finished loaf.
Don’t skip the baking powder: It helps provide lift to this otherwise substantial batter.
Cool completely: Cutting the bread while hot can make the center appear wetter or more fragile.
How to Serve Quinoa Chickpea Bread
This hearty bread works particularly well with savory toppings.
- Top with mashed avocado
- Serve with fried, scrambled, or poached eggs
- Spread generously with hummus
- Add cottage cheese and black pepper
- Spread with cream cheese and herbs
- Top with sliced tomatoes
- Add cucumber and feta
- Spread with pesto
- Serve with tuna or chicken salad
- Use for open-faced sandwiches
- Pair with vegetable soups
- Serve alongside salads
- Top with roasted vegetables
- Drizzle toasted slices with olive oil
- Serve with a Mediterranean-style bean salad
For breakfast, toasted Quinoa Chickpea Bread with avocado and eggs makes a hearty option. For lunch, try hummus, cucumber, tomato, and fresh herbs.
Flavor Variations
Garlic Herb Quinoa Chickpea Bread
Add garlic powder, rosemary, oregano, Italian seasoning, or black pepper to the batter.
Seeded Quinoa Chickpea Bread
Sprinkle sesame, sunflower, pumpkin, or flax seeds over the top before baking.
Mediterranean Chickpea Bread
Add oregano, garlic powder, black pepper, and a little grated Parmesan if dairy isn’t a concern.
Spicy Chickpea Bread
Add smoked paprika, crushed red pepper flakes, cayenne, or finely minced jalapeño.
Cheesy Quinoa Chickpea Bread
Fold in finely grated Parmesan or shredded cheddar before baking.
Everything Seasoning Bread
Sprinkle everything bagel seasoning over the surface immediately before baking.
Tips for the Best Quinoa Chickpea Bread
Plan for soaking time. Although hands-on preparation is short, the chickpeas need to soak overnight.
Soak chickpeas and quinoa separately. Their required soaking times are different, and keeping them separate makes draining and rinsing easier.
Drain thoroughly. Too much residual soaking water can change the batter consistency.
Use fresh water for blending. Discard the soaking liquid and use the measured 1 cup fresh water listed in the recipe.
Blend until mostly smooth. Give the blender enough time to break down the soaked chickpeas.
Scrape the blender sides. Dense batter can collect around the sides, so stop and scrape as necessary.
Use a smaller loaf pan. This helps create a loaf with enough height for useful slices.
Check the center for doneness. A browned surface doesn’t necessarily mean the middle has fully baked.
Don’t rush cooling. The bread’s texture improves substantially as it cools and sets.
Toast leftover slices. Toasting is an excellent way to refresh refrigerated bread.
Is Quinoa Chickpea Bread High in Protein?
This bread uses several naturally protein-containing ingredients, including chickpeas, quinoa, and eggs.
Chickpeas provide plant-based protein and fiber, while quinoa contributes additional protein and other nutrients. Eggs add more protein while also providing important structural support to the loaf.
However, the precise protein content per slice will depend on your ingredients and how large you cut each serving.
If you’re monitoring protein intake closely, calculate the nutrition using the exact ingredient labels and final number of slices.
Is Quinoa Chickpea Bread Gluten-Free?
The ingredients listed in this recipe—chickpeas, quinoa, eggs, olive oil, baking powder, salt, and water—don’t inherently require wheat flour.
However, if you’re making the bread for someone with celiac disease or another medical need to strictly avoid gluten, use quinoa, baking powder, and other packaged ingredients that are labeled or otherwise verified gluten-free, and avoid problematic cross-contact during preparation.
Make-Ahead Instructions
Quinoa Chickpea Bread is well suited to meal preparation.
Bake the loaf according to the recipe and allow it to cool completely.
Slice it into individual portions and store them in an airtight container in the refrigerator.
When you’re ready to serve, toast individual slices until the edges are lightly crisp and the center is warmed through.
For longer storage, freeze individual slices so you can remove only what you need.
Storage Information
Allow the loaf to cool completely before storing.
Transfer the bread to an airtight container and refrigerate for up to 4 days.
For longer storage, cut the loaf into individual slices. Separate the pieces with parchment paper if desired, then place them in an airtight freezer bag or freezer-safe container.
Freeze for up to 2 months.
Thaw the desired number of slices before serving, then toast for the best texture.
Frequently Asked Questions
Do I need to cook the chickpeas before making this bread?
For this specific recipe, no. It is designed around dry chickpeas that are soaked overnight, thoroughly drained and rinsed, blended into the batter, and then fully baked. Do not use completely dry, unsoaked chickpeas.
Can I use canned chickpeas instead?
Canned chickpeas contain considerably more moisture and have already been cooked, so they aren’t a direct one-for-one substitute in this particular formula. A recipe specifically formulated for canned chickpeas would give more predictable results.
Why do I need to soak the quinoa?
Soaking softens the quinoa and helps it blend into the batter more effectively.
Why should I rinse quinoa before soaking it?
Quinoa naturally contains saponins on its outer surface, which can contribute a bitter or soapy flavor. Thorough rinsing helps remove them.
Can I skip soaking the chickpeas?
No. Completely dry chickpeas are too hard for this preparation. The overnight soaking step is essential to this recipe.
Why did my bread turn out wet in the middle?
Possible causes include insufficient draining, too much water, inadequate baking time, or slicing the loaf before it had completely cooled.
Why does the bread need to cool completely?
The crumb continues to set during cooling. Slicing too early can result in fragile or overly moist pieces.
Can I add herbs and seasonings?
Yes. Garlic powder, rosemary, oregano, black pepper, smoked paprika, Italian seasoning, and red pepper flakes all pair nicely with chickpeas and quinoa.
Can I add seeds?
Absolutely. Sesame, sunflower, pumpkin, and flax seeds are excellent options for the top of the loaf.
What’s the best way to serve leftover Quinoa Chickpea Bread?
Toast it. Toasting firms the surface and warms the center, making refrigerated slices especially good with avocado, hummus, eggs, cottage cheese, or other savory toppings.
Recipe Card
Recipe: Quinoa Chickpea Bread (Gluten-Free) 🌱🍞💪
Prep Time: 15 minutes
Chickpea Soaking Time: Overnight
Quinoa Soaking Time: 4–6 hours
Cook Time: 50–60 minutes
Cooling Time: 10–15 minutes in the pan, plus complete cooling
Total Active + Baking Time: About 1 hour 10 minutes, plus soaking and final cooling
Servings: Approximately 10 slices
Calories: Approximately 150 per serving, depending on exact ingredients and portion size
Oven Temperature: 350°F (175°C)
Method: Soak, blend, and bake
Main Ingredients: Chickpeas, quinoa, eggs, olive oil, and baking powder
Storage: Refrigerate for up to 4 days or freeze for up to 2 months
This Quinoa Chickpea Bread combines nutty quinoa and hearty chickpeas into a satisfying homemade loaf without traditional flour or yeast. Eggs provide structure, olive oil adds tenderness, and baking powder gives the dense whole-food batter enough lift to create a sliceable bread.
Once completely cooled, the loaf is versatile enough for breakfast, lunch, or snacks. Toast a slice and top it with avocado and eggs, spread it generously with hummus, add cottage cheese and herbs, or turn it into a savory open-faced sandwich.
With protein-containing chickpeas, quinoa, and eggs at its foundation, this hearty gluten-free Quinoa Chickpea Bread is a simple and satisfying loaf to bake, slice, toast, and enjoy throughout the week.
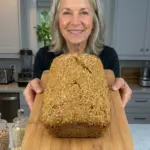
Quinoa Chickpea Bread (Gluten-Free)
- Author: Luna
Ingredients
Here’s what you’ll need and why each ingredient matters:
- 1 cup dry chickpeas, soaked overnight — Chickpeas create much of the body and structure while adding an earthy, nutty flavor and plant-based protein.
- 1 cup uncooked quinoa, rinsed and soaked for 4–6 hours — Adds substance, mild nuttiness, and additional protein.
- 1 cup water — Provides the moisture needed to blend the soaked chickpeas and quinoa into a thick batter.
- 2 large eggs — Help bind the ingredients together and provide structure as the bread bakes.
- 1 tablespoon olive oil — Adds richness and helps create a more tender texture.
- 1 teaspoon baking powder — Provides leavening so the loaf isn’t excessively dense.
- ½ teaspoon salt — Enhances the natural flavor of the chickpeas and quinoa.
Instructions
Step 1: Soak the Chickpeas
Place 1 cup dry chickpeas in a large bowl and cover generously with water.
The chickpeas will expand significantly as they hydrate, so make sure they’re covered by several inches of water.
Soak them overnight.
For this recipe, the soaked chickpeas are drained and blended without first being boiled.
Step 2: Rinse and Soak the Quinoa
Place 1 cup uncooked quinoa in a separate bowl.
Rinse it thoroughly, then cover it with plenty of fresh water.
Allow the quinoa to soak for 4–6 hours.
Rinsing quinoa thoroughly is helpful for removing much of the naturally occurring saponin coating that can contribute bitterness.
Step 3: Drain Thoroughly
Drain the chickpeas and quinoa separately.
Rinse both very well under cool running water.
Allow them to drain thoroughly for several minutes.
This is important because excess soaking water can alter the consistency of the batter.
Step 4: Prepare the Oven and Pan
Preheat your oven to 350°F (175°C).
Line a small loaf pan with parchment paper and lightly grease the exposed sides.
The parchment makes it much easier to remove the finished loaf.
Step 5: Blend the Batter
Add the drained soaked chickpeas and quinoa to a high-speed blender.
Add:
- 1 cup water
- 2 large eggs
- 1 tablespoon olive oil
- 1 teaspoon baking powder
- ½ teaspoon salt
Blend until you have a thick, mostly smooth batter.
Stop the blender and scrape down the sides as necessary.
Continue blending until there are no large pieces of chickpea remaining.
Step 6: Fill the Loaf Pan
Pour the batter into your prepared loaf pan.
Use a spatula to spread it evenly and smooth the surface.
If desired, you can sprinkle seeds over the top before baking.
Step 7: Bake
Bake for 50–60 minutes.
The bread should become firm through the center and lightly colored on top.
Insert a toothpick into the middle. It should come out clean without wet batter attached.
Because loaf pans and ovens vary, begin checking around the 50-minute mark.
Step 8: Cool in the Pan
Remove the bread from the oven and let it rest in the pan for approximately 10–15 minutes.
This gives the loaf time to begin setting before it’s moved.
Step 9: Cool Completely
Carefully remove the loaf from the pan and transfer it to a wire rack.
Allow it to cool completely before slicing.
This step is particularly important with chickpea- and quinoa-based bread because the interior continues to firm as it cools.
Step 10: Slice and Serve
Use a sharp serrated knife to cut the cooled loaf into approximately 10 slices.
Enjoy as-is or toast the slices for a firmer, lightly crisp exterior.