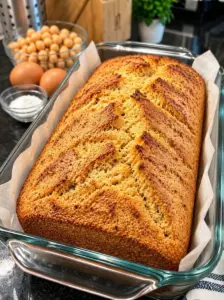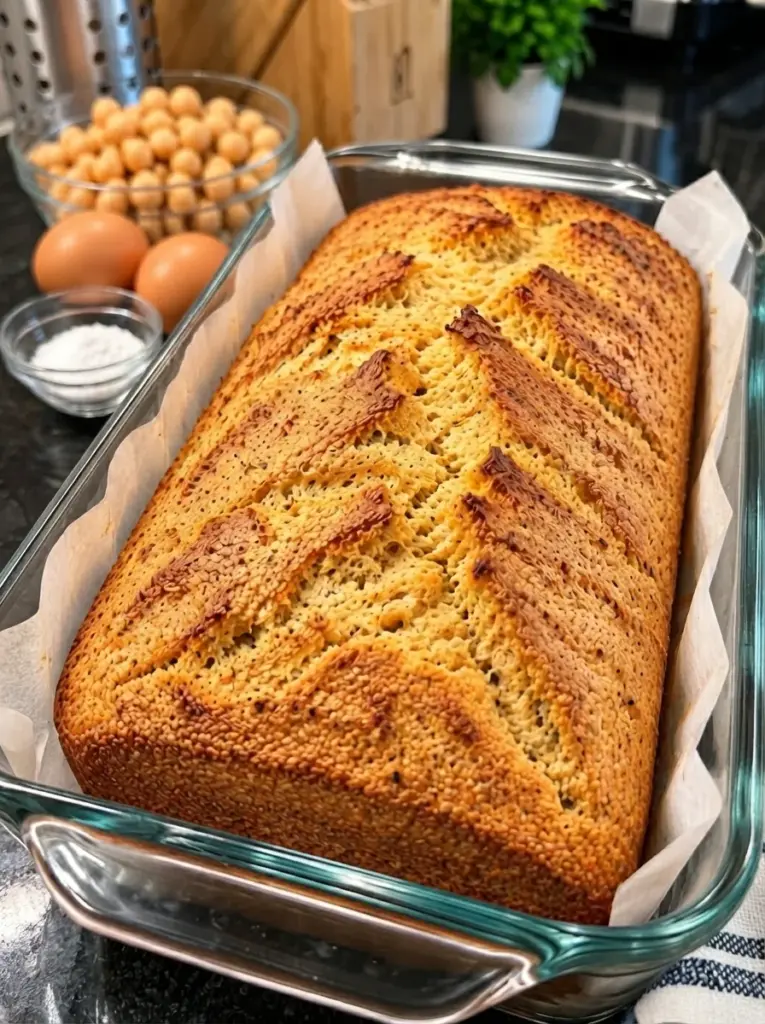
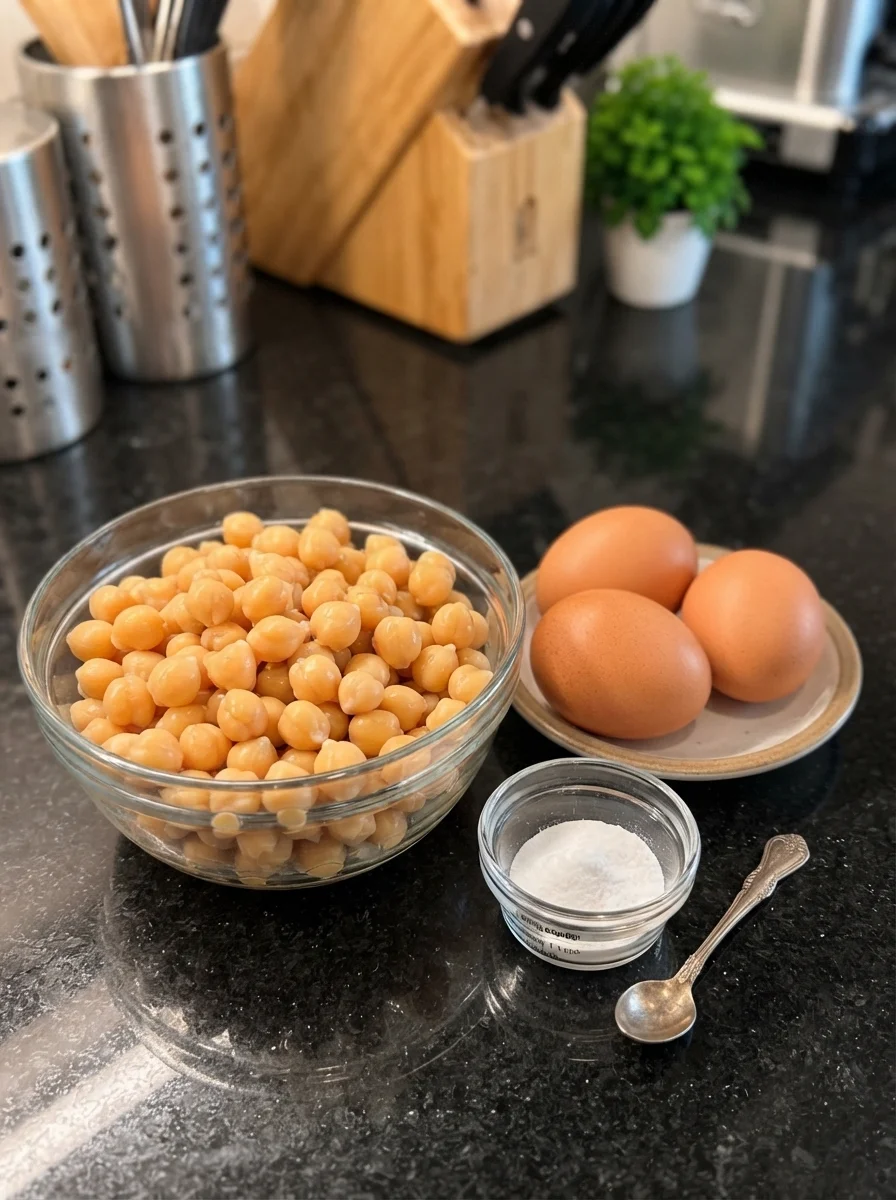
A can of chickpeas, three eggs, and a teaspoon of baking powder make the base of this simple flourless loaf. There is no yeast, kneading, or rising stage. The ingredients are blended into a batter, baked in a small pan, and cooled before slicing.
The loaf has a mild chickpea flavor and a moist, close-grained interior. Light toasting gives the surfaces a firmer finish, making small slices useful for breakfast, open-faced sandwiches, or a savory snack.
It is important to set realistic expectations. This formula contains no flour, starch addition, or gluten network, so it will not produce a tall, fluffy loaf like conventional sandwich bread. Expect a small, compact, egg-bound loaf with some lift during baking and possible settling afterward.
The method below expands the supplied recipe. It has not been independently kitchen-tested, and the finished texture will depend on the chickpeas, drainage, blender, pan, and oven.
What Makes This Recipe Simple
Canned chickpeas are already cooked, so there is no soaking or separate bean-cooking stage. Eggs supply moisture and binding, while baking powder provides a modest amount of lift.
The batter comes together in a blender or food processor. The most useful preparation steps are draining thoroughly and blending finely; neither requires complicated bread-making skills.
Cooling is part of the process rather than an optional pause. A hot loaf may feel fragile or seem gummy even when its structure improves after cooling. Plan enough time before you need sandwich slices.
Recipe Overview
| Detail | Guide |
|---|---|
| Yield | 1 small, low loaf |
| Portions | Approximately 8 small slices |
| Main ingredients | Cooked canned chickpeas, eggs, baking powder |
| Pan | 8 × 4-inch loaf pan |
| Oven | 350°F |
| Preparation | About 10 minutes |
| Baking | Approximately 40–50 minutes, checking earlier if shallow |
| Cooling | About 45–60 minutes, or until completely cool |
| Total | Approximately 1 hour 35 minutes to 2 hours |
| Texture | Moist, dense, tender, and best lightly toasted |
Ingredients
- 1 can chickpeas, 15 ounces, drained and rinsed
- 3 large eggs
- 1 teaspoon baking powder
Use parchment to line the pan. A little oil for exposed corners is a preparation aid; include it when calculating nutrition if used in a meaningful quantity.
The 15-ounce measurement refers to the original can, including its packing liquid. Use the drained contents of one can rather than measuring 15 ounces of drained chickpeas, which would increase the bean proportion.
Ingredient Notes
Chickpeas
Use plain canned chickpeas, also called garbanzo beans. Avoid flavored or heavily seasoned varieties for the basic loaf.
Drain the packing liquid, rinse, and pat away loose surface water. There is no need to squeeze the chickpeas dry or remove their natural internal moisture.
Skins can remain if your blender processes them finely. Removing every skin is time-consuming and not required by the supplied recipe. If a few loosen during rinsing, discard them if convenient.
Dry uncooked chickpeas are not a substitute. They need proper separate preparation and cooking; this baking schedule is designed for chickpeas that are already cooked.
Eggs
Three large eggs help bind the puree and set it into a sliceable form. They also contribute much of the loaf’s protein.
This recipe is not entirely plant-based, even though chickpeas are its main pantry ingredient. An egg substitute would change the structure substantially and needs a separately developed method.
Expect some egg flavor, especially while warm. Savory toppings and light browning during toasting can complement it.
Baking powder
Baking powder supplies lift but cannot replace the structural role of flour. A little expansion followed by some settling is possible.
Measure one level teaspoon and use a fresh product. Extra baking powder is not a reliable solution to a compact loaf and can leave a bitter or chemical taste.
Baking soda is not an equal replacement. Use baking powder as listed.
Equipment
You will need a blender or food processor, a strainer, a clean towel, an 8 × 4-inch loaf pan, parchment, a spatula, and a cooling rack. A serrated knife helps make neat slices without pressing straight down through the loaf.
A metal pan is a practical starting point. A larger pan produces a lower loaf and may shorten baking time. Glass, ceramic, and silicone can also change browning and heating, so do not assume every pan behaves identically.
Prepare the pan before blending so the batter can be baked promptly after the leavener is incorporated.
How to Make Chickpea Sandwich Bread
1. Heat the oven and line the pan
Preheat to 350°F. Line an 8 × 4-inch loaf pan with parchment, leaving overhang along the long sides for lifting.
Lightly grease exposed ends if needed. This moist batter may cling to an unprepared pan, and forcing it out can damage the loaf.
2. Drain and rinse the chickpeas
Pour the can into a strainer and rinse under cool running water. Shake gently, then spread the chickpeas on a clean towel and pat lightly to remove surface water.
Do not add aquafaba or reserved can liquid to the batter. The three eggs provide the listed liquid, and extra water can make setting more difficult.
3. Blend the chickpeas and eggs
Place the chickpeas and eggs in the blender or food processor. Process until very smooth, stopping to scrape down the sides as necessary.
The batter should be thick but able to move and pour slowly. Large chickpea pieces can create coarse patches and weak points in the finished slices.
If the blender struggles, stop, scrape, and restart according to its operating guidance. A food processor may handle a thick mixture better than a blender that needs a large volume of liquid to circulate. Do not automatically thin the mixture with water.
Do not taste the raw egg batter. Judge smoothness visually and by spreading a little between clean utensils if needed.
4. Add baking powder
Add the baking powder and blend briefly to distribute it evenly. Avoid a prolonged mixing session after this step.
Check the bottom and sides with a spatula so no concentrated pocket of powder remains. Pour the batter into the prepared pan promptly.
5. Fill and smooth
Scrape the batter into the pan and smooth the surface. Tap lightly once or twice to release large bubbles.
The batter will not fill the pan as deeply as a large wheat loaf dough. A low starting level is expected from this small quantity of ingredients. Do not add unmeasured chickpeas simply to make the pan look fuller.
6. Bake until fully set
Bake approximately 40–50 minutes, beginning to check around 35 minutes if the batter is shallow or the pan browns quickly.
The top should look set and lightly golden. A toothpick inserted into the center should not carry wet batter or raw paste. Some moisture is normal in a bean-based loaf, but a liquid or smearing interior needs more cooking.
For an egg-containing dish, the center should reach at least 160°F. That minimum is not a guarantee of ideal loaf texture: also check that the center has set and the skewer is free of wet batter.
If the top darkens early, tent loosely with foil and continue baking. Do not remove an underdone loaf simply because the surface has browned.
7. Cool in stages
Rest the loaf in its pan for about 10 minutes. Lift it onto a rack using the parchment handles, then loosen the paper from the sides so steam can escape.
Let cool completely, approximately 45–60 minutes or longer if needed. The center needs this time to firm enough for cleaner slicing.
Some shrinkage may occur. A large collapse with a wet middle suggests excess moisture or incomplete baking rather than a need for more baking powder.
8. Slice gently
Use a serrated knife with a light sawing motion. Support the loaf and cut about eight small slices without pressing down hard.
If the bread is especially delicate, refrigerating the cooled loaf before slicing may help handling. It will still have a compact, moist texture.
9. Toast and serve
Warm slices in a skillet, toaster oven, or oven tray until the surfaces firm and brown lightly. These methods support fragile slices better than a pop-up toaster.
Use a pop-up toaster only if your slices are sturdy enough to insert and retrieve safely. Do not force soft pieces into narrow slots.
Serve with modest toppings and eat shortly after assembly. Prolonged contact with watery fillings can soften the bread.
Tips for the Best Texture
Drain before adjusting anything else
Loose rinse water changes the batter. Remove it before blending rather than trying to solve a wet mixture by guessing at added ingredients.
Blend thoroughly
A fine puree gives a more even crumb. Stop and scrape so chickpeas above the blades are included rather than leaving visible chunks.
Keep the first batch plain
Adding cheese, vegetables, or extra liquids makes it harder to judge the basic formula. Try the supplied proportions before experimenting.
Allow full cooling
The original preparation-and-baking estimate does not include complete cooling. Add that time when planning a meal.
Use gentle browning
Toasting can improve the surfaces, but very high heat may burn the outside while the center remains cold. Moderate heat is easier to control.
Troubleshooting
| Problem | Possible reason | Adjustment |
|---|---|---|
| Loaf is low | Small batter volume and flourless structure | Expect a small loaf and use the specified pan |
| Center seems gummy | Extra water, incomplete baking, or early slicing | Drain thoroughly, bake until set, and cool fully |
| Texture is gritty | Chickpeas were not finely processed | Blend longer in intervals and scrape the bowl |
| Slices crumble | Loaf warm, center under-set, or rough cutting | Cool completely and use a serrated knife |
| Bread sticks | Insufficient pan preparation | Line with parchment and lift after the initial rest |
| Flavor is too eggy | High proportion of eggs in a simple formula | Toast and pair with savory toppings |
| Bitter taste | Too much or unevenly mixed baking powder | Measure level and distribute evenly |
| Top browns before center sets | Strong top heat or pan differences | Cover loosely and continue baking as needed |
A compact texture does not automatically mean the recipe failed. The absence of wheat flour sets limits on the height, stretch, and crumb that these three ingredients can produce.
Optional Flavor Variations
Each addition increases the ingredient count. Keep quantities modest so the small loaf is not overwhelmed.
Salt and herbs
Add a small pinch of salt and ½ teaspoon dried Italian herbs. Adjust salt with the chickpea label in mind, especially when using salted canned beans.
Garlic
A little garlic powder gives a savory flavor without adding significant liquid. Begin with ¼ teaspoon rather than a large spoonful.
Parmesan
Fold in 1–2 tablespoons finely grated Parmesan for extra flavor. It changes sodium, calories, and browning, so count it separately.
Sesame topping
Scatter a small amount of sesame seeds on the batter before baking. Press lightly so they adhere as the surface sets.
Avoid adding a large quantity of grated zucchini, tomatoes, or other wet ingredients without adapting the formula. This loaf has limited structure to accommodate extra moisture.
Serving Ideas
For breakfast, toast a slice and spread with cream cheese or avocado. A cooked egg or a small portion of cottage cheese can add more protein to the meal.
For lunch, try an open-faced slice with hummus, cucumber, and herbs. Drain sliced vegetables and use a modest amount so the bread is not overloaded.
For a two-slice sandwich, toast both slices and let them stand briefly before assembling. Choose fillings that hold together rather than a large amount of loose salad and thin dressing.
Serve plain toasted pieces beside soup or a savory bean dish. The mild chickpea flavor works best with seasonings and toppings you already enjoy.
Make-Ahead Plan
Bake the loaf ahead, cool completely, and refrigerate. Slice once cool or chilled, then portion for individual meals.
For longer storage, freeze separated slices. This is more convenient than repeatedly thawing a whole loaf to remove one serving.
Prepare the oven and pan before blending. There is no benefit to leaving raw egg batter sitting out while equipment is gathered or the oven preheats.
Storage and Reheating
Refrigerator
Refrigerate this moist egg-and-chickpea loaf after cooling and within 2 hours of baking. Store at 40°F or below in an airtight container and use within 4 days.
Let heavy steam escape on a rack before sealing, while keeping the cooling period short. Condensation inside the container can make the surfaces wetter.
Freezer
Place parchment between cooled slices and seal in a freezer-safe bag or container. Freeze for up to 2 months for best quality.
Thaw portions in the refrigerator or warm carefully from frozen on a supported surface. The texture may become slightly softer after thawing.
Reheating
A skillet or toaster oven gives the most control over fragile slices. Warm gently, turn as needed, and avoid burning the edges.
Microwaving heats the bread but does not create a toasted surface. Use brief intervals if you prefer it soft.
Store filled sandwiches according to their most perishable filling. Plain loaf storage guidance does not override the needs of chicken, cheese spreads, or other toppings.
Nutrition: Checking the Original Estimate
The supplied estimate of 105–115 calories and 6–7 grams protein per slice may overstate the nutrition of eight small slices from one drained can of chickpeas and three eggs.
Depending on the chickpea label and drained yield, the full loaf may contain roughly 550–700 calories and 35–45 grams protein. Divided into eight slices, that is approximately 70–90 calories and 4–6 grams protein per slice.
These are illustrative estimates. Use the labels for your actual ingredients, taking care to distinguish drained beans from beans with liquid, and divide by the number of slices you cut.
The loaf contains carbohydrates from chickpeas and is not keto simply because it is flourless. It provides protein from both chickpeas and eggs, rather than being an exclusively plant-protein recipe.
The basic ingredients do not require wheat flour, but check baking powder and canned-food labels and avoid cross-contact if gluten-free preparation is important.
Frequently Asked Questions
Does this taste like regular sandwich bread?
It has a denser, moister interior and a noticeable chickpea-and-egg character. It can be useful as small toast or sandwich slices, but it will not duplicate a wheat loaf.
Can I use dry chickpeas?
Not directly. The recipe requires already cooked chickpeas. Dry chickpeas need appropriate separate preparation and cooking.
Can I leave out the eggs?
Eggs are a main structural ingredient. An egg-free version needs its own formula rather than simply omitting them.
Can I replace baking powder with baking soda?
No. They do not work identically, and this recipe does not include an adjusted acid-and-soda balance.
Why is the loaf small?
One drained can and three eggs make a modest volume of batter. The recipe is for eight small slices, not eight large commercial sandwich slices.
Can I double it in the same pan?
A much deeper batter can be difficult to bake through evenly. Two small loaves are a more cautious approach, checking each for doneness.
Do I need to remove chickpea skins?
Not if your machine blends them finely. Smoothness matters more than manually peeling every chickpea.
Why is toasting recommended?
It firms and browns the cut surfaces, improving handling and flavor. It cannot correct raw batter in an underbaked loaf, so bake fully first.
Can I add water to help blending?
Extra water changes a moisture-sensitive formula. Try scraping and using a suitable appliance first rather than thinning automatically.
Recipe Card
3-Ingredient Chickpea Sandwich Bread
A small flourless loaf with a moist, close crumb, intended for gentle slicing and light toasting.
Yield: 1 small loaf, about 8 slices
Prep: 10 minutes
Bake: Approximately 40–50 minutes
Cool: Approximately 45–60 minutes or until completely cool
Total: About 1 hour 35 minutes to 2 hours
Oven: 350°F
Pan: 8 × 4 inches
Ingredients
- 1 can chickpeas, 15 ounces, drained, rinsed, and patted dry
- 3 large eggs
- 1 teaspoon baking powder
Instructions
- Heat the oven to 350°F. Line an 8 × 4-inch loaf pan with parchment, leaving handles.
- Drain and rinse chickpeas, then pat away excess surface water.
- Blend chickpeas and eggs until very smooth, scraping as needed. Add baking powder and blend briefly.
- Scrape into the pan, smooth the top, and tap gently to remove large bubbles.
- Bake approximately 40–50 minutes, checking around 35 minutes if shallow. The center should be set and a toothpick should show no wet batter. Confirm at least 160°F in the center as well as a fully set texture.
- Rest 10 minutes in the pan, then lift onto a rack and cool completely.
- Cut into eight small slices with a serrated knife. Toast on a supported surface if delicate and serve with modest fillings.
Storage: Refrigerate within 2 hours and use within 4 days. Freeze separated slices for up to 2 months for best quality.
Estimated nutrition: Approximately 70–90 calories and 4–6 grams protein per small slice, depending on labels and yield.
Little tip: Think of this as a compact chickpea loaf rather than a fluffy wheat bread. Fine blending, thorough baking, and complete cooling give the three ingredients their best chance to hold together.
Print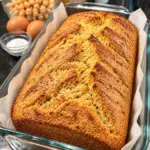
3-Ingredient High-Protein Chickpea Sandwich Bread
Description
A small flourless loaf with a moist, close crumb, intended for gentle slicing and light toasting.
Yield: 1 small loaf, about 8 slices
Prep: 10 minutes
Bake: Approximately 40–50 minutes
Cool: Approximately 45–60 minutes or until completely cool
Total: About 1 hour 35 minutes to 2 hours
Oven: 350°F
Pan: 8 × 4 inches
Ingredients
- 1 can chickpeas, 15 ounces, drained, rinsed, and patted dry
- 3 large eggs
- 1 teaspoon baking powder
Instructions
- Heat the oven to 350°F. Line an 8 × 4-inch loaf pan with parchment, leaving handles.
- Drain and rinse chickpeas, then pat away excess surface water.
- Blend chickpeas and eggs until very smooth, scraping as needed. Add baking powder and blend briefly.
- Scrape into the pan, smooth the top, and tap gently to remove large bubbles.
- Bake approximately 40–50 minutes, checking around 35 minutes if shallow. The center should be set and a toothpick should show no wet batter. Confirm at least 160°F in the center as well as a fully set texture.
- Rest 10 minutes in the pan, then lift onto a rack and cool completely.
- Cut into eight small slices with a serrated knife. Toast on a supported surface if delicate and serve with modest fillings.
Storage: Refrigerate within 2 hours and use within 4 days. Freeze separated slices for up to 2 months for best quality.
Estimated nutrition: Approximately 70–90 calories and 4–6 grams protein per small slice, depending on labels and yield.
Little tip: Think of this as a compact chickpea loaf rather than a fluffy wheat bread. Fine blending, thorough baking, and complete cooling give the three ingredients their best chance to hold together.