
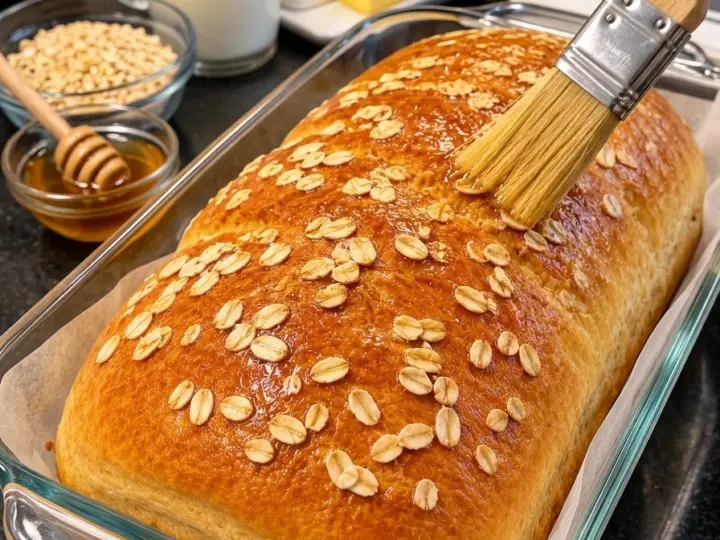
Easy No-Knead Honey Oat Sandwich Bread combines a soft wheat-based crumb with tender oats, gentle honey sweetness, and a lightly buttery finish. It is designed as an everyday pan loaf: mild enough for sandwiches, flavorful enough for buttered toast, and simple to mix without a stand mixer or a traditional kneading session.
The oats are softened in hot water before the dough is mixed. That gives them time to absorb moisture and helps them blend into the finished bread rather than remaining dry flakes. Milk and butter add richness, while bread flour provides the structure needed to support the soft dough.
Most of the work happens in one bowl after the oat mixture cools. Stir thoroughly, let the dough rise, transfer it to the pan, and wait for it to become puffy again. The loaf needs cooling time before slicing, so plan the bake ahead of the meal rather than expecting sandwich slices immediately from the oven.
Development note: This is an untested proposed recipe created for the requested title. The formula, rising ranges, and baking time need a home-kitchen test before being described as tested. The cues below explain the intended dough and loaf so you can evaluate that first bake realistically.
What to Expect
This bread should be softly textured with small, slightly irregular air pockets and visible bits of oats. The honey provides a gentle sweetness rather than the flavor of a dessert loaf. It pairs with savory sandwich fillings as well as jam, nut butter, or a little extra honey.
The crust is intended to be tender rather than crackly. A light brushing of butter after baking softens the surface further. You will not need a Dutch oven, a steam pan, or a high-temperature artisan-bread method.
The dough is sticky and transferred into a loaf pan rather than rolled into a firm log. No-knead does not mean no mixing: a thorough stir and one simple fold set help it become cohesive without countertop kneading.
Ingredients
Oat Soaker
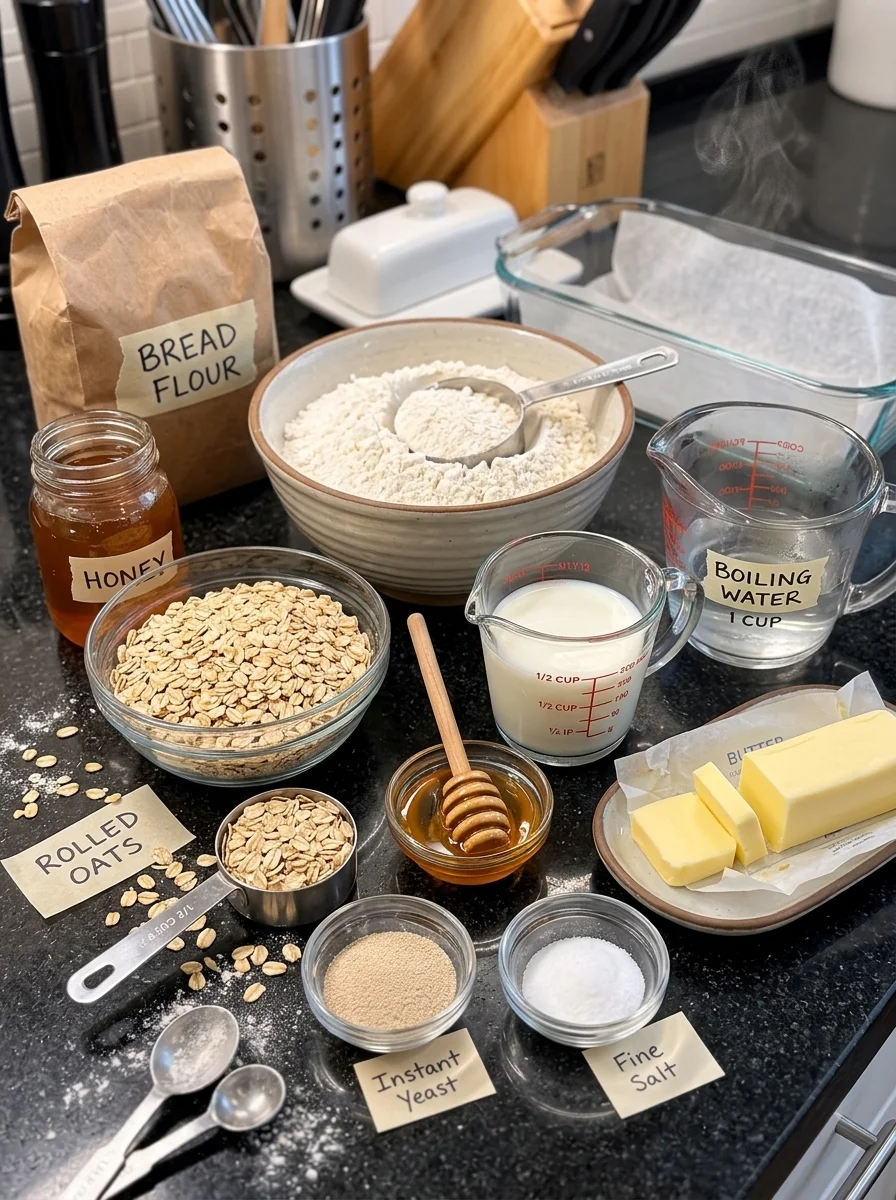
- 1/2 cup old-fashioned rolled oats, approximately 1 1/2 ounces by weight
- 1 cup boiling water
- 3 tablespoons honey
- 2 tablespoons unsalted butter
- 1/2 cup whole milk, cool or at room temperature
Dough
- 3 cups bread flour, spooned and leveled, approximately 12 3/4 ounces by weight
- 2 1/4 teaspoons instant yeast
- 1 1/4 teaspoons fine salt
Pan and Topping
- Softened butter or nonstick spray for greasing
- 1 tablespoon rolled oats for the top, optional
- 1 teaspoon melted butter for brushing after baking, optional
Yield: One 9-by-5-inch loaf, approximately 12 slices.
The water and milk are both part of the recipe. Do not drain the oat soaker or add a second cup of water when mixing the dough. Keep the optional topping oats separate from the measured half cup in the soaker.
Ingredient Notes
Rolled Oats
Use old-fashioned rolled oats for the intended starting point. They soften in the hot liquid while retaining a little texture.
Steel-cut oats are not a direct substitution because they hydrate and cook differently. Instant oatmeal packets may contain sugar, flavoring, or milk powder, and they should not replace the plain rolled oats here.
Plain quick oats may produce a less distinct oat texture, but that variation has not been tested. Begin with the stated oats so you have a useful reference before changing ingredients.
Bread Flour
Bread flour supports the soft dough and helps create slices that hold together. The oats add texture but do not provide the gluten structure that wheat flour supplies.
Measure carefully. A packed cup can add substantially more flour than a spooned and leveled one. If using a scale, follow the ounce weight rather than trying to match both a different cup standard and the stated weight simultaneously.
All-purpose flour may make a softer dough with a different rise. Whole-wheat flour absorbs moisture differently and should not replace all the bread flour without a separately balanced test.
Honey
Three tablespoons sweeten the loaf moderately and add flavor. A mild honey lets the oats remain noticeable, while a stronger honey contributes more of its own character.
Honey also affects browning, so the loaf may become golden before the center has finished baking. Use the foil-tenting guidance rather than reducing the bake simply because the top has colored.
This bread is sweetened with honey; it is not sugar-free. Honey is also not an equal volume substitute for granulated sugar in every bread formula because it supplies liquid as well as sweetness.
Water and Milk
Boiling water is used only for softening the oats. The oat mixture must cool before yeast is added. A thermometer makes that step easier to judge.
The milk contributes moisture and richness and also helps cool the soaker. Whole milk follows the proposed formula. Lower-fat or plant-based options may behave differently and are not verified identical substitutions.
Do not add extra liquid because the oats initially look thick. The whole mixture, including hydrated oats, honey, butter, and milk, is intended to go into the dough.
Butter
The butter melts into the hot oat mixture, distributing through the loaf. Unsalted butter allows the measured salt to remain consistent.
The optional teaspoon for brushing is separate. It adds a slight sheen and softens the top, but it is not necessary to make the dough rise.
Instant Yeast and Salt
Instant yeast mixes directly with the flour. Check its storage history and package date before beginning.
Fine salt seasons the bread. Coarse kosher salt can differ significantly by spoonful, so do not replace it automatically with the same volume.
If using active dry yeast, follow the product’s guidance for activation in a small reserved portion of the measured liquid. Avoid adding an extra quantity of water outside the recipe. The instant-yeast method is the simplest starting point for this formula.
Equipment
Use a heat-safe mixing bowl large enough for the dough to expand, a sturdy spoon or dough whisk, a flexible spatula or scraper, measuring tools, and a 9-by-5-inch metal loaf pan.
A kitchen scale helps with flour consistency, and an instant-read thermometer is useful for checking both the cooled soaker and the baked loaf. Have a cooling rack and serrated knife ready.
You can line the pan with a parchment sling for easier removal. Grease the uncovered ends and corners so the soft loaf releases without tearing.
How to Make Honey Oat Sandwich Bread
1. Soften the Oats
Place the half cup of rolled oats in the heat-safe bowl. Pour the cup of boiling water over them and stir.
Add the honey and two tablespoons butter. Stir until the butter melts and the honey disperses. Let stand for about 15 minutes, then stir in the milk.
The mixture may look like a loose, soft porridge. That is expected. Do not strain it or discard any liquid.
2. Cool Before Adding Yeast
Let the oat mixture cool to approximately 95–105°F. Depending on the bowl, milk temperature, and room, the full soaking and cooling stage may take 20 to 30 minutes or longer.
Stir before measuring the temperature because a deep mixture can remain warmer underneath. If it is still hot, wait; yeast should not be added to the freshly scalded oats.
Do not rush cooling by adding unmeasured cold water. That changes the dough’s hydration rather than simply shortening the wait.
3. Mix the Dough
Whisk the bread flour, instant yeast, and fine salt together in a separate bowl. Add to the cooled oat mixture.
Stir until every patch of dry flour is incorporated, scraping the bottom and sides. Continue stirring firmly for about 1 to 2 minutes after the ingredients first come together.
Expect a soft, sticky dough that clings to the spoon and stretches unevenly. It should have body rather than pour like batter, but it should not be a firm ball that needs kneading on the counter.
4. Rest and Fold
Cover and let the dough rest for 20 minutes. This gives the wheat flour more time to hydrate and makes the dough easier to lift.
With damp fingers or a lightly greased scraper, lift one side and fold it toward the middle. Rotate the bowl and repeat from three more sides.
This is a short fold set rather than a traditional kneading session. The dough may become more cohesive, although oats will keep it from looking as smooth as plain white dough.
5. Finish the First Rise
Cover again and leave in a comfortably warm place for approximately another 45 to 75 minutes, until substantially expanded and close to doubled from its original volume.
The earlier 20-minute rest counts toward the first-rise period. Watch the dough rather than automatically adding a separate full rise on top of it.
Look for a puffy surface, some bubbles, and an overall lighter appearance. A cool room can lengthen the process. Avoid placing the bowl on a hot appliance or inside an oven that is switched on.
6. Prepare the Pan and Transfer
Grease the 9-by-5-inch pan and add parchment if desired. Scrape the risen dough gently away from the sides of the bowl.
Fold or turn it once or twice to release the largest air pockets, then transfer to the pan. Use a lightly buttered spatula or damp fingertips to ease it into the corners.
You do not need to roll the dough into a tight log. Its stickiness is part of the pan-supported method. Avoid adding flour repeatedly just to make the transfer feel like conventional bread shaping.
7. Allow the Second Rise
Cover loosely and let rise for approximately 35 to 60 minutes, until puffy and approaching the pan rim. The precise height depends on the pan’s true dimensions.
The top should look expanded without seeming fragile or collapsed. A gentle touch should leave a slight impression that slowly relaxes. If it springs back immediately, allow a little longer; if it sinks deeply, it may have proofed too far.
Preheat the oven to 350°F during this period, with a rack near the center. The oven should be fully heated before the dough is ready.
8. Add the Optional Oat Topping
If using topping oats, lightly moisten the surface with wet fingertips and sprinkle the tablespoon evenly over the loaf. Press very gently so the flakes make contact without deflating the dough.
Some loose oats may fall off when slicing. A decorative layer should be modest rather than a thick blanket that obscures the top.
Avoid brushing the proofed dough with a heavy amount of liquid; it is already delicate at this stage.
9. Bake
Bake for approximately 40 to 50 minutes, beginning checks toward the earlier end. The top should be golden, the sides set, and the center structurally firm.
A center temperature around 195–200°F can be a useful additional check for this moist oat loaf, alongside its appearance and feel. It is a baking cue, not a guarantee that any visibly wet center is ready.
If the honey-rich crust browns before the center finishes, cover loosely with foil and continue baking. Do not remove the loaf early based on top color alone.
10. Cool and Slice
Let the loaf rest in its pan for about 10 minutes. Brush with the optional teaspoon melted butter, then carefully remove it to a rack.
Cool completely before making sandwich slices, allowing roughly another 60 to 90 minutes as needed. Oat bread can look gummy when cut while still steaming because the moist interior has not settled.
Use a serrated knife and gentle sawing motion. Pressing down hard compresses the crumb and makes the loaf appear denser than it is.
Dough Consistency: What to Watch
The hydrated oats hold moisture, so this dough will not feel identical to a plain white bread dough. It may be slightly tacky even after rising and may show oat pieces throughout.
If the dough looks very wet immediately after mixing, allow the rest before changing anything. If it is dry enough to crumble, check whether flour was packed into the cups or liquid was accidentally omitted.
Large corrective additions make a first test difficult to interpret. Record the flour weight, oat type, and liquid quantities so you can adjust deliberately in a later bake rather than changing several things at once.
Tips for Soft, Useful Sandwich Slices
Hydrate the oats before mixing. Dry oats added at the end would absorb moisture on a different schedule.
Cool the soaker properly. Hot oats and yeast are not a shortcut to faster rising.
Mix thoroughly despite the no-knead name. Dry flour pockets will not reliably disappear during proofing.
Use the stated pan size. A wider pan produces a lower loaf, while a smaller pan can overflow or leave a deeper center that needs more baking.
Allow full cooling. This is particularly important for a moist loaf intended for thin slices.
Keep toppings and fillings balanced. Wet sandwich fillings soften fresh bread quickly, so assemble close to serving or use a thin protective spread.
Serving Ideas
Toast a slice with butter for breakfast, or add peanut butter and sliced banana. The gentle sweetness works well with both fruit and nut flavors.
For lunch, pair fully cooled slices with turkey, cheddar, egg salad, or roasted vegetables. A little mustard contrasts nicely with honey, while cream cheese gives a milder finish.
Serve thicker slices with vegetable soup, chicken stew, or a simple salad. The oats provide texture without making the bread strongly flavored.
Use slightly older slices for toast or French toast, handling any additional egg-and-milk mixture according to the recipe you use. Do not expect bread that has become moldy to be salvageable by toasting.
Make-Ahead Options
For predictable timing, bake the loaf ahead, cool it fully, and freeze slices. This avoids trying to time a cold dough’s rise around a meal.
An overnight dough variation can be tested by refrigerating the covered dough after the initial rest and fold. Allow expansion space and assess it the next day rather than assuming a fixed volume.
After refrigeration, transfer to the pan and allow enough time for the dough to become puffy. That may take much longer than the standard second-rise range because the dough starts cold.
This overnight option is not a verified schedule for the proposed formula. Start with the same-day method if you want a clearer reference for consistency and rise.
Storage and Freezing
Once completely cool, keep the plain, fully baked loaf in a sealed bread bag or covered container at room temperature for about two days for best quality. This applies to the unfilled baked bread, not raw milk-containing dough or sandwiches with perishable fillings.
Refrigeration tends to accelerate bread staling. If you cannot finish the loaf promptly, freeze portions rather than keeping it in the refrigerator solely to extend freshness.
Slice first if you want easy individual servings. Place parchment between slices if necessary and freeze in a sealed freezer-safe bag for up to two months for best quality.
Toast refrigerated or frozen slices as suitable for your appliance. To warm a thawed loaf, wrap loosely in foil and heat in a 300°F oven until warmed through, checking to avoid drying it out.
In a hot or humid kitchen, freeze earlier and inspect bread carefully. Discard a moldy loaf rather than cutting off a visible patch. Do not return served slices exposed to other foods to the main storage bag.
Variations to Test
Seeded Top
Use a small amount of sesame or sunflower seeds with the oats. A heavy topping can fall off and is unnecessary for flavor.
Cinnamon Toast Loaf
Add a modest amount of cinnamon as a separate flavor test. It changes the bread’s direction from savory sandwiches toward breakfast, and large amounts can affect dough behavior.
Olive Oil Instead of Butter
A neutral or mild olive oil changes flavor and the fat composition. It is not an assurance of an identical crumb, so record the substitution and evaluate the bake.
Whole-Wheat Blend
Replacing a portion of bread flour with whole-wheat flour would need hydration and rise reassessment. Do not replace all three cups and promise the same lightness or timing.
Troubleshooting
The Dough Is Slow to Rise
The room may be cool, the yeast old, or the soaker too hot when mixed. If there are bubbles and gradual expansion, allow more time. If the yeast was heat-damaged, waiting may not fix the problem.
The Loaf Is Dense
Too much flour, insufficient mixing, or underproofing can contribute. Oats naturally make a different crumb from plain white bread, but the loaf should not be a compressed wet block.
The Center Is Gummy
It may need more baking or more cooling, or the dough may contain excess water. Check both the bake and the slicing schedule before concluding that every gummy center has the same cause.
The Top Collapses
Overproofing, a weak dough, or underbaking can cause sinking. Record the dough height before baking and avoid allowing it to become extremely fragile above the pan.
The Crust Browns Too Quickly
Honey and milk encourage color. Tent with foil after the top is golden and continue until the interior is baked.
Slices Tear
The loaf may still be warm, the knife dull, or the slices too thin for the crumb. Cool fully and use a gentle serrated cut.
Frequently Asked Questions
Is This Gluten-Free?
No. Bread flour is wheat flour and supplies the structure of the loaf. Using gluten-free oats does not change that.
Can I Skip the Oat Soak?
Not while expecting the same formula to behave identically. The soak is part of how moisture is distributed in this proposed recipe.
Does It Need an Egg?
No egg is included. Milk, butter, honey, and hydrated oats enrich the dough without one.
Can I Make It Dairy-Free?
A suitable milk alternative and fat substitution would create a separate variation. Their effect on texture and flavor has not been verified here.
Can I Double the Recipe?
Use two pans rather than one deeper loaf. Mixing effort, oven space, and rise timing may change, so assess each loaf individually.
Print
Easy No-Knead Honey Oat Sandwich Bread
Description
Yield: One 9-by-5-inch loaf, about 12 slices
Hands-on prep: Approximately 15 minutes
Oat soaking and cooling: Approximately 20–30 minutes, longer if needed
First rest and rise: Approximately 65–95 minutes total
Second rise: Approximately 35–60 minutes
Bake: Approximately 40–50 minutes
Rest and cooling: Approximately 70–100 minutes
Total: Approximately 4–6 hours, depending on temperature and cooling
Status: Untested proposed recipe
Ingredients
Oat Soaker
- 1/2 cup old-fashioned rolled oats, approximately 1 1/2 ounces by weight
- 1 cup boiling water
- 3 tablespoons honey
- 2 tablespoons unsalted butter
- 1/2 cup whole milk, cool or at room temperature
Dough
- 3 cups bread flour, spooned and leveled, approximately 12 3/4 ounces by weight
- 2 1/4 teaspoons instant yeast
- 1 1/4 teaspoons fine salt
Pan and Topping
- Softened butter or nonstick spray for greasing
- 1 tablespoon rolled oats for the top, optional
- 1 teaspoon melted butter for brushing after baking, optional
Yield: One 9-by-5-inch loaf, approximately 12 slices.
The water and milk are both part of the recipe. Do not drain the oat soaker or add a second cup of water when mixing the dough. Keep the optional topping oats separate from the measured half cup in the soaker.
Instructions
- Pour 1 cup boiling water over 1/2 cup rolled oats. Stir in 3 tablespoons honey and 2 tablespoons butter. Stand about 15 minutes, then add 1/2 cup milk and cool to 95–105°F.
- Mix 3 cups carefully measured bread flour, 2 1/4 teaspoons instant yeast, and 1 1/4 teaspoons fine salt. Stir into the oat mixture thoroughly, continuing 1–2 minutes after the flour disappears.
- Cover 20 minutes, fold inward from four sides, then cover and rise another 45–75 minutes, until close to doubled.
- Gently deflate and transfer to a greased 9-by-5-inch metal loaf pan. Smooth and rise 35–60 minutes, until puffy and approaching the rim.
- Heat the oven to 350°F. Add optional topping oats lightly and bake 40–50 minutes, until golden and baked through. Tent if needed.
- Rest 10 minutes in the pan, brush with optional butter, then cool fully on a rack before slicing.
Storage: Keep completely cooled plain bread covered at room temperature for about two days for best quality, or freeze slices for up to two months.
Estimated nutrition: Approximately 160–185 calories and 4–6 grams protein per slice when divided into 12, depending on products and toppings. These are rough ingredient-based estimates, not a verified nutrition analysis.