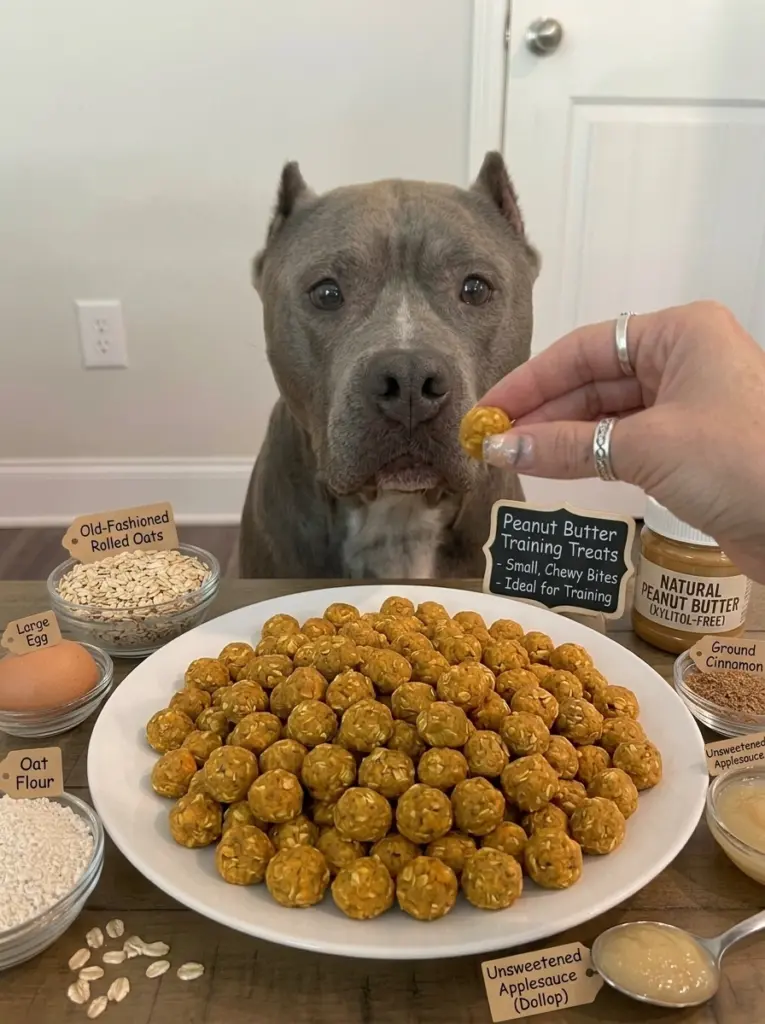
These Peanut Butter Training Treats are small, crunchy-chewy bites made with simple, dog-friendly ingredients and plenty of peanut butter flavor. Their tiny size makes them ideal for training sessions, practicing new tricks, or rewarding good behavior throughout the day, without handing your dog a full-size biscuit every time.
Because peanut butter is the star ingredient here, there’s one critical safety detail worth understanding thoroughly before you start. The notes below cover that, along with tips for getting the texture right and storing the treats properly between training sessions.
A quick but important note before you start: even with dog-friendly ingredients, homemade treats like these should only make up a small part of your dog’s overall diet. Because training treats are often given frequently within a single session, keep each piece small and factor them into your dog’s daily food intake. If your dog has any known allergies, digestive issues, or health conditions, check with your veterinarian before introducing a new treat.
Why Your Dog Will Love This Recipe
- Big peanut butter flavor. Most dogs find peanut butter especially motivating, which makes these great for training.
- Crunchy-chewy texture. A slightly firmer bite than a soft training treat, without being as hard as a full-size biscuit.
- Tiny, training-appropriate size. Small pieces mean you can reward frequently without overfeeding.
- Simple ingredients. Just a few pantry staples, no complicated steps.
- Freezer-friendly. Easy to make a big batch and freeze portions for future training sessions.
Ingredients for Peanut Butter Training Treats
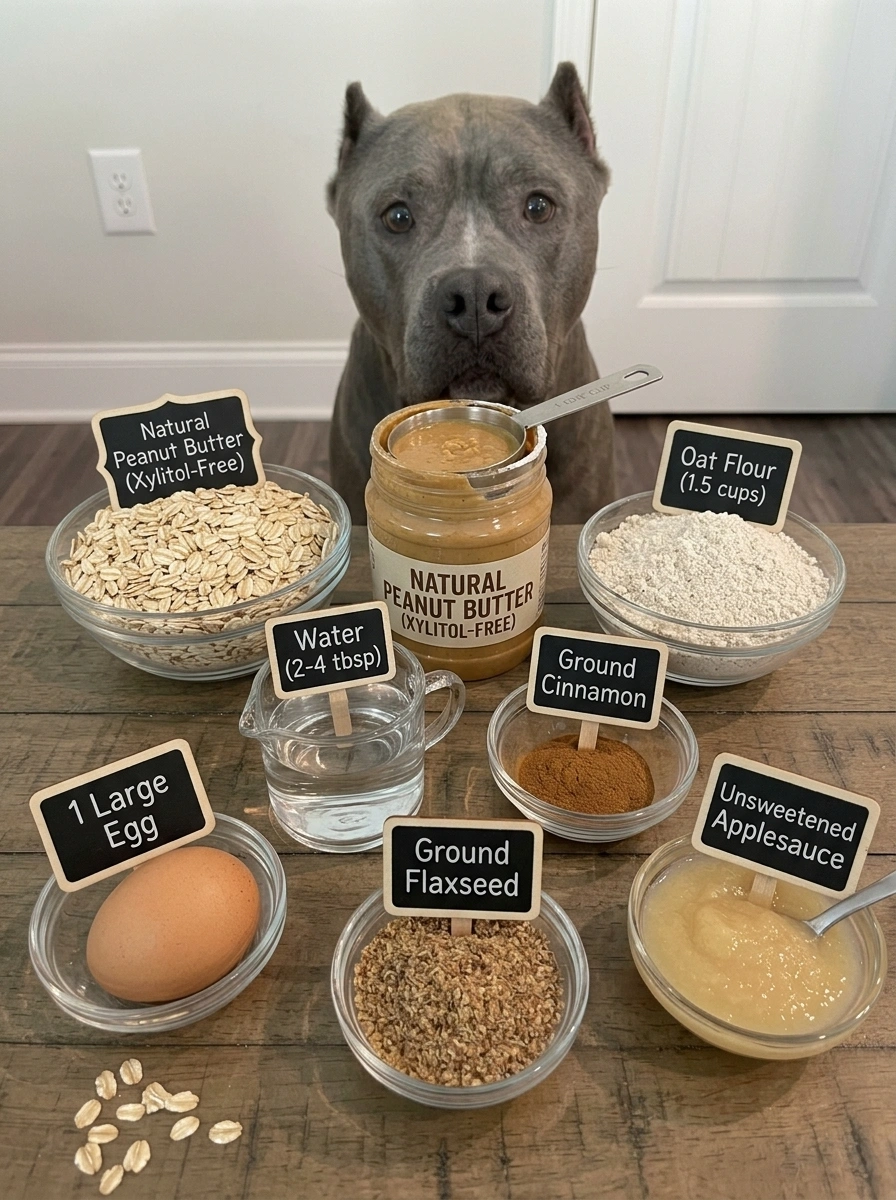
- 1 cup natural peanut butter (xylitol-free)
- 1 large egg
- 1½ cups oat flour (blended from old-fashioned rolled oats), plus more as needed
- 2–4 tablespoons water, as needed
Optional Add-Ins
- ¼ teaspoon ground cinnamon
- 1 tablespoon ground flaxseed
- 1 tablespoon unsweetened applesauce
Ingredient Notes
Peanut butter — xylitol-free is essential. This is the single most important ingredient note in the entire recipe. Xylitol is a sugar substitute found in many “natural” or sugar-free peanut butters, and it is highly toxic to dogs, even in small amounts — it can cause a dangerous, rapid drop in blood sugar and, in some cases, liver failure. Always check the ingredient label carefully and confirm the peanut butter you’re using does not contain xylitol (sometimes listed as “birch sugar”) before using it in this or any dog treat recipe. Choose a plain peanut butter with minimal ingredients, ideally just peanuts and perhaps a small amount of salt.
Egg. The egg helps bind the dough together and adds a bit of protein. This recipe bakes long enough to cook the egg thoroughly.
Oat flour. Oats are gentle and easy to digest for most dogs. Using oat flour gives these treats a smooth, cohesive texture that’s easy to roll thin and cut into very small pieces.
Cinnamon, if using. A small amount of cinnamon is generally considered safe for dogs in small quantities and adds a warm flavor note, though it’s entirely optional.
Substitutions and Variations
- Sunflower seed butter instead of peanut butter: For dogs with peanut allergies, plain sunflower seed butter can be used in place of peanut butter in an equal amount — just be sure it’s also free of xylitol and added sugar.
- Applesauce for extra moisture: A tablespoon of unsweetened applesauce can help soften the dough slightly if it feels too stiff.
- Whole-wheat flour: If your dog doesn’t have a wheat sensitivity, part of the oat flour can be replaced with whole-wheat flour for a slightly different texture.
- Flaxseed: Ground flaxseed adds a bit of fiber and healthy fat and blends easily into the dough.
Kitchen Equipment
- Baking sheet
- Parchment paper
- Large mixing bowl
- Rolling pin
- Pizza cutter or sharp knife, for cutting tiny pieces
- Wire cooling rack
How to Make Peanut Butter Training Treats
Step 1: Preheat and Prep
Preheat the oven to 325°F (165°C) and line a baking sheet with parchment paper. A slightly lower oven temperature helps these small treats bake through gently without over-browning.
Step 2: Mix the Dough
In a large bowl, combine the peanut butter and egg, stirring until smooth. Add the oat flour and cinnamon, if using, and mix until a firm, workable dough forms. If the dough feels too dry or crumbly, add water a tablespoon at a time. If it’s too sticky, work in a bit more oat flour.
Step 3: Roll and Cut
Roll the dough out on a lightly floured surface to about ⅛ inch thick — thin enough to create small, training-appropriate pieces. Use a pizza cutter or sharp knife to cut the dough into small squares or tiny rounds, roughly the size of a pea to a dime, depending on your dog’s size.
Step 4: Arrange and Bake
Arrange the tiny treats on the prepared baking sheet, leaving a little space between each one. Bake for 15 to 18 minutes, or until they’re firm and just lightly golden at the edges. Because these are so small, keep an eye on them toward the end of baking, since they can go from perfectly done to overly dry more quickly than a full-size biscuit.
Step 5: Cool Completely
Transfer the treats to a wire rack and let them cool completely before using them for training or storing them. They’ll firm up further as they cool, developing that crunchy-chewy texture.
Expert Tips for the Best Results
- Always double-check your peanut butter label. Confirm it’s free of xylitol every time you buy a new jar, since ingredients can change between brands or even between batches.
- Cut the pieces small and consistent. Uniform, tiny pieces make it easy to reward frequently during a training session without overfeeding.
- Watch the bake time closely. Because these are so small, they can dry out more quickly than a full-size biscuit if left in too long.
- Keep a batch in the freezer. Freezing a big batch in advance means you’ll always have training treats ready to thaw and use.
- Let the treats cool completely before storing. This helps them firm up to their final crunchy-chewy texture and prevents them from sticking together.
Common Mistakes to Avoid
Using peanut butter that contains xylitol. This is the most critical mistake to avoid in this recipe. Xylitol is dangerous for dogs, so always read the label carefully, even on brands marketed as “natural” or “all-natural.”
Cutting the pieces too large. Oversized “training” treats can add up quickly in calories during a session with many repetitions. Keep them genuinely bite-sized.
Overbaking. Because these are thin and small, they can dry out faster than a standard biscuit. Check them a few minutes before the low end of the bake time listed.
Rolling the dough unevenly. Inconsistent thickness leads to some pieces baking through while others turn out too hard or too soft.
Not accounting for treats in your dog’s daily food intake. Because training sessions often involve many small treats given in a row, it’s easy to lose track of how much your dog has eaten. Keep portions small and be mindful of the total amount given in a day.
How to Serve Peanut Butter Training Treats
These treats are designed specifically for training sessions, trick practice, or any time you want to reward your dog frequently without handing out full-size biscuits. They also work well as a simple, everyday reward for good behavior outside of formal training.
Make-Ahead Instructions
This recipe is ideal for making ahead, since a single batch can supply several training sessions. Bake a full batch, portion it into smaller bags or containers, and keep some at room temperature or in the refrigerator for near-term use and the rest in the freezer for later.
Storage Instructions
Room Temperature or Refrigerating
Because these treats are fully baked and low in moisture, they can be stored in an airtight container at room temperature for up to 1 week, or in the refrigerator for slightly longer freshness.
Freezing
For longer storage, freeze the treats in a freezer-safe container or bag for up to 3 months. Because they’re so small, they thaw quickly at room temperature, which makes them convenient to pull out right before a training session.
Reheating
Reheating isn’t necessary, since these treats are meant to be served at room temperature straight from storage or after thawing.
Frequently Asked Questions
Can I make these treats ahead of time? Yes. They’re an excellent make-ahead treat — bake a big batch and store portions at room temperature and in the freezer for ongoing training sessions.
How long do these training treats last? Stored in an airtight container at room temperature, they’ll keep for about 1 week, or up to 3 months in the freezer.
Can I freeze homemade peanut butter dog treats? Yes. Freeze them in a freezer-safe container or bag, and they’ll thaw quickly at room temperature when you’re ready to use them.
Is xylitol really dangerous for dogs? Yes, and seriously so. Xylitol, a sugar substitute found in some peanut butters and other products, can cause a rapid and dangerous drop in blood sugar in dogs, and in some cases can lead to liver failure. Always check ingredient labels closely and never use a peanut butter unless you’ve confirmed it’s xylitol-free.
Can I use sunflower seed butter instead of peanut butter? Yes. Plain sunflower seed butter, free of xylitol and added sugar, works as a substitute for dogs with peanut allergies.
Why are my treats too dry? This usually means they were rolled too thin relative to the bake time, or left in the oven a bit too long. Because these are small, check them a few minutes before the low end of the suggested bake time.
How small should I cut these treats? Aim for pieces roughly the size of a pea to a dime, depending on your dog’s size — small enough to reward frequently without adding up to a large amount of food over a training session.
How many training treats can I give my dog in one session? This depends on your dog’s size, the treat’s size, and their regular diet, so it’s worth keeping an eye on the total amount given in a day. If you’re doing a lot of training, consider using a portion of your dog’s regular meal as additional rewards, or check with your veterinarian for guidance on appropriate treat allowances.
Final Recipe Summary
These Peanut Butter Training Treats turn simple, wholesome ingredients into a crunchy-chewy, flavor-packed reward perfectly sized for training sessions. Their tiny size and easy make-ahead, freezer-friendly nature make them a practical choice for frequent positive reinforcement, whether you’re working on basic obedience or polishing more advanced tricks. Just remember to always use xylitol-free peanut butter, keep portions small, and factor these treats into your dog’s overall daily food intake.
Prep Time: 10–15 minutes Cook Time: 15–18 minutes Total Time: Approximately 30 minutes Yield: Approximately 100+ tiny treats, depending on size
Print
Peanut Butter Training Treats
Ingredients
- 1 cup natural peanut butter (xylitol-free)
- 1 large egg
- 1½ cups oat flour (blended from old-fashioned rolled oats), plus more as needed
- 2–4 tablespoons water, as needed
Optional Add-Ins
- ¼ teaspoon ground cinnamon
- 1 tablespoon ground flaxseed
- 1 tablespoon unsweetened applesauce
Instructions
Preheat the oven to 325°F (165°C) and line a baking sheet with parchment paper. A slightly lower oven temperature helps these small treats bake through gently without over-browning.
In a large bowl, combine the peanut butter and egg, stirring until smooth. Add the oat flour and cinnamon, if using, and mix until a firm, workable dough forms. If the dough feels too dry or crumbly, add water a tablespoon at a time. If it’s too sticky, work in a bit more oat flour.
Roll the dough out on a lightly floured surface to about ⅛ inch thick — thin enough to create small, training-appropriate pieces. Use a pizza cutter or sharp knife to cut the dough into small squares or tiny rounds, roughly the size of a pea to a dime, depending on your dog’s size.
Arrange the tiny treats on the prepared baking sheet, leaving a little space between each one. Bake for 15 to 18 minutes, or until they’re firm and just lightly golden at the edges. Because these are so small, keep an eye on them toward the end of baking, since they can go from perfectly done to overly dry more quickly than a full-size biscuit.
Transfer the treats to a wire rack and let them cool completely before using them for training or storing them. They’ll firm up further as they cool, developing that crunchy-chewy texture.