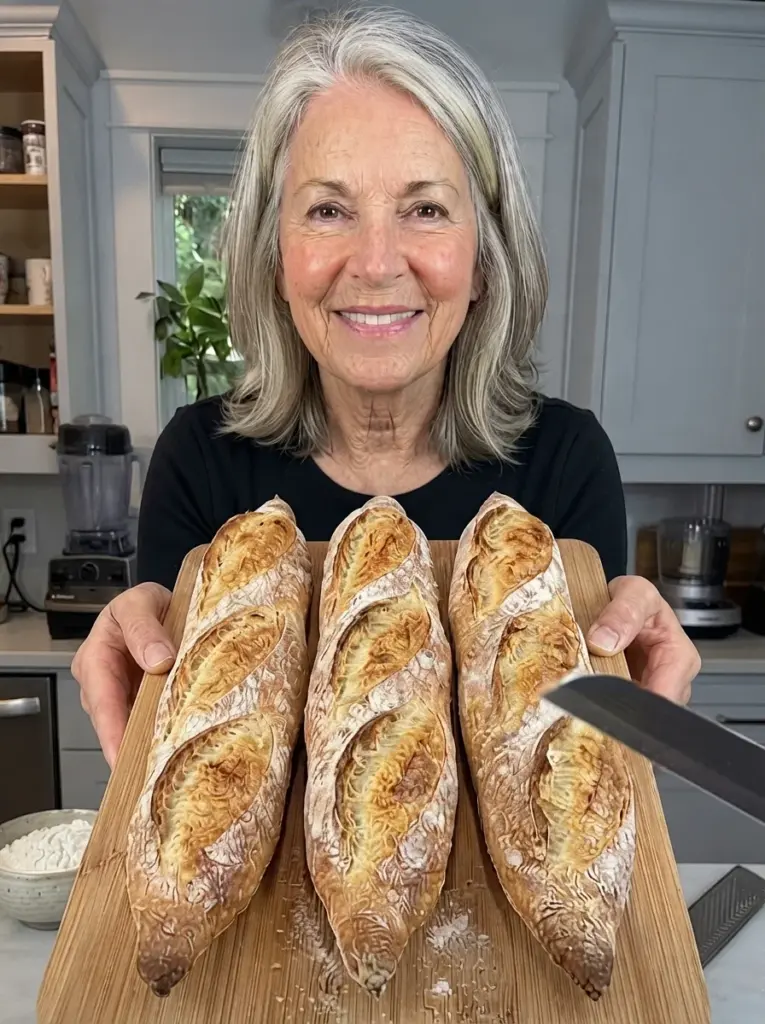
Crispy Golden Homemade Baguettes bring a crackly crust, a lightly chewy center, and the aroma of freshly baked bread to your kitchen. Made with flour, water, yeast, and salt, these slender loaves are delicious with butter, alongside soup, or sliced for sandwiches and crostini.
This same-day method includes a short rest, a few folds, and two shaped loaves that fit on a standard large baking sheet. You do not need a baguette pan or stand mixer. The main skills are handling soft dough gently, shaping with light tension, and allowing enough proofing time before baking.
A little steam during the first part of baking can improve crust development, but it must suit your oven and equipment. A dry-oven option is included so you can bake the bread without improvised steam methods.
This is a suggested home recipe developed from the supplied title and has not been kitchen-tested. Flour measurements, room temperature, shaping, and oven performance affect the result. Use the dough cues along with the time ranges.
Recipe Overview
- Yield: 2 baguettes, approximately 13–15 inches long
- Servings: About 12 slices or 6 sandwich portions
- Active preparation: About 25–30 minutes
- First rise: About 1½–2 hours, including folds
- Preshape rest: About 15–20 minutes
- Final proof: About 35–60 minutes
- Bake: About 22–30 minutes
- Cooling: At least 30–45 minutes
- Total: Approximately 3½–4¾ hours
- Oven: 450°F
Cool rooms can extend fermentation. The dough should guide the schedule rather than the other way around.
What to Expect
These are home-oven baguettes with a thin, browned crust and a springy, moderately open interior. Large, dramatic holes are not guaranteed, especially with cup measurements and all-purpose flour. A gently shaped loaf can still have excellent texture without looking identical to a bakery baguette.
The crust is crispest after cooling on a rack and during the first few hours. It naturally softens as moisture moves from the center to the surface. Brief reheating restores some of that crispness.
The two shorter loaves fit more comfortably in a home oven than full-length bakery baguettes. If your sheet is smaller, make three shorter loaves and begin checking them earlier during baking.
Ingredients
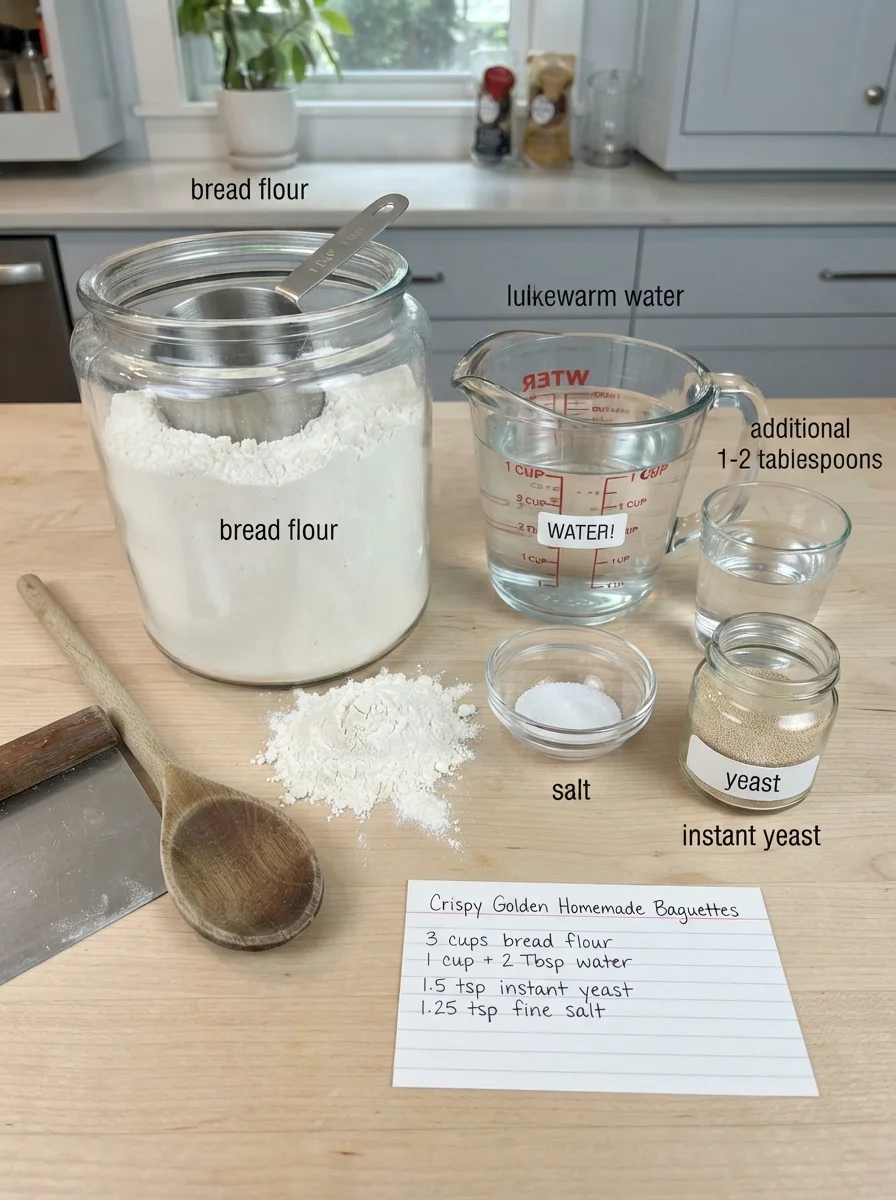
- 3 cups bread flour, spooned into the measuring cup and leveled, plus a little extra for shaping
- 1 cup plus 2 tablespoons lukewarm water, with another 1–2 tablespoons only if needed
- 1½ teaspoons instant yeast
- 1¼ teaspoons fine salt
No sugar, butter, milk, or egg is needed for the base dough. A little additional flour for the work surface is used for handling, not kneaded in repeatedly until the dough feels dry.
Ingredient Notes
Bread Flour
Bread flour gives the dough strength and a pleasantly chewy crumb. All-purpose flour can work as a variation, but it may absorb less water and produce a softer dough. Begin with the measured starting water and judge the texture before adding more.
Flour volume varies with measuring technique. Stir it loosely, spoon it into the cup, and level the top. Dipping the cup directly into a compacted bag can add enough extra flour to make the dough stiff.
Water
Use water that feels gently warm rather than hot, approximately 85–95°F as a practical starting point. Very warm kitchens may need cooler water to avoid rapid fermentation.
The dough should be soft and tacky, with enough moisture to stretch during folding. It should not be a dry ball, but it also does not need to pour like batter. Add extra water a teaspoon at a time if dry flour remains or the dough feels unusually stiff.
Instant Yeast
Instant yeast can be mixed directly into the flour. It does not need a separate foaming step. Check its storage instructions and freshness if fermentation is unexpectedly inactive.
Active dry yeast can be used according to its package directions, dissolving it in some of the measured water if instructed. Do not add a second quantity of water or yeast after that step.
Fine Salt
Fine salt disperses evenly in this dough. Coarse kosher salt brands differ in density, so the same teaspoon measure is not necessarily an equivalent amount. Use fine salt for the stated volume.
Equipment
Use a large bowl, a sturdy spoon, a dough scraper if available, parchment suitable for the stated baking temperature, a large rimmed metal baking sheet, and a wire rack.
A clean, tightly woven kitchen towel can support the shaped dough during proofing. A bread lame or very sharp thin blade makes cleaner scores than a blunt kitchen knife. Handle blades carefully and keep them away from children.
A baking stone or steel is optional and should be heated and used according to its manufacturer. Do not preheat equipment that is not designed for empty heating.
For steam, use only an oven-approved method and appropriate metal equipment. Skip steam if your oven manual discourages added water or you do not have suitable equipment.
How to Make the Baguettes
1. Mix the Dough
Combine flour and instant yeast in a large bowl. Add the starting water and stir until a shaggy dough forms. Cover and let rest for about 15 minutes.
Sprinkle in the salt and work it through with damp fingers or a spoon, squeezing and folding until evenly distributed. If the dough is dry or crumbly, add a little of the optional water. Avoid adding it all without checking.
This short rest helps the flour hydrate and makes the dough easier to handle. It is a simple hydration rest rather than a strict traditional autolyse, since yeast is already present.
2. Develop the Dough Gently
Knead in the bowl or on a lightly floured surface for about 3–5 minutes, until the dough begins to look more cohesive. It can remain tacky and somewhat rough at this stage.
Use a scraper or lightly damp hands instead of repeatedly coating the dough in flour. You will continue building strength with folds during the rise.
If the dough tears immediately when stretched, give it a short covered rest. Resting often makes it easier to handle than forcing it to stretch.
3. Let Rise and Fold
Cover the bowl and leave in a comfortably warm place. After about 30 minutes, lift one side of the dough gently, stretch without tearing, and fold it over the center. Repeat on the other three sides.
Cover again. Repeat a similar set of folds after another 30 minutes, then let the dough continue rising until puffy and roughly doubled, usually about 1½–2 hours total from the start of the first rise.
The dough should look smoother and hold its shape better after folding. A cool room can take longer, and a very warm room can move faster. Do not fold so aggressively that you squeeze out every bubble.
4. Divide and Preshape
Turn the dough onto a lightly floured surface. Divide into two equal portions with a scraper or knife rather than tearing.
Gently gather each portion into a short log. Cover loosely and rest for 15–20 minutes. This relaxes the dough so you can lengthen it without excessive resistance.
Use enough flour to prevent sticking, but brush away thick patches. Flour trapped inside the final roll can leave seams or gaps in the crumb.
5. Shape into Baguettes
Pat one portion gently into a short rectangle. Fold the upper long edge toward the middle and seal lightly with your fingertips. Fold the lower long edge toward the middle, then fold the dough lengthwise again and seal the final seam.
Place seam-side down and roll gently from the center toward the ends. Lengthen to about 13–15 inches, or to fit your baking sheet with room at the edges. Taper the ends slightly if desired.
If the dough springs back, stop, cover, and rest for 5 minutes before continuing. Forcing it can tear the surface and squeeze out more gas than necessary.
Repeat with the second portion. Aim for even thickness rather than very thin tips and a thick middle, which bake unevenly.
6. Proof with Support
Place the loaves seam-side down on parchment on the baking sheet, leaving several inches between them. For additional support, a lightly floured, clean towel can be arranged in raised folds beside the loaves during proofing, then removed carefully before baking. Do not let the towel go into the oven.
Cover loosely without sticking to the dough and proof for about 35–60 minutes, until visibly puffy. A gentle floured fingertip press should recover slowly and partly.
If the indentation springs back immediately, allow more time. If the dough feels very fragile and the indentation remains completely, it may have proofed too far. Handle it particularly gently and bake promptly.
Begin preheating the oven to 450°F early enough that it is fully hot when the loaves are ready. A stone or steel needs the preheating time specified by its manufacturer.
7. Score
Remove the cover and any towel support. Make three or four overlapping diagonal scores along each loaf, keeping the cuts mainly within a narrow strip along the top rather than slashing far across the sides.
Hold the blade at a shallow angle and cut about ¼ inch deep with quick, controlled strokes. Avoid repeatedly sawing through the same spot.
Scoring gives the loaf a planned place to expand. A torn-looking score can still bake into good bread, so do not keep cutting in an attempt to perfect the appearance.
8. Bake
Bake at 450°F for about 22–30 minutes, until deeply golden and the sides feel set. Rotate the sheet near the end if your oven browns unevenly, after the loaf structure has set.
If checking with a thermometer, the center should be around 205–210°F. Color also matters for crust flavor: a pale loaf may be baked inside but lack the browned crust described in the title.
Use one of the steam approaches below only if appropriate for your equipment. The dry-oven method still produces bread, though the crust and expansion may differ.
9. Cool on a Rack
Transfer the baguettes to a wire rack and cool for at least 30–45 minutes before slicing. Do not cover the hot bread, which traps steam and softens the crust.
The crumb continues setting during cooling. Cutting immediately can compress the center and release enough steam to make it seem gummy.
Steam Options for a Home Oven
Dry-Oven Method
Bake on the prepared sheet without adding water. This is the simplest method if you do not have an approved steam setup. Expect somewhat less glossy crust and potentially less expansion, depending on the oven.
Approved Metal Steam-Pan Method
Only if your oven and pan manufacturers permit it, place a sturdy metal pan on a lower rack during preheating. After loading the bread, carefully add about ½ cup hot water to the metal pan, keeping your hands and face away from the steam, and close the oven.
Use long oven mitts and avoid spilling on the oven floor, glass door, light, or heating element. Never pour water into a glass or ceramic dish, and never pour directly onto the oven floor.
After about 10 minutes, allow the remaining baking time to be dry. Remove the pan only if it can be handled safely; otherwise leave it undisturbed and follow equipment guidance. Do not carry a pan of boiling water unnecessarily.
Steam is optional. It is not worth improvising with unsuitable cookware or spraying an oven that is not designed for it.
Tips for a Golden Crust and Chewy Center
Keep the dough soft. Adding flour until it feels completely dry makes shaping easy but can produce a tight, heavy crumb.
Give shaping its own short rest. Relaxed dough lengthens more easily and needs less pressure.
Watch proofing rather than insisting on a fixed minute count. Underproofed dough can split unexpectedly, while overproofed dough may spread and lose height.
Bake to a good golden color. Oven thermostats vary, so a thermometer can help if the crust consistently burns or remains pale at the stated temperature.
Cool uncovered with airflow. A rack lets moisture escape from underneath as well as above, protecting the crust from becoming damp against a tray.
Troubleshooting
| Problem | Likely cause | Adjustment |
|---|---|---|
| Dough feels stiff | Too much flour or insufficient water | Measure flour lightly and add water gradually if needed. |
| Dough spreads flat | Weak shaping, excess water, or overproofing | Use folds, moderate hydration, and support during proofing. |
| Loaves spring back during rolling | Gluten needs relaxation | Cover and rest briefly before lengthening again. |
| Crumb is very dense | Dry dough, short fermentation, or heavy handling | Keep dough supple and allow full rises. |
| Sides burst | Underproofing or shallow/poorly placed scores | Proof until puffy and score along the top. |
| Crust is pale | Insufficient heat or bake time | Fully preheat and bake until golden. |
| Center seems gummy | Early slicing or incomplete baking | Cool before cutting and verify doneness. |
| Crust softens after storage | Interior moisture migrates outward | Recrisp briefly in the oven before serving. |
Variations
Three shorter loaves: Divide into three portions and shape shorter baguettes to fit a smaller sheet. Begin checking earlier because thinner loaves can bake faster.
All-purpose flour: Use the same starting amount, holding back optional water until you assess the dough. The result may be softer and less chewy.
Part whole-wheat: Replace ½ cup bread flour with whole-wheat flour as a suggested variation. It may need a little extra water and will likely have a tighter crumb. A full whole-wheat substitution requires a different formula.
Sesame finish: Lightly moisten the shaped surface and sprinkle with sesame seeds before scoring and baking. This adds an ingredient and changes browning, so monitor the seeds.
Garlic bread serving: Bake the baguettes plain, then slice and add garlic butter for a separate toasted preparation. Adding a wet garlic-butter topping before the original bake changes crust development.
Serving Ideas
Slice alongside soup, stew, or a salad. The firm crust and chewy interior work well with butter, soft cheese, or a little olive oil.
For sandwiches, let the bread cool fully, then cut into portions and split lengthwise. Avoid pressing the loaf flat while sawing through the crust.
For crostini, slice day-old bread thinly and toast with a light coating of oil. Older baguettes can also become breadcrumbs, croutons, or a bread-based salad.
Make-Ahead Planning
This is a same-day method rather than an overnight fermentation formula. You can arrange your schedule around the two rises, but room temperature changes the timing.
For convenient future meals, bake and cool the loaves, then freeze them. This is more predictable than casually extending the room-temperature rise overnight with the stated yeast amount.
A refrigerated dough variation would need fermentation and proofing adjustments. Do not leave the mixed dough out all night and assume it follows the same schedule or will retain enough strength.
Storage and Recrisping
Baguettes are best the day they are baked. Keep the fully cooled bread in a paper bag or loosely wrapped for the remainder of the day if maintaining some crust texture is the priority.
For up to 1–2 days, an airtight bag helps limit drying but softens the crust. Freeze what you will not use soon rather than expecting a lean baguette to stay soft for many days.
Wrap cooled loaves or portions well and freeze for up to 2 months for best quality. Thaw covered at room temperature, then unwrap and warm at about 350°F for 5–10 minutes to refresh the crust, allowing longer if needed for a whole loaf.
Refrigeration generally speeds staling in plain bread, so it is not the best texture choice for short-term storage. Added perishable sandwich fillings have their own refrigeration needs.
Discard the entire loaf if mold develops rather than cutting away a visible spot.
Nutrition Estimate
With the base four ingredients divided into 12 similar slices, a rough estimate is approximately 110–125 calories and 4 grams of protein per slice. Six larger sandwich portions contain about twice that amount.
These are illustrative estimates rather than a calculated nutrition label. Flour measurement, slice size, and any additional toppings affect the result. Butter, oil dips, cheese, and sandwich fillings are additional.
The bread contains wheat and is not gluten-free. It is also not low-carb or a high-protein specialty loaf, even though flour contributes some protein.
Frequently Asked Questions
Do I need a baguette pan?
No. A large baking sheet works. Proofing support and careful shaping help keep the loaves slender without a specialty pan.
Is this a no-knead recipe?
It uses brief kneading and folds rather than a long kneading session. Omitting all development steps would change the method.
Do I need sugar to feed the yeast?
No added sugar is required for this lean bread formula. The dough ferments with flour, water, yeast, and salt.
Why are the holes smaller than in bakery baguettes?
Hydration, flour strength, fermentation, shaping, and oven conditions all affect the crumb. Gentle handling helps, but a same-day home recipe does not guarantee very large holes.
Can I skip steam?
Yes. Use the dry-oven method if you lack approved equipment. The bread may look different, but improvised steam is not necessary to complete the recipe.
Can I use parchment under a broiler?
This recipe does not need broiling. Use parchment only within its stated temperature rating and follow the oven and baking surface instructions.
Why did the crust soften?
Moisture moves from the crumb into the crust as bread cools and sits. Airtight storage accelerates the soft feel. A brief oven warm-up can refresh it.
Can I double the recipe?
You can mix a larger dough, but bake in batches if the oven cannot accommodate all the loaves with space. Coordinate proofing so the second batch does not overproof while the first bakes.
Recipe Card
Crispy Golden Homemade Baguettes
Two shorter home-oven baguettes with a golden crust and a chewy, tender center.
Yield: 2 loaves, about 13–15 inches each
Servings: 12 slices or 6 sandwich portions
Active prep: 25–30 minutes
Rise and resting: About 2¼–3¼ hours
Bake: 22–30 minutes
Cool: 30–45 minutes
Total: Approximately 3½–4¾ hours
Oven: 450°F
Ingredients
- 3 cups bread flour, spooned and leveled, plus extra for shaping
- 1 cup plus 2 tablespoons lukewarm water
- 1–2 tablespoons additional water, only if needed
- 1½ teaspoons instant yeast
- 1¼ teaspoons fine salt
Instructions
- Mix flour and yeast with the starting water until shaggy. Cover and rest 15 minutes. Work in salt, adding small amounts of optional water only if dry or stiff.
- Knead gently for 3–5 minutes until cohesive. Cover for the first rise.
- Fold the dough from four sides after 30 minutes and repeat after another 30 minutes. Continue rising until puffy and roughly doubled, about 1½–2 hours total or longer in a cool room.
- Divide in two. Preshape into short logs, cover, and rest 15–20 minutes.
- Fold and seal each portion into a log, then roll gently to 13–15 inches. Rest briefly if it resists stretching.
- Place seam-side down on parchment on a large sheet, with space between. Cover loosely and proof 35–60 minutes until puffy and a gentle indentation returns slowly and partly. Preheat oven to 450°F.
- Remove any towel supports. Score each loaf three or four times with shallow overlapping diagonal cuts along the top.
- Bake 22–30 minutes until deeply golden and set, around 205–210°F in the center. Use optional steam only with an oven-approved setup as described in the article; otherwise bake dry.
- Cool uncovered on a rack for at least 30–45 minutes before slicing.
Storage: Best the day baked. Store cooled bread briefly, or freeze wrapped portions up to 2 months for best quality. Refresh thawed bread at 350°F for about 5–10 minutes.
Estimated nutrition: About 110–125 calories per slice at 12 slices, before toppings.
Development note: Suggested formula, not kitchen-tested. Use dough texture, proofing cues, and crust color to adjust the timing.
Print
Crispy Golden Homemade Baguettes
Description
Two shorter home-oven baguettes with a golden crust and a chewy, tender center.
Yield: 2 loaves, about 13–15 inches each
Servings: 12 slices or 6 sandwich portions
Active prep: 25–30 minutes
Rise and resting: About 2¼–3¼ hours
Bake: 22–30 minutes
Cool: 30–45 minutes
Total: Approximately 3½–4¾ hours
Oven: 450°F
Ingredients
- 3 cups bread flour, spooned and leveled, plus extra for shaping
- 1 cup plus 2 tablespoons lukewarm water
- 1–2 tablespoons additional water, only if needed
- 1½ teaspoons instant yeast
- 1¼ teaspoons fine salt
Instructions
- Mix flour and yeast with the starting water until shaggy. Cover and rest 15 minutes. Work in salt, adding small amounts of optional water only if dry or stiff.
- Knead gently for 3–5 minutes until cohesive. Cover for the first rise.
- Fold the dough from four sides after 30 minutes and repeat after another 30 minutes. Continue rising until puffy and roughly doubled, about 1½–2 hours total or longer in a cool room.
- Divide in two. Preshape into short logs, cover, and rest 15–20 minutes.
- Fold and seal each portion into a log, then roll gently to 13–15 inches. Rest briefly if it resists stretching.
- Place seam-side down on parchment on a large sheet, with space between. Cover loosely and proof 35–60 minutes until puffy and a gentle indentation returns slowly and partly. Preheat oven to 450°F.
- Remove any towel supports. Score each loaf three or four times with shallow overlapping diagonal cuts along the top.
- Bake 22–30 minutes until deeply golden and set, around 205–210°F in the center. Use optional steam only with an oven-approved setup as described in the article; otherwise bake dry.
- Cool uncovered on a rack for at least 30–45 minutes before slicing.
Storage: Best the day baked. Store cooled bread briefly, or freeze wrapped portions up to 2 months for best quality. Refresh thawed bread at 350°F for about 5–10 minutes.
Estimated nutrition: About 110–125 calories per slice at 12 slices, before toppings.
Development note: Suggested formula, not kitchen-tested. Use dough texture, proofing cues, and crust color to adjust the timing.