
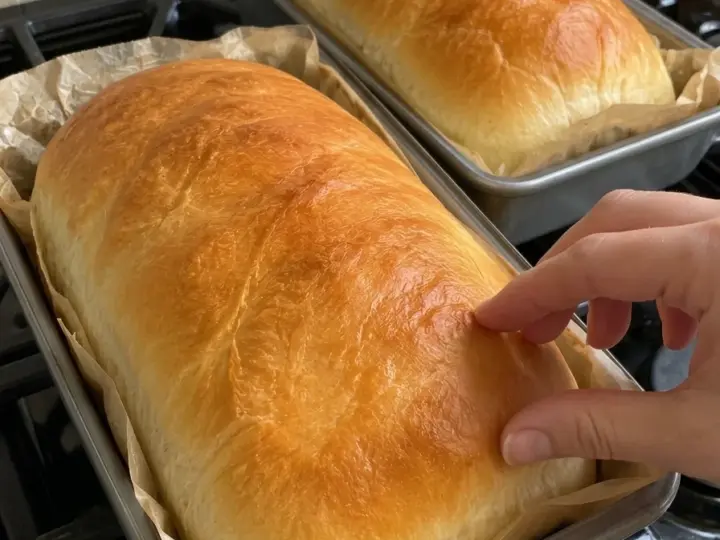
This Light & Airy Everyday Homemade Bread has a soft, springy center, a golden crust, and a mild, buttery flavor that works with almost any meal. Slice it for sandwiches, toast it for breakfast, or serve it alongside a warm bowl of soup.
The recipe uses straightforward ingredients: flour, water, milk, yeast, a little sugar, butter, and salt. Milk and butter help create a tender crumb, while kneading and two rises give the loaf its structure and volume.
You do not need a bread machine or special equipment. The dough can be mixed in a bowl and kneaded by hand, making it an approachable recipe for anyone who wants a dependable homemade sandwich loaf.
The dough should feel soft and slightly tacky rather than dry. Giving it enough time to rise and allowing the baked loaf to cool before slicing are just as important as measuring the ingredients carefully.
Below, you will find ingredient explanations, detailed instructions, tips for a lighter crumb, variations, storage guidance, and a complete recipe card.
What Is Everyday Homemade Bread?
Everyday homemade bread is a simple yeast loaf designed for regular meals rather than a specific occasion.
This version is lightly enriched with milk and butter. Those ingredients soften the crumb and give it a gentle richness without making the bread heavy or noticeably sweet.
The dough is kneaded until smooth, allowed to rise, shaped into a log, and proofed again in a loaf pan. Baking produces a lightly golden crust around a tender interior.
Expect an even, moderately airy crumb suitable for sandwiches. It should hold fillings without large holes, while remaining soft enough for toast with butter or jam.
Why You’ll Love This Recipe
It suits everyday meals. Use it for breakfast, sandwiches, dinner sides, or toast.
The ingredients are familiar. There are no specialty flours or additives required.
You can knead it by hand. A stand mixer is optional.
The flavor is mild and versatile. It pairs with both sweet spreads and savory fillings.
It makes one loaf. The batch is manageable for a small household.
It freezes well. Individual slices can be removed as needed.
The method teaches useful bread-making skills. Learning how the dough should feel helps with many other yeast recipes.
Ingredient Breakdown
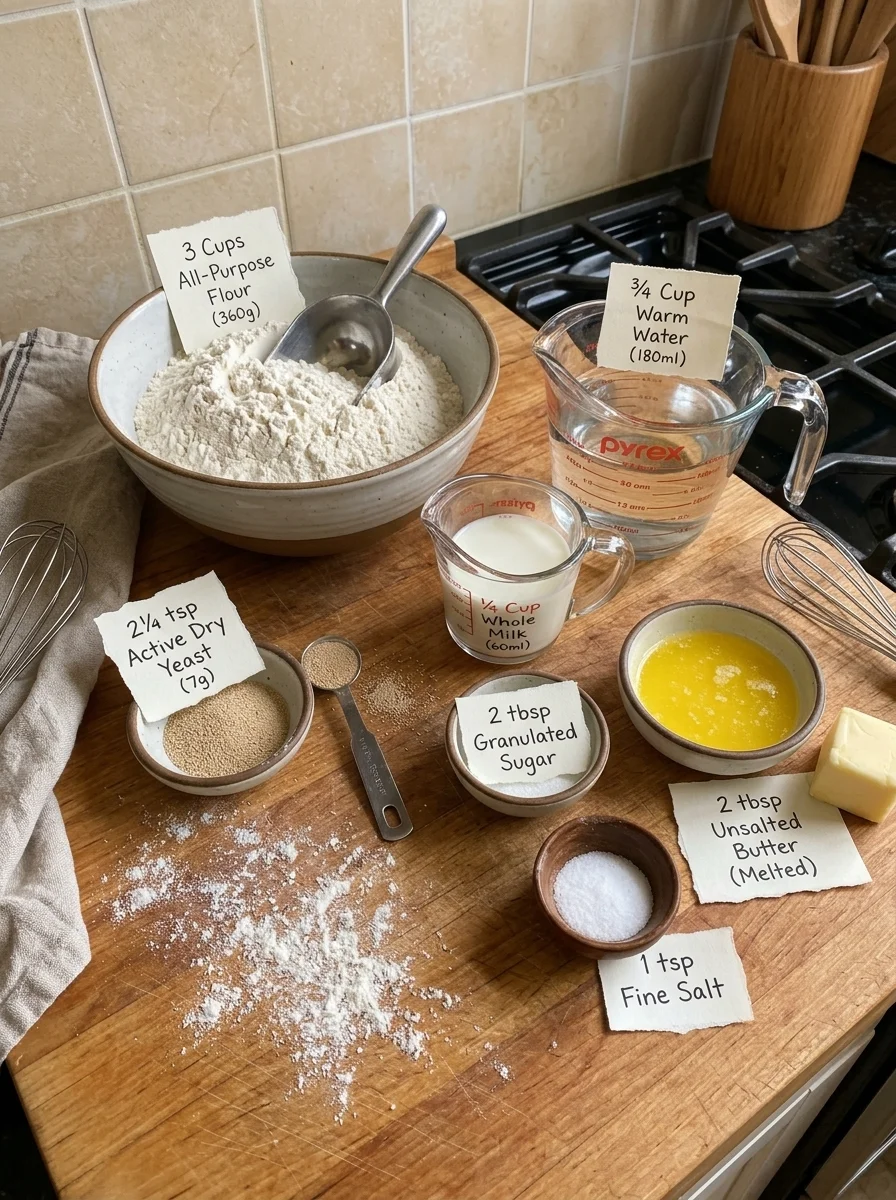
All-Purpose Flour — 3 Cups, About 360 Grams
All-purpose flour gives the loaf a tender texture with enough structure for slicing.
For consistent results, weigh it. If using measuring cups, fluff the flour, spoon it into the cup, and level the top.
Keep a small amount available for kneading, but do not add it automatically. Extra flour can turn a soft dough into a heavy loaf.
Bread flour can be substituted in the same weight for a slightly chewier result.
Warm Water — ¾ Cup, About 180 Milliliters
Use water at approximately 105–110°F (40–43°C).
This is warm enough to encourage active dry yeast without being excessively hot. A thermometer is helpful if you are uncertain.
Whole Milk — ¼ Cup, About 60 Milliliters
Milk contributes flavor, tenderness, and crust color.
Warm it gently until lukewarm before adding. It should not be hot. Two-percent milk also works.
Active Dry Yeast — 2¼ Teaspoons
This equals one standard 7-gram packet.
Check the expiration date and store opened yeast according to the package instructions.
The first resting step lets you look for signs of activity before proceeding.
Granulated Sugar — 2 Tablespoons
Sugar adds mild sweetness and helps the crust brown.
The quantity is modest, so the bread remains suitable for savory meals.
Unsalted Butter — 2 Tablespoons
Melt the butter and let it cool until lukewarm.
Butter adds richness and helps keep the crumb tender. Very hot butter should not be poured directly into the yeast mixture.
Fine Salt — 1 Teaspoon
Salt seasons the bread and helps regulate yeast activity.
Use fine salt for the listed measurement. Coarse salts vary in density, so they are less predictable when measured by teaspoon.
Optional Finishing Butter
Brush the hot loaf with 1 teaspoon melted butter for a softer, lightly glossy crust.
Equipment You’ll Need
- A large mixing bowl
- A sturdy spoon or spatula
- Measuring tools or a kitchen scale
- A clean kneading surface
- An 8½ × 4½-inch loaf pan
- A clean towel or lightly greased plastic wrap
- A wire cooling rack
- An instant-read thermometer, if available
A larger 9 × 5-inch pan can be used, but the loaf will be wider and shorter.
How to Make Light & Airy Everyday Homemade Bread
Step 1: Activate the Yeast
Combine the warm water, sugar, and active dry yeast in a large bowl.
Stir gently and let stand for 5–10 minutes, until small bubbles or a light foam appear.
If there is no activity after a little extra resting time, check the yeast and water temperature before continuing.
Step 2: Add the Remaining Wet Ingredients
Stir in the lukewarm milk and melted, cooled butter.
The mixture should feel warm rather than hot.
Step 3: Form the Dough
Add the flour and salt.
Stir until no loose flour remains and a shaggy dough forms. Scrape the bottom and sides of the bowl to incorporate dry patches.
Cover and rest for 10 minutes. This gives the flour time to hydrate and makes the dough easier to knead.
Step 4: Knead Until Smooth
Turn the dough onto a lightly floured surface.
Knead for 8–10 minutes, folding it over itself, pressing forward with the heel of your hand, and turning between folds.
The dough should become smooth, elastic, and slightly tacky.
If it sticks heavily, add flour 1 tablespoon at a time. If it feels dry and stiff, knead in water 1 teaspoon at a time.
Step 5: First Rise
Place the dough in a lightly greased bowl and turn once to coat.
Cover and let rise in a warm, draft-free place for 60–90 minutes, until approximately doubled.
The dough should look expanded and feel lighter. A cool room may require more time.
Step 6: Shape the Loaf
Grease the loaf pan.
Gently press the dough to release large air pockets. Pat it into a rectangle approximately 8 inches wide and 10 inches long.
Starting from an 8-inch edge, roll into a snug log. Pinch the seam closed, tuck the ends underneath, and place seam-side down in the pan.
Step 7: Second Rise
Cover loosely and let rise for 35–55 minutes, until the center crowns approximately 1 inch above the rim.
Preheat the oven to 350°F (175°C) during the final 20 minutes.
Judge the rise by the dough’s appearance rather than waiting for an exact number of minutes.
Step 8: Bake
Remove the covering and bake for 30–35 minutes.
The top should be golden brown, and the center should register approximately 190–195°F (88–91°C).
If the crust browns too quickly, loosely tent with foil.
Step 9: Cool
Let the loaf rest in the pan for 5–10 minutes, then transfer to a wire rack.
Brush with the optional melted butter.
Cool for at least 1 hour, preferably until barely warm in the center, before slicing.
Tips for a Lighter, Softer Loaf
Measure flour accurately. Too much flour is a common reason bread becomes dense.
Keep the dough soft. A slightly tacky dough generally produces a more tender loaf than a stiff one.
Allow the short hydration rest. It makes kneading easier without requiring extra flour.
Knead until elastic. The dough needs enough structure to hold the gas produced by the yeast.
Give both rises enough time. Underproofed dough can bake into a tight crumb.
Avoid excessive warmth. A very hot proofing location can dry the surface or cause the dough to rise too quickly.
Shape with even tension. A snug log supports an even rise and reduces large internal gaps.
Do not overproof. A loaf that rises far beyond its strength can collapse or develop a weak top.
Cool completely for neat slices. Warm bread is more likely to compress under the knife.
Variations to Try
Honey Everyday Bread
Replace the sugar with 2 tablespoons honey.
The dough may feel slightly stickier. Adjust only if it remains difficult to handle after kneading.
Olive Oil Bread
Replace the melted butter with 2 tablespoons mild olive oil.
This gives a different flavor while keeping the method unchanged.
Garlic Herb Loaf
Add 1 teaspoon garlic powder and 1 teaspoon dried Italian seasoning with the flour.
Serve with soups, pasta, or savory sandwiches.
Part Whole-Wheat Bread
Replace 1 cup of all-purpose flour with 120 grams whole-wheat flour.
Use the hydration rest and add a little water if the dough feels firm. Expect a heartier loaf with a slightly closer crumb.
Cinnamon Raisin Bread
Add 1 teaspoon cinnamon with the dry ingredients.
Knead in ½ cup raisins near the end of kneading so they distribute without tearing the dough excessively.
Dinner Rolls
After the first rise, divide into 8 equal pieces and shape into balls.
Place in a greased baking dish, cover, and let rise until puffy. Bake at 350°F (175°C) for approximately 20–25 minutes, checking for doneness.
What to Serve with Homemade Bread
This mild loaf fits easily into meals throughout the day.
- Butter and jam: A simple way to enjoy the soft crumb.
- Eggs: Serve toasted alongside scrambled eggs or an omelet.
- Grilled cheese: The even slices toast well in a skillet.
- Chicken salad: Use fully cooled bread for sturdier sandwiches.
- Tomato soup: Serve thick slices for dipping.
- French toast: Day-old bread absorbs the egg mixture well.
- Roast dinner: Offer slices with vegetables and gravy.
If the loaf starts to lose freshness, make croutons, breadcrumbs, or bread pudding rather than discarding it.
Storage and Freezing
Room Temperature
Cool completely before wrapping.
Store in a bread bag or airtight container at room temperature for 2–3 days. In warm or humid conditions, freeze the portion you will not use promptly.
Freezer
Slice the cooled loaf and place in a freezer-safe bag.
Separate slices with parchment if needed. Freeze for up to 3 months for best quality.
Thawing
Thaw a whole loaf in its wrapping at room temperature.
Individual slices can usually go directly into the toaster from frozen.
Refreshing the Bread
Wrap a thawed loaf loosely in foil and warm at 300°F (150°C) for approximately 10–15 minutes.
Refrigeration is generally less helpful for plain bread because it speeds staling. Freezing is preferable for longer storage.
Overnight Dough Option
After kneading, place the dough in a greased bowl with room to expand, cover, and refrigerate overnight.
The next day, gently deflate, shape, and allow the final rise. Cold dough will need extra time to become puffy before baking.
Frequently Asked Questions
Can I use instant yeast?
Yes. Substitute the same amount. You can follow the same mixing sequence, but the dough may rise faster.
Can I knead with a stand mixer?
Yes. Use a dough hook on low speed according to the mixer’s guidance. Stop when the dough is smooth and elastic rather than relying on hand-kneading times.
Why is my dough sticky?
Some tackiness is normal. Knead for a few minutes before adding flour, since the texture often improves as the dough develops.
Why did my loaf turn out dense?
Excess flour, inactive yeast, insufficient kneading, or inadequate rising time can all contribute.
Why did the top collapse?
The dough may have overproofed, or the center may have been underbaked. Watch the final rise and check doneness before removing.
Can I use water instead of milk?
Yes. Replace the milk with the same volume of water. The loaf will have a slightly different flavor and may be less tender.
Can I use salted butter?
Yes. Reduce the added salt slightly if desired, accounting for the butter’s salt content.
Why is the middle gummy?
The bread may be underbaked or sliced too soon. Let the crumb set during cooling before cutting.
Can I make it without a loaf pan?
Shape into a short oval and bake on a parchment-lined sheet. It will spread more, and the baking time may differ.
Can I double the recipe?
Yes. Divide the dough between two loaf pans and check each loaf individually for doneness.
How do I keep the crust soft?
Brush the baked loaf lightly with butter, cool fully, and store airtight. Wrapping while hot traps steam and can make the surface damp.
What knife should I use?
A serrated bread knife works best. Use a gentle sawing motion rather than pressing down on the loaf.

Light & Airy Everyday Homemade Bread
Description
A soft, lightly enriched yeast loaf with a golden crust and tender crumb.
- Prep and kneading: 20 minutes
- Yeast rest: 5–10 minutes
- Hydration rest: 10 minutes
- First rise: 60–90 minutes
- Second rise: 35–55 minutes
- Bake time: 30–35 minutes
- Cooling: At least 1 hour
- Total time: Approximately 3 hours 40 minutes–4 hours 40 minutes
- Yield: 1 loaf, approximately 12 slices
- Difficulty: Easy
Ingredients
Ingredients
- 3 cups (360 g) all-purpose flour
- ¾ cup (180 ml) warm water, 105–110°F (40–43°C)
- ¼ cup (60 ml) whole milk, lukewarm
- 2¼ teaspoons (7 g) active dry yeast
- 2 tablespoons (25 g) granulated sugar
- 2 tablespoons (28 g) unsalted butter, melted and cooled
- 1 teaspoon fine salt
- Additional flour for kneading, as needed
- Butter or oil for greasing
- 1 teaspoon melted butter for finishing, optional
Instructions
Instructions
- Combine warm water, sugar, and yeast. Rest for 5–10 minutes.
- Stir in milk and melted, cooled butter.
- Add flour and salt. Mix into a shaggy dough.
- Cover and rest for 10 minutes.
- Knead for 8–10 minutes, until smooth and elastic.
- Place in a greased bowl, cover, and rise for 60–90 minutes, until doubled.
- Gently deflate and pat into an 8 × 10-inch rectangle.
- Roll into a snug log and pinch the seam closed.
- Place seam-side down in a greased 8½ × 4½-inch loaf pan.
- Cover and rise for 35–55 minutes, until crowned above the rim.
- Bake at 350°F (175°C) for 30–35 minutes, until golden and the center reaches 190–195°F (88–91°C).
- Rest in the pan for 5–10 minutes, then transfer to a rack.
- Brush with optional butter and cool before slicing.