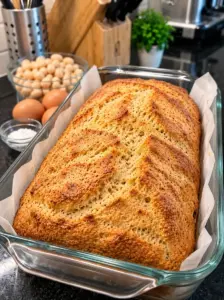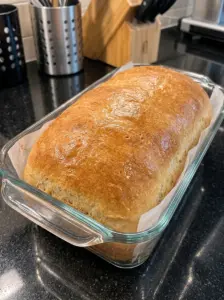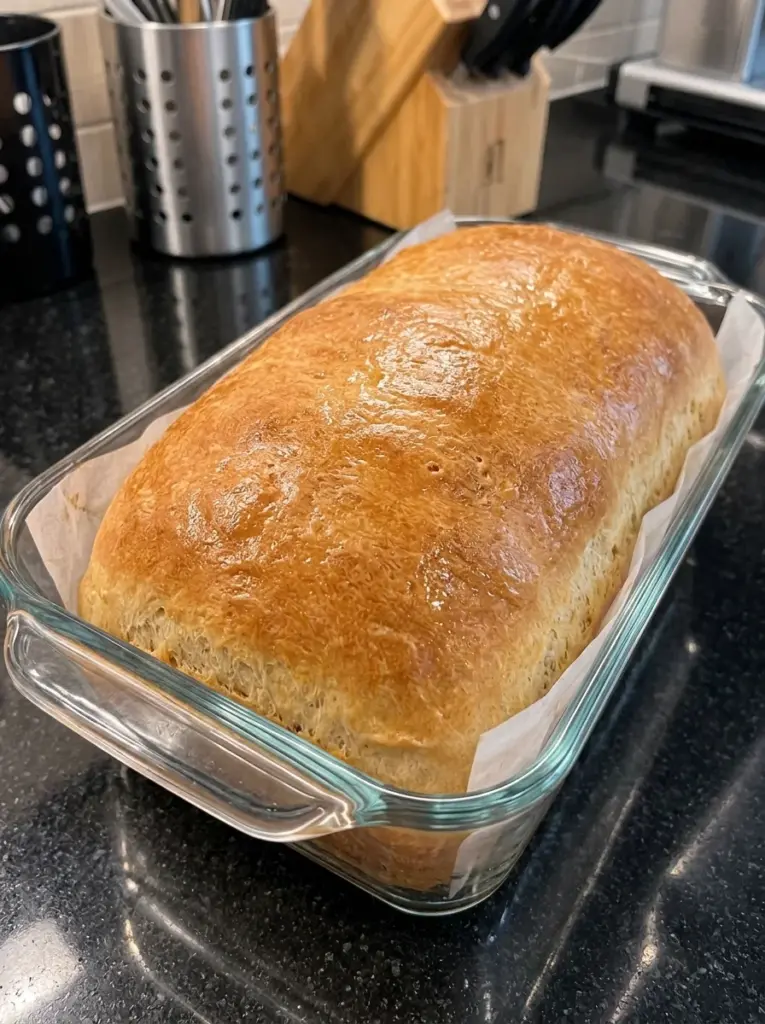
A loaf of homemade sandwich bread does not need a stand mixer or a long kneading session. This easy no-knead version uses a soft dough, a little patience, and a standard loaf pan to make bread with a tender center and a lightly golden crust. Mix with a sturdy spoon, let the dough rise, shape it gently, and bake.
The loaf is lightly sweetened and enriched with milk and butter, making it suitable for everyday sandwiches, breakfast toast, and grilled cheese. It has more structure than a cake-like quick bread and a softer crust than a rustic bread baked in a Dutch oven.
Because the title did not include an ingredient list, the formula below is a suggested recipe rather than an independently kitchen-tested reproduction. Flour absorption, room temperature, and pan dimensions affect the result. Use the dough texture and rise cues alongside the approximate times.
What Makes This Bread No-Knead?
Kneading helps develop the gluten network that holds gas inside bread dough. In a no-knead method, thorough mixing, moisture, and resting time do much of that work. The dough gradually becomes more cohesive as it sits.
This version also includes one brief set of folds during the first rise. Folding means lifting an edge of dough and bringing it toward the middle a few times while it stays in the bowl. It is a short handling step, not a continuous kneading session, and helps give the loaf a little more strength.
No-knead does not mean no handling at all. You still need to mix until the flour is hydrated, fold gently, and shape the dough so it rises evenly in the pan. A few purposeful movements are more useful than adding excess flour to make the dough feel dry.
The Texture to Expect
The finished bread should have a tender, fairly even crumb that slices neatly after cooling. It will not have the large holes of a wet artisan boule, and it is not intended to be as rich as brioche.
Milk and butter soften the crumb, while a modest amount of sugar rounds out the flavor. Brushing the warm top with butter gives the crust a softer finish.
Fresh bread can seem gummy if sliced while hot. Letting it cool completely is one of the most important steps for sandwich slices that hold their shape.
Recipe Overview
| Detail | Suggested guide |
|---|---|
| Yield | 1 loaf, about 12 slices |
| Pan | 9 × 5-inch metal loaf pan |
| Active preparation | Approximately 15–20 minutes |
| First rise | Approximately 1½–2½ hours |
| Second rise | Approximately 45–75 minutes |
| Baking | Approximately 35–40 minutes |
| Cooling | At least 1–1½ hours |
| Total time | Roughly 4–6 hours, including cooling |
| Oven | 350°F |
The rise times are flexible. A cooler room slows the dough, and a warmer room speeds it up. Watch the dough rather than trying to force it into an exact schedule.
Ingredients
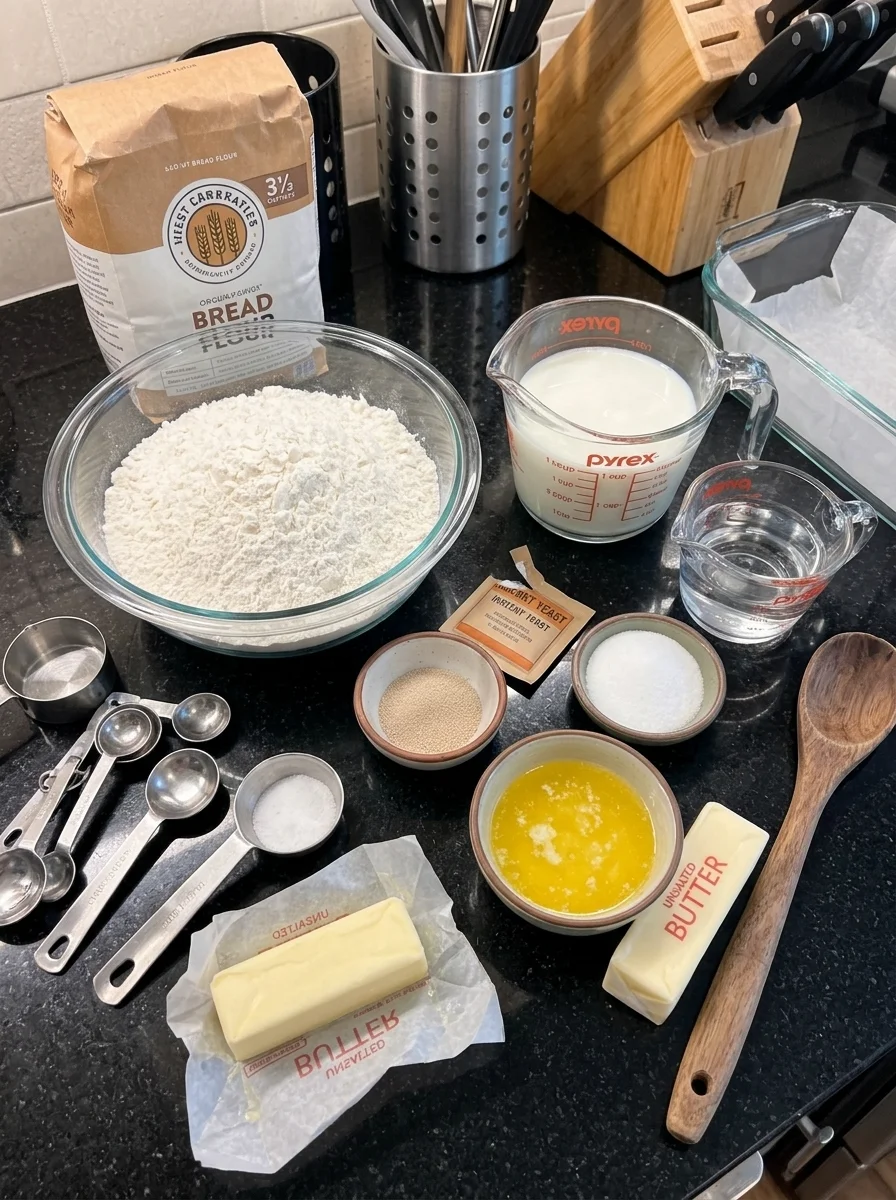
- 3½ cups bread flour or all-purpose flour, spooned into the cup and leveled, plus a little for shaping
- 2¼ teaspoons instant yeast
- 2 tablespoons granulated sugar
- 1¼ teaspoons fine salt
- 1 cup lukewarm milk
- ½ cup lukewarm water, divided, with the last 2 tablespoons reserved initially
- 3 tablespoons unsalted butter, melted and cooled until lukewarm
- 1 tablespoon melted butter, optional, for brushing the baked loaf
This is an egg-free enriched loaf. It still contains milk and butter, so it is not dairy-free as written.
The water is adjustable because flour and measuring methods vary. Start with the milk and 6 tablespoons of water. Add the final 2 tablespoons gradually if needed to produce a very soft, tacky dough. Do not add them automatically if the dough is already loose.
Ingredient Notes
Bread flour or all-purpose flour
Bread flour generally gives the loaf more strength and chew, which can be useful in a soft no-knead dough. All-purpose flour can produce a more tender loaf, but brands vary in absorption and protein content.
Measure gently. Scooping flour directly from the bag can pack more into the cup and make the dough drier than intended. Stir the flour, spoon it into the measuring cup, and level the top without pressing down.
Avoid replacing all the flour with whole-wheat flour in the first batch. Whole-wheat flour absorbs water differently and can make the loaf denser. Start with the plain formula before making changes.
Instant yeast
Instant yeast can be mixed directly into the flour. You do not need a separate proofing step for this method.
Check that the yeast has been stored appropriately and is within its useful date. If the dough does not rise, yeast condition is one possibility, but cold room temperature can also slow activity substantially.
Active dry yeast can often be used in the same amount, but follow its package instructions for hydration and expect timing differences. If you dissolve it first, use liquid already counted in the recipe rather than adding extra water.
Milk and water
The milk adds flavor and helps make the crumb tender. The water loosens the dough so it can be mixed with a spoon.
Use comfortably lukewarm liquid, approximately 95–105°F. Hot liquid can damage yeast. The melted butter should also be lukewarm rather than hot when it touches the dough.
Whole milk gives a slightly richer result, but lower-fat milk can be used. The dough texture is a better guide than the milk’s fat level alone.
Butter
Butter adds richness and helps soften the bread. Melt it gently and let it cool before mixing.
The optional finishing butter goes on after baking. It is not part of the liquid used to form the dough. Brushing the warm crust lightly is enough; there is no need to saturate the loaf.
Sugar and salt
The small amount of sugar provides mild sweetness without turning the bread into a sweet loaf. Salt balances flavor and affects how the dough behaves during fermentation.
Use the stated fine salt measurement. Coarse salts can differ substantially by volume. Avoid adding extra salt by eye before you have tried the suggested formula.
Equipment
You need a large bowl, a sturdy spoon or spatula, a bowl cover, a 9 × 5-inch loaf pan, a cooling rack, and an oven. A bench scraper is helpful for moving sticky dough but is optional.
A metal pan is the suggested starting point. Glass, ceramic, and dark nonstick pans can change browning and baking time. Grease the pan thoroughly, or line it with parchment that leaves handles along the long sides.
An instant-read thermometer helps assess the baked center. It is not essential for mixing the dough, but it can be reassuring when the crust browns before you are sure the inside is done.
How to Make No-Knead Sandwich Bread
1. Mix the dry ingredients
Place the flour, instant yeast, sugar, and salt in the large bowl. Stir thoroughly so the yeast and salt are distributed rather than concentrated in one spot.
Choose a bowl with enough room for the dough to approximately double. A cramped bowl makes it harder to fold the dough and judge its rise.
2. Add the liquids and butter
Add the lukewarm milk, 6 tablespoons of the water, and the melted, cooled butter. Stir firmly, scraping the bottom and sides, until no dry flour remains.
The dough should be very soft and tacky. If dry flour remains and the mixture feels stiff, add the reserved water a tablespoon at a time. If the dough already forms a loose, sticky mass, stop adding liquid.
Spend about 2–3 minutes mixing, including scraping and turning the dough over on itself. You are looking for complete hydration, not a smooth kneaded ball. The mixture may look rough at first.
Do not keep adding flour until the dough stops sticking. Some stickiness is intentional and helps make spoon mixing possible.
3. Rest and fold once
Cover the bowl and let the dough rest for about 30 minutes.
Lightly wet or oil your fingers. Lift one edge of dough and fold it toward the center. Turn the bowl and repeat three or four times, working around the dough. Stop before tearing it.
This should take less than a minute. Cover the bowl again. The dough may already feel more elastic than it did immediately after mixing.
4. Complete the first rise
Let the dough continue rising until approximately doubled and visibly aerated, usually another 1–2 hours after the fold. The total first rise is often 1½–2½ hours, including the initial rest.
Keep it in a comfortably warm, draft-free place. Avoid a hot oven or direct contact with a heat source, which can warm the dough unevenly and melt the butter out of it.
Look for expansion and a puffy surface. A few bubbles are helpful signs. If the room is cool and the dough has barely expanded, give it more time before deciding that something is wrong.
5. Prepare the loaf pan
Grease a 9 × 5-inch loaf pan, including the corners and upper edges. If using parchment, leave overhang on the long sides and grease exposed areas as needed.
Prepare the pan before turning the dough out so you can shape and transfer without leaving a sticky mass on the counter while looking for equipment.
6. Shape gently
Lightly flour the work surface and your hands. Turn the risen dough out with a spatula or scraper.
Gently pat it into a rough rectangle about as wide as the pan is long. Fold the sides inward slightly if necessary, then roll it into a short log. Pinch the seam lightly and place seam-side down in the pan.
Use only enough flour to prevent uncontrollable sticking. A scraper can help lift the dough without working large amounts of flour into it.
The shape does not need to be perfect. The purpose is to distribute the dough evenly, create a little surface tension, and avoid large trapped pockets or a folded center that is much thicker than the ends.
7. Let the loaf rise again
Cover the pan loosely with a lightly greased cover so it does not stick to the dough. Let rise for approximately 45–75 minutes, until the center crowns about ½–1 inch above the rim, depending on the pan’s actual capacity.
The dough should look puffy and slightly springy. A very gentle touch with a floured fingertip should leave an indentation that returns slowly rather than snapping back immediately.
Begin preheating the oven to 350°F before the loaf is fully ready. Do not wait until the dough has reached its final height to turn the oven on.
If it is rising rapidly, check it sooner. Leaving an already expanded loaf waiting too long can weaken the structure and lead to collapse.
8. Bake until golden and set
Remove the cover and place the pan on the middle rack. Bake for approximately 35–40 minutes, checking as needed for your oven.
The top should be golden brown, the sides should look set, and the center should reach roughly 195–200°F. Temperature is a useful guide alongside appearance; a wet or compressed center may indicate that it needs longer.
If the top darkens too quickly, loosely cover it with foil and continue baking. A brown top alone does not guarantee that the center is finished.
Avoid opening the oven repeatedly early in baking. Give the loaf time to establish its structure before checking.
9. Remove from the pan and cool
Let the bread rest in the pan for about 5–10 minutes. Turn it onto a rack or lift it using the parchment, then remove the paper so steam can escape.
Brush the warm top with the optional melted butter. Cool for at least 1–1½ hours, preferably until completely cool, before slicing.
Use a serrated knife and a gentle sawing motion. Pressing straight down can squash a soft loaf, especially if it is still warm.
Tips for a Tender Loaf
Keep the dough soft
A no-knead dough needs enough moisture to mix and develop during rest. A stiff, dry dough can produce a heavy loaf and be difficult to shape without kneading.
Use the reserved water thoughtfully
Flour measurements and absorption vary. Holding back a small amount lets you adjust without immediately making the dough too wet.
Give fermentation time
Rising is affected by temperature, yeast condition, and the dough itself. Doubling and puffiness are more useful than a rigid countdown.
Shape without squeezing excessively
A gentle shaping step redistributes gas and organizes the loaf. There is no need to press the dough flat with force or repeatedly roll it out.
Cool before bagging
Warm bread releases steam. Sealing it immediately can make the crust damp and encourage excess condensation in the bag.
Troubleshooting
| Problem | Possible cause | What to change |
|---|---|---|
| Dough is stiff and dry | Packed flour or insufficient liquid | Measure flour lightly and add reserved water gradually |
| Dough is too loose to shape | Excess liquid or low-absorption flour | Use a scraper and minimal flour; hold back more water next time |
| Little rise | Cool room, weak yeast, or liquid too hot | Allow time, check yeast condition, and use lukewarm liquids |
| Dense loaf | Underproofing, dry dough, or insufficient mixing | Hydrate fully and let the dough expand before shaping and baking |
| Loaf collapses | Overproofing or incomplete baking | Bake when puffy and ready; check the center before removal |
| Gummy slices | Bread cut hot or underbaked | Bake until set and cool completely |
| Hard crust | Long baking or uncovered storage | Check doneness promptly, brush with butter, and bag once cool |
| Large tunnel under the top | Uneven shaping or proofing issues | Shape evenly and avoid trapping a large pocket while rolling |
Do not try to fix every problem by adding more yeast. A loaf can be dense because it needed more rising time, more moisture, or better baking—not because the original yeast amount was too small.
Variations
Honey sandwich loaf
Replace the 2 tablespoons sugar with 2 tablespoons honey. This changes the dough slightly, so hold back the final reserved water and add only as needed. Honey can also encourage browning; watch the crust.
Part whole-wheat loaf
For a cautious first variation, replace ½ cup of the flour with whole-wheat flour. Let the mixed dough rest before judging whether it needs extra water. Expect a somewhat heartier crumb and possibly different rise times.
Seeded top
Brush the shaped loaf lightly with water just before baking and sprinkle with a modest amount of sesame or poppy seeds. Press very gently so they adhere without deflating the dough.
Dairy-free trial
Unsweetened plain plant milk and a suitable plant-based butter may work, but this substitution has not been tested in the suggested formula. Choose unflavored products and assess the dough texture before adding all the water.
Savory herb bread
Add 1 teaspoon dried mixed herbs with the flour. Keep additions modest for the first attempt. Large quantities of cheese, vegetables, or other wet ingredients can change how the loaf rises and bakes.
Serving Ideas
The mild flavor suits turkey, chicken, cheese, and vegetable sandwiches. For moist fillings, spread a thin layer of butter, cream cheese, or another suitable spread on the cut bread before adding vegetables.
Toast slices for breakfast with jam, nut butter, or eggs. The soft crumb also works well for grilled cheese: cook over moderate heat so the filling warms before the exterior becomes too dark.
Day-old bread can be used for French toast, croutons, or breadcrumbs. If making croutons, cut consistent cubes and watch them closely as they dry and brown.
For packed lunches, let any warm cooked filling cool appropriately before assembling. Warm fillings can create condensation and soften the bread in a closed container.
Planning Ahead
You can measure the dry ingredients ahead, keeping the yeast protected from moisture. Prepare the pan before the first rise finishes so shaping stays simple.
This article uses a same-day schedule. An overnight refrigerator rise is possible in many bread formulas, but cold dough, yeast quantity, and proof timing need attention. Do not assume that leaving this dough at room temperature overnight is equivalent to the stated rise.
For the most predictable make-ahead approach, bake the loaf, cool fully, slice, and freeze. You can remove only the slices you need without planning around fermentation.
Storage and Freezing
Room temperature
Keep completely cooled bread in an airtight bread bag or container for approximately 2–3 days in a cool, dry environment. Homemade bread has no added commercial preservatives, so quality and mold development vary with the environment.
Slice only what you need if you prefer to keep the remaining loaf intact. Always use a clean knife and keep the storage container dry.
Refrigerator
Refrigeration can make bread firm or stale faster, so freezing is often the better choice for storage beyond a few days. If your environment is very warm or humid and you choose refrigeration, toast slices to refresh them.
Freezer
Slice the cooled loaf, separate portions with parchment if desired, and seal in a freezer-safe bag. Freeze for up to 2–3 months for best quality.
Toast slices from frozen or thaw the amount needed while covered. Avoid repeatedly thawing and refreezing the entire loaf.
Reheating
Toast for a crisp surface, or microwave a slice very briefly if you want it soft. Long microwaving can make bread tough as it cools.
Discard bread that develops visible mold rather than trimming away only the affected spot.
Nutrition Notes
For a loaf divided into 12 slices, a broad estimate is approximately 180–210 calories per slice before toppings. The exact amount depends on the flour, milk, finishing butter, and slice size.
This is a conventional wheat sandwich bread with some enrichment from milk and butter. It is not a low-carbohydrate or gluten-free recipe. Calculate nutrition from your specific ingredient labels and actual slice count when precision matters.
Frequently Asked Questions
Do I need a stand mixer?
No. A large bowl and sturdy spoon are sufficient. Mix thoroughly enough that no dry flour remains.
Is the folding step kneading?
It is a brief strengthening step performed in the bowl. You are not working the dough continuously on a counter. The suggested method remains no-knead.
Can I skip the fold?
The dough may still rise, but the fold is included to improve its strength and handling. For a first attempt, follow it so you can assess the intended result.
Why is the dough sticky?
A soft, tacky dough is expected. If it pours like batter, it is too loose for the shaping method; if it forms a dry, firm ball immediately, it may need more water. Use the reserved liquid and a scraper thoughtfully.
Can I use a smaller loaf pan?
A smaller pan can overflow or create an overly tall loaf. Use the suggested 9 × 5-inch size, or divide off excess dough rather than filling another pan almost to the rim before proofing.
Should I score the top?
This soft pan loaf does not require scoring. Let it proof appropriately and bake without cutting the surface.
Why did my loaf rise more slowly than expected?
Room temperature is a common reason. Yeast condition, liquid temperature, and dough texture also matter. Let the visible rise guide you rather than shaping an undeveloped dough just because the timer rang.
Can I substitute self-rising flour?
No. Self-rising flour contains chemical leavening and salt and is not a direct replacement for the flour in this yeast recipe.
Can I double the recipe?
You can mix a larger batch if your bowl allows thorough hydration, then divide between two suitable pans. Watch each loaf for proofing and baking rather than assuming both finish at exactly the same moment.
Why does the bread compress when sliced?
It may still be warm, underbaked, or cut with too much downward pressure. Cool fully and use a serrated knife with a light sawing motion.
Recipe Card
Easy No-Knead Homemade Sandwich Bread
A suggested soft milk-and-butter sandwich loaf mixed by spoon, strengthened with one brief fold, and baked in a loaf pan.
Yield: 1 loaf, approximately 12 slices
Prep: 15–20 minutes active
First rise: 1½–2½ hours
Second rise: 45–75 minutes
Bake: 35–40 minutes
Cool: At least 1–1½ hours
Total: Approximately 4–6 hours
Oven: 350°F
Pan: 9 × 5 inches
Ingredients
- 3½ cups bread flour or all-purpose flour, spooned and leveled
- 2¼ teaspoons instant yeast
- 2 tablespoons granulated sugar
- 1¼ teaspoons fine salt
- 1 cup lukewarm milk
- ½ cup lukewarm water, divided; reserve 2 tablespoons initially
- 3 tablespoons unsalted butter, melted and cooled
- 1 tablespoon melted butter for the baked top, optional
Instructions
- Stir flour, yeast, sugar, and salt together in a large bowl.
- Add milk, 6 tablespoons water, and melted, cooled butter. Mix for 2–3 minutes until no dry flour remains. Add reserved water gradually only if needed for a very soft, tacky dough.
- Cover and rest 30 minutes. With damp or lightly oiled fingers, fold the dough toward the center from three or four sides. Cover again.
- Let rise until approximately doubled, usually another 1–2 hours, depending on temperature.
- Grease a 9 × 5-inch loaf pan. Turn dough onto a lightly floured surface, gently pat into a rectangle, and roll into a log. Place seam-side down in the pan.
- Cover loosely and rise approximately 45–75 minutes, until puffy and crowned about ½–1 inch above the rim. Preheat the oven to 350°F before proofing finishes.
- Bake approximately 35–40 minutes, until golden and set, with a center temperature around 195–200°F. Tent with foil if browning early.
- Rest 5–10 minutes in the pan, then transfer to a rack. Brush with optional finishing butter and cool completely before slicing.
Storage: Keep cooled bread airtight for 2–3 days in a cool, dry place, or freeze sliced bread for up to 2–3 months for best quality.
Little tip: Use the dough’s softness and visible rise as your guides. Extra flour and rushed proofing are two of the easiest ways to lose the tender texture you want in sandwich bread.
Print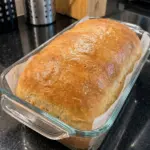
Easy No-Knead Homemade Sandwich Bread
Description
A suggested soft milk-and-butter sandwich loaf mixed by spoon, strengthened with one brief fold, and baked in a loaf pan.
Yield: 1 loaf, approximately 12 slices
Prep: 15–20 minutes active
First rise: 1½–2½ hours
Second rise: 45–75 minutes
Bake: 35–40 minutes
Cool: At least 1–1½ hours
Total: Approximately 4–6 hours
Oven: 350°F
Pan: 9 × 5 inches
Ingredients
- 3½ cups bread flour or all-purpose flour, spooned and leveled
- 2¼ teaspoons instant yeast
- 2 tablespoons granulated sugar
- 1¼ teaspoons fine salt
- 1 cup lukewarm milk
- ½ cup lukewarm water, divided; reserve 2 tablespoons initially
- 3 tablespoons unsalted butter, melted and cooled
- 1 tablespoon melted butter for the baked top, optional
Instructions
- Stir flour, yeast, sugar, and salt together in a large bowl.
- Add milk, 6 tablespoons water, and melted, cooled butter. Mix for 2–3 minutes until no dry flour remains. Add reserved water gradually only if needed for a very soft, tacky dough.
- Cover and rest 30 minutes. With damp or lightly oiled fingers, fold the dough toward the center from three or four sides. Cover again.
- Let rise until approximately doubled, usually another 1–2 hours, depending on temperature.
- Grease a 9 × 5-inch loaf pan. Turn dough onto a lightly floured surface, gently pat into a rectangle, and roll into a log. Place seam-side down in the pan.
- Cover loosely and rise approximately 45–75 minutes, until puffy and crowned about ½–1 inch above the rim. Preheat the oven to 350°F before proofing finishes.
- Bake approximately 35–40 minutes, until golden and set, with a center temperature around 195–200°F. Tent with foil if browning early.
- Rest 5–10 minutes in the pan, then transfer to a rack. Brush with optional finishing butter and cool completely before slicing.
Storage: Keep cooled bread airtight for 2–3 days in a cool, dry place, or freeze sliced bread for up to 2–3 months for best quality.
Little tip: Use the dough’s softness and visible rise as your guides. Extra flour and rushed proofing are two of the easiest ways to lose the tender texture you want in sandwich bread.