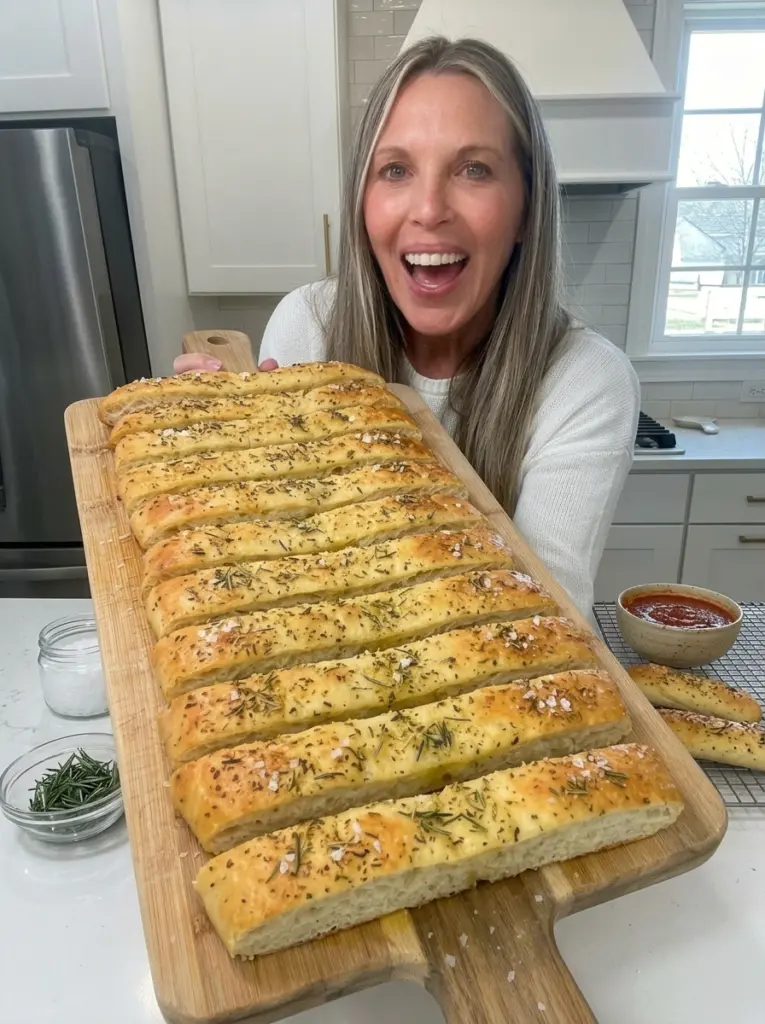
There’s nothing quite like pulling a tray of golden, olive-oil-soaked focaccia out of the oven and watching steam rise off the crackly, dimpled top. These Focaccia Sticks take everything wonderful about classic Italian focaccia — the crispy, deeply golden exterior, the soft and airy interior, the fragrant hit of herbs and garlic — and shape it into perfectly snackable strips that are practically impossible to stop eating.
This recipe uses a wonderfully wet, shaggy dough that gets folded and rested over several rounds rather than kneaded, which is exactly what produces that signature light, open crumb focaccia is known for. A generous coating of extra virgin olive oil in the pan creates a deeply crisp, almost fried-like bottom crust, while deep dimples pressed into the risen dough trap little pools of olive oil, herbs, and flaky salt across the top. The result is bread that’s crunchy where it should be crunchy, pillowy-soft where it should be soft, and bursting with flavor in every single bite.
Whether you’re serving these alongside a big bowl of pasta, dipping them into warm marinara at an appetizer spread, building the ultimate sandwich, or just tearing into a warm piece straight off the tray because you couldn’t wait, these Focaccia Sticks are the kind of homemade bread that turns any meal into something special. Best of all, despite looking (and tasting) like something from an Italian bakery, this recipe is entirely approachable for home bakers, even if you’ve never worked with a wet dough before.
What Is Focaccia?
Focaccia is a classic Italian flatbread known for its thick, airy crumb, crisp golden crust, and generous use of olive oil both in the dough and as a finishing touch on top. Unlike many other bread styles that rely on tight kneading to develop structure, focaccia dough is typically much wetter and looser, developed instead through a series of gentle stretches and folds combined with a long, slow rise.
The dough’s signature dimpled surface isn’t just decorative — pressing deep indentations into the risen dough creates little pockets that catch pools of olive oil, herbs, and salt as the bread bakes, infusing every bite with flavor while also helping create that irresistible crisp-on-the-outside, soft-on-the-inside texture.
This particular recipe transforms the traditional focaccia into “sticks” — long strips cut after baking that make for perfect snacking, dipping, or serving alongside a meal. It’s flavored simply with Italian seasoning, garlic powder, fresh rosemary, and flaky sea salt, but the recipe is easy to dress up with endless variations to suit whatever you’re in the mood for.
Why You’ll Love This Recipe
It has an incredible texture contrast. The exterior is deeply golden and crisp, almost like the crust of a good pizza, while the interior stays soft, airy, and full of large, irregular air pockets.
It’s easier than it looks. Despite the impressive bakery-style results, this recipe doesn’t require any kneading — just simple stretches, folds, and patience while the dough rises.
It’s endlessly versatile. Serve it as a snack, an appetizer, a side for pasta or soup, or the base for an incredible sandwich. It pairs with just about anything.
It’s packed with flavor. Between the olive oil in the dough, the herb and garlic topping, and the flaky sea salt finish, every bite delivers big, savory flavor.
It freezes beautifully. Make a big batch and freeze extras so you always have bakery-quality bread ready to reheat whenever the craving strikes.
It’s a crowd-pleaser. Few things disappear faster at a gathering than a warm tray of homemade focaccia sticks with a bowl of marinara or garlic butter for dipping.
Ingredient Breakdown: Why Each One Matters
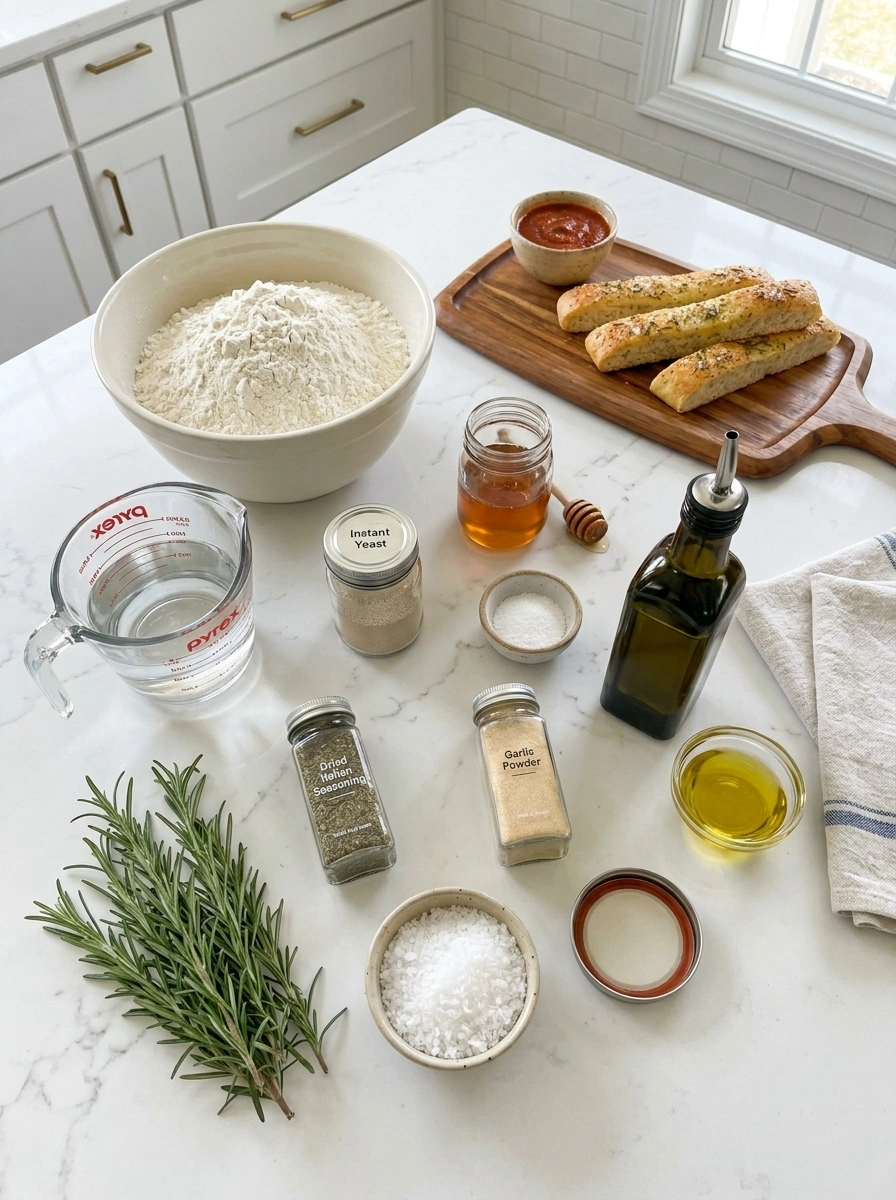
Bread flour (3½ cups / 440 g): Bread flour has a higher protein content than all-purpose flour, which helps develop the gluten structure needed to trap air and create focaccia’s signature light, chewy crumb.
Warm water (1¾ cups / 420 ml): Warm water activates the yeast and hydrates the flour. This recipe uses a generous amount of water, which is intentional — the resulting wet, shaggy dough is exactly what gives focaccia its airy texture.
Instant yeast (2 tsp): Instant yeast helps the dough rise efficiently without needing to be proofed separately in water first, making the process a bit more streamlined.
Honey (1 tbsp): Honey feeds the yeast and adds a subtle background sweetness that balances the savory olive oil and salt in the finished bread.
Salt (2 tsp): Salt strengthens the dough’s structure, controls the fermentation process, and is essential for a well-balanced, flavorful bread.
Extra virgin olive oil (¼ cup, plus more for the pan and topping): Olive oil is used throughout this recipe — in the dough for richness, in the pan for that deeply crisp bottom crust, and drizzled on top before baking to create those signature flavorful pools in the dimples.
Dried Italian seasoning (1 tsp) and garlic powder (1 tsp): These add a fragrant, savory herb-and-garlic flavor across the top of the bread, infusing the olive oil pooled in each dimple.
Flaky sea salt (for topping): A sprinkle of flaky salt on top adds little bursts of salty flavor and a beautiful, rustic finish that regular table salt can’t replicate.
Fresh rosemary (optional): Fresh rosemary adds an aromatic, slightly piney note that pairs beautifully with the olive oil and garlic, and is a classic focaccia topping.
Step-by-Step Instructions
Step 1: Make the dough. In a large bowl, combine the warm water, honey, and yeast. Let the mixture stand for about 5 minutes, until it looks slightly foamy. Add the bread flour, salt, and olive oil, then mix with a wooden spoon or your hands until a sticky, shaggy dough forms. Don’t worry if it feels much wetter than a typical bread dough — that wetness is exactly what creates focaccia’s light, airy texture.
Step 2: Stretch and fold. Cover the bowl and let the dough rest for 15 minutes. With wet or lightly oiled hands, grab one side of the dough, stretch it upward, and fold it over itself. Rotate the bowl and repeat this stretch-and-fold motion around all four sides. Cover and rest for another 15 minutes, then repeat the entire stretch-and-fold process two to three more times. This process builds strength in the dough without traditional kneading.
Step 3: First rise. Cover the bowl tightly and let the dough rise at room temperature for approximately 1½ to 2 hours, or until it looks noticeably puffy and has nearly doubled in size.
Step 4: Prepare the pan. Generously coat a 9×13-inch baking pan with extra virgin olive oil. Pour the risen dough into the pan and gently stretch it into a rough rectangle, without forcing it into every corner right away. Cover and let it rest for 20 minutes, then gently stretch it again if needed to fill more of the pan.
Step 5: Second rise. Cover the pan and let the dough rise again for another 45 to 60 minutes, until it becomes very puffy and airy. While the dough rises, preheat your oven to 425°F (220°C).
Step 6: Dimple the dough. Drizzle the surface generously with olive oil. Lightly oil your fingertips and press deep dimples all the way through the dough, working across the entire surface. Sprinkle with Italian seasoning, garlic powder, fresh rosemary if using, and a generous amount of flaky sea salt.
Step 7: Bake. Bake for approximately 20 to 25 minutes, or until the focaccia is deeply golden brown on top and crisp around the edges. For an extra-crispy bottom crust, place the pan on the lowest oven rack while baking.
Step 8: Cool and cut. Allow the focaccia to cool for about 10 to 15 minutes in the pan. Transfer it to a cutting board and, using a sharp knife or pizza cutter, slice it into long strips. Serve warm.
Helpful Tips for the Best Results
- Resist the urge to add extra flour to make the dough less sticky — a wetter dough is exactly what produces a light, airy focaccia.
- Don’t skimp on the olive oil in the pan and on top; it’s essential for achieving that deeply golden, crisp crust.
- Make sure the dough looks truly puffy and airy before baking, both after the first and second rise — this indicates proper fermentation and will produce the best texture.
- Press dimples deep enough to reach nearly to the bottom of the dough without fully deflating it; this creates those signature pools of olive oil and flavor.
- Let the focaccia cool for a few minutes before cutting so the strips hold their shape cleanly.
Fun Variations to Try
Garlic Parmesan: Add minced roasted garlic and grated Parmesan cheese to the top of the dough before baking for a rich, cheesy, garlicky finish.
Rosemary Sea Salt: Top generously with extra fresh rosemary and flaky sea salt for a simple, classic focaccia flavor.
Cheesy Focaccia Sticks: Add shredded mozzarella and Parmesan during the final few minutes of baking for melty, cheesy sticks.
Everything Seasoning: Sprinkle everything bagel seasoning over the olive-oil-covered dough before baking for a fun, bagel-inspired twist.
Spicy: Add red pepper flakes and thinly sliced jalapeños to the top for a spicy kick.
Mediterranean: Top with Kalamata olives, sun-dried tomatoes, oregano, and crumbled feta for a Mediterranean-inspired version.
Pesto: Brush the baked sticks with pesto just before serving for an herby, garlicky finish.
Dipping Ideas
These focaccia sticks are perfect for dipping into:
- Warm marinara sauce
- Garlic butter
- Whipped feta
- Hummus
- Olive oil and balsamic vinegar
- Spinach artichoke dip
- Tomato basil dip
- Creamy Alfredo sauce
- Pesto
For a simple homemade Italian dipping sauce, combine extra virgin olive oil, balsamic vinegar, Italian herbs, minced garlic, and cracked black pepper in a small dish.
Serving Suggestions
These Focaccia Sticks are wonderful for:
- Snacking on their own, warm from the oven
- Serving as an appetizer with a variety of dipping sauces
- Pairing alongside pasta night as the ultimate bread accompaniment
- Serving with a warm bowl of soup for dunking
- Building into hearty sandwiches, sliced horizontally and filled with your favorite ingredients
- Rounding out an Italian-inspired dinner spread alongside antipasto and a fresh salad
Storage Instructions
Store cooled focaccia sticks in an airtight container at room temperature for up to 2 days. For longer storage, freeze them in a freezer-safe bag for up to 2 months.
To reheat, place the sticks in a 350°F (175°C) oven for approximately 5 to 10 minutes to bring back their crisp exterior. Avoid microwaving, as this will make the crust soft and chewy rather than crisp.
❓ Frequently Asked Questions
Why is the dough so wet and sticky? This is intentional. A higher hydration dough is what gives focaccia its signature light, airy crumb and open texture. Resist the urge to add extra flour, even though it may feel unfamiliar if you’re used to kneading a firmer bread dough.
Can I use all-purpose flour instead of bread flour? Bread flour is recommended for its higher protein content, which helps create the chewy, structured crumb focaccia is known for. All-purpose flour can be used in a pinch, but the texture may be slightly less chewy and airy.
Do I need a stand mixer to make this dough? No, this recipe is designed to be made entirely by hand using a series of stretches and folds rather than traditional kneading, so no special equipment is required.
What if my dough doesn’t seem to be rising well? Make sure your yeast is fresh and your environment is warm enough — focaccia dough rises best in a warm spot, around 75–80°F (24–27°C). A cold kitchen can significantly slow down fermentation.
Can I make the dough ahead of time? Yes. After the first rise, you can refrigerate the dough overnight and let it come to room temperature before shaping and continuing with the recipe. This can even deepen the flavor slightly.
Why didn’t my focaccia get crispy on the bottom? Make sure you’re using enough olive oil in the pan, and try placing the pan on the lowest oven rack for the last several minutes of baking to encourage a deeper, crisper bottom crust.
Can I freeze the baked focaccia sticks? Yes, baked and cooled focaccia sticks freeze very well. Store them in a freezer-safe bag for up to 2 months and reheat directly from frozen in a 350°F (175°C) oven until warmed through and crisp again.
Can I make this recipe without yeast? Traditional focaccia relies on yeast for its characteristic rise and airy texture, so this particular recipe isn’t easily adapted to a yeast-free version without significantly changing the method and final texture.
How do I know when the dough has risen enough? The dough should look noticeably puffy and almost doubled in size after each rise, with visible air bubbles near the surface. If you press it gently with a finger, the indentation should slowly spring back partway rather than immediately snapping back into place.
Final Thoughts
These Focaccia Sticks bring bakery-quality bread right into your own kitchen, with a crackly, golden crust, a soft and airy interior, and endless flavor packed into every dimple. The process may look involved on paper, but with simple stretches and folds instead of traditional kneading, it’s a genuinely approachable recipe even for beginner bakers. Serve them warm with your favorite dipping sauce, dress them up with one of the many flavor variations, and get ready for this bread to become a permanent fixture at your table.
Print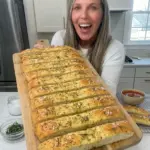
Focaccia Sticks
Ingredients
- 3½ cups (440 g) bread flour
- 1¾ cups (420 ml) warm water
- 2 tsp instant yeast
- 1 tbsp honey
- 2 tsp salt
- ¼ cup extra virgin olive oil, plus more for the pan and topping
- 1 tsp dried Italian seasoning
- 1 tsp garlic powder
- Flaky sea salt, for topping
- Fresh rosemary, optional
Instructions
- Combine warm water, honey, and yeast; let stand 5 minutes. Add flour, salt, and olive oil; mix into a sticky, shaggy dough.
- Rest 15 minutes, then stretch and fold the dough on all four sides. Repeat 2–3 more times, resting 15 minutes between rounds.
- Cover and let rise 1½–2 hours, until nearly doubled.
- Oil a 9×13-inch pan generously, pour in the dough, and gently stretch into a rough rectangle. Rest 20 minutes and stretch again if needed.
- Cover and let rise again for 45–60 minutes. Preheat oven to 425°F (220°C).
- Drizzle with olive oil, press deep dimples, and top with Italian seasoning, garlic powder, rosemary, and flaky salt.
- Bake 20–25 minutes, until deeply golden and crisp.
- Cool 10–15 minutes, then slice into strips and serve warm.