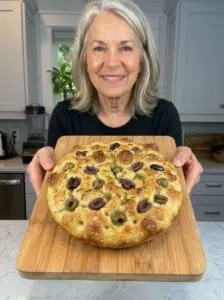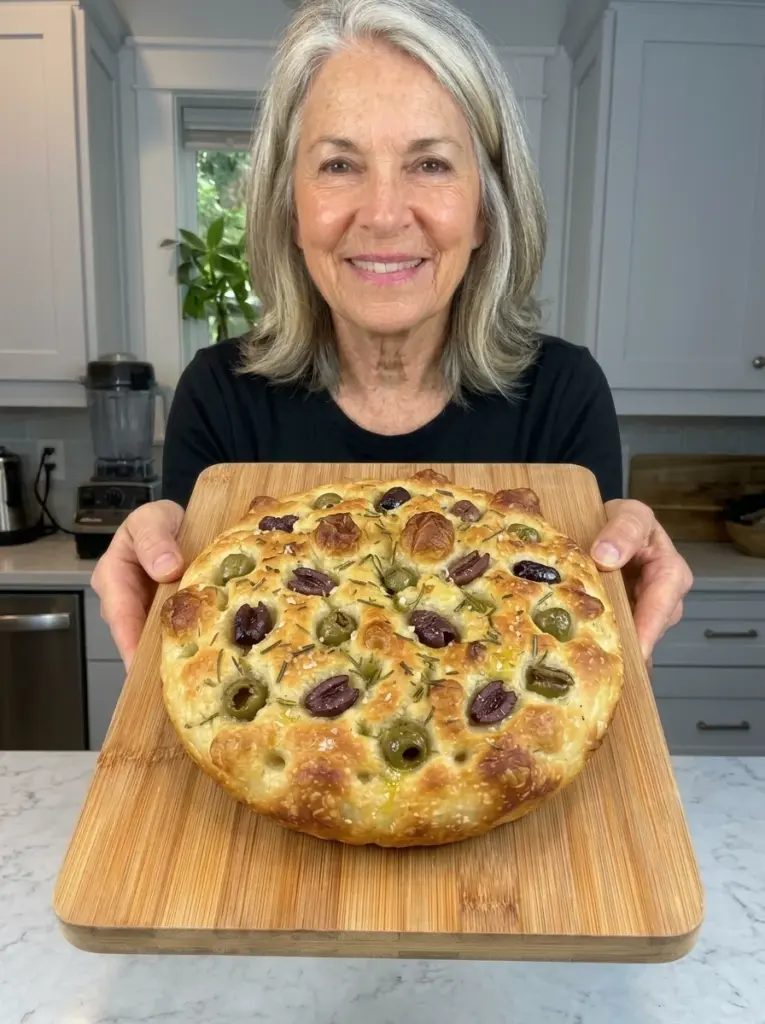
No-Knead Mini Olive Focaccia gives you a small pan of golden bread with briny olives, fragrant rosemary, and crisp, olive-oil-rich edges. The center stays soft and chewy, making it a good companion for soup or a flavorful base for a small sandwich.
The dough mixes with a spoon and needs two rests before baking. Gentle handling preserves some of the air developed during fermentation, while deep fingertip dimples create places for oil and toppings to settle.
This small batch fits a 6-inch skillet or a similarly sized baking dish. It is enough for two generous portions or three smaller side servings, without the leftovers of a full sheet-pan focaccia.
The article expands the supplied recipe with handling and timing guidance. The formula has not been independently kitchen-tested, and large airy pockets are not guaranteed; flour, fermentation, and handling affect the finished crumb.
Recipe at a Glance
- Yield: 1 mini focaccia
- Pan: 6-inch oven-safe skillet or comparably sized baking dish
- Servings: 2 generous portions or 3 smaller portions
- Active preparation: Approximately 10–15 minutes
- First rise: Approximately 1½–2 hours
- Second rise: Approximately 45–60 minutes
- Baking: Approximately 20–24 minutes
- Brief cooling: Approximately 10 minutes
- Total: Approximately 2¾–3¾ hours, depending on fermentation
- Oven: 425°F
A cool kitchen can extend the rises. The dough should look ready before moving on, even if that takes longer than the listed schedule.
Why You’ll Love This Focaccia
- A genuinely small batch: One little pan is useful for a snack or dinner side.
- No mixer or kneading: Stir thoroughly, then let time do much of the work.
- Savory toppings: Olives and rosemary complement the olive oil.
- A contrast of textures: The oiled pan encourages crisp edges around a tender center.
- Flexible serving: Cut into wedges, strips, or sandwich pieces.
What Makes It Focaccia?
Focaccia is an olive-oil-enriched bread associated with a dimpled surface and a relatively flat shape. This mini version uses a soft yeast dough and a small skillet rather than a large tray.
The top is pressed with fingertips after proofing. Those dimples help distribute oil and toppings, but the dough should still retain some of its puffiness. It is not rolled flat like pizza dough.
No-knead does not mean barely mixed. All the flour needs to be hydrated before the first rise. The dough will become more cohesive as it rests, although this modestly hydrated formula may produce a finer crumb than a very wet bakery-style focaccia.
Ingredients
For the Dough and Pan
- 1 cup plus 2 tablespoons all-purpose flour, spooned and leveled
- ½ teaspoon instant yeast
- ½ teaspoon kosher salt
- ½ teaspoon honey
- ½ cup lukewarm water
- 2 tablespoons extra-virgin olive oil, divided as described below
- 1 teaspoon butter, for greasing the pan
For the Topping
- ⅓ cup pitted Kalamata or mixed olives, drained and halved
- 1 teaspoon chopped fresh rosemary
- ¼ teaspoon garlic powder
- ¼ teaspoon black pepper
- 1 teaspoon extra-virgin olive oil
- Flaky sea salt, to taste; start with a small pinch, using up to ½ teaspoon only if desired
Olive-Oil Allocation
Use 1 tablespoon in the dough, 2 teaspoons to coat the dough during its first rise, and 1 teaspoon in the pan, in addition to the butter. The separate 1 teaspoon topping oil is used before dimpling.
This keeps the recipe’s oil amount clear instead of using the full 2 tablespoons before asking for an unspecified extra amount in the pan. Any finishing drizzle is optional and additional.
Ingredient Notes
All-Purpose Flour
Measure lightly rather than packing it into the cup. Too much flour can make the dough stiff and the bread heavy.
Bread flour is an alternative for a chewier result, but its absorption differs. Start with the listed water and assess after a short rest. Do not use self-rising flour, which contains separate leavening and salt.
Yeast and Water
Instant yeast can be mixed directly with the dry ingredients. Use fresh yeast stored according to the package directions.
Water should be comfortably lukewarm, approximately 95–105°F, not hot. If using active dry yeast, follow its hydration directions using the measured recipe water and honey; timing may differ.
Salt
Kosher salt brands vary in density. The dough’s ½ teaspoon will season differently depending on the brand, and fine table salt is not an identical volume replacement.
The olives also supply salt, so start with less flaky salt on top. You can add a little at serving time, but cannot remove an overly salty baked topping easily.
Olive Oil and Butter
Use an olive oil whose flavor you enjoy. It contributes directly to both the bread and the crust.
Butter greases the skillet, while the measured pan oil helps coat the base. This is enough for the stated method; the bread does not need to sit in a deep pool of extra oil.
Olives
Use pitted olives and check for stray pits. Drain thoroughly and blot excess moisture so the surface does not become wet around them.
Kalamata olives give a pronounced briny flavor. Milder green olives or a mixture provide a gentler contrast. Halve large olives so the small focaccia is easier to cut and eat.
Rosemary and Garlic Powder
Chop rosemary finely to avoid long, tough needles. Garlic powder distributes easily without fresh pieces that can brown quickly at the hot surface.
Fresh garlic is not a direct volume substitution for powder. If trying it, keep pieces small and watch for scorching.
Choosing the Pan
A 6-inch skillet gives a fairly thick little focaccia. An 8-inch pan spreads the same dough much thinner and changes the baking time. A small deep dish may hold more heat and delay center baking.
Check that the skillet, handle, and any lid or coating are rated for 425°F. This method starts with a greased, unheated pan; there is no need to handle a preheated skillet while stretching the dough.
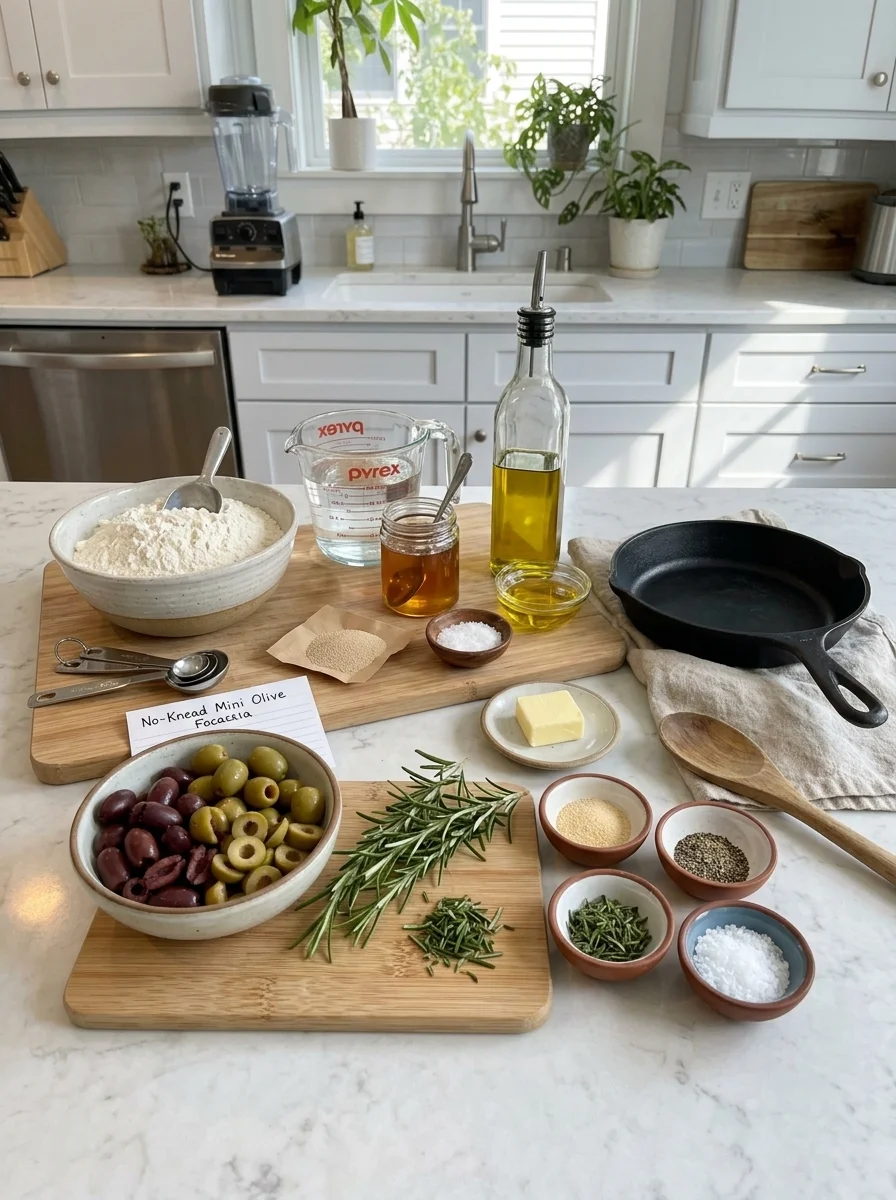
How to Make No-Knead Mini Olive Focaccia
1. Mix Thoroughly
Stir flour, yeast, and kosher salt together in a bowl. Add water, honey, and 1 tablespoon olive oil.
Mix with a sturdy spoon until no dry flour remains, scraping the bottom and sides. The dough should be soft and tacky to sticky, holding together as a rough mass rather than pouring like batter.
If it looks dry, let it rest for 10 minutes before adjusting. Add water a teaspoon at a time only if dry flour still will not incorporate. Avoid adding extra flour just to make the dough dry to the touch.
2. Coat and Let Rise
Drizzle 2 teaspoons of the measured oil over the dough and gently turn to coat. Cover the bowl so the surface cannot dry out.
Let rise for approximately 1½–2 hours, until expanded and puffy, with visible bubbles or signs of aeration. A cool room may require longer.
The dough’s appearance matters more than an exact doubling mark. Do not continue waiting if it has become extremely fragile and started to collapse.
3. Grease the Pan
Coat the 6-inch skillet with the butter and the remaining 1 teaspoon oil from the dough-and-pan allowance. Cover the base and a little of the lower sides.
Set the pan on a stable work surface while handling the dough.
4. Transfer Gently
Use lightly oiled hands or a spatula to move the dough into the pan. If very slack, fold an edge inward once or twice to organize it, rather than repeatedly working it.
Gently ease toward the edges. If it resists and springs back, rest for 10–15 minutes, then try again. Do not tear the dough or press it flat to force a perfect fit immediately.
5. Allow the Second Rise
Cover loosely and let rest for approximately 45–60 minutes, until noticeably puffy. It should spread more easily and show some movement when the pan is nudged.
Preheat the oven to 425°F during the latter part of this rise, with a rack near the center.
6. Dimple
Drizzle the separate teaspoon of topping oil over the dough. Oil your fingertips lightly from the surface and press down across the dough to make deep dimples.
Press toward the bottom without dragging or tearing. Work across the surface once rather than repeatedly flattening the whole loaf.
7. Add Toppings
Distribute the drained olives over the top and press them gently into some dimples. Sprinkle with rosemary, garlic powder, black pepper, and a small pinch of flaky salt.
Use the upper salt amount only if your olives and preferences justify it. Avoid adding an extra finishing pinch automatically.
8. Bake
Bake for approximately 20–24 minutes, until golden on top, crisp at the edges, and baked through in the center. Timing varies with pan material and thickness.
If the top browns early, tent loosely with foil and continue checking the center. A central temperature around 200–205°F is a useful bread-texture guide alongside a set interior.
Use oven mitts for the hot handle and leave a reminder on it after removing the pan if that helps prevent accidental handling.
9. Rest and Remove
Rest for approximately 5 minutes in the pan, then loosen the edges and transfer to a rack. Give it another few minutes before cutting.
Leaving it in the skillet too long can trap condensation beneath the bread. A rack preserves more of the crisp base. Serve warm, allowing longer cooling if you want to split it cleanly for a sandwich.
Tips for Good Texture
Keep expectations realistic. No-knead dough can develop air pockets, but their size varies with flour, moisture, and handling.
Give resistant dough a rest. Time makes stretching easier without force.
Dry the olives. Extra brine can create wet patches on a small loaf.
Reserve the oil accurately. Measured allocation makes the result easier to repeat.
Use salt sparingly. The olive topping already seasons the surface.
Let the bottom breathe after baking. Transfer from the pan once firm enough to handle.
Troubleshooting
| Problem | Possible cause | What to try |
|---|---|---|
| Dough feels stiff | Packed flour or insufficient moisture | Rest first, then add water in small increments if needed. |
| Dough resists stretching | Tight structure | Rest 10–15 minutes before gently extending. |
| Bread is dense | Underproofing, excess flour, or heavy handling | Follow puffiness cues and avoid repeatedly compressing dough. |
| Topping tastes too salty | Briny olives plus generous flaky salt | Start with a pinch and reduce next batch if necessary. |
| Base is soft | Insufficient baking or condensation | Bake until set and cool on a rack. |
| Top browns before center | Thick loaf or hot-running oven | Tent loosely and continue baking. |
Variations
Milder Olive Focaccia
Choose mild green olives and use little or no flaky salt until serving.
Lemon Rosemary
Add a small pinch of finely grated lemon zest with the rosemary. Zest adds aroma without introducing much liquid.
Parmesan Finish
Sprinkle a little finely grated Parmesan over the surface late in baking. It adds salt and browns quickly, so use sparingly.
Plain Mini Focaccia
Omit the olives and keep rosemary, oil, and a little salt. Do not replace the olives with an equal volume of wet ingredients without considering moisture.
Tomato Topping
A few halved cherry tomatoes are a possible variation, but use a modest amount and place cut-side up. They add moisture and may affect cooking. This variation has not been separately tested.
Serving Suggestions
Cut into wedges for tomato soup, bean stew, or a salad plate. Serve strips with a little olive oil for dipping, recognizing that the bread already contains a generous amount of oil.
For a small sandwich, cool longer and split horizontally with a serrated knife. Add mozzarella, roasted vegetables, turkey, or another filling you enjoy. Store assembled sandwiches according to their perishable fillings.
Two portions are generous; three portions work better as a side alongside a full meal.
Storage and Reheating
This focaccia tastes best freshly baked. Cool completely before storing so steam does not dampen the surface.
Keep covered for up to 1 day in a cool, dry kitchen, or refrigerate for up to 3 days. In warm or humid conditions, refrigerate sooner. Added perishable toppings or fillings require their own storage guidance.
Reheat at 350°F for approximately 5–8 minutes, checking to avoid drying it out. An oven or toaster oven restores more edge crispness than a microwave.
Freeze cooled, tightly wrapped portions for up to 1 month for best quality. Thaw and reheat gently. Discard if mold develops.
Frequently Asked Questions
Can I use an 8-inch skillet?
Yes, but the dough spreads much thinner. Start checking earlier and do not expect the same height or bake time.
Is this a single serving?
It can be eaten as one large portion, but the recipe is presented as two generous portions or three side portions. The nutrition changes accordingly.
Can I skip the second rise?
It is part of the method and helps the transferred dough regain puffiness. Skipping it can produce denser bread.
Do I need to knead?
No extended kneading is included. Thorough mixing and gentle shaping are still necessary.
Can I leave it overnight?
The yeast amount and timing here describe a same-day method. An overnight schedule needs adjustment rather than leaving this dough untouched at room temperature for many additional hours.
Can I use dried rosemary?
Use less than the fresh amount and crush it finely. Dried needles can be tough and more concentrated in flavor.
Recipe Card: No-Knead Mini Olive Focaccia
Yield: One 6-inch focaccia
Servings: 2–3
Active prep: 10–15 minutes
Rising: 2¼–3 hours
Baking: 20–24 minutes
Brief cooling: 10 minutes
Total: Approximately 2¾–3¾ hours
Oven: 425°F
Ingredients
- 1 cup plus 2 tablespoons all-purpose flour, spooned and leveled
- ½ teaspoon instant yeast
- ½ teaspoon kosher salt
- ½ teaspoon honey
- ½ cup lukewarm water
- 2 tablespoons olive oil: 1 tablespoon for dough, 2 teaspoons for coating, 1 teaspoon for pan
- 1 teaspoon butter for pan
- ⅓ cup drained, pitted, halved olives
- 1 teaspoon chopped fresh rosemary
- ¼ teaspoon garlic powder
- ¼ teaspoon black pepper
- 1 teaspoon olive oil for topping
- Flaky salt to taste, starting with a small pinch
Instructions
- Mix flour, yeast, and kosher salt. Stir in water, honey, and 1 tablespoon oil until no dry flour remains.
- Coat with 2 teaspoons oil, cover, and rise for 1½–2 hours, until puffy and aerated.
- Grease a 6-inch oven-safe skillet with butter and the remaining teaspoon oil. Transfer dough gently and stretch toward edges, resting if resistant.
- Cover and rise for 45–60 minutes until puffy. Preheat to 425°F.
- Drizzle with topping oil and dimple gently. Add olives, rosemary, garlic powder, pepper, and a little flaky salt.
- Bake for 20–24 minutes, or until golden and baked through.
- Rest in the pan for 5 minutes, then transfer to a rack and cool briefly before serving.
Approximate Nutrition
Estimate 300–340 calories per portion when divided into three, or 450–510 calories when divided into two, including the listed oil and butter. Actual values vary with flour measurement, olives, and how much oil remains in the bowl or pan. Additional oil drizzles and sandwich fillings are extra. These are ingredient-based estimates, not verified nutrition data.
Notes
- The expanded method and estimates have not been independently kitchen-tested.
- Oil quantities are allocated explicitly; finishing drizzles are additional.
- Begin with less flaky salt because olives are briny.
- A different pan size changes height and baking time.
- Follow dough readiness rather than the clock alone.
Final Thoughts
A soft dough, patient rising, and gentle dimpling make this small focaccia a useful accompaniment to soup or a simple lunch. Drain the olives well, measure the oil clearly, and season lightly. Serve warm for crisp edges and a tender center.
No-Knead Mini Olive Focaccia
Description
Yield: One 6-inch focaccia
Servings: 2–3
Active prep: 10–15 minutes
Rising: 2¼–3 hours
Baking: 20–24 minutes
Brief cooling: 10 minutes
Total: Approximately 2¾–3¾ hours
Oven: 425°F
Ingredients
- 1 cup plus 2 tablespoons all-purpose flour, spooned and leveled
- ½ teaspoon instant yeast
- ½ teaspoon kosher salt
- ½ teaspoon honey
- ½ cup lukewarm water
- 2 tablespoons olive oil: 1 tablespoon for dough, 2 teaspoons for coating, 1 teaspoon for pan
- 1 teaspoon butter for pan
- ⅓ cup drained, pitted, halved olives
- 1 teaspoon chopped fresh rosemary
- ¼ teaspoon garlic powder
- ¼ teaspoon black pepper
- 1 teaspoon olive oil for topping
- Flaky salt to taste, starting with a small pinch
Instructions
- Mix flour, yeast, and kosher salt. Stir in water, honey, and 1 tablespoon oil until no dry flour remains.
- Coat with 2 teaspoons oil, cover, and rise for 1½–2 hours, until puffy and aerated.
- Grease a 6-inch oven-safe skillet with butter and the remaining teaspoon oil. Transfer dough gently and stretch toward edges, resting if resistant.
- Cover and rise for 45–60 minutes until puffy. Preheat to 425°F.
- Drizzle with topping oil and dimple gently. Add olives, rosemary, garlic powder, pepper, and a little flaky salt.
- Bake for 20–24 minutes, or until golden and baked through.
- Rest in the pan for 5 minutes, then transfer to a rack and cool briefly before serving.