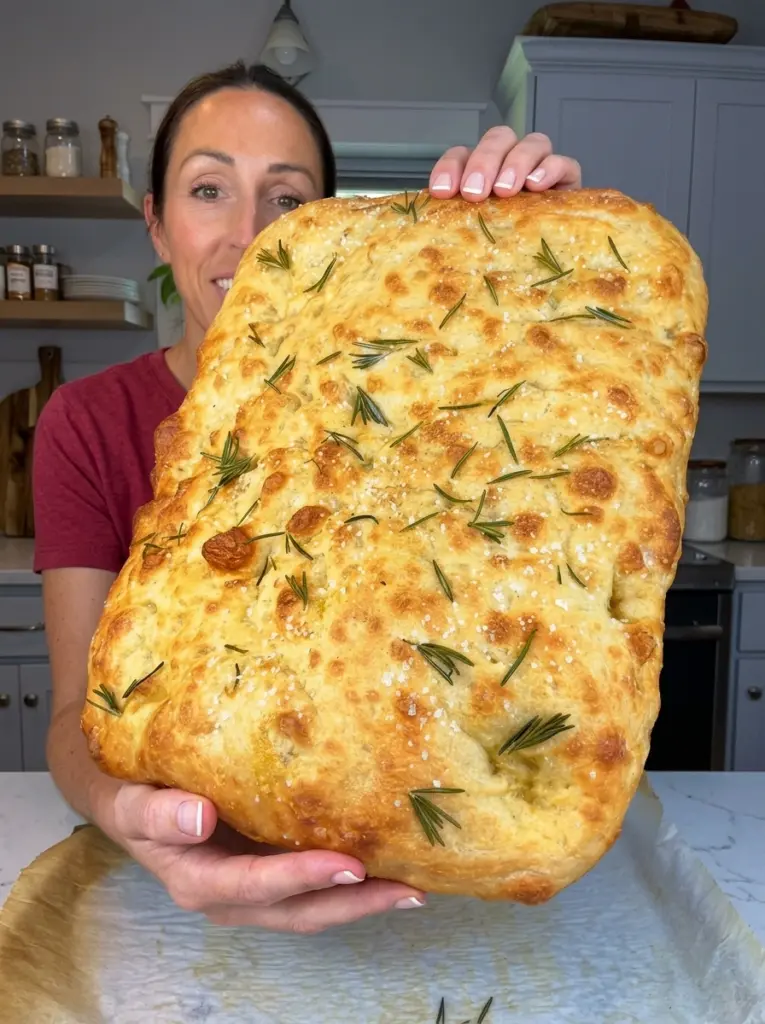
If you’ve ever wanted to bake a loaf of bread with a beautifully crisp, golden crust and an impossibly airy, bubbly interior, this Focaccia Bread recipe will show you exactly how to get there. This classic Italian flatbread is made from a soft, highly hydrated dough that’s generously drizzled with extra-virgin olive oil, dimpled by hand, and topped with fresh rosemary and flaky sea salt before baking to golden perfection.
Focaccia has a reputation for being intimidating, but this recipe breaks the process down into simple, manageable steps that anyone can follow, even without prior bread-baking experience. The key lies in embracing a wet, sticky dough rather than fighting it, along with a series of gentle stretch-and-fold techniques that build strength and structure without the need for intensive kneading.
Whether you’re serving it alongside a bowl of soup, building the ultimate Italian sandwich, setting it out on a charcuterie board, or simply tearing off a warm piece to dip into olive oil, this Focaccia Bread delivers bakery-quality results right from your own oven. In this article, you’ll find a complete ingredient breakdown, step-by-step instructions, expert tips, flavor variations, serving ideas, storage information, and answers to the most frequently asked questions about making perfect focaccia at home.
What Is Focaccia Bread?
Focaccia is a classic Italian flatbread known for its rich olive oil flavor, golden crust, and signature dimpled surface. Unlike many other bread recipes that rely on firm, well-structured dough, focaccia is built on a very soft, sticky, highly hydrated dough. This high hydration is exactly what gives focaccia its distinctive airy, open crumb and light, tender texture.
The process begins with a simple dough made from bread flour or all-purpose flour, instant yeast, salt, sugar or honey, water, and olive oil. Rather than kneading the dough extensively, this recipe uses a series of gentle stretch-and-fold sets to develop strength while preserving the dough’s soft, bubbly texture. After a slow rise, the dough is transferred to a generously oiled pan, stretched to the edges, proofed once more, and then dimpled deeply with oiled fingertips — a technique that creates focaccia’s iconic pockmarked surface and helps distribute olive oil throughout the dough as it bakes.
Finished with fresh rosemary, flaky sea salt, and a final drizzle of olive oil, this focaccia bakes into a loaf with a deeply golden, slightly crisp crust and a soft, pillowy interior full of irregular air pockets — the hallmark of a truly well-made focaccia.
Why You’ll Love This Recipe
- Airy, bubbly interior — the high-hydration dough creates a light, open crumb.
- Beautifully crisp crust — generous olive oil in the pan creates a golden, almost fried bottom.
- No intensive kneading required — simple stretch-and-fold sets do the work instead.
- Endlessly customizable — top it with garlic, tomatoes, cheese, olives, or your favorite mix-ins.
- Great for make-ahead baking — the dough can be refrigerated overnight for deeper flavor.
- Perfect for any occasion — from casual weeknight dinners to entertaining a crowd.
Ingredients You’ll Need
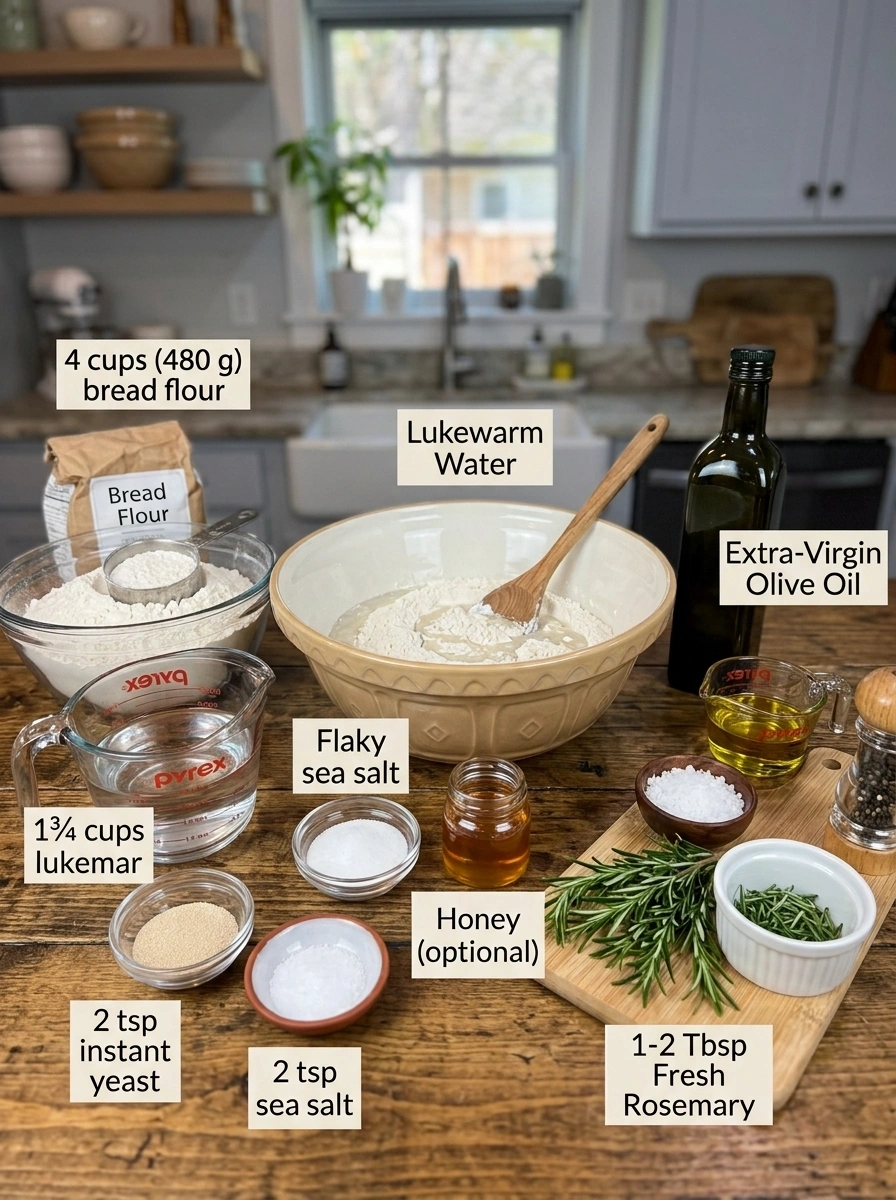
For the Dough
- 4 cups (480 g) bread flour or all-purpose flour — provides the structure for the dough; bread flour will yield a slightly chewier texture.
- 2 tsp instant yeast — leavens the dough and helps create the bubbly, airy texture focaccia is known for.
- 2 tsp fine sea salt — essential for flavor and for regulating the yeast’s activity.
- 1 tsp granulated sugar or honey — feeds the yeast and adds a subtle touch of sweetness.
- 1¾ cups (420 g) lukewarm water — hydrates the dough; the high water content is key to focaccia’s signature texture.
- 2 tbsp extra-virgin olive oil — adds richness and helps create a tender, flavorful crumb.
For the Pan & Topping
- ¼ cup extra-virgin olive oil, divided — used generously in the pan and on top of the dough for flavor and crispness.
- 1–2 tbsp fresh rosemary leaves — the classic focaccia topping, adding a fragrant, herby flavor.
- Flaky sea salt, to taste — enhances the flavor and adds a satisfying crunch to the finished bread.
- Freshly ground black pepper, optional — for a subtle layer of warmth.
Step-by-Step Instructions
Step 1: Mix the Dough
Add the flour, instant yeast, salt, and sugar to a large mixing bowl. Pour in the lukewarm water and 2 tablespoons of olive oil, then mix with a wooden spoon or dough whisk until no dry flour remains. The dough should be very soft, sticky, and highly hydrated — resist the urge to keep adding flour simply because it feels sticky, as this hydration is essential to focaccia’s texture.
Step 2: Rest the Dough
Cover the bowl and let the dough rest for approximately 20–30 minutes. This resting period gives the flour time to fully absorb the water and makes the dough much easier to strengthen in the next step.
Step 3: Stretch & Fold
Wet your hands to prevent sticking. Grab one side of the dough, gently stretch it upward, and fold it toward the center. Rotate the bowl and repeat this motion on all four sides. Let the dough rest for approximately 20–30 minutes, then repeat the stretch-and-fold process. Complete about 3 sets of folds in total. The dough should become noticeably smoother and more elastic with each round.
Step 4: First Rise 🫧
Cover the bowl and let the dough rise at room temperature for approximately 1–2 hours, or until it’s noticeably expanded, airy, and bubbly. For deeper, more complex flavor, you can refrigerate the covered dough overnight after fermentation begins.
Step 5: Prepare the Pan 🫒
Generously coat a 9×13-inch baking pan with approximately 2 tablespoons of olive oil, making sure the bottom and corners are well coated. This generous amount of olive oil is what helps create focaccia’s beautifully crisp, almost fried bottom crust.
Step 6: Transfer the Dough
Carefully transfer the risen dough into the prepared pan, turning it once so both sides become lightly coated in olive oil. Using oiled fingertips, gently stretch the dough toward the corners of the pan. If the dough keeps shrinking back, let it rest for 15–20 minutes and try stretching it again.
Step 7: Final Proof
Cover the dough loosely and let it proof for approximately 45–90 minutes. It should become very puffy, jiggly, and visibly bubbly by the end of this proofing period.
Step 8: Dimple the Focaccia ✨
Preheat the oven to 425°F (220°C). Drizzle another 1–2 tablespoons of olive oil over the surface of the dough, then coat your fingertips in olive oil as well. Press your fingers deeply into the dough, going almost to the bottom of the pan, to create the classic focaccia dimples. Be gentle — you don’t want to aggressively flatten the dough, since preserving those beautiful fermentation bubbles is key to a light, airy crumb.
Step 9: Add the Toppings 🌿
Sprinkle the surface with fresh rosemary, flaky sea salt, and freshly ground black pepper if desired. Finish with another light drizzle of olive oil for extra flavor and a beautifully glossy finish.
Step 10: Bake 🔥
Bake for approximately 22–28 minutes, until the top is deeply golden brown and the edges are crisp. The bottom should also become golden and slightly fried from the generous amount of olive oil in the pan.
Step 11: Cool
Allow the focaccia to rest in the pan for approximately 5–10 minutes, then carefully transfer it to a wire rack so the bottom stays crisp rather than steaming and softening. Let it cool slightly before slicing.
Expert Tips for the Best Focaccia
- Embrace the sticky dough. A wet, sticky dough is exactly what gives focaccia its signature airy texture — resist the urge to add extra flour.
- Use wet or oiled hands. Handling the dough with wet or oiled hands throughout the process prevents sticking and makes the dough much easier to work with.
- Don’t rush the stretch-and-fold process. These gentle folds build strength and structure without deflating the dough the way traditional kneading might.
- Watch for bubbles and jiggle. The dough is properly proofed when it looks visibly bubbly and jiggles when the pan is gently moved.
- Be generous with the olive oil. Both the pan and the topping benefit from a liberal amount of olive oil, which contributes directly to focaccia’s flavor and crisp texture.
- Dimple deeply, but gently. Press your fingers almost all the way to the bottom of the pan to create the classic dimples, without deflating the airy bubbles inside the dough.
- Cool on a wire rack. Transferring the baked focaccia out of the pan and onto a wire rack prevents the bottom from becoming soggy as it cools.
Flavor Variations ✨
Focaccia is one of the most versatile breads to customize. Try these delicious variations:
- Garlic Rosemary: Add thinly sliced garlic along with plenty of fresh rosemary for a bold, aromatic flavor.
- Cherry Tomato: Press halved cherry tomatoes gently into the dough before baking for bursts of juicy sweetness.
- Parmesan: Sprinkle freshly grated Parmesan over the top before baking for a salty, nutty finish.
- Olive Focaccia: Add Kalamata or Castelvetrano olives for a briny, Mediterranean-inspired twist.
- Caramelized Onion: Scatter caramelized onions over the surface for a sweet, savory topping.
- Jalapeño Cheddar: Add sliced jalapeños and shredded cheddar for a spicy, cheesy variation.
- Everything Focaccia: Finish with everything bagel seasoning for a fun, flavorful twist on the classic.
Serving Ideas 🍞
This versatile bread pairs beautifully with a wide range of dishes. Use Focaccia Bread for:
- Italian sandwiches
- Turkey and cheese sandwiches
- Caprese sandwiches
- Soup and chili
- Pasta dinners
- Charcuterie boards
- Dipping into olive oil
- Focaccia pizza
- Breakfast sandwiches
Its sturdy yet airy texture makes it equally suited for slicing into sandwich bread, serving alongside a meal, or transforming into a quick focaccia pizza topped with sauce and cheese.
Storage Information
Store completely cooled focaccia in an airtight container at room temperature for about 2 days. For the best texture when reheating, warm it at 375°F (190°C) for 5–8 minutes, which helps restore the crisp crust and soft interior. You can also freeze individual pieces and reheat them directly from frozen whenever a craving strikes.
Tip: The secret to amazing focaccia is a soft, sticky dough plus plenty of olive oil and enough final proofing time. When the dough looks bubbly and jiggles when the pan moves, you’re much closer to getting that airy, bakery-style interior.
Recipe Card
Focaccia Bread
Airy, bubbly Italian flatbread with a crisp, golden crust, generous olive oil, fresh rosemary, and flaky sea salt.
- Prep Time: 30 minutes
- Rise/Proof Time: approximately 2 hours 30 minutes to 4 hours
- Bake Time: 22–28 minutes
- Total Time: approximately 3 hours to 4 hours 30 minutes
- Servings: 10–12
Ingredients: See full ingredient list above.
Instructions: See full step-by-step instructions above.
Frequently Asked Questions
1. Why is focaccia dough so sticky? Focaccia relies on a high-hydration dough, meaning it contains more water relative to flour than many other bread recipes. This wetness is exactly what creates the airy, open crumb focaccia is known for, so the stickiness is intentional rather than a mistake.
2. Can I make the dough ahead of time? Yes, you can refrigerate the covered dough overnight after the first rise begins, which also deepens the bread’s flavor. Let it come closer to room temperature before shaping and proofing in the pan.
3. What if my dough keeps shrinking back when I try to stretch it? This means the gluten needs more time to relax. Let the dough rest for 15–20 minutes, then try stretching it toward the corners of the pan again.
4. Do I need bread flour, or can I use all-purpose flour? Both work well in this recipe. Bread flour will yield a slightly chewier texture due to its higher protein content, while all-purpose flour produces a softer crumb.
5. Why didn’t my focaccia turn out very airy? This is often caused by adding too much extra flour during mixing, under-proofing the dough, or handling it too roughly during the dimpling step. Be sure the dough looks bubbly and jiggly before baking.
6. Can I freeze focaccia bread? Yes, focaccia freezes very well. Freeze individual pieces in an airtight container or bag, then reheat them directly from frozen in the oven for the best texture.
7. What’s the best pan to use for focaccia? A 9×13-inch metal baking pan works well for this recipe, as it helps create an evenly crisp bottom crust when generously coated with olive oil.
8. Can I add toppings other than rosemary? Absolutely. Focaccia is highly customizable — see the flavor variations section above for ideas like garlic, cherry tomatoes, Parmesan, olives, and more.
9. How do I know when the dough has proofed enough before baking? The dough should look very puffy and visibly bubbly, and it should jiggle slightly when you gently move the pan. This is a good sign that it’s ready for dimpling and baking.
Final Thoughts
This Focaccia Bread recipe proves that a beautifully airy, golden loaf is well within reach for home bakers of any experience level. With a soft, sticky dough, a few gentle stretch-and-fold sessions, and plenty of good olive oil, you’ll end up with a bread that has a crisp, golden crust and a light, bubbly interior every single time. Whether you serve it alongside dinner, use it for sandwiches, or simply enjoy it warm with a drizzle of olive oil, this focaccia is guaranteed to become a staple in your baking rotation.
Give this recipe a try, and don’t forget to share how your focaccia turned out. Tag us with your creations!
Print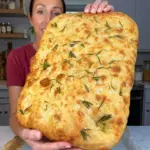
Focaccia Bread
Ingredients
For the Dough
- 4 cups (480 g) bread flour or all-purpose flour — provides the structure for the dough; bread flour will yield a slightly chewier texture.
- 2 tsp instant yeast — leavens the dough and helps create the bubbly, airy texture focaccia is known for.
- 2 tsp fine sea salt — essential for flavor and for regulating the yeast’s activity.
- 1 tsp granulated sugar or honey — feeds the yeast and adds a subtle touch of sweetness.
- 1¾ cups (420 g) lukewarm water — hydrates the dough; the high water content is key to focaccia’s signature texture.
- 2 tbsp extra-virgin olive oil — adds richness and helps create a tender, flavorful crumb.
For the Pan & Topping
- ¼ cup extra-virgin olive oil, divided — used generously in the pan and on top of the dough for flavor and crispness.
- 1–2 tbsp fresh rosemary leaves — the classic focaccia topping, adding a fragrant, herby flavor.
- Flaky sea salt, to taste — enhances the flavor and adds a satisfying crunch to the finished bread.
- Freshly ground black pepper, optional — for a subtle layer of warmth.
Instructions
Add the flour, instant yeast, salt, and sugar to a large mixing bowl. Pour in the lukewarm water and 2 tablespoons of olive oil, then mix with a wooden spoon or dough whisk until no dry flour remains. The dough should be very soft, sticky, and highly hydrated — resist the urge to keep adding flour simply because it feels sticky, as this hydration is essential to focaccia’s texture.
Cover the bowl and let the dough rest for approximately 20–30 minutes. This resting period gives the flour time to fully absorb the water and makes the dough much easier to strengthen in the next step.
Wet your hands to prevent sticking. Grab one side of the dough, gently stretch it upward, and fold it toward the center. Rotate the bowl and repeat this motion on all four sides. Let the dough rest for approximately 20–30 minutes, then repeat the stretch-and-fold process. Complete about 3 sets of folds in total. The dough should become noticeably smoother and more elastic with each round.
Cover the bowl and let the dough rise at room temperature for approximately 1–2 hours, or until it’s noticeably expanded, airy, and bubbly. For deeper, more complex flavor, you can refrigerate the covered dough overnight after fermentation begins.
Generously coat a 9×13-inch baking pan with approximately 2 tablespoons of olive oil, making sure the bottom and corners are well coated. This generous amount of olive oil is what helps create focaccia’s beautifully crisp, almost fried bottom crust.
Carefully transfer the risen dough into the prepared pan, turning it once so both sides become lightly coated in olive oil. Using oiled fingertips, gently stretch the dough toward the corners of the pan. If the dough keeps shrinking back, let it rest for 15–20 minutes and try stretching it again.
Cover the dough loosely and let it proof for approximately 45–90 minutes. It should become very puffy, jiggly, and visibly bubbly by the end of this proofing period.
Preheat the oven to 425°F (220°C). Drizzle another 1–2 tablespoons of olive oil over the surface of the dough, then coat your fingertips in olive oil as well. Press your fingers deeply into the dough, going almost to the bottom of the pan, to create the classic focaccia dimples. Be gentle — you don’t want to aggressively flatten the dough, since preserving those beautiful fermentation bubbles is key to a light, airy crumb.
Sprinkle the surface with fresh rosemary, flaky sea salt, and freshly ground black pepper if desired. Finish with another light drizzle of olive oil for extra flavor and a beautifully glossy finish.
Bake for approximately 22–28 minutes, until the top is deeply golden brown and the edges are crisp. The bottom should also become golden and slightly fried from the generous amount of olive oil in the pan.
Allow the focaccia to rest in the pan for approximately 5–10 minutes, then carefully transfer it to a wire rack so the bottom stays crisp rather than steaming and softening. Let it cool slightly before slicing.