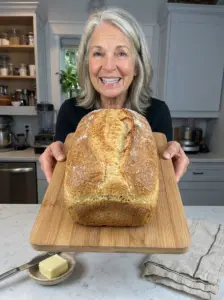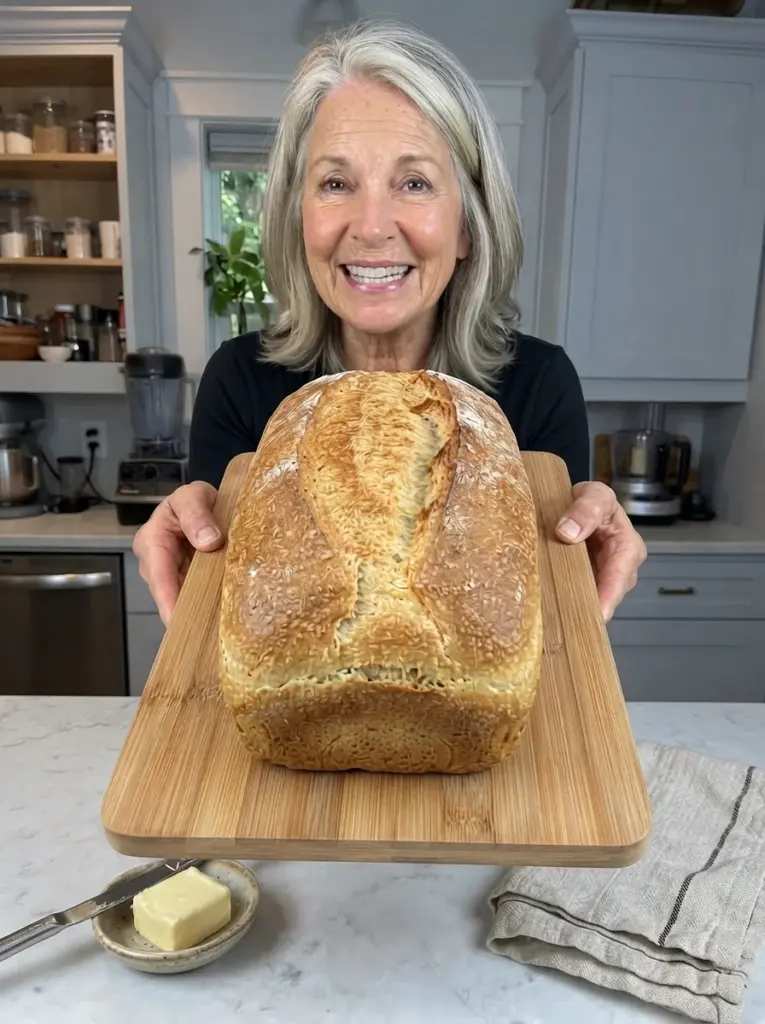
Homemade sandwich bread does not need to involve a stand mixer or a long session of kneading. A soft dough, thorough spoon mixing, and enough resting time can produce a loaf with a tender interior and a golden crust. This Easy No-Knead Sandwich Bread uses flour, water, yeast, a little sugar, and oil to make a simple everyday loaf.
The dough is mixed in a bowl, left to rise, and transferred to a loaf pan for a second rise. It is softer and stickier than a traditional kneaded dough, so a spatula and lightly oiled hands are more useful than a heavily floured work surface.
Once cooled, the bread can be sliced for toast, sandwiches, or a warm bowl of soup. The crumb is somewhat more rustic and less uniform than a carefully kneaded commercial-style loaf, but the pan shape makes it convenient for everyday use.
This is a suggested starting formula rather than a kitchen-tested recipe. Flour absorption, room temperature, pan dimensions, and oven performance affect the result. The visual cues below are intended to help you assess the dough rather than follow the clock alone.
Recipe at a Glance
- Hands-on preparation: About 15 minutes
- First rise: About 60–90 minutes
- Second rise: About 30–60 minutes
- Baking: About 35–40 minutes
- Cooling: About 1½ hours
- Total: Approximately 4–5 hours, mostly unattended
- Yield: One 9 × 5-inch loaf
- Servings: About 12 slices
The dough does not require kneading, but it does need a vigorous initial mix and time to develop structure. Cooling is included in the total because warm bread is more fragile and difficult to cut into tidy sandwich slices.
What Makes This Bread No-Knead?
Kneading stretches and organizes the dough’s gluten network. In a no-knead method, thorough initial mixing and resting time do much of that work without repeated hand kneading.
A relatively soft dough allows the flour to hydrate easily. As it rests, the dough becomes more cohesive and capable of holding fermentation gases. The loaf pan supports it during the final rise and baking.
This does not mean the dough needs no mixing at all. Stir until every bit of flour is moistened, then continue beating with a sturdy spoon for a short period. A few loose strokes that leave dry flour pockets will not give the same result.
The finished bread should be tender and sliceable, but it may have a slightly less even crumb than a kneaded sandwich loaf. It is an approachable home-baking method rather than a promise of an exact commercial bread texture.
Ingredients
For the Loaf
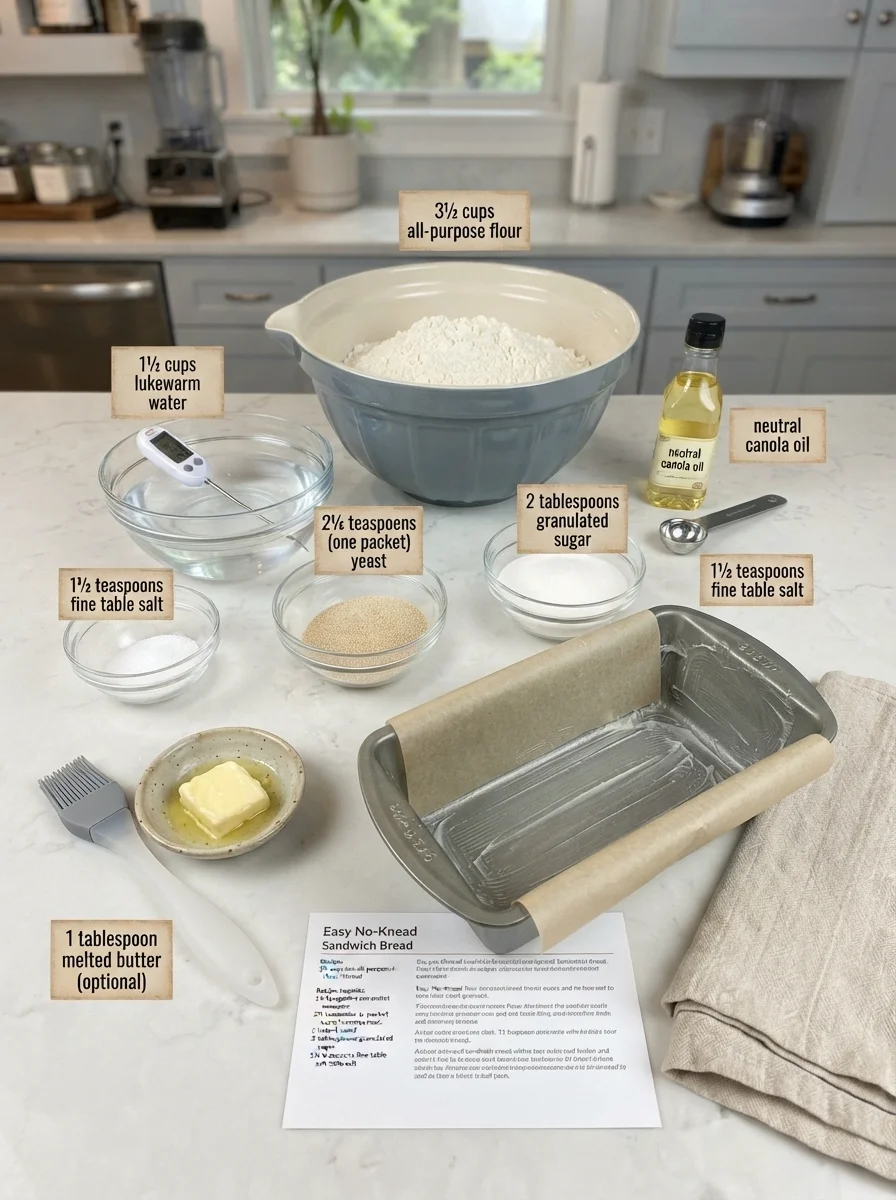
- 3½ cups all-purpose flour or bread flour, spooned and leveled
- 1½ cups lukewarm water, with 1–2 additional tablespoons available only if needed
- 2¼ teaspoons instant yeast, one standard packet
- 2 tablespoons granulated sugar
- 1½ teaspoons fine table salt
- 2 tablespoons neutral oil, plus a little for the bowl, hands, and pan
Optional Finish
- 1 tablespoon melted butter, for brushing the baked loaf
Start with the listed water amount. The dough should be soft and sticky but have some elasticity after mixing and resting. Avoid adding the extra water automatically.
Ingredient Notes
All-Purpose Flour or Bread Flour
Bread flour can give the loaf a somewhat stronger, chewier structure. All-purpose flour can produce a softer crumb, though its protein content varies among brands.
Measure by spooning the flour into the cup and leveling it. Scooping directly from a packed bag can add enough flour to change a soft dough into a stiff one.
The formula is written for wheat flour. Whole-wheat flour absorbs more liquid and changes the crumb, while gluten-free flour cannot form the same gluten structure. Neither is a guaranteed direct replacement for the full flour amount.
Lukewarm Water
Use water that feels comfortably warm, approximately 95–105°F. It should not feel hot. Very hot water can damage the yeast, while cool water slows the rise.
The amount of water matters more than a perfectly exact temperature within a gentle lukewarm range. A warm kitchen also speeds fermentation, so do not use the rise times as fixed deadlines.
Instant Yeast
Instant yeast can be mixed directly with the flour. Check the package for storage and usage instructions, especially if it has been open for a while.
Active dry yeast can often be used, but it may benefit from dissolving in some of the measured water first, according to the manufacturer’s directions. Keep any activation water within the total listed amount rather than adding it on top.
Sugar
Sugar gives mild sweetness and helps the crust brown. Two tablespoons should not make the bread taste like a dessert loaf.
Honey can be tried in the same spoon measure, but it introduces moisture and changes flavor. The base recipe uses granulated sugar for a straightforward starting point.
Salt
The listed amount refers to fine table salt. Coarse kosher salts differ in density, so the same teaspoon measurement may give a different salt level.
Salt contributes flavor and influences dough behavior. Omitting it entirely changes more than the taste, so do not treat it as an unnecessary garnish.
Oil
A neutral oil such as canola or a mild vegetable oil supports a tender crumb without adding a strong flavor. Olive oil is an option if you enjoy its taste.
The optional butter finish softens the crust after baking. Leave it off for a dairy-free loaf, provided your other selected ingredients meet that need.
Equipment
Use a large mixing bowl, sturdy spoon or dough whisk, flexible spatula, 9 × 5-inch loaf pan, and wire rack. A kitchen thermometer is helpful for checking water and the baked center, though visual cues remain useful.
A metal loaf pan is a practical starting point. Glass, ceramic, and dark metal can heat and brown differently, so watch the crust and center rather than expecting identical timing.
Grease the pan thoroughly, especially the corners. A strip of parchment across the long sides can help with lifting, but grease any exposed ends as well.
How to Make Easy No-Knead Sandwich Bread
1. Mix the Dry Ingredients
Combine the flour, instant yeast, sugar, and salt in a large bowl. Stir well so the yeast and salt are dispersed rather than concentrated in separate pockets.
Choose a bowl with room for the dough to expand. A narrow container that barely holds the initial mixture can overflow during fermentation.
2. Add Water and Oil
Pour in the lukewarm water and oil. Stir with a sturdy spoon until no dry flour remains, scraping around the bottom and sides.
Continue stirring and beating for about 2 minutes. The dough should become a thick, sticky mass that stretches slightly when lifted with the spoon. It will not look as smooth or firm as a fully kneaded dough.
If it is dry and crumbly after all the flour is incorporated, add an extra tablespoon of water and mix again. Add the second only if needed. If it is merely sticky, that is expected and does not call for extra flour.
3. Let the Dough Rise
Cover the bowl with a lid, wrap, or another cover that prevents the surface from drying. Leave in a comfortably warm, draft-free spot until approximately doubled, usually 60–90 minutes.
The dough should look puffier and more aerated, with bubbles visible around the edges or surface. In a cool kitchen it may take longer; in a warm room it may be ready sooner.
Avoid putting the dough in a hot oven or directly against a strong heat source. Gentle warmth is sufficient.
4. Prepare the Pan
Grease a 9 × 5-inch loaf pan while the dough rises. Have a spatula ready and lightly oil your hands if you will touch the dough.
There is no need to cover the work surface with flour. This soft dough can move directly from bowl to pan.
5. Transfer and Settle the Dough
Use the spatula to gently release the dough from the bowl. Fold the edges toward the center a few times to gather it, then scrape it into the prepared pan.
These brief handling folds are not a kneading session. They simply help collect the dough and distribute it in the pan.
With lightly oiled fingers or the spatula, ease the dough toward the corners and smooth the surface. Do not press it into a dense block. It will settle and expand during the second rise.
6. Allow the Second Rise
Cover loosely and leave until noticeably puffy. Begin checking after about 30 minutes; it may take up to an hour or longer in a cool room.
The dough should approach the rim or form a modest dome, depending on the actual pan dimensions and dough volume. A gentle touch should leave a shallow impression that slowly starts to fill. If it springs back immediately, it may need more time; if it collapses or feels extremely fragile, it may have risen too far.
Near the end of the rise, preheat the oven to 375°F with a rack near the center. Uncover the pan before baking.
7. Bake
Bake for about 35–40 minutes, beginning to check at 35 minutes. The top should be golden brown and the loaf should feel set rather than soft and wobbly in the middle.
A center temperature around 195–205°F is a useful guide for this lean, lightly enriched loaf. Insert the probe into the center without touching the pan. A single reading should be considered alongside crust color and the loaf’s overall condition.
If the top browns too quickly, loosely tent it with foil and continue baking. Avoid removing the bread merely because the crust looks attractive while the center remains underdone.
8. Brush and Cool
Let the loaf rest in the pan for about 5–10 minutes, then remove it and place upright on a wire rack. Brush the top with optional melted butter if you want a softer crust.
Allow approximately another 80 minutes, or longer as needed, for the loaf to cool through. Warm bread can compress beneath the knife and seem gummy even when it was baked adequately.
Do not wrap the loaf while it is still releasing steam. Trapped moisture makes the crust damp.
9. Slice
Use a serrated knife with a gentle sawing motion. Slice only what you need, leaving the rest of the loaf intact if you plan to eat it over the next day or two.
For freezing, slice the whole cooled loaf so individual portions are easy to remove later.
Understanding the Dough
The dough should be stickier than a traditional hand-kneaded sandwich dough. You should be able to stir it with effort and scrape it into the pan, rather than pick it up as a dry, firm ball.
At the same time, it should not flow like pancake batter. If the mixture is pourable with no body after the initial mix, reassess your measurements. Add flour only in small amounts if a clear measuring error has made it excessively loose.
Flour brands and humidity create variation, but trying to eliminate every trace of stickiness often causes more trouble than it solves. Use a spatula and a little oil to manage the dough instead of repeatedly adding flour.
Tips for a Better Loaf
Mix thoroughly at the beginning. No-knead does not mean barely mixed. Hydrating the flour evenly gives the resting period a useful starting point.
Watch volume rather than only time. The dough’s appearance tells you more than a timer in a kitchen with a different temperature.
Use the correct pan. A larger pan makes a lower loaf; a smaller one may crowd the dough or require a different baking time.
Keep the surface covered during rising. A dry skin can restrict expansion and leave an uneven top.
Cool before slicing. This is especially useful when you want thin, intact slices for sandwiches.
Freeze surplus early. Bread frozen while fresh usually gives a better result than bread left out until it is already stale.
Troubleshooting
| Problem | Possible cause | Helpful adjustment |
|---|---|---|
| Dough barely rises | Old yeast, cool conditions, or overly hot mixing water | Check yeast condition and allow more time in gentle warmth. |
| Loaf is dense | Too much flour, insufficient rise, or weak initial mixing | Measure flour lightly, mix thoroughly, and follow expansion cues. |
| Top collapses | Overproofing, overly wet dough, or underbaking | Watch the final rise and bake until the center is set. |
| Center seems gummy | Slicing hot or insufficient baking | Cool completely and check the baked center carefully. |
| Crust is too dark | Rapid browning from the pan or oven | Tent with foil once the surface has enough color. |
| Loaf sticks | Inadequate greasing or exposed pan corners | Grease thoroughly and consider a parchment sling. |
| Bread dries quickly | Overbaking or loose storage | Begin checking promptly and wrap only after cooling. |
Simple Variations
Butter-Finished Loaf
Brush the hot baked surface with the optional tablespoon of butter. This adds flavor and tends to soften the crust as the loaf cools.
Olive Oil Bread
Use a mild olive oil in the dough. The flavor is particularly pleasant for toast, tomato sandwiches, or bread served with soup.
Sesame or Oat Topping
Lightly moisten the risen top with water and scatter on a modest amount of sesame seeds or rolled oats before baking. Avoid pressing hard enough to deflate the dough.
Herb Sandwich Bread
Add a small amount of dried herbs to the flour for a savory variation. Begin modestly so the loaf remains versatile for sandwiches.
Part Whole-Wheat Experiment
Try replacing a small portion of the flour, such as ½ cup, with whole-wheat flour. Expect a heartier crumb and potentially different water needs. This variation is not kitchen-tested here, so keep the substitution modest and assess the dough after mixing.
Serving Ideas
Use cooled slices for turkey sandwiches, cheese sandwiches, or peanut butter toast. A relatively tender loaf benefits from gentle handling rather than oversized wet fillings.
For grilled cheese, slice evenly and cook over moderate heat so the filling warms before the bread becomes too dark. Toasting also gives day-old slices a pleasant texture.
Serve thicker slices beside soup or stew, or cut leftover bread into cubes for croutons. Dry slices can be turned into breadcrumbs instead of being discarded.
If you want a warm slice with butter, briefly warm a portion after the loaf has cooled and been cut. This preserves the crumb structure while giving you the warm-bread experience.
Storage and Freezing
Let the loaf cool completely before storing it in a bread bag or airtight container. Keep at room temperature in a cool kitchen for about 2–3 days.
Refrigeration can accelerate bread staling, so freezing is generally more useful for portions you will not eat soon. A very warm or humid kitchen may call for a shorter counter-storage period.
Freeze cooled slices in a well-sealed freezer bag for up to 3 months for best quality. Put parchment between slices if they tend to stick together. Press excess air from the bag without crushing the bread.
Toast slices directly from frozen, or thaw wrapped portions before warming. For a whole frozen loaf, allow enough time to thaw through rather than heating the outside aggressively while the middle remains frozen.
Discard bread with visible mold. Cutting away the visible spot is not an appropriate way to keep the rest of a soft loaf.
Nutrition Notes
When divided into 12 slices, the basic loaf is estimated at approximately 160–180 calories per slice, before optional butter topping or sandwich fillings. Protein may be about 4–6 grams per slice, depending on the flour and slice size.
These are planning estimates, not a measured analysis. A thicker slice contains more of the loaf, and different flour products change the totals. Calculate from your measured ingredients if you need closer values.
The base dough contains wheat and is not gluten-free. It contains no dairy or eggs as written, but the optional butter adds dairy. Check individual products for dietary requirements.
Frequently Asked Questions
Is this truly no-knead?
Yes. The method uses spoon mixing, resting, and a few brief folds to transfer the dough. It does not require repeated kneading on the counter or a mixer dough hook.
Can I use active dry yeast?
Follow its package instructions. If dissolving it first, use some of the measured water rather than additional water. Rise times may differ.
Can I replace the water with milk?
Milk changes flavor, browning, and dough behavior. It can be an interesting variation, but the result needs checking and may brown sooner. The base formula is written with water.
Can I leave it overnight?
This amount of yeast and timing are intended for same-day preparation. Leaving the dough on the counter overnight can overferment it. An overnight version needs a different yeast amount or a planned refrigerated schedule.
Can I make two loaves?
Double the ingredients and divide the dough evenly between two pans. Give the bowl enough room for rising and leave space around the pans in the oven. Check each loaf individually.
Why is the dough too sticky to shape into a log?
This method avoids conventional dry-surface log shaping. Scrape the soft dough directly into the pan and smooth it with lightly oiled hands or a spatula.
Can I slice it warm?
You can, but it is more likely to compress or tear. For sandwich slices, cool thoroughly and rewarm individual pieces afterward.
How do I know whether it needs more water?
After thorough mixing, a dry, crumbly mass may need an extra tablespoon. A cohesive sticky dough usually does not. Make small adjustments rather than changing the formula dramatically.
Recipe Card
Easy No-Knead Sandwich Bread
A soft, spoon-mixed wheat loaf baked in a standard sandwich pan. Suggested starting formula; not kitchen-tested here.
Prep: 15 minutes | Rises: 1½–2½ hours | Bake: 35–40 minutes | Cool: About 1½ hours
Yield: One 9 × 5-inch loaf, about 12 slices
Ingredients
- 3½ cups all-purpose flour or bread flour, spooned and leveled
- 1½ cups lukewarm water, plus 1–2 tablespoons only if needed
- 2¼ teaspoons instant yeast
- 2 tablespoons granulated sugar
- 1½ teaspoons fine table salt
- 2 tablespoons neutral oil, plus a little for greasing
- Optional: 1 tablespoon melted butter for the baked top
Instructions
- Stir flour, yeast, sugar, and salt together in a large bowl.
- Add water and oil. Mix until no dry flour remains, then beat with a sturdy spoon for about 2 minutes. Add extra water only if dry and crumbly.
- Cover and let rise until approximately doubled, about 60–90 minutes or as needed.
- Grease a 9 × 5-inch loaf pan. Gently gather the dough with a few spatula folds, scrape into the pan, and smooth with lightly oiled fingers.
- Cover and let rise until puffy, about 30–60 minutes. Preheat the oven to 375°F near the end of this rise.
- Uncover and bake for about 35–40 minutes, until golden and set. A center temperature around 195–205°F is a useful guide. Tent with foil if browning too quickly.
- Rest in the pan for 5–10 minutes, then remove to a rack. Brush with optional butter.
- Cool through before slicing, allowing approximately 1½ hours total cooling time.
Storage: Keep cooled bread covered for 2–3 days in a cool kitchen, or freeze slices for up to 3 months for best quality.
Estimated calories: Approximately 160–180 per slice, based on 12 slices and excluding optional butter.
Print
Easy No-Knead Sandwich Bread
Description
A soft, spoon-mixed wheat loaf baked in a standard sandwich pan. Suggested starting formula; not kitchen-tested here.
Prep: 15 minutes | Rises: 1½–2½ hours | Bake: 35–40 minutes | Cool: About 1½ hours
Yield: One 9 × 5-inch loaf, about 12 slices
Ingredients
- 3½ cups all-purpose flour or bread flour, spooned and leveled
- 1½ cups lukewarm water, plus 1–2 tablespoons only if needed
- 2¼ teaspoons instant yeast
- 2 tablespoons granulated sugar
- 1½ teaspoons fine table salt
- 2 tablespoons neutral oil, plus a little for greasing
- Optional: 1 tablespoon melted butter for the baked top
Instructions
- Stir flour, yeast, sugar, and salt together in a large bowl.
- Add water and oil. Mix until no dry flour remains, then beat with a sturdy spoon for about 2 minutes. Add extra water only if dry and crumbly.
- Cover and let rise until approximately doubled, about 60–90 minutes or as needed.
- Grease a 9 × 5-inch loaf pan. Gently gather the dough with a few spatula folds, scrape into the pan, and smooth with lightly oiled fingers.
- Cover and let rise until puffy, about 30–60 minutes. Preheat the oven to 375°F near the end of this rise.
- Uncover and bake for about 35–40 minutes, until golden and set. A center temperature around 195–205°F is a useful guide. Tent with foil if browning too quickly.
- Rest in the pan for 5–10 minutes, then remove to a rack. Brush with optional butter.
- Cool through before slicing, allowing approximately 1½ hours total cooling time.
Storage: Keep cooled bread covered for 2–3 days in a cool kitchen, or freeze slices for up to 3 months for best quality.
Estimated calories: Approximately 160–180 per slice, based on 12 slices and excluding optional butter.