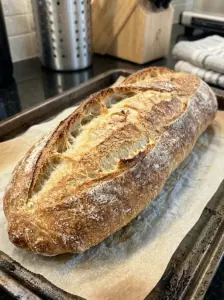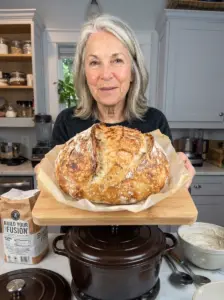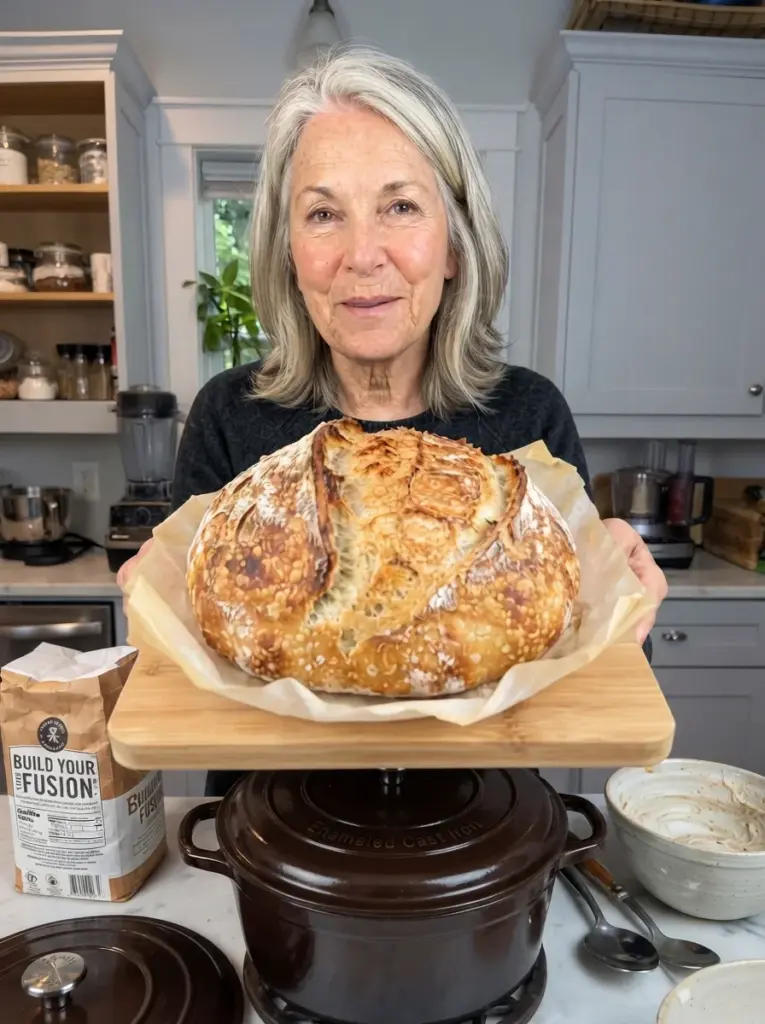
Easy Overnight No-Knead White Bread turns flour, water, yeast, and salt into a rustic loaf with a golden crust and a tender, chewy center. Stir the dough together in the evening, let it ferment overnight, and bake the next day in a covered Dutch oven.
The long rest develops flavor and gives the soft dough time to become more cohesive without an extended kneading session. A hot covered pot traps moisture around the loaf during the first part of baking, helping it expand before the crust finishes browning uncovered.
This version makes a round, crusty white loaf rather than a soft sandwich-pan bread. Slice it for toast, serve it with soup, or tear off pieces for dipping in olive oil.
This is a suggested recipe formula and has not been kitchen-tested. Room temperature, flour absorption, and cookware affect the schedule, so follow the dough and baking cues alongside the estimated times.
Recipe at a Glance
- Yield: 1 medium round loaf, approximately 10–12 slices
- Active preparation: Approximately 15 minutes
- Overnight fermentation: Approximately 12–16 hours at a cool room temperature around 68–72°F
- Final rise: Approximately 45–75 minutes
- Baking: Approximately 40–50 minutes
- Cooling: At least 1½ hours
- Total: Approximately 15–20 hours, including overnight resting and cooling
- Cookware: A 4–6-quart Dutch oven rated for the baking temperature
- Oven: 450°F
Final proofing and oven preheating overlap. A warmer kitchen may shorten fermentation substantially, while a colder one can extend it.
Why You’ll Love This Bread
- Four basic ingredients: Flour, water, salt, and a small amount of yeast.
- No mixer required: A sturdy spoon does the initial mixing.
- An evening-to-next-day schedule: Most of the time is hands-off.
- A rustic crust: Covered baking helps create a well-expanded loaf with a browned exterior.
- Versatile slices: Use for toast, sandwiches, bruschetta, or serving with dinner.
How Overnight No-Knead Bread Works
A soft dough and a long fermentation give flour time to hydrate and the dough time to develop structure. Stirring thoroughly at the start is still important: no-knead does not mean leaving dry flour pockets in the bowl.
The yeast quantity is intentionally small. This is not a quick-rise recipe, and adding a whole packet without adjusting the schedule can cause the dough to ferment much faster than intended.
The finished bread has a rustic crumb. Expect a mix of small and larger holes rather than identical slices. Flour choice, handling, and proofing will affect how open the interior becomes.
Ingredients
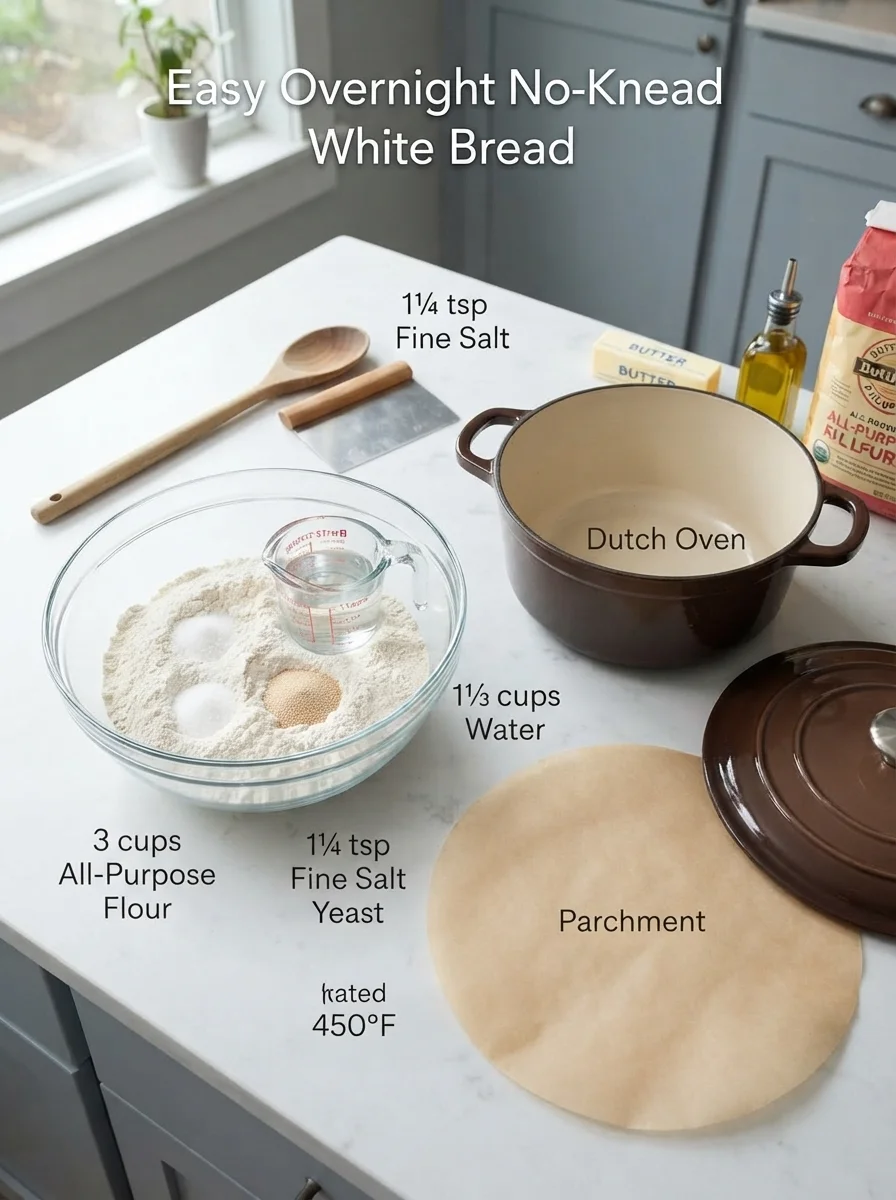
- 3 cups all-purpose flour, spooned and leveled, plus a little for shaping
- 1¼ teaspoons fine salt
- ¼ teaspoon instant yeast
- 1⅓ cups room-temperature water, plus 1–2 tablespoons only if needed
No sugar or oil is required for this formula. Serving butter, olive oil, and optional toppings are additional ingredients.
Ingredient Notes
All-Purpose Flour
Use all-purpose flour for the intended white loaf. Fluff the flour, spoon it into the measuring cup, and level the top. Scooping from a tightly packed bag can add enough flour to make the dough too stiff.
Bread flour is an alternative and may produce a chewier result. Its absorption varies, so use the dough’s texture to guide small water adjustments.
Do not substitute self-rising flour. Its added baking powder and salt are not designed for this method. Whole wheat and gluten-free versions require different proportions and handling.
Instant Yeast
Measure the ¼ teaspoon carefully. It is a small amount because the dough rests for many hours.
Check the yeast’s freshness and follow package storage instructions. If you use active dry yeast, follow its hydration directions using a portion of the measured water. Its performance may change the fermentation time.
Water
Use room-temperature water. Very warm water speeds fermentation and is unnecessary for the overnight schedule. Hot water can damage the yeast.
Begin with 1⅓ cups. If dry flour remains after thorough stirring and a brief rest, add a tablespoon at a time from the allowance. The dough should be sticky and shaggy, not a thin batter.
Salt
Fine salt distributes easily and seasons the loaf. Coarse salts differ in volume, so the same spoonful may not provide the same seasoning.
Equipment
You will need a large bowl with a cover, sturdy spoon, flexible spatula or bench scraper, parchment rated for the baking temperature, and a suitable Dutch oven with its lid.
Read the cookware manufacturer’s guidance before preheating an empty pot. Some cookware does not permit dry preheating, and some lids or knobs have lower temperature limits. Use a pot whose instructions allow the method below.
If using parchment, check its temperature rating rather than assuming every product is suitable at 450°F. Keep excess paper away from oven walls and heating elements. A wire rack and serrated knife are useful after baking.
An Example Overnight Schedule
| Time | Task |
|---|---|
| 7 p.m. | Mix the dough and cover the bowl. |
| 7–11 a.m. the next day | Check for a bubbly, expanded dough and shape when ready. |
| Following 45–75 minutes | Let the shaped loaf rise; preheat the oven and suitable pot during the latter part. |
| After proofing | Score and bake, covered first and uncovered to finish. |
| After baking | Cool at least 1½ hours before slicing. |
This is a planning example, not a guarantee. A warm room can make the dough ready earlier than breakfast, while a cold room may require more time.
How to Make Easy Overnight No-Knead White Bread
1. Mix the Dry Ingredients
Stir the flour, salt, and instant yeast together in a large bowl. Distribute the small amount of yeast thoroughly.
Choose a bowl with plenty of room for expansion. The dough should not reach the cover as it rises.
2. Add Water and Stir
Pour in 1⅓ cups room-temperature water. Stir firmly until all the flour is moistened, scraping the sides and bottom of the bowl.
The dough should look shaggy, sticky, and irregular. It does not need to become a smooth ball. Let it stand for about 10 minutes if you are unsure whether it needs more liquid, then add extra water only if dry flour still will not incorporate.
Cover the bowl to prevent the surface drying out.
3. Ferment Overnight
Leave at a cool room temperature, approximately 68–72°F, for around 12–16 hours. Check earlier in a warmer kitchen.
Ready dough should be noticeably expanded, bubbly across the surface, and soft enough to wobble when the bowl moves. It may show strands as you lift an edge with a spatula.
Do not wait deliberately for the dough to collapse. A strong alcoholic aroma, a sunken surface, and extremely slack texture can indicate that it has gone beyond the ideal point.
4. Shape Gently
Lightly flour the counter and your hands. Scrape the dough out without pulling it into long strands.
Fold the edges toward the center a few times, then gently turn and tuck into a round. Use a scraper if needed. This brief shaping step helps organize the dough; it is not an extended knead.
Avoid burying it in flour to make handling effortless. A soft, slightly sticky dough is expected.
5. Prepare the Final Rise
Place the shaped round seam-side down on suitable parchment. Set it in a bowl or shallow basket that supports its shape, leaving enough paper to lift it later.
Cover loosely and let rise for approximately 45–75 minutes, until puffy. A gentle fingertip indentation should return slowly. If it springs back immediately, allow more time; if the dough is fragile and starts to sink, bake promptly.
6. Preheat the Oven and Pot
During the latter part of proofing, preheat the oven to 450°F. If your Dutch oven allows empty preheating, place it inside with the lid on and allow approximately 30 minutes of heating once the oven is hot.
Keep the shaped dough away from the hot pot until you are ready to load it. Use dry, substantial oven mitts and a heatproof surface for the lid.
7. Score and Load
Just before baking, make a shallow slash across the top with a sharp blade. Work carefully and avoid pressing the loaf flat.
Remove the hot pot and lid, remembering both are extremely hot. Lift the loaf using the parchment and lower it gently into the pot. Replace the lid and return to the oven.
8. Bake Covered
Bake covered for approximately 25–30 minutes. The enclosed moisture helps the loaf expand while the crust is still flexible.
Keep the lid on during this phase rather than opening repeatedly to inspect the loaf.
9. Finish Uncovered
Remove the lid carefully, keeping your face and hands clear of escaping steam. Bake uncovered for another 15–20 minutes, until well browned.
The loaf should look set and feel firm at the sides. A center temperature around 205–210°F is a useful doneness guide for this lean loaf, but assess it alongside crust color and structure.
If the base browns excessively in your oven, review rack position and cookware on the next bake. Do not remove a loaf with a raw center simply because the bottom is dark.
10. Cool Before Slicing
Lift the bread from the pot and remove the parchment if practical. Cool on a wire rack for at least 1½ hours, or until the center is no longer warm.
Cutting immediately can compress the interior and make a well-baked loaf seem gummy. Use a serrated knife and gentle sawing motion once cool.
Tips for a Better Loaf
Use a small yeast measure accurately. Extra yeast changes the overnight schedule.
Watch temperature. A long room-temperature rest is not the same in a cool kitchen and a hot summer room.
Stir thoroughly. All flour needs contact with water before the overnight rest.
Shape with gentle folds. Preserve some air while creating a surface that holds together.
Check cookware and parchment limits. The covered-pot method requires equipment suited to the temperature and preheating instructions.
Bake to a real finish. A pale crust and underbaked center will not improve simply by cooling longer.
Let steam escape after baking. Cooling on a rack helps prevent a damp base.
Troubleshooting
| Problem | Possible cause | What to try |
|---|---|---|
| Little overnight expansion | Cool room, inactive yeast, or overly stiff dough | Allow more time if activity is visible; check yeast freshness and measurement. |
| Dough collapses before shaping | Fermentation too long or room too warm | Shape and bake sooner next time; check earlier rather than following the clock alone. |
| Dough is hard to handle | Normal stickiness or excessive water | Use a scraper and light flour; keep water adjustments small next batch. |
| Loaf spreads flat | Weak shaping, overproofing, or very slack dough | Fold gently, support during proofing, and bake before it becomes fragile. |
| Dense crumb | Insufficient fermentation or excess flour | Follow expansion cues and avoid adding large amounts during shaping. |
| Gummy center | Underbaking or slicing hot | Check the center and cool fully. |
| Crust softens after storage | Moisture moves outward and is trapped | Refresh briefly in the oven; expect airtight storage to soften crust. |
Variations
Rosemary Loaf
Add 1–2 teaspoons finely chopped fresh rosemary to the dry ingredients. Keep additions modest so the basic dough remains easy to assess.
Sesame or Seeded Top
Lightly dampen the shaped surface and sprinkle with sesame seeds before baking. Take care not to deflate the loaf.
Olive Variation
A small amount of well-drained chopped olives can be folded in during shaping. They add moisture and salt and can make the dough more difficult to handle. Try the plain loaf first before changing the formula.
Different Serving Flavors
Keep the dough plain and vary the serving: garlic butter, herb oil, jam, or cheese can give each meal a different direction without changing fermentation.
These are suggested variations and have not been separately tested.
Serving Suggestions
Serve slices with tomato soup, bean stew, or a simple salad. Toast for breakfast with butter and jam, or make open-faced sandwiches with cheese and roasted vegetables.
For bruschetta, toast slices before adding tomato toppings. This helps the bread hold up to juicy ingredients.
Slightly stale bread can become croutons, breadcrumbs, or bread salad. Freeze portions while fresh if you will not use the whole loaf soon.
Storage and Reheating
Room Temperature
Cool fully before wrapping. Store for approximately 2 days in a cool, dry kitchen. Airtight wrapping preserves softness but reduces crust crispness; a paper bag protects the crust less from drying but allows more airflow.
Choose according to how soon you plan to eat it. Warm, humid conditions shorten keeping quality. Discard the loaf if mold develops.
Refrigerator
Refrigeration can make plain bread stale faster. Freeze portions for longer storage instead.
Freezer
Slice the cooled loaf or freeze in larger portions. Wrap well and place in a freezer-safe bag for up to 2–3 months for best quality.
Separate slices with parchment if you want to remove them individually.
Refreshing the Crust
Warm a portion in a 350°F oven for approximately 8–12 minutes, checking to avoid drying it out. Toast individual slices directly from frozen if preferred.
Once you add perishable fillings or toppings, follow storage guidance appropriate to those ingredients.
Frequently Asked Questions
Does overnight mean in the refrigerator?
Not in this version. The small yeast quantity is intended for a long rest at a cool room temperature. A refrigerated method needs a different schedule and cannot be assumed to finish in the same time.
Can I use a whole yeast packet?
Not with the same overnight plan. It would ferment much faster. Measure the small quantity listed.
Is this sourdough?
No. It uses commercial yeast rather than sourdough starter. Long fermentation adds flavor but does not make it sourdough.
Do I need sugar to feed the yeast?
No added sugar is needed for this flour-and-water dough.
Can I bake it in a loaf pan?
That changes the shape, steam environment, and baking method. The instructions here are developed as a suggested covered-pot loaf rather than a tested loaf-pan conversion.
What if my kitchen is very warm?
Check much earlier. Do not leave it untouched for the full time simply because the recipe says overnight. A warm-weather or refrigerated schedule would need adjustment.
Can I use a pot that cannot be preheated empty?
Do not use the preheating instructions against the manufacturer’s guidance. Choose suitable cookware or a separate recipe designed for a cold-pot method.
Will the crust stay crisp overnight?
It usually softens as moisture redistributes, especially when wrapped. Brief oven refreshing restores some crispness.
Recipe Card: Easy Overnight No-Knead White Bread
Yield: 1 round loaf, approximately 10–12 slices
Active preparation: 15 minutes
Overnight rise: 12–16 hours at approximately 68–72°F
Final rise: 45–75 minutes
Baking: 40–50 minutes
Cooling: At least 1½ hours
Total: Approximately 15–20 hours
Ingredients
- 3 cups all-purpose flour, spooned and leveled
- 1¼ teaspoons fine salt
- ¼ teaspoon instant yeast
- 1⅓ cups room-temperature water
- 1–2 tablespoons additional water, only if needed
- A little flour for shaping
Instructions
- Stir flour, salt, and yeast together. Add the water and mix until no dry flour remains. Rest briefly before adding extra water if needed. Dough should be sticky and shaggy.
- Cover and ferment at a cool room temperature for approximately 12–16 hours, until expanded and bubbly. Check earlier in warm conditions.
- Turn onto a lightly floured surface. Fold the edges inward and gently shape a round.
- Place on parchment rated for 450°F in a supportive bowl. Cover and rise for 45–75 minutes, until puffy.
- Preheat the oven to 450°F. Preheat a suitable 4–6-quart Dutch oven with its lid according to manufacturer guidance, approximately 30 minutes once the oven is hot.
- Score the loaf and carefully lower into the hot pot using the parchment. Cover.
- Bake for 25–30 minutes covered, then 15–20 minutes uncovered, until well browned and baked through. Approximately 205–210°F in the center is a useful guide.
- Cool on a rack for at least 1½ hours before slicing.
Approximate Nutrition
For 12 slices, estimate 110–125 calories and 3–4 grams of protein per slice, before spreads or toppings. Ten larger slices contain more per slice. Values are approximate and depend on flour measurement and portion size.
Notes
- This suggested formula has not been kitchen-tested.
- Use a small yeast measure and follow dough cues rather than a fixed overnight clock.
- Only use cookware and parchment suited to the temperature and method.
- The bread is a crusty round loaf rather than a soft sandwich bread.
- Cool completely for a well-set crumb.
Final Thoughts
A small amount of yeast and a long rest make this a convenient loaf to mix in the evening and bake the next day. Watch for a bubbly, expanded dough, shape gently, and give the bread time to finish baking and cooling. The result is a rustic white loaf ready for toast, soup, and everyday meals.
Print
Easy Overnight No-Knead White Bread
Description
Yield: 1 round loaf, approximately 10–12 slices
Active preparation: 15 minutes
Overnight rise: 12–16 hours at approximately 68–72°F
Final rise: 45–75 minutes
Baking: 40–50 minutes
Cooling: At least 1½ hours
Total: Approximately 15–20 hours
Ingredients
- 3 cups all-purpose flour, spooned and leveled
- 1¼ teaspoons fine salt
- ¼ teaspoon instant yeast
- 1⅓ cups room-temperature water
- 1–2 tablespoons additional water, only if needed
- A little flour for shaping
Instructions
- Stir flour, salt, and yeast together. Add the water and mix until no dry flour remains. Rest briefly before adding extra water if needed. Dough should be sticky and shaggy.
- Cover and ferment at a cool room temperature for approximately 12–16 hours, until expanded and bubbly. Check earlier in warm conditions.
- Turn onto a lightly floured surface. Fold the edges inward and gently shape a round.
- Place on parchment rated for 450°F in a supportive bowl. Cover and rise for 45–75 minutes, until puffy.
- Preheat the oven to 450°F. Preheat a suitable 4–6-quart Dutch oven with its lid according to manufacturer guidance, approximately 30 minutes once the oven is hot.
- Score the loaf and carefully lower into the hot pot using the parchment. Cover.
- Bake for 25–30 minutes covered, then 15–20 minutes uncovered, until well browned and baked through. Approximately 205–210°F in the center is a useful guide.
- Cool on a rack for at least 1½ hours before slicing.