
Introduction
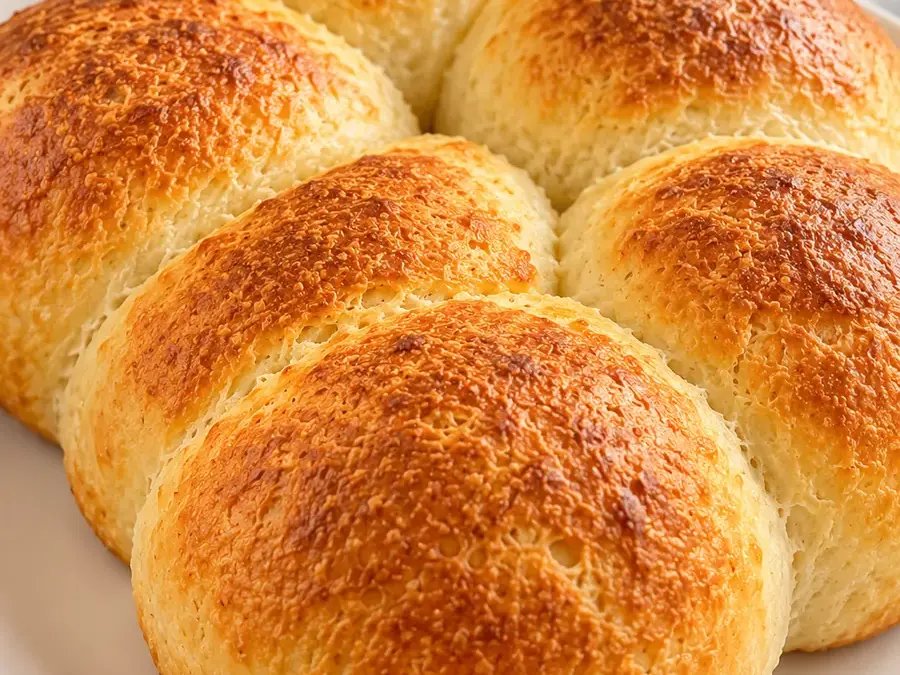
Easy 3-Ingredient Cottage Cheese Dinner Rolls combine blended cottage cheese, prepared self-rising flour, and olive oil in small, tender rounds. The cheese provides moisture and a mild dairy flavor, while the oil softens the crumb. Blending the cheese first helps distribute its curds through the dough, so the finished rolls have a more even interior.
Expect a close, soft crumb, modest lift, and rustic surfaces. These are quick dinner rolls with a gentle crumble rather than the stretchy texture of proofed bread. They suit a meal when you want individually portioned bread without a long preparation schedule. Plan on about 62 minutes: 20 minutes of active preparation, 22 minutes of baking, and 20 minutes of cooling. Preheating overlaps preparation. Your oven and cheese consistency may require a little flexibility, especially when checking whether the centers have finished.
Why You’ll Love This Recipe
The whole measured portion of cottage cheese goes into the dough. Blending distributes both curds and liquid, helping the moisture reach the flour evenly.
Preparation uses one bowl after blending. A sturdy spatula brings the dough together, and a scraper helps divide it without prolonged handling or elaborate shaping.
Eight individual rolls make serving and freezing convenient. You can take out the number you need without cutting into a larger loaf each time.
The shaping flour comes from the measured total. Setting it aside before mixing gives you a defined allowance for handling while keeping the dough from becoming progressively drier.
Ingredients
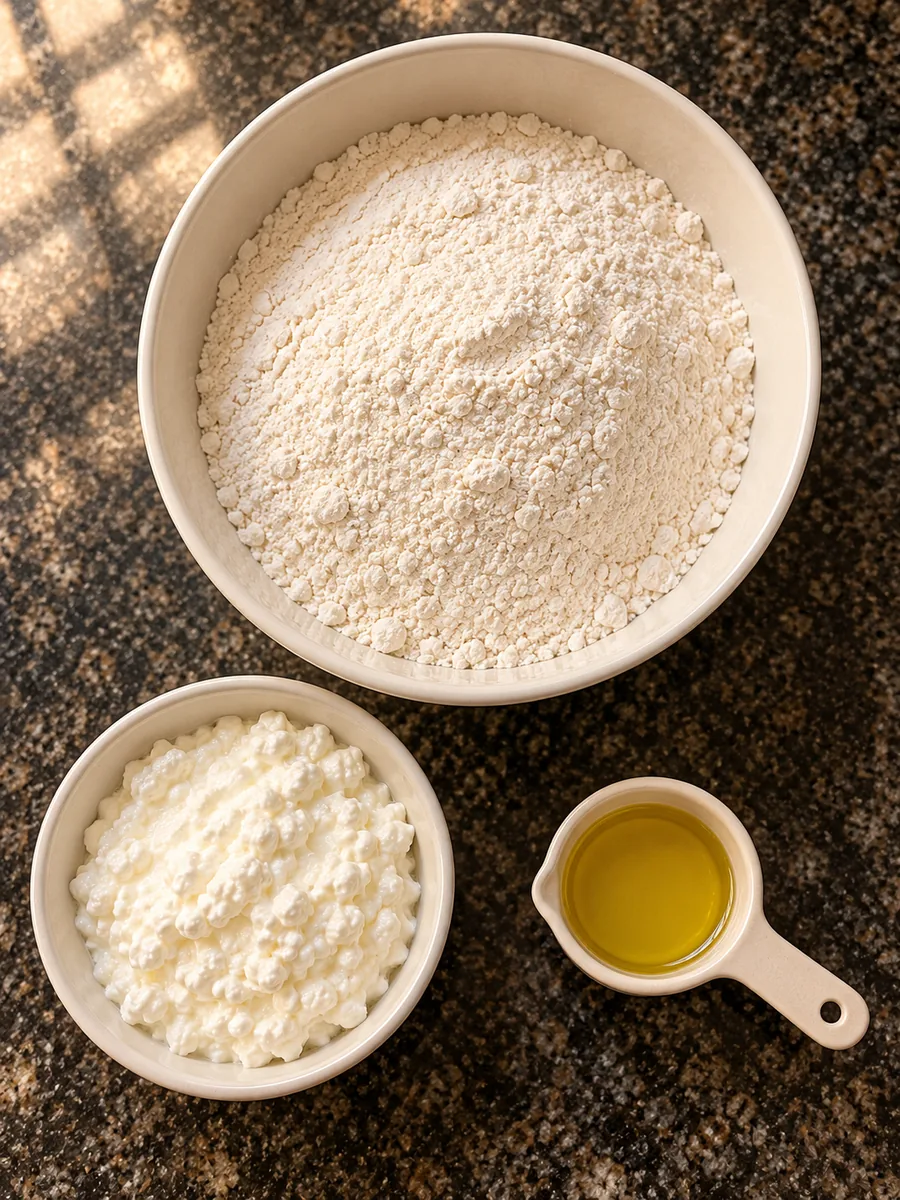
Choose plain, undrained 4% milkfat cottage cheese. Stir the container before weighing so your portion contains a representative balance of curds and liquid. Curd size changes how much fits into a cup, making the gram measurement particularly helpful.
Prepared self-rising flour already contains leavening and salt. This formula uses that purchased product as specified; check that it is fresh and suitable for baking. Reserve the shaping portion before mixing. Choose an olive oil with a flavor you enjoy because its character can remain noticeable in these mild rolls. All the oil goes into the dough, and ungreased parchment lines the pan.
- 2 1/2 cups prepared self-rising flour, spooned and leveled (300 g), divided: 290 g for dough and 10 g for shaping
- About 1 cup plus 1 tablespoon plain, undrained 4% milkfat cottage cheese (250 g)
- 2 tablespoons olive oil (27 g)
Ingredient Notes and Substitutions
The cottage cheese supplies approximately 199 g water at the specified weight. Compared with approximately 290 g wheat flour within the prepared product, that suggests about 69% effective hydration. The wheat contribution is an estimate because the product also contains other components. Dairy solids absorb and hold moisture differently from flour alone, so the dough should feel soft and slightly tacky without flowing like batter.
Small-curd and large-curd cottage cheese are both reasonable choices when blended thoroughly. Keep the specified milkfat percentage and retain the liquid. Brand differences in moisture and curd firmness can affect handling; weighing cannot eliminate those differences. No substitution blend is supplied.
A complete protein estimate cannot be established from the documented values because they do not include the prepared self-rising flour. The cottage cheese contributes approximately 27.8 g protein to the entire batch, but that is only a partial ingredient calculation. It should not be presented as the rolls’ total protein or a verified protein claim.
How to Make Easy 3-Ingredient Cottage Cheese Dinner Rolls
- Heat the oven to 400°F with a rack in the middle. Line a 9-by-13-inch rectangular metal baking pan with ungreased parchment rated for this temperature. Measure 290 g self-rising flour into a mixing bowl. Set aside the remaining measured flour for shaping. Have a spatula, scraper, and scale ready.
- Blend the cottage cheese and olive oil in a small food processor until mostly smooth. Stop and scrape down the container as needed, retaining all the cheese liquid. Small curd flecks are fine. Scrape the entire mixture into the flour bowl, including the coating around the blade.
- Fold with a sturdy spatula until a soft, slightly tacky dough gathers together. Press loose crumbs into the moister dough and check underneath for dry flour. Stop when no dry pockets remain. Expect an uneven surface rather than an elastic dough. Do not taste raw dough.
- With no bench rest, spread all 10 g reserved flour thinly over the work surface and dough. Divide into 8 portions, approximately 72 g each. Use a scraper and gentle tucks to form squat rounds about 2 1/2 inches wide and 1 inch tall, incorporating the measured flour during handling. Arrange in two rows of four with gaps between them. Bake immediately without proofing.
- Bake for 22 minutes at 400°F. Look for lightly golden tops, set sides, and firm bases. Insert a thermometer through the side of a middle roll; its center should reach 200°F. If necessary, continue baking until the temperature and appearance cues agree. Avoid relying on top color alone.
- Cool in the pan for 5 minutes, then transfer to a wire rack for another 15 minutes before splitting. This initial cooling lets steam escape and the crumb settle. Makes 8 rolls; one roll is one serving. Cool any storage portions completely before packaging.
Expert Baking Tips
Weigh the flour before dividing it. Packing a measuring cup can introduce enough extra dry material to change how readily this small batch comes together and how tender it stays.
Use a processor sized for the cheese mixture. If the blade spins beneath a stationary coating, stop and scrape the walls so the mixture can circulate and become more uniform.
Recover the blended mixture carefully. Leaving a thick coating behind removes moisture and fat from the dough, even when the ingredients were weighed correctly at the start.
Distribute the shaping flour thinly. A light coating helps the scraper lift portions, while concentrated piles can become dry seams that remain visible after baking.
Compare the portions from the side before they enter the oven. Similar thickness helps the centers finish together; slightly irregular edges are less important than matching their height.
Probe through the side toward the center. Keep the thermometer tip away from the pan, and check another roll if the reading seems inconsistent with the crumb and crust.
Common Mistakes to Avoid
Draining the cheese removes intended dough moisture. If the mixture initially looks crumbly, scrape beneath it and press loose flour into the moist portion before deciding something is wrong. A few slow folds often reveal unmixed flour at the bottom.
Trying to make the dough glossy and elastic can produce a firmer roll. Stop mixing when the dry pockets disappear, then shape with gentle tucks. Small creases are acceptable; rubbing them away repeatedly adds handling without improving the basic structure.
Tall balls or tightly crowded portions can leave thick centers while the outsides appear finished. Keep the rounds squat and separated. If the bases darken early, consider the rack position and whether the pan is unusually dark. A damp cut surface can also come from splitting too soon, so allow the stated cooling period before assessing the crumb.
Variations and Serving Ideas
For a rustic finish, leave shallow folds visible on top. For smoother rounds, tuck the edges underneath and place the seam against the parchment. Keep the portions equal in weight and thickness.
For smaller rolls, divide the same dough into twelve equal pieces. Begin checking earlier because their centers will heat faster, and still confirm a 200°F center. This changes the yield and baking schedule.
Slightly flatter rounds give you a wider surface for horizontal splitting, although they may finish sooner. Serve after the initial cooling period while still warm, or cool completely for cleaner cuts. Use a serrated knife with light strokes instead of pressing down.
Storage and Freezing
Let leftover rolls finish cooling uncovered on the rack, then seal them in an airtight container. Refrigerate within two hours of baking and use within three days for best texture. If the room is above 90°F, refrigerate within one hour. Chilling firms the crumb, so warm only the portions you plan to serve.
Freeze completely cooled rolls individually, then transfer them to a freezer bag or container. Remove excess air without crushing their tops. Label the package and use within two months for best quality. Thaw covered in the refrigerator.
Warm thawed rolls loosely wrapped in foil in a 325°F oven for about 10 minutes, until heated through. Open the foil near the end if the surfaces feel damp. Avoid repeatedly warming the entire batch.
Frequently Asked Questions
Are these fluffy like proofed dinner rolls?
Expect modest lift and a tender, close crumb. The rolls break apart readily but have less stretch and airiness than bread made with a developed, proofed dough.
Why blend the cottage cheese?
Blending distributes its curds and liquid through the flour. Large intact curds can leave uneven moist pockets and make consistent shaping more difficult.
Can I use large-curd cottage cheese?
Yes, choose plain, undrained 4% milkfat cottage cheese. Blend until the large lumps break down, then scrape the processor thoroughly to retain the measured portion.
Can the mixed dough wait before baking?
Bake promptly after mixing and shaping. For advance preparation, bake and cool the rolls first, then refrigerate or freeze them for later warming.
Why are the tops only lightly golden?
Restrained browning is reasonable for these uncoated rolls. Check the set sides, firm bases, and 200°F center before using crust color to judge doneness.
What if the dough sticks during shaping?
Use the measured flour reserve and lift portions with a scraper. Slight tackiness is expected. Work with gentle tucks rather than repeatedly squeezing or rolling the dough.
Why did my rolls spread outward?
Unusually wet cheese, inaccurate flour measurement, or very flat shaping can encourage spreading. Check those details before the next batch rather than adding unmeasured flour.
WP Tasty Recipe Card
PrintEasy 3-Ingredient Cottage Cheese Dinner Rolls
- Total Time: 62 minutes
Ingredients
2 1/2 cups prepared self-rising flour, spooned and leveled (300 g), divided: 290 g for dough and 10 g for shaping
About 1 cup plus 1 tablespoon plain, undrained 4% milkfat cottage cheese (250 g)
2 tablespoons olive oil (27 g)
Instructions
Heat the oven to 400°F with a rack in the middle. Line a 9-by-13-inch rectangular metal baking pan with ungreased parchment rated for this temperature. Measure 290 g self-rising flour into a mixing bowl. Set aside the remaining measured flour for shaping. Have a spatula, scraper, and scale ready.
Blend the cottage cheese and olive oil in a small food processor until mostly smooth. Stop and scrape down the container as needed, retaining all the cheese liquid. Small curd flecks are fine. Scrape the entire mixture into the flour bowl, including the coating around the blade.
Fold with a sturdy spatula until a soft, slightly tacky dough gathers together. Press loose crumbs into the moister dough and check underneath for dry flour. Stop when no dry pockets remain. Expect an uneven surface rather than an elastic dough. Do not taste raw dough.
With no bench rest, spread all 10 g reserved flour thinly over the work surface and dough. Divide into 8 portions, approximately 72 g each. Use a scraper and gentle tucks to form squat rounds about 2 1/2 inches wide and 1 inch tall, incorporating the measured flour during handling. Arrange in two rows of four with gaps between them. Bake immediately without proofing.
Bake for 22 minutes at 400°F. Look for lightly golden tops, set sides, and firm bases. Insert a thermometer through the side of a middle roll; its center should reach 200°F. If necessary, continue baking until the temperature and appearance cues agree. Avoid relying on top color alone.
Cool in the pan for 5 minutes, then transfer to a wire rack for another 15 minutes before splitting. This initial cooling lets steam escape and the crumb settle. Makes 8 rolls; one roll is one serving. Cool any storage portions completely before packaging.
- Prep Time: 20 minutes
- Cook Time: 22 minutes