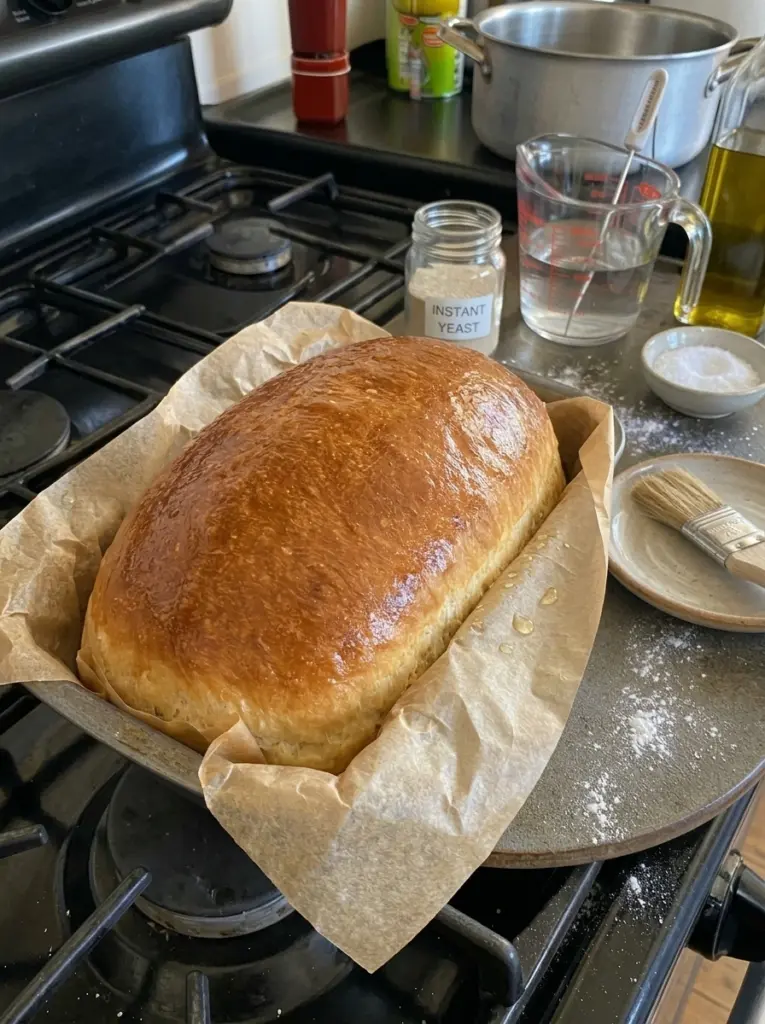
This Easiest No-Knead Sandwich Bread is soft, fluffy, and perfect for everyday sandwiches. No kneading or special equipment required for this beautifully golden, tender loaf!
If the idea of homemade bread sounds appealing but the kneading process feels like too much effort, this Easiest No-Knead Sandwich Bread is exactly the recipe for you. A simple, slightly sticky dough comes together in minutes with just a bowl and a spoon, then slowly rises until light and airy before baking into a beautifully golden loaf with a soft, tender crumb. No stand mixer, no intensive kneading, and no special equipment required.
This bread is the perfect everyday loaf, ideal for sandwiches, toast, grilled cheese, and French toast. The extended rise time does all the work that kneading would normally accomplish, developing the gluten structure gently and resulting in a wonderfully soft, tender crumb that’s perfect for slicing.
Let’s walk through everything you need to know to make this soft, fluffy, no-knead sandwich bread at home.
Why You’ll Love This No-Knead Sandwich Bread
There’s so much to love about this simple, foolproof bread recipe:
No kneading required. This recipe skips the traditional kneading process entirely, relying instead on gentle folds and a long rise to develop the dough’s structure.
No special equipment needed. With just a mixing bowl, a wooden spoon, and a loaf pan, this recipe is accessible to anyone, regardless of their baking equipment.
Soft, tender crumb. The wet, sticky dough creates an incredibly soft, tender interior, perfect for sandwiches and toast.
Beautifully golden crust. This loaf bakes up with a lovely golden-brown crust that’s soft enough for easy slicing and sandwich-making.
Perfect for beginners. This approachable recipe is a wonderful introduction to bread baking for those who have never made homemade bread before.
Endlessly versatile. From classic sandwiches to French toast, this bread is a true everyday staple.
Ingredients You’ll Need
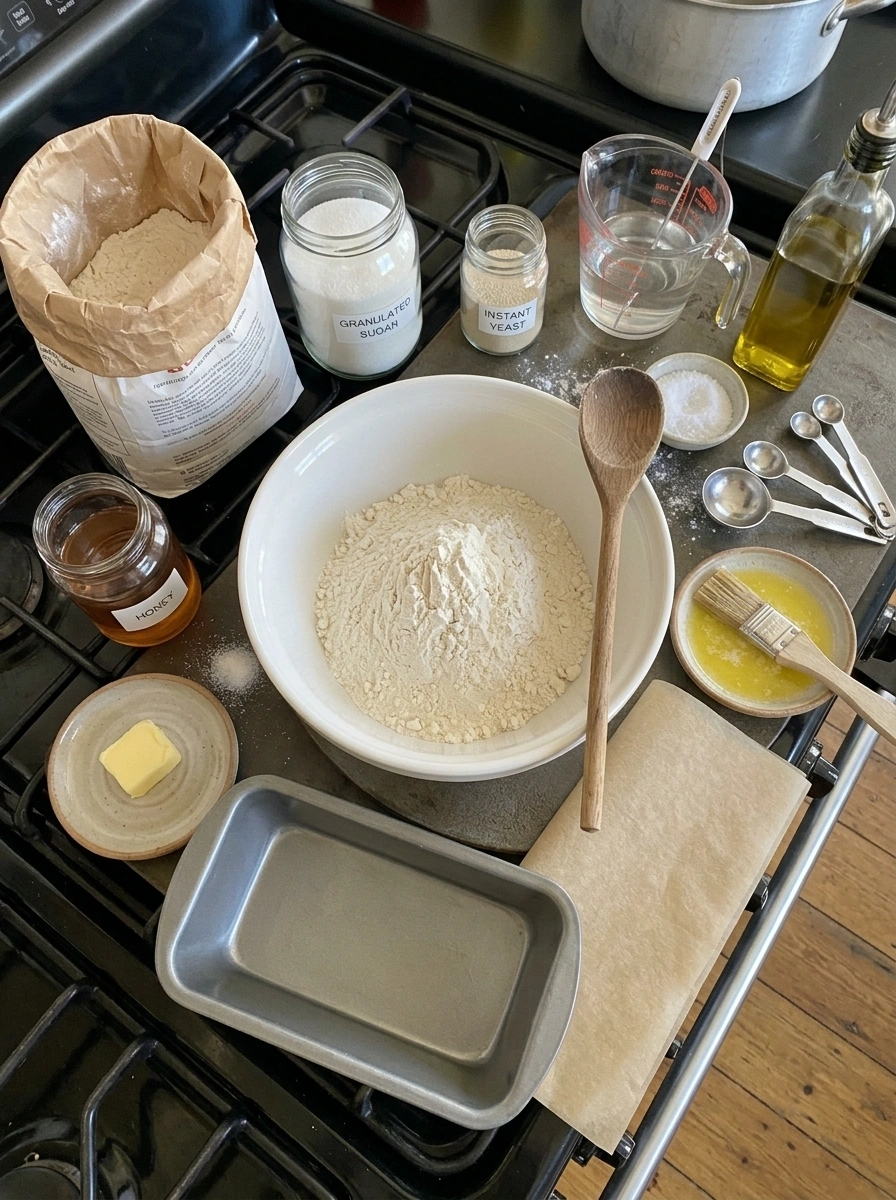
Here’s a breakdown of what goes into this soft, fluffy no-knead bread and why each ingredient matters.
For the Dough
- 3 cups (360 g) all-purpose flour — Forms the structure of the bread; all-purpose flour is ideal for this soft, tender sandwich loaf.
- 1½ tsp instant yeast — The leavening agent that gives this bread its rise; instant yeast can be mixed directly into the dry ingredients without proofing separately.
- 1½ tsp granulated sugar or honey — Adds a touch of sweetness and helps feed the yeast for a good rise.
- 1½ tsp fine sea salt — Essential for flavor, salt also helps regulate the yeast’s activity and strengthens the dough.
- 1½ cups (360 g) warm water — Hydrates the flour and activates the yeast; this generous amount of water is key to the soft, tender texture of this no-knead bread.
- 1 tbsp olive oil — Adds richness and makes the sticky dough easier to handle during shaping.
For the Pan
- Softened butter or olive oil, as needed — Used to grease the loaf pan and prevent sticking.
Optional for Finishing
- 1 tbsp melted butter — Brushed over the baked loaf for an extra-soft, flavorful crust.
How to Make Easiest No-Knead Sandwich Bread
This recipe unfolds over several rising stages, but requires very little hands-on effort. Here’s exactly how to make it.
Step 1: Mix the Dry Ingredients
Add the flour, instant yeast, sugar, and salt to a large mixing bowl. Whisk until evenly combined. No stand mixer is needed for this recipe.
Step 2: Add the Warm Water
Pour in the warm water. Mix with a wooden spoon or sturdy spatula until no dry flour remains. The dough will look sticky, soft, and somewhat shaggy. That’s exactly what you want—don’t keep adding flour simply because the dough doesn’t resemble traditional kneaded bread dough.
Step 3: First Rise
Cover the bowl with plastic wrap or a clean cover. Let the dough rise at room temperature for approximately 1½–2 hours, until noticeably expanded, airy, and bubbly. A cooler kitchen may require additional time.
Step 4: Fold the Dough
Lightly oil your hands. Pull one edge of the dough upward and fold it toward the center. Rotate the bowl and repeat several times around the dough. This gently strengthens the dough without traditional kneading.
Step 5: Add the Olive Oil
Drizzle the olive oil over the dough. Gently turn and fold the dough so the outside becomes lightly coated. This also makes the sticky dough much easier to handle.
Step 6: Shape the Loaf
Transfer the dough to a lightly oiled surface. Gently stretch it into a rough rectangle. Fold the top third toward the center, then fold the bottom third upward like a letter. Tuck the sides underneath and gently shape it into a loaf. Avoid aggressively pressing out all the air.
Step 7: Transfer to the Pan
Grease or parchment-line a 9×5-inch loaf pan. Place the shaped dough inside seam-side down.
Step 8: Final Rise
Cover loosely and let rise for approximately 45–60 minutes, or until the dough looks beautifully puffy and has risen close to the top of the pan. Don’t rely only on the clock—the appearance of the dough matters more.
Step 9: Bake
Preheat the oven to 375°F (190°C). Bake for approximately 40–45 minutes, until the loaf is beautifully golden brown and baked through. If the top becomes too dark before the bread is finished, loosely tent it with foil.
Step 10: Brush with Butter
For an extra-soft sandwich-bread crust, brush the top with melted butter immediately after baking. Let the bread rest in the pan for approximately 10 minutes. Then remove it and transfer it to a wire rack.
Step 11: Cool Before Slicing
Allow the loaf to cool for at least 30–60 minutes before slicing. Cutting into very hot bread can compress the soft interior and make it seem gummy.
What the Dough Should Look Like
Don’t expect a firm dough ball. For this no-knead bread, the dough should be:
- Soft
- Sticky
- Well hydrated
- Bubbly after rising
- Stretchy enough to gently fold
- Puffy before baking
That extra moisture helps create a soft, tender sandwich crumb without intensive kneading.
Easy Variations
Honey Sandwich Bread: Replace the sugar with honey for a subtly different, slightly rounder sweetness.
Garlic Herb: Add garlic powder and dried Italian herbs to the dry ingredients for a savory, flavorful loaf.
Cheddar Bread: Fold shredded sharp cheddar into the dough for a rich, cheesy twist.
Everything Bread: Sprinkle everything bagel seasoning over the loaf before baking for a bold, savory crust.
Seeded Sandwich Bread: Top with sesame, sunflower, or pumpkin seeds for extra texture and visual appeal.
Perfect For
This versatile loaf is perfect for:
- Turkey sandwiches
- Ham and cheese
- Peanut butter and jelly
- Grilled cheese
- Egg sandwiches
- Avocado toast
- French toast
- Garlic toast
- Toast with butter and jam
Tips for the Best No-Knead Sandwich Bread
Resist adding extra flour. The biggest secret to this recipe’s soft, tender texture is resisting the urge to add extra flour just because the dough feels sticky. A soft, well-hydrated dough is essential for a tender crumb.
Watch the dough, not just the clock. Rising times can vary based on your kitchen’s temperature, so look for the dough to appear expanded, airy, and bubbly rather than relying solely on a specific time.
Use lightly oiled hands when handling the dough. Since this dough is quite sticky, oiling your hands makes folding and shaping much easier.
Don’t skip the final rise. Letting the shaped loaf rise until puffy and close to the top of the pan ensures a light, airy finished texture rather than a dense loaf.
Let the bread cool before slicing. Cutting into the bread while it’s still hot can compress the soft interior and make it seem gummy, even though it’s fully baked.
Tent with foil if needed. If the top of the loaf is browning too quickly during baking, loosely tenting it with foil helps prevent over-browning while the interior finishes baking.
Storage Information
Once completely cooled, keep the bread in an airtight container or bread bag at room temperature for approximately 2–3 days. For longer storage, slice the loaf and freeze it. Individual slices can go directly from the freezer into the toaster, making it easy to enjoy fresh-tasting bread whenever you need it.
Frequently Asked Questions
Why is my dough so sticky? This recipe is designed to have a wet, sticky dough, which is key to achieving the soft, tender crumb characteristic of this no-knead bread. Resist the urge to add extra flour, as this can result in a denser, drier loaf.
Do I need a stand mixer for this recipe? No, this recipe is specifically designed to be made without a stand mixer. A simple mixing bowl and a wooden spoon or sturdy spatula are all you need.
Can I use active dry yeast instead of instant yeast? Instant yeast is recommended for this recipe since it can be mixed directly into the dry ingredients. If using active dry yeast, you may need to proof it in the warm water first before combining with the dry ingredients.
Why does my bread seem dense after baking? A dense loaf can result from adding too much extra flour during mixing, not allowing the dough enough time to rise, or using expired yeast. Be sure to follow the visual cues for rising rather than relying solely on time.
Can I add mix-ins like cheese or herbs? Yes, this dough is easy to customize with mix-ins like shredded cheese, dried herbs, or seasonings. Fold them in during the initial mixing stage for even distribution throughout the loaf.
How do I know when the final rise is complete? The dough should look beautifully puffy and have risen close to the top of the loaf pan. This visual cue is more reliable than relying strictly on a specific time, since rising speed can vary based on kitchen temperature.
Recipe Summary
Prep Time: Approximately 20 minutes active preparation Rise Time: Approximately 2–3 hours total (first rise and final rise combined) Bake Time: 40–45 minutes Yield: 1 loaf (9×5-inch)
This Easiest No-Knead Sandwich Bread proves that homemade bread doesn’t have to be complicated or time-consuming to achieve a soft, fluffy, bakery-quality loaf. With no kneading and no special equipment required, this approachable recipe is perfect for both beginner bakers and experienced home cooks looking for an easy, reliable sandwich bread.
Bake a loaf today, and get ready for this soft, tender bread to become your new everyday staple!
Print
Easiest No-Knead Sandwich Bread
- Total Time: 40–45 minutes
Ingredients
Here’s a breakdown of what goes into this soft, fluffy no-knead bread and why each ingredient matters.
For the Dough
- 3 cups (360 g) all-purpose flour — Forms the structure of the bread; all-purpose flour is ideal for this soft, tender sandwich loaf.
- 1½ tsp instant yeast — The leavening agent that gives this bread its rise; instant yeast can be mixed directly into the dry ingredients without proofing separately.
- 1½ tsp granulated sugar or honey — Adds a touch of sweetness and helps feed the yeast for a good rise.
- 1½ tsp fine sea salt — Essential for flavor, salt also helps regulate the yeast’s activity and strengthens the dough.
- 1½ cups (360 g) warm water — Hydrates the flour and activates the yeast; this generous amount of water is key to the soft, tender texture of this no-knead bread.
- 1 tbsp olive oil — Adds richness and makes the sticky dough easier to handle during shaping.
For the Pan
- Softened butter or olive oil, as needed — Used to grease the loaf pan and prevent sticking.
Optional for Finishing
- 1 tbsp melted butter — Brushed over the baked loaf for an extra-soft, flavorful crust.
Instructions
This recipe unfolds over several rising stages, but requires very little hands-on effort. Here’s exactly how to make it.
Add the flour, instant yeast, sugar, and salt to a large mixing bowl. Whisk until evenly combined. No stand mixer is needed for this recipe.
Pour in the warm water. Mix with a wooden spoon or sturdy spatula until no dry flour remains. The dough will look sticky, soft, and somewhat shaggy. That’s exactly what you want—don’t keep adding flour simply because the dough doesn’t resemble traditional kneaded bread dough.
Cover the bowl with plastic wrap or a clean cover. Let the dough rise at room temperature for approximately 1½–2 hours, until noticeably expanded, airy, and bubbly. A cooler kitchen may require additional time.
Lightly oil your hands. Pull one edge of the dough upward and fold it toward the center. Rotate the bowl and repeat several times around the dough. This gently strengthens the dough without traditional kneading.
Drizzle the olive oil over the dough. Gently turn and fold the dough so the outside becomes lightly coated. This also makes the sticky dough much easier to handle.
Transfer the dough to a lightly oiled surface. Gently stretch it into a rough rectangle. Fold the top third toward the center, then fold the bottom third upward like a letter. Tuck the sides underneath and gently shape it into a loaf. Avoid aggressively pressing out all the air.
Grease or parchment-line a 9×5-inch loaf pan. Place the shaped dough inside seam-side down.
Cover loosely and let rise for approximately 45–60 minutes, or until the dough looks beautifully puffy and has risen close to the top of the pan. Don’t rely only on the clock—the appearance of the dough matters more.
Preheat the oven to 375°F (190°C). Bake for approximately 40–45 minutes, until the loaf is beautifully golden brown and baked through. If the top becomes too dark before the bread is finished, loosely tent it with foil.
For an extra-soft sandwich-bread crust, brush the top with melted butter immediately after baking. Let the bread rest in the pan for approximately 10 minutes. Then remove it and transfer it to a wire rack.
Allow the loaf to cool for at least 30–60 minutes before slicing. Cutting into very hot bread can compress the soft interior and make it seem gummy.
- Prep Time: Approximately 20 minutes active preparation
- Cook Time: Approximately 2–3 hours total (first rise and final rise combined)