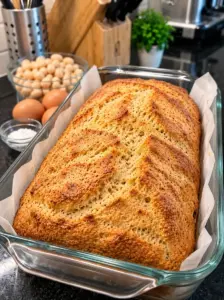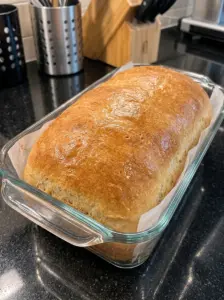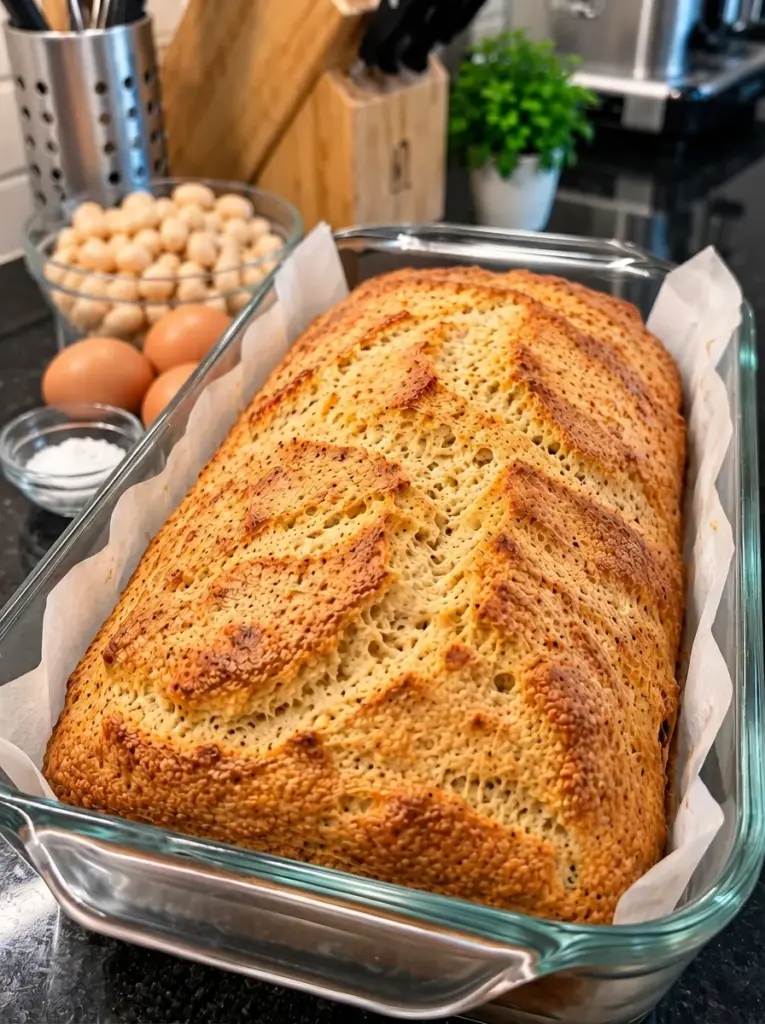
White beans, eggs, and baking powder come together in this simple flourless loaf. There is no yeast to activate, dough to knead, or rising time to plan around. Drain the beans, blend the ingredients, and bake the batter in a small loaf pan.
The result is a moist, savory loaf with a close, tender interior. It is especially useful for toast, small open-faced sandwiches, and breakfast plates. White beans provide mild flavor and substance, while eggs help the mixture set into slices.
There is an important texture distinction: this three-ingredient formula will not behave like conventional wheat sandwich bread. Without flour or another structural ingredient, expect a relatively low loaf with a dense, egg-bound crumb rather than a tall, fluffy loaf. Cooling and toasting make the slices easier to handle, but do not turn the bread into a gluten-developed yeast loaf.
The article below expands the supplied recipe. It has not been independently kitchen-tested, and the final height, texture, and baking time will depend on the beans, drainage, pan, and oven.
Why Make White Bean Bread?
This recipe offers a short ingredient list and an easy way to use canned beans. It can be prepared with a blender or food processor and requires little active work beyond draining and mixing.
The beans supply fiber and some protein, while the eggs contribute additional protein and structure. The finished bread still contains carbohydrates from beans. Flourless does not mean carbohydrate-free, and the title should not be interpreted as a promise of unusually high protein in every small slice.
The mild flavor makes savory toppings a good fit. Avocado, soft cheese, cooked eggs, hummus, or sliced vegetables can provide contrast to the moist interior.
Recipe Overview
| Detail | Guide |
|---|---|
| Main ingredients | Canned white beans, eggs, baking powder |
| Yield | 1 small, relatively low loaf |
| Portions | About 8 small slices |
| Pan | 8 × 4-inch loaf pan |
| Oven | 350°F |
| Preparation | About 10 minutes |
| Baking | Approximately 40–50 minutes; check earlier if shallow |
| Cooling | About 45–60 minutes or until completely cool |
| Total | Approximately 1 hour 35 minutes to 2 hours, including cooling |
| Texture | Moist, close-grained, and tender; best lightly toasted |
Ingredients
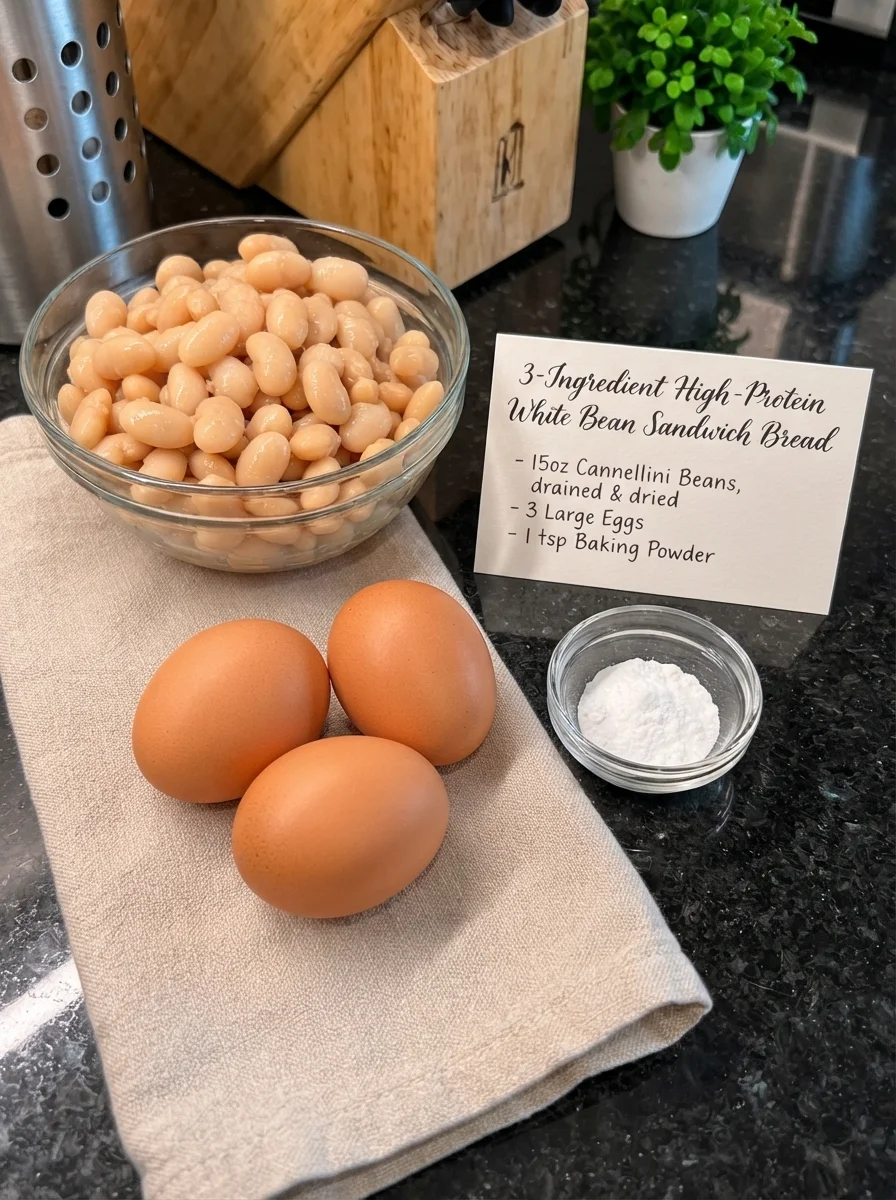
- 1 can cannellini or Great Northern beans, 15 ounces, drained and rinsed
- 3 large eggs
- 1 teaspoon baking powder
Parchment paper is used to prepare the pan. Any oil used for greasing is a preparation aid rather than one of the three main ingredients.
The can size refers to the beans and their packing liquid together. Use the drained contents of one can, not 15 ounces of drained beans. That difference matters because a larger quantity of beans changes the balance with the eggs.
Ingredient Notes
White beans
Cannellini beans have a mild, creamy character. Great Northern beans are another suitable option, although brands and varieties can differ in moisture and firmness.
Use cooked canned beans. Dry beans are not a direct substitute and must not be blended into this formula without proper separate preparation. The listed baking time is for beans that are already cooked.
Drain, rinse, and remove excess surface water. The goal is not to dehydrate the beans; it is to avoid carrying extra rinse water into a batter that already has considerable moisture.
A drained 15-ounce can often provides roughly 1½ cups, but the exact amount varies. If using home-cooked beans, that volume is only an approximate starting point, and the texture may differ because hydration is less standardized.
Eggs
Use three large eggs. They bind the pureed beans and set during baking, giving the loaf enough cohesion to slice after cooling.
This formula depends heavily on eggs. Flax eggs, chia mixtures, and commercial replacers are not automatically equivalent. An egg-free version would need separate development rather than a simple substitution.
The flavor can be slightly eggy, particularly while warm. Savory toppings and light toasting can make that quality less noticeable.
Baking powder
Baking powder provides some lift, but it cannot create the same structure as flour. A rise in the oven followed by some settling during cooling is possible in this egg-bound mixture.
Use a fresh product and measure level. Adding extra baking powder is not a dependable way to make the loaf taller and can leave an unpleasant taste.
Baking soda is not a direct replacement. Keep the listed baking powder for the supplied formula.
Equipment
You will need a blender or food processor, a fine-mesh strainer, a clean towel or paper towels, an 8 × 4-inch loaf pan, parchment paper, a spatula, and a cooling rack.
A small metal pan is a useful starting point. A 9 × 5-inch pan will spread this modest amount of batter more thinly and produce a flatter loaf that may finish sooner. Silicone, glass, and ceramic can change browning and timing.
Line the pan with parchment extending over the long sides so you can lift the loaf out gently. Avoid assuming that a flourless batter will release easily from an unprepared pan.
How to Make the Bread
1. Prepare the oven and pan
Heat the oven to 350°F. Line an 8 × 4-inch loaf pan with parchment, leaving handles along the long sides. Lightly grease exposed corners if needed.
Have the pan ready before blending. Once the baking powder is mixed into the moist ingredients, the batter should go into the oven promptly.
2. Drain and rinse the beans
Empty the can into a strainer and rinse under cool running water. Shake gently to remove water, then spread the beans briefly on a clean towel and pat dry.
Do not mash them during drying. Their surfaces should no longer be dripping, but a little natural moisture is expected.
Check for stray pieces of can label or damaged beans as you transfer them. Use clean equipment because the smooth batter can make small foreign material difficult to see afterward.
3. Blend until smooth
Add the drained beans and eggs to the blender or food processor. Process until very smooth, stopping to scrape down the sides as necessary.
The batter should be thick but pourable, without large bean pieces. A few tiny flecks of bean skin are less concerning than whole or half beans that remain unprocessed.
If the machine struggles, stop, scrape, and restart rather than adding water immediately. Extra liquid can make the center wetter and change the baking time.
Add the baking powder and blend briefly to distribute it. Do not taste batter containing raw eggs.
4. Fill the pan
Scrape the batter into the lined pan and smooth the surface. Tap the pan lightly once or twice to release large trapped bubbles.
The batter may sit relatively low in the pan. That is consistent with the small quantity of ingredients. Do not expect it to fill the pan like a large wheat bread dough.
5. Bake until set
Bake for approximately 40–50 minutes. Begin checking around 35 minutes if the batter is shallow or your pan runs hot.
The center should look set rather than liquid or jiggly, and a toothpick should come out without wet batter. A few moist crumbs may remain because this is a bean-based loaf, but raw paste or a liquid coating means it needs longer.
An egg-containing dish should reach at least 160°F in its center. That minimum alone does not establish an ideal bread texture: continue assessing whether the middle is set and the skewer is free of wet batter.
If the surface browns before the interior is ready, tent loosely with foil and continue baking. Avoid repeatedly opening the oven early in the cooking period.
6. Cool completely
Let the loaf rest in the pan for about 10 minutes, then lift it out using the parchment. Place it on a rack and loosen the paper from the sides so steam can escape.
Allow approximately 45–60 minutes, or longer if necessary, until completely cool. The loaf is more fragile while warm and may compress if cut too early.
Some settling is possible as it cools. A dramatic collapse with a wet center suggests underbaking or excess moisture rather than a need for more leavener.
7. Slice and toast
Use a sharp serrated knife and a gentle sawing motion to cut about eight small slices. Support the loaf rather than pressing firmly down through it.
Toast lightly to firm the cut surfaces. If the slices are too fragile for a pop-up toaster, use a skillet, toaster oven, or oven tray so they stay supported.
Add toppings after toasting and serve promptly. Wet fillings left on the bread for a long time can make it softer.
Tips for Better Results
Keep the formula simple for the first batch
Try the supplied proportions before adding vegetables, cheese, or extra liquid. That makes it easier to judge the basic texture and identify what you want to change.
Drain thoroughly
Retained rinse water is an avoidable source of excess moisture. Pat the beans dry without squeezing out their natural interior moisture.
Blend finely
Smooth puree gives the eggs a more even bean mixture to bind. Large pieces create weak spots and a less consistent bite.
Use a suitable pan
A larger pan does not create more bread. It spreads the batter and lowers the finished height. Use the specified small pan or expect a different shape and timing.
Treat cooling as part of the recipe
The original 50–60 minute total covers preparation and baking, but it does not include full cooling. Plan additional time before slicing for sandwiches.
Troubleshooting
| Problem | Possible reason | What to try |
|---|---|---|
| Center is wet or gummy | Excess moisture, insufficient baking, or early slicing | Drain carefully, bake until set, and cool completely |
| Loaf is low | Small batter volume and flourless structure | Use the small pan and expect modest height |
| Slices break | Warm loaf, rough slicing, or incomplete setting | Cool fully, use a serrated knife, and support each slice |
| Texture is coarse | Beans were not finely blended | Scrape the blender and process until smooth |
| Bread sticks | Pan was not lined or release was attempted too soon | Use parchment and rest briefly before lifting |
| Strong egg flavor | The formula contains a high proportion of eggs | Toast and serve with savory toppings |
| Bitter flavor | Too much or poorly measured baking powder | Use one level teaspoon and check product freshness |
| Loaf shrinks markedly | Center underbaked or structure too wet | Check the middle before removal and avoid added liquid |
Optional Flavor Additions
These additions increase the ingredient count. Keep them modest, especially when making the formula for the first time.
Salt and pepper
A small pinch of salt can improve a loaf made with unsalted beans. Taste the finished plain bread first if you are unsure, since canned beans vary in sodium.
Garlic and herbs
Add ¼ teaspoon garlic powder and ½ teaspoon dried Italian herbs for a savory flavor. Avoid a large amount of fresh chopped herbs, which can affect the texture more noticeably.
Parmesan
A small amount of finely grated Parmesan adds flavor, but it also changes salt, calories, and browning. Begin with 1–2 tablespoons rather than a large handful.
Seed topping
A light scattering of sesame seeds on the batter can add surface texture. Press them gently into the top so they adhere after baking.
Avoid adding grated zucchini, watery vegetables, or substantial wet fillings without developing the formula further. This batter has limited structure to accommodate extra moisture.
Serving Ideas
For breakfast, warm a slice and top with cream cheese, a cooked egg, or avocado. The loaf is savory rather than sweet, so pepper, herbs, and fresh vegetables pair well with it.
For lunch, try open-faced sandwiches with hummus, cucumber, or sliced chicken. Keep toppings manageable rather than stacking a heavy sandwich on a delicate slice.
For a two-slice sandwich, toast both slices and let them cool slightly before adding fillings. Use a modest amount of dressing and eat soon after assembling.
The bread can also be served alongside soup, although a moist slice will soften quickly if soaked in broth. A toasted edge offers a better contrast.
Make-Ahead Plan
Bake the loaf far enough ahead to cool fully, then refrigerate. Slicing a chilled loaf may be easier than slicing one that is still slightly warm.
For several days of breakfasts, separate slices with parchment and store in a covered container. Remove portions with clean utensils or clean hands rather than repeatedly handling the whole loaf.
Freezing is useful if you will not finish it within four days. Freeze individual slices so you can warm only what you need.
Do not blend the raw batter and leave it sitting on the counter for hours. Prepare the pan and oven first, then blend and bake promptly.
Storage and Reheating
Refrigerator
This is a moist, egg-and-bean loaf rather than a conventional dry bread. Refrigerate after cooling, within 2 hours of baking, and store at 40°F or below for up to 4 days.
Cool on a rack so steam escapes efficiently. Avoid sealing it while it is releasing heavy steam, which can create condensation inside the container.
Freezer
Separate cooled slices with parchment and place in a freezer-safe bag or container. Freeze for up to 2 months for best quality.
Thaw in the refrigerator or heat gently from frozen using a method that supports the slice. Texture may soften somewhat after thawing.
Reheating
Use a skillet, oven, or toaster oven to warm slices and dry the surfaces lightly. Pop-up toasters are suitable only if the slices are firm enough to handle without breaking.
Microwaving warms the bread but tends to leave the interior soft rather than crisp. Heat briefly, then let it stand before handling.
Nutrition: A More Realistic Estimate
The supplied estimate of 100–115 calories and 6–7 grams protein per slice is likely too high for eight slices made from only one drained can of beans and three eggs.
Depending on the bean label and drained yield, the full loaf may provide approximately 500–650 calories and 36–46 grams protein. Divided into eight small slices, that is roughly 65–80 calories and 4½–6 grams protein per slice.
These are illustrative ranges, not a laboratory analysis. Check whether your canned bean label describes drained beans or beans with liquid, and calculate from the amount actually used. Toppings and optional additions are separate.
The loaf supplies protein from both beans and eggs; it is not entirely plant-based. For a more protein-rich meal, pair a slice with suitable toppings rather than assuming each thin slice is a large protein serving.
Frequently Asked Questions
Is this really sandwich bread?
It can be sliced and used for small sandwiches, but it does not have the structure or fluffiness of wheat sandwich bread. Open-faced servings and toast are particularly practical.
Can I use uncooked dried beans?
No. The recipe requires cooked canned beans. Dried beans need proper separate cooking and are not interchangeable in this baking schedule.
Can I replace the eggs?
Not with a guaranteed equivalent. Eggs provide much of the structure, and an egg-free version needs separate development.
Can I use another kind of bean?
Other cooked beans may form a loaf, but their moisture, flavor, and texture differ. Cannellini or Great Northern beans are the intended choices here.
Is it gluten-free?
The main ingredients do not inherently require wheat flour, but check the baking powder and other labels and prevent cross-contact if gluten-free preparation is necessary.
Is it keto?
No. Beans contain carbohydrates, and removing wheat flour does not make the recipe keto.
Can I double the recipe?
Two separate small loaves are a more cautious approach than putting double batter into the same pan. A deeper loaf may take substantially longer and can be difficult to set in the center.
Why does it seem moist even after baking?
Beans retain moisture, and this loaf lacks a conventional flour crumb. It should still be cooked and cohesive, not raw or liquid. Cooling and toasting improve handling, but a moist texture remains part of the formula.
Recipe Card
3-Ingredient White Bean Sandwich Bread
A small flourless loaf with a moist, egg-bound crumb, best cooled completely and lightly toasted.
Yield: 1 small loaf, approximately 8 slices
Prep: 10 minutes
Bake: 40–50 minutes, checking earlier if shallow
Cool: Approximately 45–60 minutes or until fully cool
Total: Approximately 1 hour 35 minutes to 2 hours
Pan: 8 × 4 inches
Oven: 350°F
Ingredients
- 1 can cannellini or Great Northern beans, 15 ounces, drained, rinsed, and patted dry
- 3 large eggs
- 1 teaspoon baking powder
Instructions
- Heat the oven to 350°F. Line an 8 × 4-inch loaf pan with parchment, leaving overhang.
- Drain, rinse, and pat beans dry to remove excess surface water.
- Blend beans and eggs until very smooth, scraping as needed. Add baking powder and blend briefly.
- Pour into the prepared pan and smooth the top. Tap lightly to release large bubbles.
- Bake approximately 40–50 minutes, until set and a toothpick shows no wet batter. Start checking around 35 minutes if shallow. The center should reach at least 160°F and also be fully set.
- Rest 10 minutes in the pan, then lift onto a rack. Cool completely before slicing.
- Cut into eight small slices and toast gently, supporting fragile slices in a skillet or toaster oven.
Storage: Refrigerate within 2 hours and use within 4 days. Freeze separated slices for up to 2 months for best quality.
Estimated nutrition: Approximately 65–80 calories and 4½–6 grams protein per slice, depending on beans and actual yield.
Little tip: Keep expectations realistic: this is a compact flourless bean loaf. Thorough drainage, fine blending, full baking, and complete cooling matter more than adding extra baking powder.
Print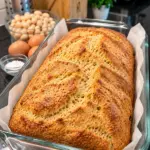
3-Ingredient High-Protein White Bean Sandwich Bread
Description
A small flourless loaf with a moist, egg-bound crumb, best cooled completely and lightly toasted.
Yield: 1 small loaf, approximately 8 slices
Prep: 10 minutes
Bake: 40–50 minutes, checking earlier if shallow
Cool: Approximately 45–60 minutes or until fully cool
Total: Approximately 1 hour 35 minutes to 2 hours
Pan: 8 × 4 inches
Oven: 350°F
Ingredients
- 1 can cannellini or Great Northern beans, 15 ounces, drained, rinsed, and patted dry
- 3 large eggs
- 1 teaspoon baking powder
Instructions
- Heat the oven to 350°F. Line an 8 × 4-inch loaf pan with parchment, leaving overhang.
- Drain, rinse, and pat beans dry to remove excess surface water.
- Blend beans and eggs until very smooth, scraping as needed. Add baking powder and blend briefly.
- Pour into the prepared pan and smooth the top. Tap lightly to release large bubbles.
- Bake approximately 40–50 minutes, until set and a toothpick shows no wet batter. Start checking around 35 minutes if shallow. The center should reach at least 160°F and also be fully set.
- Rest 10 minutes in the pan, then lift onto a rack. Cool completely before slicing.
- Cut into eight small slices and toast gently, supporting fragile slices in a skillet or toaster oven.
Storage: Refrigerate within 2 hours and use within 4 days. Freeze separated slices for up to 2 months for best quality.
Estimated nutrition: Approximately 65–80 calories and 4½–6 grams protein per slice, depending on beans and actual yield.
Little tip: Keep expectations realistic: this is a compact flourless bean loaf. Thorough drainage, fine blending, full baking, and complete cooling matter more than adding extra baking powder.