
Introduction
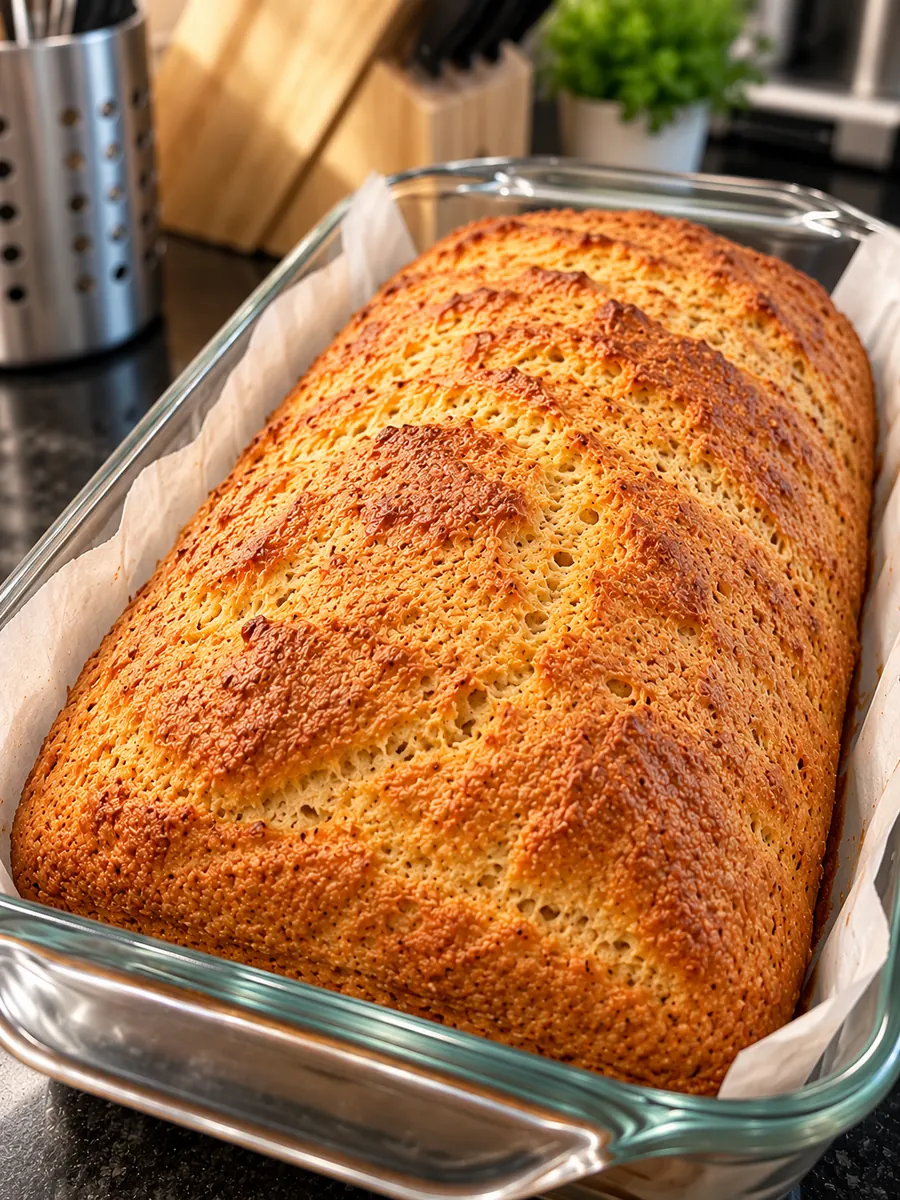
A can of mild white beans can become the foundation for a compact, savory loaf with a tender interior and sturdy slices. This 3-Ingredient High-Protein Great Northern Bean Bread combines fully cooked beans, eggs and oat flour in a food processor, then bakes in a small loaf pan. Expect a close crumb and a modest profile, with enough structure for careful slicing once cool.
The beans and eggs supply protein, but the high-protein claim in the requested title has not been verified and requires human nutritional review. This recipe makes 5 servings, each consisting of 2 slices.
Allow about 2 hours 15 minutes overall: 20 minutes of active preparation, 55 minutes of baking and 60 minutes of cooling. Oven preheating overlaps preparation; actual baking may vary with bean moisture and your oven.
Why You’ll Love This Recipe
The three ingredients each do a specific job. Beans provide the moist foundation, eggs hold that foundation together, and oat flour gives the mixture enough body to bake into a loaf.
A food processor handles the main mixing. There is no kneading, and the batter goes directly from the bowl into the lined pan without a rising period.
Great Northern beans have a mild flavor that suits a simple loaf. Their pale color also makes it easy to spot any beans that need more processing.
The finished loaf can be portioned before refrigeration or freezing. Keeping slices separated makes it convenient to reheat only the amount you plan to eat.
Ingredients
Start with plain, fully cooked Great Northern beans. For commercially canned beans, check that the label lists only beans and water. The quantity below refers to drained edible beans; buy enough cans to reach that weight.
Measure the eggs without shells. Large eggs keep their liquid and binding contribution reasonably consistent; weighing provides the clearest check.
Choose plain, finely milled oat flour with oats as its only ingredient. It blends into the puree more evenly than coarse oat meal. Everything listed goes into the batter. Parchment lines the pan without adding another edible ingredient.
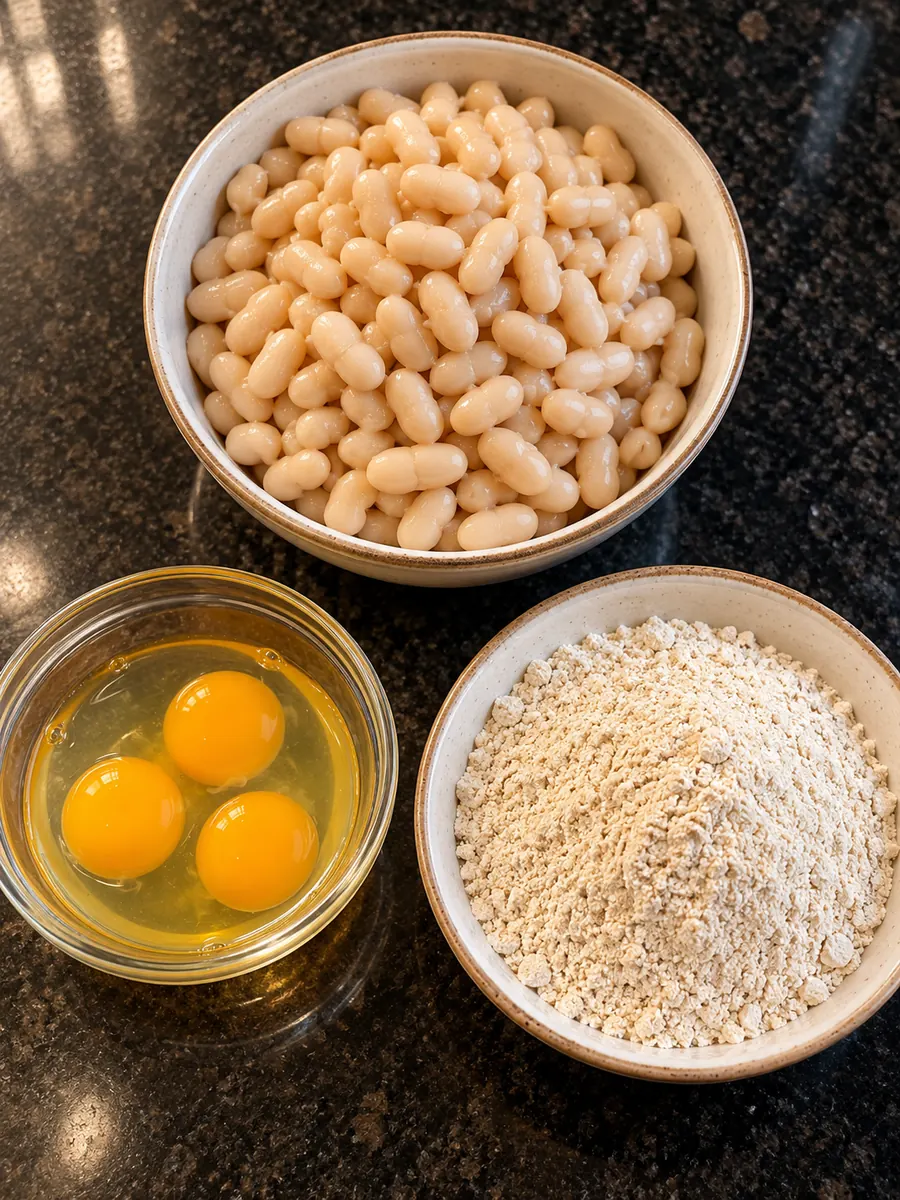
- 3 cups fully cooked unsalted Great Northern beans, rinsed and thoroughly drained (480 g)
- 3 large eggs, shells removed (150 g)
- 1 1/2 cups plain oat flour, spooned and leveled (150 g)
Ingredient Notes and Substitutions
Great Northern beans should be tender enough to crush easily between your fingers before mixing. If using beans cooked at home, cook them fully first, cool them safely and drain them thoroughly. The oven stage is for setting the loaf, not finishing undercooked beans.
Canned bean moisture varies. Rinsing removes the packing liquid, and draining removes loose water that could make the center pasty. Blot visible droplets gently; pressing the beans aggressively would make the starting moisture less predictable.
Oat flour is a functional ingredient here, so replacing it by volume with another flour is not a dependable substitution. Likewise, changing the eggs would alter both moisture and binding. Keep the stated ingredients for the base recipe.
Homemade oat flour is a cautious option if ground very finely from plain oats and weighed after grinding. Coarse particles can produce a rougher crumb and absorb moisture differently. Commercial finely milled flour offers a more consistent starting point for this particular batter.
How to Make 3-Ingredient High-Protein Great Northern Bean Bread
- Heat the oven to 375°F with a rack in the middle. Line an 8 1/2 × 4 1/2-inch metal loaf pan with parchment rated for this temperature, covering the bottom and long sides with an overhang. Leave the pan ungreased. Gather a food processor, flexible spatula, kitchen scale and instant-read thermometer before handling the eggs.
- Measure 480 g of rinsed, thoroughly drained Great Northern beans. Spread them briefly on a clean towel and blot away visible surface water without squeezing them dry. Put the beans and 150 g eggs into the processor. Process until the mixture looks like a thick, mostly smooth puree, stopping to scrape the bowl so whole beans do not remain underneath the blade.
- Add 150 g oat flour and pulse just until evenly incorporated. Scrape down the sides and fold through any dry pockets with the spatula. The mixture should be a thick, scoopable batter that holds soft ridges, rather than a pourable liquid or kneadable dough. Do not taste the raw batter. Wash hands and food-contact equipment after handling raw eggs.
- Transfer the batter directly to the prepared pan. Press it gently into the corners and smooth the surface to an even thickness. Keep the center level rather than building a tall mound. There is no bench rest or proofing; move the filled pan straight into the heated oven.
- Bake for 55 minutes, checking at 45 minutes. The surface should feel firm, and a thermometer inserted into the center should register 195°F. If the center remains cooler or visibly wet, continue baking until it reaches that target and is set. A skewer may carry moist crumbs but should not emerge coated in wet batter.
- Cool in the pan for 15 minutes, then lift out and cool on a wire rack for 45 minutes. Cut into 10 slices, making 5 servings of 2 slices. Refrigerate promptly after cooling. In surroundings above 90°F, finish cooling in the refrigerator to meet the shorter safe-storage deadline.
Expert Baking Tips
Weigh the drained beans before starting the processor. Measuring them while still sitting in rinse water changes the balance of the entire loaf, even if the cup measurement looks correct.
Scrape beneath the processor blade carefully with the machine switched off. Bean pieces trapped there can survive the first blending and leave soft pockets in an otherwise smooth batter.
Use the specified small metal pan. A much wider pan spreads the batter thinly and changes baking time, while a narrower vessel leaves a deeper center that takes longer to set.
Smooth the batter all the way to the corners. Large gaps around the edges can create fragile spots that break when you lift the loaf from its parchment sling.
Check temperature in the center without touching the pan bottom. Egg-containing batter must reach at least 160°F for safety; follow the higher recipe target for setting this moist loaf.
Give the loaf its full cooling period under normal conditions. The moist, egg-bound interior firms as it cools, so warm slices are more likely to smear or break.
Common Mistakes to Avoid
Expecting a tall sandwich loaf leads to the wrong doneness cues. This batter contains no leavening ingredient and should remain relatively compact. A small amount of expansion or surface cracking does not mean it will develop an airy crumb.
Adding extra liquid because the batter looks thick can leave a center that struggles to become sliceable. The intended mixture holds soft ridges. First check that the beans and eggs were measured correctly and the oat flour was weighed.
Cutting immediately after baking releases steam and exposes a fragile interior. Let the loaf cool, then use a sharp serrated knife with gentle sawing strokes rather than pressing straight down.
Leaving the loaf on the counter for the rest of the day is also a mistake. Its moist bean-and-egg interior requires prompt refrigeration, even when the crust feels dry.
Variations and Serving Ideas
For thinner portions, cut the cooled loaf into 15 slices instead of 10. Keep the overall yield at 5 servings by serving 3 thinner slices per person. Thin slices are more delicate, so support them with a broad spatula when moving them.
For a firmer surface, reheat chilled slices in a single layer in the oven, turning carefully once. Bring leftovers to 165°F before serving; browning at the edges alone does not establish that the center is hot.
Serve the bread warm in small slices, or cut reheated slices into manageable strips. Its mild bean flavor and compact texture suit smaller portions that are easy to lift and eat.
Storage and Freezing
Refrigerate the loaf within 2 hours of baking, or within 1 hour when the surrounding temperature exceeds 90°F. Keep the refrigerator at 40°F or below and use the bread within 3–4 days. In hot conditions, move it into refrigeration before the normal cooling schedule finishes.
Once chilled, place slices in a covered container. Separate layers with parchment so you can lift out individual portions without pulling apart their tender edges. Avoid tightly stacking warm slices, which traps moisture between them.
For longer storage, freeze cooled portions with parchment between slices inside a freezer-safe container for up to 2 months for best quality. Thaw in the refrigerator. Reheat refrigerated or thawed portions to 165°F, and discard bread showing mold or an unusual odor.
Frequently Asked Questions
Will this rise like regular bread?
Expect very little rise. The eggs help the mixture set, but there is no leavening ingredient. The intended result is a dense, low loaf with a close interior.
Can I use the liquid from the bean can?
Drain and rinse the beans, then measure their edible weight. Packing liquid adds uncontrolled moisture and changes the batter consistency, so it is excluded from this formula.
Why does the center seem sticky?
Excess surface water, incomplete baking or slicing while warm can contribute. Check the center temperature and allow full cooling before judging whether the crumb has set.
Can I mash everything by hand?
A processor gives a smoother foundation. Hand mashing may leave bean skins and chunks that interrupt the crumb, so the texture would be coarser and less predictable.
How much protein is in a serving?
A verified figure is not available. Beans and eggs contribute protein, but the requested title’s claim needs human nutritional review using the actual ingredients and serving size.
Can I eat it straight from the refrigerator?
Yes, if properly cooked, promptly refrigerated and used within 3–4 days. Chilled slices will feel firmer. If you choose to reheat them, bring their centers to 165°F.
WP Tasty Recipe Card
Print3-Ingredient High-Protein Great Northern Bean Bread
- Total Time: 135 minutes
Ingredients
3 cups fully cooked unsalted Great Northern beans, rinsed and thoroughly drained (480 g)
3 large eggs, shells removed (150 g)
1 1/2 cups plain oat flour, spooned and leveled (150 g)
Instructions
Heat the oven to 375°F with a rack in the middle. Line an 8 1/2 × 4 1/2-inch metal loaf pan with parchment rated for this temperature, covering the bottom and long sides with an overhang. Leave the pan ungreased. Gather a food processor, flexible spatula, kitchen scale and instant-read thermometer before handling the eggs.
Measure 480 g of rinsed, thoroughly drained Great Northern beans. Spread them briefly on a clean towel and blot away visible surface water without squeezing them dry. Put the beans and 150 g eggs into the processor. Process until the mixture looks like a thick, mostly smooth puree, stopping to scrape the bowl so whole beans do not remain underneath the blade.
Add 150 g oat flour and pulse just until evenly incorporated. Scrape down the sides and fold through any dry pockets with the spatula. The mixture should be a thick, scoopable batter that holds soft ridges, rather than a pourable liquid or kneadable dough. Do not taste the raw batter. Wash hands and food-contact equipment after handling raw eggs.
Transfer the batter directly to the prepared pan. Press it gently into the corners and smooth the surface to an even thickness. Keep the center level rather than building a tall mound. There is no bench rest or proofing; move the filled pan straight into the heated oven.
Bake for 55 minutes, checking at 45 minutes. The surface should feel firm, and a thermometer inserted into the center should register 195°F. If the center remains cooler or visibly wet, continue baking until it reaches that target and is set. A skewer may carry moist crumbs but should not emerge coated in wet batter.
Cool in the pan for 15 minutes, then lift out and cool on a wire rack for 45 minutes. Cut into 10 slices, making 5 servings of 2 slices. Refrigerate promptly after cooling. In surroundings above 90°F, finish cooling in the refrigerator to meet the shorter safe-storage deadline.
- Prep Time: 20 minutes
- Cook Time: 55 minutes