
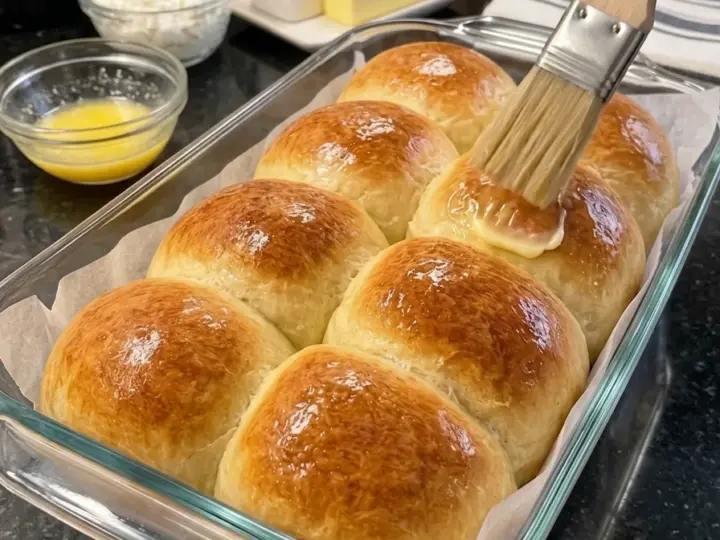
These cottage cheese dinner rolls use self-rising flour, blended cottage cheese, and an egg to make a simple dough without yeast. They bake into small, savory rolls with lightly golden tops and a tender, substantial middle. Serve them warm beside soup, with a salad, or split and toast them for a small sandwich.
Cottage cheese supplies moisture and protein, while blending smooths out the curds before mixing. Self-rising flour provides flour, baking powder, and salt in one purchased ingredient. The egg helps bind the dough and supports the crumb. There is no yeast activation or proofing, so the rolls can go into the oven soon after shaping.
Expect a quick-bread roll rather than a fluffy, pull-apart yeast roll. The dough needs only brief handling, and the baked texture will be closer to a soft savory biscuit or soda-bread-style roll. Keeping expectations clear makes this a useful recipe for a simple meal accompaniment without a long rising schedule.
Recipe development note: This is an original, untested recipe formulation. Cottage cheese moisture, flour brand, and egg size can change the dough consistency and baking time. Use the texture cues and adjust flour cautiously rather than assuming every brand behaves identically.
Recipe at a Glance
- Ingredients: 3 main dough ingredients
- Yield: 8 small dinner rolls
- Prep time: Approximately 15 minutes
- Bake time: Approximately 22–28 minutes
- Cooling before serving: 10–15 minutes
- Total time: Approximately 50–60 minutes
- Oven temperature: 375°F
- Method: Mix, shape, and bake; no yeast or proofing
The three-ingredient count uses purchased self-rising flour as one ingredient, even though it contains leavening and salt. If you make a substitute from separate pantry ingredients, the literal ingredient count increases. Optional butter or other serving additions are separate from the dough.
Ingredients
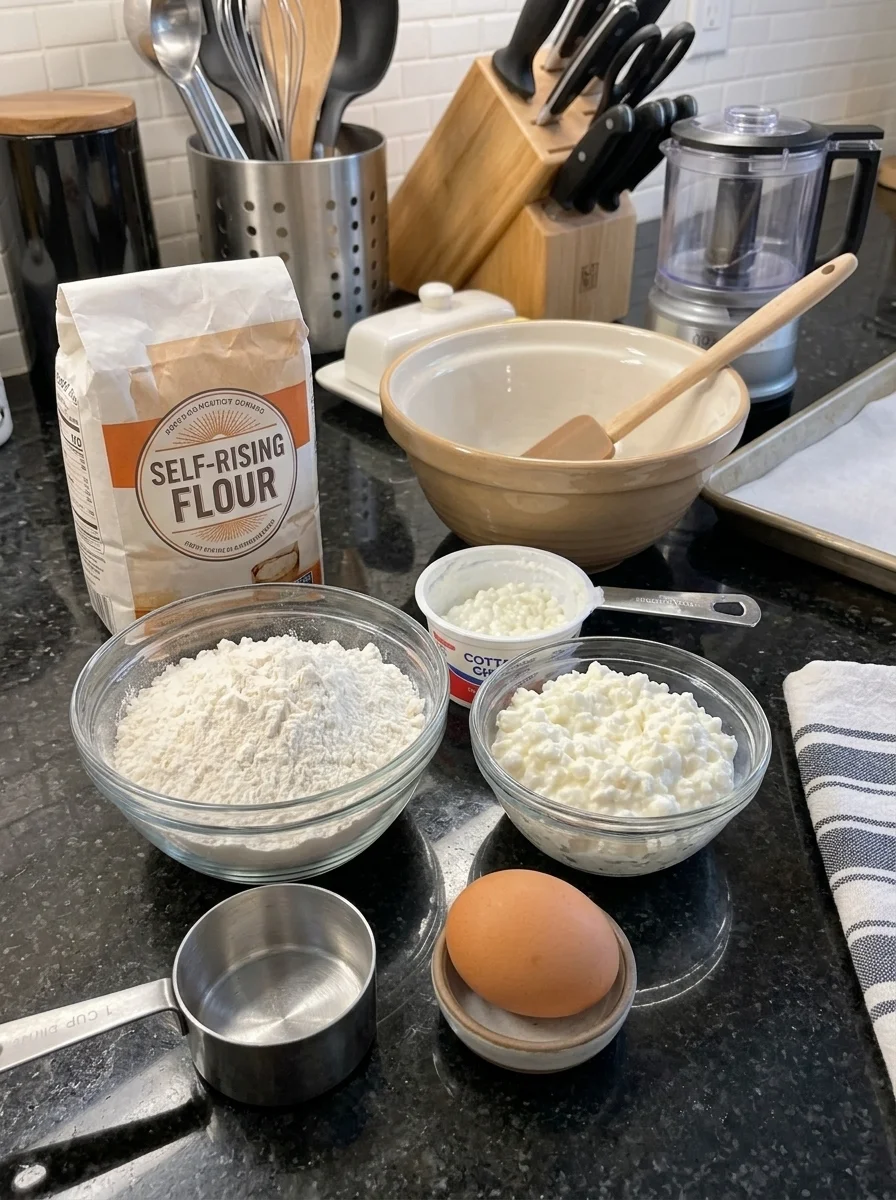
- 2 cups self-rising flour, approximately 240 grams, plus a little extra only if needed for handling
- 1 cup cottage cheese, approximately 225 grams, preferably 2% or 4% milkfat
- 1 large egg
A lined baking sheet is needed for baking. No separate egg wash is required in this version, and the whole egg goes into the dough.
For the most repeatable result, weigh the flour if possible. If measuring by cups, fluff the flour, spoon into the measuring cup, and level it without packing. Cottage cheese should be measured as sold after stirring, with excess pooled liquid drained only if it is unusually watery.
What These Rolls Are Like
Self-rising flour produces a quick chemical rise in the oven. It does not build the same airy structure as a kneaded and proofed yeast dough. These rolls should feel tender and moist but somewhat substantial, with a modest rise rather than a dramatic expansion.
The cottage cheese flavor becomes mild during baking. Its saltiness and tang remain in the background, especially when the cheese is blended smooth. The rolls can suit savory meals without needing herbs, garlic, or shredded cheese in the basic recipe.
They taste best warm after a brief cooling period, when the crumb has had time to settle. Cutting immediately from the oven can make the middle seem gummy even when the rolls have finished baking. Toasting leftover halves is a useful way to refresh the texture.
Ingredient Notes
Self-Rising Flour
Use self-rising wheat flour rather than plain all-purpose flour. The leavening and salt are essential to this three-ingredient formulation. Plain flour alone will not produce the same result.
Different self-rising flours contain different wheat blends and leavening proportions. A softer flour may make a more delicate roll, while a higher-protein flour may produce a firmer one. Follow the same starting measurement, then use the dough cues rather than adding a large amount of extra flour immediately.
If self-rising flour is unavailable, a common pantry substitution for this batch is two cups all-purpose flour mixed thoroughly with three teaspoons baking powder and half a teaspoon fine salt. This uses three separate dry ingredients plus the dairy and egg, so the finished recipe has five literal ingredients. It is also a substitution that may behave differently from a commercial flour blend.
Cottage Cheese
A regular small-curd cottage cheese is a useful starting point. Two-percent or four-percent versions provide moisture and some richness. Nonfat products may work differently because of their water content and stabilizers, so do not assume all low-fat substitutions produce an identical crumb.
Stir the container before measuring. If there is a large pool of loose liquid, drain that excess briefly, but avoid pressing the cheese until dry. The moisture is part of what forms the dough, and heavily drained curds can require a different balance.
Blend the measured cottage cheese until smooth. A small blender or food processor is convenient, but thick mixtures may need a few pauses to scrape down the sides. Do not add water simply to make blending easier unless you are prepared to adjust the dough afterward.
Egg
One large egg helps bind the dough and contributes structure. Add it to the blended cottage cheese rather than reserving part for brushing. The basic rolls can brown without an egg wash.
A smaller egg provides less liquid, and an extra-large egg adds more. The difference may seem minor, but a three-ingredient dough has fewer components to buffer changes. Use the stated size when practical.
Equipment
Gather a small blender or food processor, mixing bowl, sturdy spoon or spatula, measuring tools or kitchen scale, and a baking sheet. Parchment suitable for the baking temperature makes cleanup easier.
A dough scraper is helpful for dividing a slightly tacky dough. You do not need a stand mixer, dough hook, or long kneading session. An instant-read thermometer can help assess the center of a larger roll, but it should be used alongside the appearance and crumb cues rather than as the only measure of quality.
Use a roomy sheet rather than squeezing the rolls into a small pan. A little space encourages the sides to bake and lets you see how the dough rises. Baking closely together creates a softer-sided result and may require more time in the middle.
How to Make the Rolls
1. Preheat the Oven
Preheat the oven to 375°F with a rack near the center. Line a baking sheet with suitable parchment. Have the flour measured before blending the cottage cheese so you can mix and shape promptly.
Self-rising dough does not need to sit for an hour. Once hydrated, the leavening begins working, so prepare the oven and pan before combining everything.
2. Blend the Cottage Cheese
Place one cup cottage cheese in a small blender or food processor. Blend until mostly smooth, stopping to scrape down the sides if necessary.
A few tiny curd flecks are acceptable, but large curds create a less uniform dough. The mixture should remain thick and spoonable. Avoid adding liquid just to create a pourable consistency.
3. Add the Egg
Add the large egg and blend or whisk briefly until fully combined with the cottage cheese. Transfer to a mixing bowl, scraping out as much of the mixture as practical.
There is no need to whip air into the dairy mixture for several minutes. The rise comes primarily from the self-rising flour, and overcomplicating this step does not turn the dough into a yeast-style bread.
4. Mix in the Flour
Add most of the two cups self-rising flour and fold until a shaggy dough forms. Incorporate the remainder gradually, stopping when there are no large dry pockets.
The dough should be soft and slightly tacky rather than flowing like batter. Depending on the cheese and flour, it may feel a little rough at first. Let it stand for two to three minutes so the flour can absorb moisture before deciding that it needs more.
5. Check and Adjust the Dough
If the dough is so wet that it cannot hold a mound, add extra self-rising flour one tablespoon at a time. Mix gently after each addition and stop as soon as it becomes manageable.
If it is dry and crumbly, first press it together and check that all the dairy mixture was transferred. Add a small spoonful of cottage cheese if necessary rather than pouring in a large amount of milk or water. Any adjustment changes the balance, so keep it modest and note what your ingredients required.
6. Divide into Eight Portions
Turn the dough onto a lightly floured surface. Bring it together with a few gentle folds, then divide into eight similar pieces. Weighing the dough and dividing by eight helps the rolls bake evenly.
Do not knead for eight or ten minutes as you would a yeast bread. Prolonged handling can make a quick dough tougher. Use only enough flour on the surface to prevent sticking without burying the dough in a heavy coating.
7. Shape the Rolls
Gently tuck the edges of each portion underneath to form a rounded roll. Pinch the underside lightly and place seam-side down on the prepared pan. Smooth major cracks without stretching the surface excessively.
Leave approximately one to two inches between rolls. They will expand, but do not expect a proofed-dough doubling before baking. If the surface remains slightly rustic, that is fine; a heavily worked perfect sphere is not necessary.
8. Bake
Bake for approximately twenty-two to twenty-eight minutes, beginning to check around twenty minutes. Look for lightly golden tops, firm sides, and a center that has set rather than looking wet or pasty.
The time depends on roll size and dough moisture. If the tops color early but the centers seem underdone, cover loosely with foil and continue baking. An internal reading around 195–205°F can be a useful bread-doneness cue, but the exact best endpoint varies; do not confuse the minimum temperature for cooking egg with the higher temperature needed to set a bread-like crumb well.
9. Cool Before Opening
Transfer the rolls to a wire rack and let stand ten to fifteen minutes before splitting. Steam needs time to escape and the crumb needs a chance to firm.
If a representative roll still looks wet inside after a short rest, return the remaining rolls to the oven for additional time. A moist, close crumb is expected; a raw flour paste is not.
10. Serve
Serve warm alongside the meal. Optional butter, jam, soup, or sandwich fillings can be added at the table. Let any rolls intended for storage release excess steam, then refrigerate promptly in a suitable container.
These are small dinner rolls. If you shape fewer, larger rolls, allow more baking time and check the centers carefully rather than using the original timing unchanged.
Getting a Tender Crumb
Measure flour carefully and avoid adding extra just because the dough is slightly tacky. A soft dough is more likely to produce tender rolls than one made stiff with repeated handfuls of flour.
Let the dough rest briefly after the initial mix. Flour absorbs moisture over a few minutes, and a sticky first impression may improve without any adjustment. This short pause is for hydration, not proofing.
Handle gently. A few folds and light shaping are enough. Unlike a yeast dough, this mixture does not need extensive gluten development, and it cannot gain a long fermentation flavor from sitting on the counter.
Bake until the middle is set, then cool briefly. Underbaking and cutting too early can both make a cooked roll seem sticky or gummy. The aim is a moist, tender crumb that holds together when split.
Troubleshooting
The Dough Is Extremely Sticky
The cottage cheese may be unusually wet or the flour measurement low. Pause briefly for hydration, then add flour a tablespoon at a time. Use lightly floured hands rather than trying to eliminate every trace of tackiness.
The Dough Is Dry
The flour may have been packed into the cup, or the cottage cheese may have been drained too aggressively. Add a little more blended cottage cheese and fold gently. Weighing flour is helpful for the next batch.
The Rolls Are Dense
Some density is normal for this method, but excessive flour, overworking, or weak leavening can make it more pronounced. Check that the self-rising flour is fresh and was stored well. Do not compare the rise directly with a yeast roll.
The Center Is Gummy
The rolls may need longer baking, or they may have been opened too soon. Check the largest roll after a short cooling period. Next time, keep portions equal and avoid adding extra liquid without a reason.
The Tops Are Pale
There is no egg wash in the three-ingredient method, and browning can be modest. Bake until the rolls are properly set rather than chasing a very dark color. An optional wash changes the ingredient count and is not necessary for a usable roll.
The Cottage Cheese Flavor Is Strong
Some products are tangier or saltier than others. Choose a mild cottage cheese you enjoy on its own. Savory toppings or serving beside soup can also balance its flavor, but the dairy taste cannot be removed after baking.
Protein and Nutrition Notes
Cottage cheese adds protein, but the amount in each roll depends on the product and serving count. With two cups of regular self-rising flour, one cup cottage cheese, and one large egg divided into eight rolls, a rough estimate is about 6–8 grams of protein per roll.
Calories may fall around 140–175 per roll before butter or other toppings, depending on flour and cottage cheese. These are planning estimates, not a verified nutrition analysis. Read the actual labels and divide the batch total by the number of rolls made for more precise tracking.
The title uses “high-protein” in a descriptive recipe sense, but these are not concentrated protein supplements. A small roll does not automatically provide twenty grams of protein simply because it contains cottage cheese. Larger portions raise calories as well as protein.
The standard recipe contains wheat, milk, and egg. It is not gluten-free or dairy-free, and a substitution for one major ingredient changes how the dough works. Choose a different formulation when you need a reliable allergy-friendly version.
Serving Ideas
Serve the rolls beside tomato soup, chicken soup, or a vegetable stew. Their mild savory flavor works with dishes that have plenty of broth or sauce. A small roll can also accompany a substantial salad.
Split cooled rolls and toast the cut sides for breakfast. Butter, cream cheese, or a little jam are serving additions rather than ingredients in the basic dough. Toasting is especially useful for refrigerated leftovers.
For mini sandwiches, let the rolls cool enough to slice without tearing. Add cooked chicken, egg salad, cheese, or another filling you enjoy, and keep perishable fillings refrigerated. The rolls are small, so avoid overfilling them.
Optional Variations
Herb rolls: Add a small amount of dried herbs or chopped parsley. This increases the ingredient count and may change the visual appearance, but it keeps the same basic dough approach.
Cheese-topped rolls: Sprinkle a little grated Parmesan or cheddar on top before baking. Watch browning and remember that added cheese increases salt and fat.
Garlic butter finish: Brush baked rolls with a little melted butter and garlic seasoning. This is a serving variation, not part of the three-ingredient formulation.
Seeded tops: Add sesame or poppy seeds if you choose to use a suitable optional surface wash. A dry surface may not hold seeds well, so do not assume sprinkling them onto shaped dough will make every seed stick.
Smaller rolls: Divide into ten or twelve portions and begin checking earlier. The protein per roll decreases when the batch is split into more pieces, even though the total batch protein stays similar.
Make-Ahead and Storage
Bake close to serving time for the freshest texture. You can measure the flour and blend the cottage cheese in advance, refrigerating the dairy mixture promptly. Combine the wet and dry ingredients when the oven is ready rather than holding mixed leavened dough for a long period.
Because this is an untested, moist cottage-cheese bread formulation, use refrigerated storage rather than assuming it is suitable for several days on the counter. Cool enough to release steam and refrigerate promptly at 40°F or below. Use within three to four days.
Limit time out of refrigeration to two hours, or one hour above 90°F. Avoid sealing very hot rolls in a deep container where condensation pools. A shallow container and prompt refrigeration after a brief cooling period are more useful than waiting hours for complete room-temperature cooling.
Rewarm refrigerated rolls in a 325°F oven until hot throughout, covering loosely if the tops are drying. Split and toast for a firmer surface. If treating them as reheated leftovers, heat to 165°F in the center; appliance timing varies.
Freeze cooled rolls individually in a freezer-safe bag or container for up to two months for quality. Thaw in the refrigerator and rewarm, or split before freezing so halves can be toasted conveniently. Freezing may change moisture slightly, but it is useful for keeping a small batch beyond a few days.
General handling guidance is available from the USDA Food Safety and Inspection Service.
Frequently Asked Questions
Can I skip blending the cottage cheese?
You can mix curds directly into the dough, but they create a less uniform texture and make moisture distribution less predictable. Blending is recommended for the smoothest starting mixture.
Can I use plain flour?
Not by itself. The recipe needs leavening and salt from self-rising flour. Use the described pantry substitution if needed, recognizing that it increases the ingredient count and may behave differently.
Do these need to rise before baking?
No yeast proofing is needed. The brief hydration pause is only a few minutes. Prepare the oven first and bake soon after shaping.
Can I replace the egg?
The egg contributes liquid, binding, and structure. Simply omitting it changes the formulation. An egg-free version needs a suitable replacement and separate testing rather than a guaranteed direct swap.
Can I make one loaf instead?
A loaf has a much thicker center and needs different baking time and possibly temperature. This recipe is formulated as small rolls, so a loaf should be treated as a separate experiment rather than using the same instructions unchanged.
Can I make them in an air fryer?
An air fryer may brown the tops before the centers set, especially in larger rolls. The provided method is for the oven. If experimenting, start with a small batch and assess the center rather than transferring the oven timing directly.
Quick Recipe Reference
Blend one cup cottage cheese smooth and combine with one large egg. Fold in two cups self-rising flour until a soft, slightly tacky dough forms. Rest briefly, adjust only if necessary, and divide into eight small rolls. Shape gently and place on a lined baking sheet with space between them. Bake at 375°F for approximately twenty-two to twenty-eight minutes, checking that the centers are set. Cool ten to fifteen minutes before serving and refrigerate leftovers promptly.
3-Ingredient High-Protein Cottage Cheese Dinner Rolls
Description
- Ingredients: 3 main dough ingredients
- Yield: 8 small dinner rolls
- Prep time: Approximately 15 minutes
- Bake time: Approximately 22–28 minutes
- Cooling before serving: 10–15 minutes
- Total time: Approximately 50–60 minutes
- Oven temperature: 375°F
- Method: Mix, shape, and bake; no yeast or proofing
The three-ingredient count uses purchased self-rising flour as one ingredient, even though it contains leavening and salt. If you make a substitute from separate pantry ingredients, the literal ingredient count increases. Optional butter or other serving additions are separate from the dough.
Ingredients
- 2 cups self-rising flour, approximately 240 grams, plus a little extra only if needed for handling
- 1 cup cottage cheese, approximately 225 grams, preferably 2% or 4% milkfat
- 1 large egg
A lined baking sheet is needed for baking. No separate egg wash is required in this version, and the whole egg goes into the dough.
For the most repeatable result, weigh the flour if possible. If measuring by cups, fluff the flour, spoon into the measuring cup, and level it without packing. Cottage cheese should be measured as sold after stirring, with excess pooled liquid drained only if it is unusually watery.
Instructions
1. Preheat the Oven
Preheat the oven to 375°F with a rack near the center. Line a baking sheet with suitable parchment. Have the flour measured before blending the cottage cheese so you can mix and shape promptly.
Self-rising dough does not need to sit for an hour. Once hydrated, the leavening begins working, so prepare the oven and pan before combining everything.
2. Blend the Cottage Cheese
Place one cup cottage cheese in a small blender or food processor. Blend until mostly smooth, stopping to scrape down the sides if necessary.
A few tiny curd flecks are acceptable, but large curds create a less uniform dough. The mixture should remain thick and spoonable. Avoid adding liquid just to create a pourable consistency.
3. Add the Egg
Add the large egg and blend or whisk briefly until fully combined with the cottage cheese. Transfer to a mixing bowl, scraping out as much of the mixture as practical.
There is no need to whip air into the dairy mixture for several minutes. The rise comes primarily from the self-rising flour, and overcomplicating this step does not turn the dough into a yeast-style bread.
4. Mix in the Flour
Add most of the two cups self-rising flour and fold until a shaggy dough forms. Incorporate the remainder gradually, stopping when there are no large dry pockets.
The dough should be soft and slightly tacky rather than flowing like batter. Depending on the cheese and flour, it may feel a little rough at first. Let it stand for two to three minutes so the flour can absorb moisture before deciding that it needs more.
5. Check and Adjust the Dough
If the dough is so wet that it cannot hold a mound, add extra self-rising flour one tablespoon at a time. Mix gently after each addition and stop as soon as it becomes manageable.
If it is dry and crumbly, first press it together and check that all the dairy mixture was transferred. Add a small spoonful of cottage cheese if necessary rather than pouring in a large amount of milk or water. Any adjustment changes the balance, so keep it modest and note what your ingredients required.
6. Divide into Eight Portions
Turn the dough onto a lightly floured surface. Bring it together with a few gentle folds, then divide into eight similar pieces. Weighing the dough and dividing by eight helps the rolls bake evenly.
Do not knead for eight or ten minutes as you would a yeast bread. Prolonged handling can make a quick dough tougher. Use only enough flour on the surface to prevent sticking without burying the dough in a heavy coating.
7. Shape the Rolls
Gently tuck the edges of each portion underneath to form a rounded roll. Pinch the underside lightly and place seam-side down on the prepared pan. Smooth major cracks without stretching the surface excessively.
Leave approximately one to two inches between rolls. They will expand, but do not expect a proofed-dough doubling before baking. If the surface remains slightly rustic, that is fine; a heavily worked perfect sphere is not necessary.
8. Bake
Bake for approximately twenty-two to twenty-eight minutes, beginning to check around twenty minutes. Look for lightly golden tops, firm sides, and a center that has set rather than looking wet or pasty.
The time depends on roll size and dough moisture. If the tops color early but the centers seem underdone, cover loosely with foil and continue baking. An internal reading around 195–205°F can be a useful bread-doneness cue, but the exact best endpoint varies; do not confuse the minimum temperature for cooking egg with the higher temperature needed to set a bread-like crumb well.
9. Cool Before Opening
Transfer the rolls to a wire rack and let stand ten to fifteen minutes before splitting. Steam needs time to escape and the crumb needs a chance to firm.
If a representative roll still looks wet inside after a short rest, return the remaining rolls to the oven for additional time. A moist, close crumb is expected; a raw flour paste is not.
10. Serve
Serve warm alongside the meal. Optional butter, jam, soup, or sandwich fillings can be added at the table. Let any rolls intended for storage release excess steam, then refrigerate promptly in a suitable container.
These are small dinner rolls. If you shape fewer, larger rolls, allow more baking time and check the centers carefully rather than using the original timing unchanged.