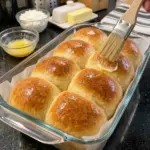
Description
- Ingredients: 3 main dough ingredients
- Yield: 8 small dinner rolls
- Prep time: Approximately 15 minutes
- Bake time: Approximately 22–28 minutes
- Cooling before serving: 10–15 minutes
- Total time: Approximately 50–60 minutes
- Oven temperature: 375°F
- Method: Mix, shape, and bake; no yeast or proofing
The three-ingredient count uses purchased self-rising flour as one ingredient, even though it contains leavening and salt. If you make a substitute from separate pantry ingredients, the literal ingredient count increases. Optional butter or other serving additions are separate from the dough.
Ingredients
- 2 cups self-rising flour, approximately 240 grams, plus a little extra only if needed for handling
- 1 cup cottage cheese, approximately 225 grams, preferably 2% or 4% milkfat
- 1 large egg
A lined baking sheet is needed for baking. No separate egg wash is required in this version, and the whole egg goes into the dough.
For the most repeatable result, weigh the flour if possible. If measuring by cups, fluff the flour, spoon into the measuring cup, and level it without packing. Cottage cheese should be measured as sold after stirring, with excess pooled liquid drained only if it is unusually watery.
Instructions
1. Preheat the Oven
Preheat the oven to 375°F with a rack near the center. Line a baking sheet with suitable parchment. Have the flour measured before blending the cottage cheese so you can mix and shape promptly.
Self-rising dough does not need to sit for an hour. Once hydrated, the leavening begins working, so prepare the oven and pan before combining everything.
2. Blend the Cottage Cheese
Place one cup cottage cheese in a small blender or food processor. Blend until mostly smooth, stopping to scrape down the sides if necessary.
A few tiny curd flecks are acceptable, but large curds create a less uniform dough. The mixture should remain thick and spoonable. Avoid adding liquid just to create a pourable consistency.
3. Add the Egg
Add the large egg and blend or whisk briefly until fully combined with the cottage cheese. Transfer to a mixing bowl, scraping out as much of the mixture as practical.
There is no need to whip air into the dairy mixture for several minutes. The rise comes primarily from the self-rising flour, and overcomplicating this step does not turn the dough into a yeast-style bread.
4. Mix in the Flour
Add most of the two cups self-rising flour and fold until a shaggy dough forms. Incorporate the remainder gradually, stopping when there are no large dry pockets.
The dough should be soft and slightly tacky rather than flowing like batter. Depending on the cheese and flour, it may feel a little rough at first. Let it stand for two to three minutes so the flour can absorb moisture before deciding that it needs more.
5. Check and Adjust the Dough
If the dough is so wet that it cannot hold a mound, add extra self-rising flour one tablespoon at a time. Mix gently after each addition and stop as soon as it becomes manageable.
If it is dry and crumbly, first press it together and check that all the dairy mixture was transferred. Add a small spoonful of cottage cheese if necessary rather than pouring in a large amount of milk or water. Any adjustment changes the balance, so keep it modest and note what your ingredients required.
6. Divide into Eight Portions
Turn the dough onto a lightly floured surface. Bring it together with a few gentle folds, then divide into eight similar pieces. Weighing the dough and dividing by eight helps the rolls bake evenly.
Do not knead for eight or ten minutes as you would a yeast bread. Prolonged handling can make a quick dough tougher. Use only enough flour on the surface to prevent sticking without burying the dough in a heavy coating.
7. Shape the Rolls
Gently tuck the edges of each portion underneath to form a rounded roll. Pinch the underside lightly and place seam-side down on the prepared pan. Smooth major cracks without stretching the surface excessively.
Leave approximately one to two inches between rolls. They will expand, but do not expect a proofed-dough doubling before baking. If the surface remains slightly rustic, that is fine; a heavily worked perfect sphere is not necessary.
8. Bake
Bake for approximately twenty-two to twenty-eight minutes, beginning to check around twenty minutes. Look for lightly golden tops, firm sides, and a center that has set rather than looking wet or pasty.
The time depends on roll size and dough moisture. If the tops color early but the centers seem underdone, cover loosely with foil and continue baking. An internal reading around 195–205°F can be a useful bread-doneness cue, but the exact best endpoint varies; do not confuse the minimum temperature for cooking egg with the higher temperature needed to set a bread-like crumb well.
9. Cool Before Opening
Transfer the rolls to a wire rack and let stand ten to fifteen minutes before splitting. Steam needs time to escape and the crumb needs a chance to firm.
If a representative roll still looks wet inside after a short rest, return the remaining rolls to the oven for additional time. A moist, close crumb is expected; a raw flour paste is not.
10. Serve
Serve warm alongside the meal. Optional butter, jam, soup, or sandwich fillings can be added at the table. Let any rolls intended for storage release excess steam, then refrigerate promptly in a suitable container.
These are small dinner rolls. If you shape fewer, larger rolls, allow more baking time and check the centers carefully rather than using the original timing unchanged.