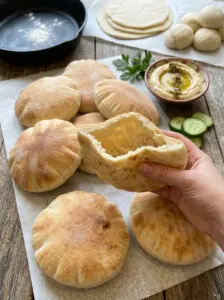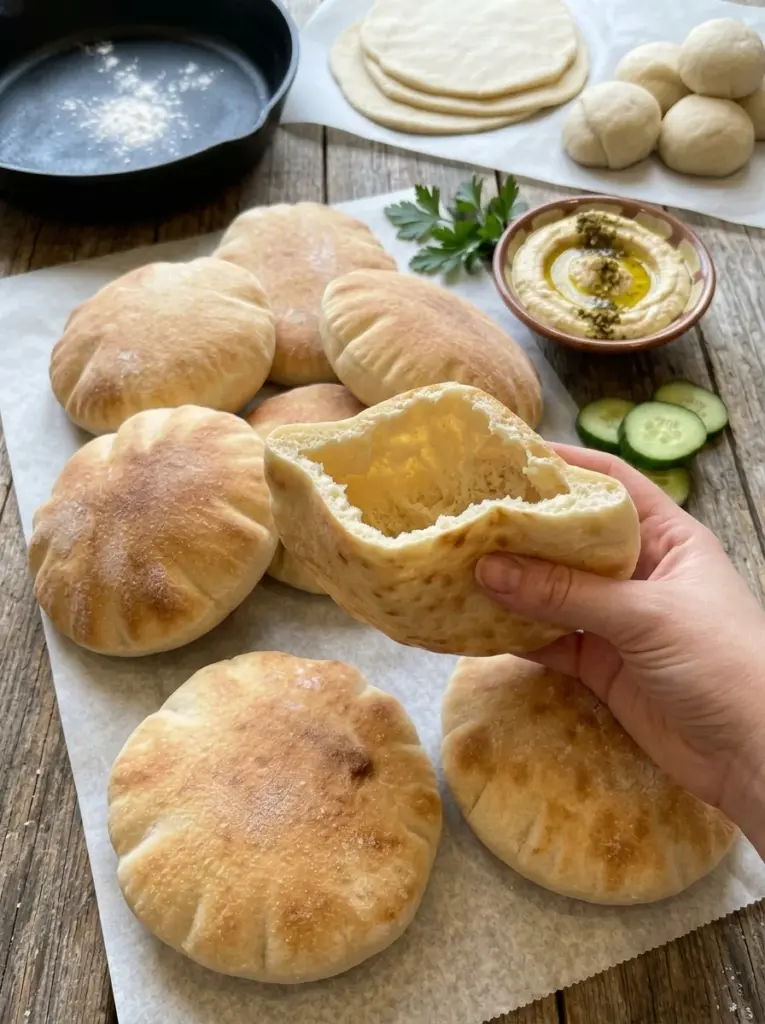
Soft, pillowy, chewy, and beautifully puffed, this Soft & Fluffy Pocket Pita Bread gives you warm homemade pitas with that classic hollow center that’s perfect for stuffing.
A simple dough made with all-purpose flour, yeast, warm water, olive oil, and a touch of honey transforms in a very hot skillet. As the pita cooks, moisture inside the dough turns to steam, causing the two sides to separate and creating the signature pocket.
No complicated shaping technique is required. The keys are giving the dough enough time to rise, rolling each piece to an even thickness, and cooking it on a properly preheated skillet.
Once cooked, fill your homemade pita pockets with gyros, falafel, grilled chicken, beef, hummus, tzatziki, fresh vegetables, or your favorite sandwich fillings. They’re also delicious served warm and torn into pieces for dipping.
Why You’ll Love This Homemade Pocket Pita Bread
Soft and fluffy. The yeast dough produces tender, pillowy pita bread with a pleasantly chewy texture.
Creates a real pocket. High skillet heat generates steam inside the dough, helping the pita inflate and separate internally.
Simple ingredients. You only need flour, water, yeast, sweetener, salt, and olive oil.
No oven required. These pitas cook directly in a hot skillet.
Perfect for stuffing. The hollow center can hold falafel, chicken, gyro meat, vegetables, and sauces.
Freezer-friendly. Make all eight and freeze extras for future meals.
Versatile. Use them as pita pockets, dipping bread, sandwich bread, or an accompaniment to Mediterranean dishes.
Easy to reheat. A few seconds in a skillet or microwave restores their soft texture.
What Makes Pita Bread Puff?
The dramatic puff is one of the most interesting parts of making pita bread.
It happens because of steam.
When the rolled dough hits a very hot cooking surface, the outside begins setting quickly while moisture inside the dough turns into steam.
That steam needs somewhere to go.
As pressure builds between the upper and lower surfaces, the pita expands like a balloon.
Once the pita cools, it deflates, but the separated interior remains, creating the familiar pocket.
Three things are especially important for successful pockets:
- Evenly rolled dough
- A properly preheated skillet
- Sufficiently high cooking heat
A pita can still taste delicious even if it doesn’t completely inflate, but controlling these factors greatly improves your chances of getting a full pocket.
Ingredients 🫓
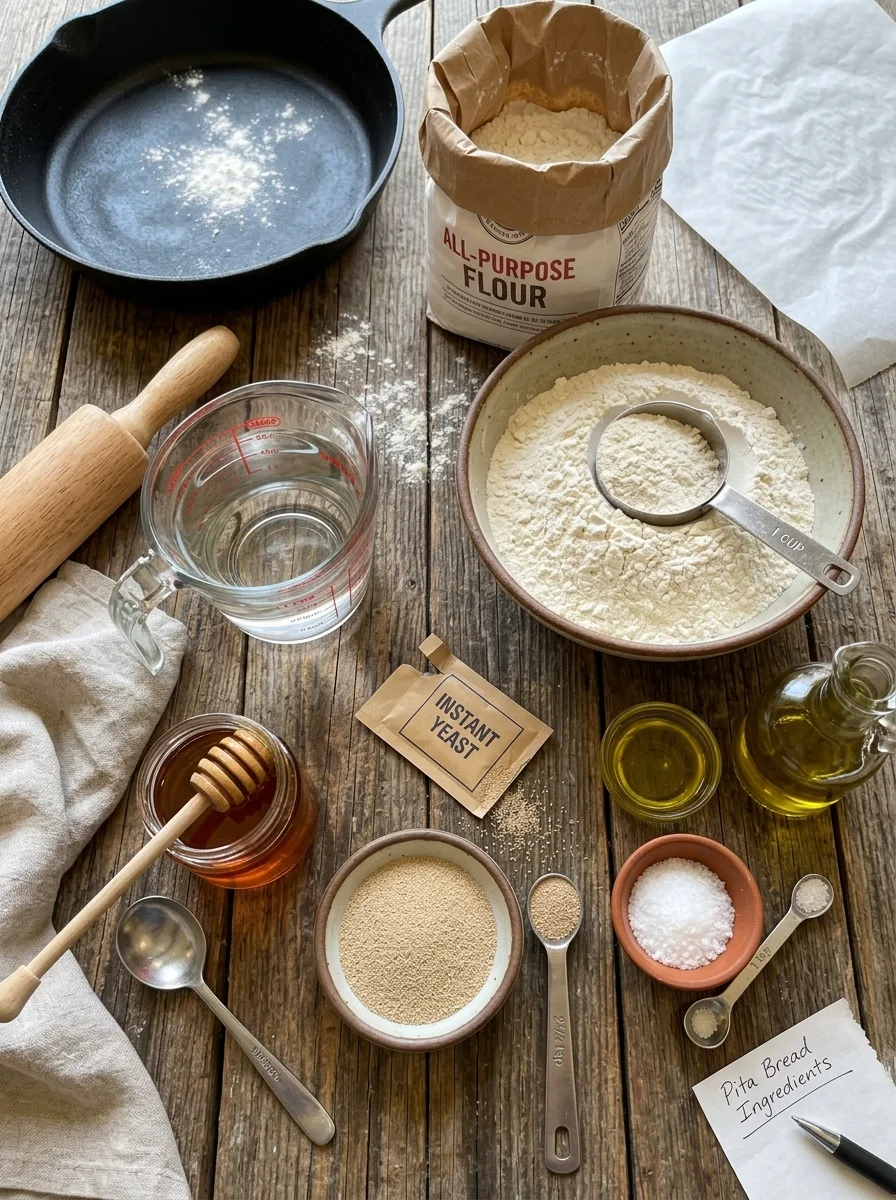
- 3 cups all-purpose flour
- 1 cup warm water, approximately 105–110°F
- 2 1/4 tsp instant yeast
- 1 tbsp honey or granulated sugar
- 1 tsp salt
- 2 tbsp extra-virgin olive oil
- 2–3 tbsp additional flour, only if needed
Ingredient Notes
All-purpose flour: Provides enough gluten-forming protein to create a stretchy dough capable of trapping the steam responsible for the pocket.
Warm water: Aim for approximately 105–110°F. The water should feel warm rather than extremely hot.
Instant yeast: Gives the pita its light, airy structure and helps create a softer dough.
Honey or granulated sugar: Either works. Honey adds subtle flavor, while granulated sugar provides a neutral sweetness.
Salt: Essential for flavor and helps balance the dough.
Extra-virgin olive oil: Adds tenderness and a subtle richness to the pita.
Additional flour: Use only when necessary. The dough is supposed to remain soft and slightly tacky, so avoid adding extra flour automatically.
How to Make Soft & Fluffy Pocket Pita Bread
Step 1: Prepare the Yeast Mixture 🍞
Pour 1 cup warm water into a large mixing bowl.
Aim for approximately 105–110°F.
Add:
- 1 tablespoon honey or granulated sugar
- 2 1/4 teaspoons instant yeast
Stir gently.
Allow the mixture to stand for approximately 5 minutes.
With instant yeast, this short rest isn’t strictly necessary for activation, but it gives the ingredients time to begin hydrating before the flour is added.
Step 2: Add the Flour
Add 3 cups all-purpose flour to the bowl.
Then add:
- 1 teaspoon salt
- 2 tablespoons extra-virgin olive oil
Begin stirring with a wooden spoon or sturdy spatula.
Continue until the mixture comes together into a shaggy dough.
Step 3: Check the Dough Consistency
The dough should be soft and slightly sticky.
Don’t try to make it completely dry.
If it’s extremely wet and impossible to handle, add additional flour gradually.
Use only 1 tablespoon at a time, up to approximately 2–3 tablespoons if necessary.
Flour absorption varies with brands, measuring methods, and humidity.
The goal is a soft dough that can be kneaded—not a stiff, dry dough.
Step 4: Knead the Dough
Turn the dough onto a lightly floured work surface.
Knead for approximately 5–7 minutes.
Use a push-fold-turn motion until the dough becomes smoother and more elastic.
As you knead, it should become easier to handle.
Avoid continually dusting the surface with flour unless genuinely necessary.
Adding too much flour during kneading can make the finished pitas dry and less flexible.
Step 5: Prepare the Dough for Rising
Lightly oil a clean mixing bowl.
Shape the kneaded dough into a ball and place it inside.
Turn it once so the exterior receives a very light coating of oil.
Cover the bowl with plastic wrap or a clean kitchen towel.
Step 6: Let the Dough Rise
Place the covered bowl somewhere warm and free from drafts.
Allow the dough to rise for approximately 60–90 minutes.
Rather than relying entirely on the clock, watch the dough.
It should approximately double in volume and look noticeably puffy.
In a warm kitchen this may happen closer to 60 minutes.
In a cooler kitchen it may require 90 minutes or slightly longer.
Step 7: Divide the Dough
Transfer the risen dough onto a lightly floured surface.
Gently press it down to release large pockets of gas.
Divide it into 8 equal pieces.
For extremely uniform pita breads, weigh the entire dough and divide the total weight by eight.
Step 8: Shape Into Balls
Take each portion and gently shape it into a smooth ball.
Try to create a relatively smooth outer surface.
Arrange the eight dough balls on your work surface.
Cover them with a clean kitchen towel.
Step 9: Rest for 10–15 Minutes
Let the dough balls rest for 10–15 minutes.
This short rest is important because dividing and shaping tightens the gluten.
Resting allows the gluten to relax, making the dough much easier to roll without springing back.
If a dough ball still resists rolling after the rest, leave it covered for another few minutes and move on to another piece.
How to Shape Pita Bread for the Best Pocket 🫓
Step 10: Roll the First Pita
Lightly flour your work surface and rolling pin.
Place one dough ball on the surface and flatten it gently.
Roll it into a round approximately 6–7 inches wide and about 1/4 inch thick.
Step 11: Keep the Thickness Even
Uniform thickness is one of the most important factors for pocket formation.
If one section is very thin while another is thick, steam can escape through the thin section before enough pressure develops to inflate the entire pita.
Roll from the center outward and rotate the dough occasionally.
Aim for consistent thickness from one edge to the other.
Step 12: Don’t Roll Too Thin
It can be tempting to roll pita dough extremely thin.
Avoid doing that for this recipe.
Approximately 1/4 inch thick gives the dough enough substance to remain soft and provides a good environment for steam to develop internally.
Step 13: Keep the Rolled Pitas Covered
Place the rolled pita rounds under a clean kitchen towel while shaping the remaining dough.
Keeping them covered prevents their surfaces from drying out.
A dried surface can interfere with proper expansion during cooking.
How to Cook Pita Bread on a Skillet 🔥
Step 14: Preheat the Skillet Thoroughly
Place a large cast-iron skillet or heavy-bottomed pan over medium-high to high heat.
Allow it to become thoroughly hot before cooking.
This step is critical.
A skillet that isn’t hot enough may slowly cook the pita without creating the rapid steam production needed for dramatic inflation.
Step 15: Don’t Add Oil
Cook the pita on a dry skillet.
Do not brush the skillet with olive oil.
Direct contact between the dough and the hot dry surface encourages rapid cooking and puffing.
Step 16: Add the First Pita
Carefully place one rolled pita into the hot skillet.
Cook for approximately 30–45 seconds.
Small bubbles should begin appearing across the surface.
Step 17: Flip
Flip the pita with a spatula or tongs.
Cook the second side for another 30–45 seconds.
You should see additional bubbles developing.
Step 18: Flip Again
Turn the pita back to the original side.
Continue cooking for approximately 30–60 seconds.
At this stage, steam should begin accumulating inside the pita.
Ideally, the bread will dramatically expand into a balloon.
Step 19: Encourage the Pocket if Needed
If only part of the pita is inflating, gently press around the edges with a spatula.
Don’t aggressively flatten the center.
Gentle pressure near uninflated areas can sometimes encourage trapped steam to move through the interior and expand the remaining section.
Step 20: Finish Cooking
Continue cooking just until the pita is cooked through and lightly browned in spots.
Avoid leaving it on the skillet unnecessarily after it’s done.
Overcooking can dry the bread and make it less flexible.
Step 21: Repeat
Transfer the cooked pita from the skillet.
Cook the remaining seven pitas using the same process.
Monitor the skillet temperature throughout.
Cast iron in particular can continue accumulating heat, so you may need to reduce the burner slightly after several pitas.
Keep the Pitas Soft ✨
As soon as each pita leaves the skillet, place it inside a clean kitchen towel.
Stack the next hot pita on top and cover again.
This is more important than it might seem.
Freshly cooked pita releases steam.
When the breads are stacked and covered, some of that moisture remains around them rather than immediately evaporating into the air.
That helps keep the pitas:
- Soft
- Flexible
- Chewy
- Easy to cut
- Easier to fill without cracking
Allow them to cool slightly before cutting open the pockets.
How to Open a Pita Pocket 🥙
Once the pita has cooled enough to handle, use a sharp knife to slice it approximately halfway across.
Gently separate the interior layers with your fingers.
If the pita puffed completely during cooking, the pocket should already be naturally separated.
Avoid cutting the pita immediately when it’s extremely hot because the soft interior can be delicate.
Time and Yield ⏱️
Prep time: 20 minutes
Rise time: 60–90 minutes
Rest time: 10–15 minutes
Cook time: approximately 15 minutes
Total time: approximately 1 hour 50 minutes
Yield: 8 pita breads
Serving size: 1 pita
Estimated calories: approximately 180 calories per pita
The exact calories will vary depending on the specific flour, sweetener, and olive oil used.
Tips for Perfect Pita Pockets
Use warm—not hot—water. Approximately 105–110°F works well.
Keep the dough soft. Resist the temptation to add excessive flour.
Knead thoroughly. Five to seven minutes helps develop the gluten structure needed for a stretchy dough.
Let the dough double. Use appearance rather than only time to judge the rise.
Rest after dividing. Relaxed dough rolls more evenly.
Roll evenly. Uneven thickness is one of the biggest enemies of a complete pita pocket.
Keep rolled dough covered. Prevent the surface from drying before cooking.
Preheat the skillet thoroughly. High initial heat is essential for rapid steam production.
Don’t oil the skillet. Use a dry cooking surface.
Watch the first 30 seconds carefully. You should begin seeing signs of bubbling relatively quickly.
Flip more than once. The flip-flip-back technique encourages even heating and pocket development.
Cover cooked pitas immediately. This maintains softness and flexibility.
Why Didn’t My Pita Puff?
A pita that doesn’t inflate can still taste excellent, but if you’re specifically trying to create pockets, several factors may be responsible.
The Skillet Wasn’t Hot Enough
This is one of the most common problems.
If the dough heats slowly, moisture can gradually escape instead of rapidly turning into enough steam to inflate the pita.
Give your skillet plenty of time to preheat.
The Dough Was Rolled Unevenly
A thin section can cook and dry before the thicker areas are ready.
Steam may escape through that weak area rather than inflating the entire pita.
The Dough Was Rolled Too Thin
Extremely thin dough can become crisp before enough steam pressure develops.
The Dough Was Too Thick
Very thick pita may cook unevenly and require more time for heat to reach the center.
Aim for approximately 1/4 inch.
The Surface Dried Out
Leaving shaped dough exposed to air can form a dry skin.
Keep the rounds covered until they’re ready to cook.
The Dough Was Too Dry
Excess flour can produce a stiff dough with less moisture available to generate steam.
The dough should remain soft and slightly tacky.
The Dough Wasn’t Properly Kneaded
Good gluten development helps create a flexible dough capable of stretching as steam expands inside it.
The Importance of Gluten Development
Pita relies on both moisture and structure.
Steam provides the pressure needed to inflate the bread, but the dough must also be elastic enough to stretch without immediately tearing.
That’s where kneading matters.
As you knead the dough for 5–7 minutes, gluten proteins develop into a stronger network.
That network helps the pita stretch when steam accumulates between the layers.
Properly kneaded dough should feel:
- Smooth
- Elastic
- Soft
- Slightly tacky
- Easy to shape
You don’t need an extremely stiff dough.
In fact, adding too much flour can work against the soft texture you’re trying to achieve.
How Hot Should the Skillet Be?
There isn’t one exact burner setting that works for every stove and skillet.
Start around medium-high to high heat.
The important part is observing the dough.
After placing a pita on the skillet, you should begin seeing bubbles within approximately 30–45 seconds.
If the dough remains completely flat and pale for much longer, the skillet may not be hot enough.
If the pita immediately develops very dark or burnt spots before bubbles have time to form, reduce the heat.
You may need to adjust the burner as you cook the batch.
Heavy cast iron retains substantial heat, so the skillet can become hotter after the first several pitas.
Why Cook Pita Without Oil?
Unlike the Greek-style skillet flatbread that’s often brushed with oil, pocket pita benefits from direct contact with a hot, dry cooking surface.
The goal isn’t to fry the exterior.
Instead, you want intense heat to rapidly cook the outside while generating steam inside.
You can always brush the finished pita with olive oil afterward if you’re serving it as dipping bread rather than stuffing it.
How to Keep Homemade Pita Soft
Homemade pita is at its softest shortly after cooking.
The moment it leaves the skillet, it begins losing moisture to the surrounding air.
That’s why you should immediately transfer it to a clean towel and cover it.
Continue stacking the hot pitas under the towel as you cook.
For storage, allow them to cool enough that excessive condensation won’t accumulate, then seal them in an airtight bag or container.
If a stored pita feels slightly firm, brief reheating will usually restore much of its flexibility.
What to Put Inside Pita Bread 🥙
Chicken Pita
Fill with grilled chicken, lettuce, tomatoes, cucumber, onion, and tzatziki.
Gyro Pita
Stuff with gyro-style meat, tomato, onion, lettuce, and creamy tzatziki.
Falafel Pita
Add warm falafel, hummus, chopped vegetables, pickles, and tahini sauce.
Beef Pita
Use seasoned grilled or sliced beef with onions, tomatoes, and your favorite Mediterranean sauce.
Hummus & Vegetable Pita
Spread the inside generously with hummus and add:
- Cucumber
- Tomato
- Lettuce
- Red onion
- Roasted peppers
- Olives
Mediterranean Chicken Pocket
Combine chicken with feta, cucumber, tomato, red onion, and tzatziki.
Breakfast Pita
Fill with scrambled eggs, cheese, tomatoes, and herbs.
Roasted Vegetable Pita
Stuff with roasted zucchini, peppers, eggplant, onion, hummus, and feta.
Other Ways to Serve Homemade Pita
You don’t have to use the pocket.
Hummus Dippers
Cut warm pita into wedges and serve alongside hummus.
Tzatziki Platter
Serve with tzatziki, cucumbers, tomatoes, olives, and feta.
Whipped Feta
Tear warm pita into pieces and dip them into whipped feta.
Mediterranean Mezze
Include pita alongside hummus, olives, vegetables, feta, and other dips.
Pita Chips
Cut leftover pita into wedges, season, and bake until crisp for homemade pita chips.
Make-Ahead Instructions
You can make the pita bread earlier in the day and reheat it just before serving.
After cooking, keep the pitas covered until they’re no longer extremely hot.
Once cooled, transfer them to an airtight bag or container.
For serving, briefly reheat them in a skillet or microwave until soft and flexible.
You can also freeze a batch and remove individual pitas as needed.
Troubleshooting Common Problems
Why is my pita hard?
It may have been overcooked or the dough may have contained too much flour.
Cook only until done and keep each pita covered immediately after removing it from the skillet.
Why is my dough too sticky?
A slightly sticky dough is desirable.
If it’s genuinely impossible to handle, add additional flour 1 tablespoon at a time.
Avoid dumping in the entire optional amount at once.
Why does my dough keep shrinking?
The gluten is too tense.
Cover the dough and give it another 5–10 minutes to relax before rolling again.
Why does only one side of my pita puff?
The dough may have been rolled unevenly or one area of your skillet may be hotter than another.
Try rotating the pita or improving the consistency of your rolling.
Why does only one section inflate?
Gently press around the uninflated edges with a spatula to encourage steam toward those sections.
Why does my pita burn?
The skillet is too hot.
Reduce the heat slightly while keeping it hot enough for rapid puffing.
Why is my pita pale?
The skillet may need more preheating or slightly higher heat.
Why does the pocket tear?
The pita may have been rolled too thin in one area or the dough may have dried before cooking.
Why is my pita dense?
Insufficient rising, too much flour, or inadequate kneading can contribute to a denser texture.
Storage Information 🥡
Allow the pita breads to cool.
Place them in an airtight container or zip-top bag.
Store at room temperature for up to 3 days.
Keep the container well sealed because pita dries relatively quickly when exposed to air.
For the best texture, briefly warm stored pita before serving.
Freezer Instructions ❄️
Pita bread freezes exceptionally well.
Allow all the pitas to cool completely.
Place a piece of parchment paper between each pita.
Stack them inside a freezer-safe bag or container.
Remove excess air and seal securely.
Freeze for up to 3 months.
The parchment makes it easy to remove a single pita without thawing the entire stack.
How to Reheat Pita Bread
Skillet Method
Place a pita in a dry skillet over medium heat.
Warm briefly on each side until soft and flexible.
Avoid cooking it for too long, which can dry it out.
Microwave Method
Place the pita on a microwave-safe plate.
Cover it with a slightly damp paper towel.
Microwave for approximately 10–15 seconds, or just until warm and soft.
From Frozen
You can thaw the pita at room temperature first or gently reheat it directly from frozen.
Keep it covered after warming to preserve moisture.
Frequently Asked Questions
Why does pita bread have a pocket?
The pocket forms when moisture inside the dough rapidly turns into steam during high-heat cooking, causing the two surfaces to separate.
Do all homemade pitas puff completely?
Not necessarily. Even experienced bakers occasionally get partial pockets. Proper heat and even rolling greatly improve the chances of full inflation.
Can I use pita that didn’t puff?
Absolutely. It will still be soft, chewy bread and can be used for dipping, wraps, or open-faced sandwiches.
How thick should I roll pita dough?
Approximately 1/4 inch thick for this recipe.
How wide should each pita be?
Approximately 6–7 inches.
Why shouldn’t I oil the skillet?
A hot, dry skillet gives the dough direct heat and encourages the rapid steam formation needed for the pocket.
Can I use a cast-iron skillet?
Yes. Cast iron works particularly well because it retains high heat.
Do I need an oven?
No. This recipe is designed specifically for stovetop skillet cooking.
Can I use honey instead of sugar?
Yes. Either 1 tablespoon honey or granulated sugar works.
Can I use instant yeast?
Yes. The recipe specifically calls for instant yeast.
Can I fill these with gyros?
Yes. They’re ideal for gyro meat, chicken, falafel, vegetables, hummus, and similar fillings.
Can I make pita bread ahead of time?
Yes. Store it airtight after cooling and briefly reheat before serving.
How long does homemade pita last?
Store it airtight at room temperature for up to 3 days.
Can pita bread be frozen?
Yes. Freeze it with parchment between the individual pitas for up to 3 months.
What’s the best way to keep pita soft?
Cover each pita with a clean kitchen towel immediately after cooking, then transfer the cooled bread to an airtight container.
Final Thoughts
This Soft & Fluffy Pocket Pita Bread turns a simple homemade yeast dough into warm, pillowy bread with the classic hollow center that’s perfect for filling. 🫓🍞✨
The secret is less complicated than it looks: soft well-kneaded dough, an even 1/4-inch thickness, and a very hot dry skillet.
As the pita hits the hot surface, moisture trapped inside turns into steam. That steam separates the interior layers and can inflate the entire bread into a dramatic balloon before it settles back down into a soft pita pocket.
Fill the finished pitas with gyros, falafel, chicken, beef, hummus, tzatziki, fresh vegetables, or Mediterranean-inspired sandwich fillings, or simply tear them into pieces and enjoy them warm with your favorite dips.
And because the pitas keep for several days and freeze for up to three months, they’re an excellent homemade bread to prepare in batches and keep ready for easy meals.
Print
Soft & Fluffy Pocket Pita Bread
Ingredients
- 3 cups all-purpose flour
- 1 cup warm water, approximately 105–110°F
- 2 1/4 tsp instant yeast
- 1 tbsp honey or granulated sugar
- 1 tsp salt
- 2 tbsp extra-virgin olive oil
- 2–3 tbsp additional flour, only if needed
Instructions
Step 1: Prepare the Yeast Mixture 🍞
Pour 1 cup warm water into a large mixing bowl.
Aim for approximately 105–110°F.
Add:
- 1 tablespoon honey or granulated sugar
- 2 1/4 teaspoons instant yeast
Stir gently.
Allow the mixture to stand for approximately 5 minutes.
With instant yeast, this short rest isn’t strictly necessary for activation, but it gives the ingredients time to begin hydrating before the flour is added.
Step 2: Add the Flour
Add 3 cups all-purpose flour to the bowl.
Then add:
- 1 teaspoon salt
- 2 tablespoons extra-virgin olive oil
Begin stirring with a wooden spoon or sturdy spatula.
Continue until the mixture comes together into a shaggy dough.
Step 3: Check the Dough Consistency
The dough should be soft and slightly sticky.
Don’t try to make it completely dry.
If it’s extremely wet and impossible to handle, add additional flour gradually.
Use only 1 tablespoon at a time, up to approximately 2–3 tablespoons if necessary.
Flour absorption varies with brands, measuring methods, and humidity.
The goal is a soft dough that can be kneaded—not a stiff, dry dough.
Step 4: Knead the Dough
Turn the dough onto a lightly floured work surface.
Knead for approximately 5–7 minutes.
Use a push-fold-turn motion until the dough becomes smoother and more elastic.
As you knead, it should become easier to handle.
Avoid continually dusting the surface with flour unless genuinely necessary.
Adding too much flour during kneading can make the finished pitas dry and less flexible.
Step 5: Prepare the Dough for Rising
Lightly oil a clean mixing bowl.
Shape the kneaded dough into a ball and place it inside.
Turn it once so the exterior receives a very light coating of oil.
Cover the bowl with plastic wrap or a clean kitchen towel.
Step 6: Let the Dough Rise
Place the covered bowl somewhere warm and free from drafts.
Allow the dough to rise for approximately 60–90 minutes.
Rather than relying entirely on the clock, watch the dough.
It should approximately double in volume and look noticeably puffy.
In a warm kitchen this may happen closer to 60 minutes.
In a cooler kitchen it may require 90 minutes or slightly longer.
Step 7: Divide the Dough
Transfer the risen dough onto a lightly floured surface.
Gently press it down to release large pockets of gas.
Divide it into 8 equal pieces.
For extremely uniform pita breads, weigh the entire dough and divide the total weight by eight.
Step 8: Shape Into Balls
Take each portion and gently shape it into a smooth ball.
Try to create a relatively smooth outer surface.
Arrange the eight dough balls on your work surface.
Cover them with a clean kitchen towel.
Step 9: Rest for 10–15 Minutes
Let the dough balls rest for 10–15 minutes.
This short rest is important because dividing and shaping tightens the gluten.
Resting allows the gluten to relax, making the dough much easier to roll without springing back.
If a dough ball still resists rolling after the rest, leave it covered for another few minutes and move on to another piece.
How to Shape Pita Bread for the Best Pocket 🫓
Step 10: Roll the First Pita
Lightly flour your work surface and rolling pin.
Place one dough ball on the surface and flatten it gently.
Roll it into a round approximately 6–7 inches wide and about 1/4 inch thick.
Step 11: Keep the Thickness Even
Uniform thickness is one of the most important factors for pocket formation.
If one section is very thin while another is thick, steam can escape through the thin section before enough pressure develops to inflate the entire pita.
Roll from the center outward and rotate the dough occasionally.
Aim for consistent thickness from one edge to the other.
Step 12: Don’t Roll Too Thin
It can be tempting to roll pita dough extremely thin.
Avoid doing that for this recipe.
Approximately 1/4 inch thick gives the dough enough substance to remain soft and provides a good environment for steam to develop internally.
Step 13: Keep the Rolled Pitas Covered
Place the rolled pita rounds under a clean kitchen towel while shaping the remaining dough.
Keeping them covered prevents their surfaces from drying out.
A dried surface can interfere with proper expansion during cooking.
How to Cook Pita Bread on a Skillet 🔥
Step 14: Preheat the Skillet Thoroughly
Place a large cast-iron skillet or heavy-bottomed pan over medium-high to high heat.
Allow it to become thoroughly hot before cooking.
This step is critical.
A skillet that isn’t hot enough may slowly cook the pita without creating the rapid steam production needed for dramatic inflation.
Step 15: Don’t Add Oil
Cook the pita on a dry skillet.
Do not brush the skillet with olive oil.
Direct contact between the dough and the hot dry surface encourages rapid cooking and puffing.
Step 16: Add the First Pita
Carefully place one rolled pita into the hot skillet.
Cook for approximately 30–45 seconds.
Small bubbles should begin appearing across the surface.
Step 17: Flip
Flip the pita with a spatula or tongs.
Cook the second side for another 30–45 seconds.
You should see additional bubbles developing.
Step 18: Flip Again
Turn the pita back to the original side.
Continue cooking for approximately 30–60 seconds.
At this stage, steam should begin accumulating inside the pita.
Ideally, the bread will dramatically expand into a balloon.
Step 19: Encourage the Pocket if Needed
If only part of the pita is inflating, gently press around the edges with a spatula.
Don’t aggressively flatten the center.
Gentle pressure near uninflated areas can sometimes encourage trapped steam to move through the interior and expand the remaining section.
Step 20: Finish Cooking
Continue cooking just until the pita is cooked through and lightly browned in spots.
Avoid leaving it on the skillet unnecessarily after it’s done.
Overcooking can dry the bread and make it less flexible.
Step 21: Repeat
Transfer the cooked pita from the skillet.
Cook the remaining seven pitas using the same process.
Monitor the skillet temperature throughout.
Cast iron in particular can continue accumulating heat, so you may need to reduce the burner slightly after several pitas.