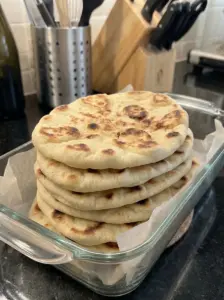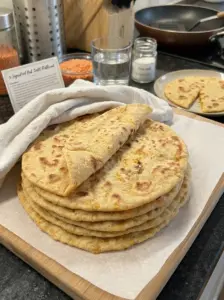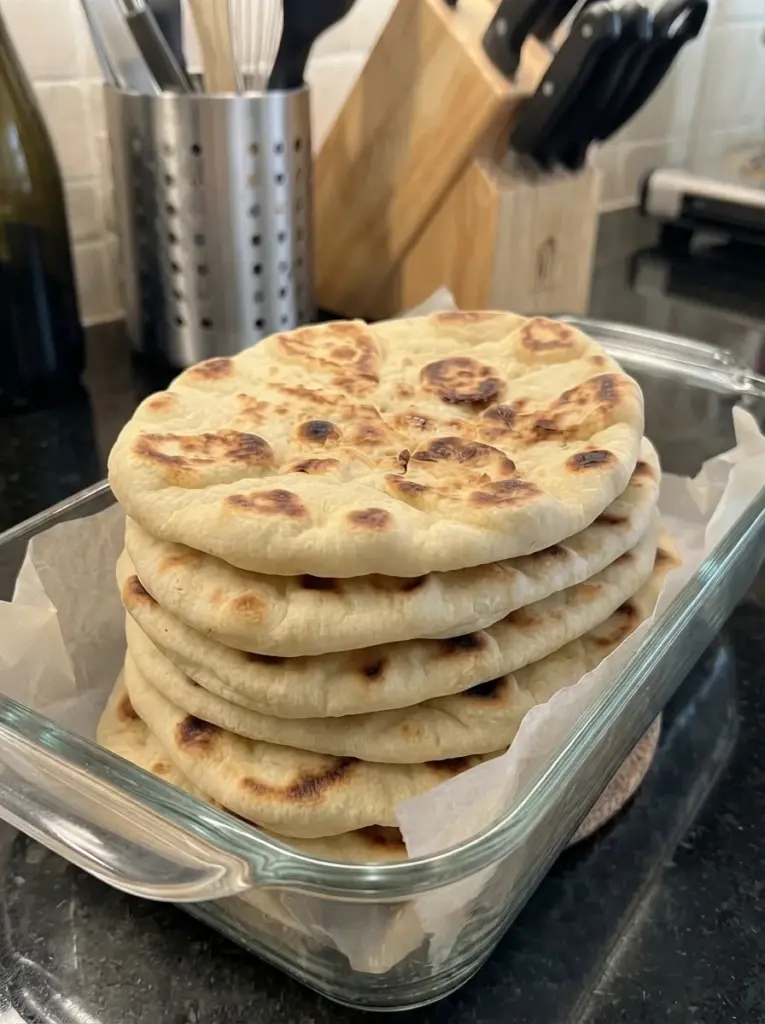
Warm skillet pita brings a simple meal together: tender bread, lightly browned spots, and enough flexibility to fold around chicken, vegetables, or a generous spoonful of tzatziki. This Greek-style version uses a straightforward yeast dough enriched with olive oil, then cooks in a hot skillet instead of an oven.
The bread is intended to be soft and moderately thick, with small bubbles and a tender interior. It is especially useful for souvlaki-style wraps, dipping, or serving beside salads and grilled food. You do not need a stand mixer, baking stone, or outdoor grill.
Because the title did not include an ingredient list, the formula below is a suggested starting recipe rather than an independently kitchen-tested reproduction. Flour absorption and skillet heat vary, so follow the texture and cooking cues alongside the approximate times.
Greek-Style Pita: What to Expect
This recipe aims for a soft, generally pocketless flatbread suitable for wrapping and dipping. Some rounds may inflate in places, but a full internal pocket is not the goal or a guaranteed result.
The dough contains yeast for a light interior and olive oil for tenderness. A short kneading step develops enough strength to make the rounds easier to roll and handle. After rising, the dough is divided, rested, shaped, and cooked a few minutes per side.
The finished bread should have a cooked, tender center rather than a raw dough line. Keeping the rounds covered after cooking helps the surfaces soften and preserves flexibility.
Recipe Overview
| Detail | Suggested guide |
|---|---|
| Yield | 8 small pitas |
| Finished diameter | Approximately 6–7 inches |
| Active preparation | About 25–30 minutes |
| First rise | Approximately 60–90 minutes |
| Divided-dough rest | About 15–20 minutes |
| Cooking | Approximately 25–35 minutes in batches |
| Total time | About 2–3 hours |
| Main equipment | Bowl, rolling pin, heavy skillet, clean towel |
| Texture | Soft, lightly chewy, and flexible while warm |
Ingredients
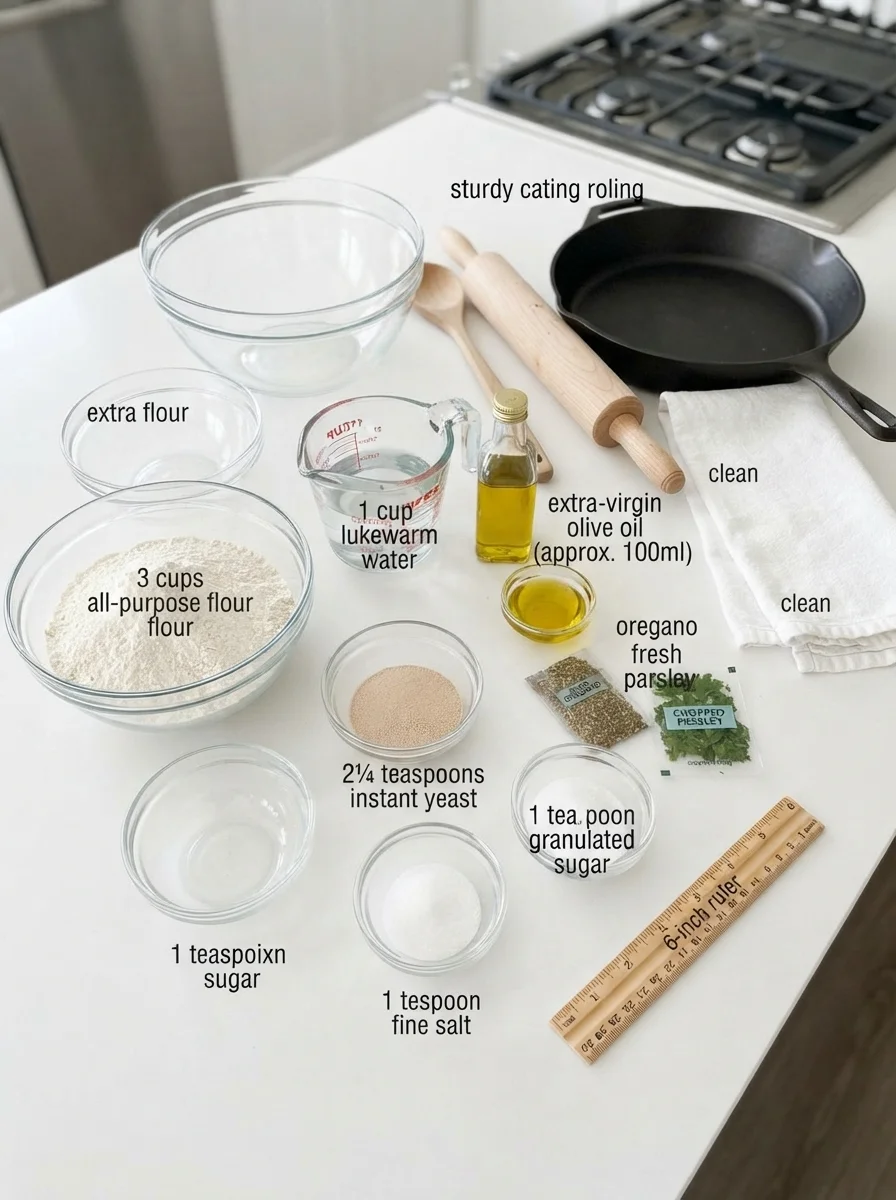
- 3 cups all-purpose flour, spooned and leveled, plus a little for shaping
- 2¼ teaspoons instant yeast
- 1 teaspoon granulated sugar
- 1 teaspoon fine salt
- 1 cup lukewarm water, plus 1–3 tablespoons more if needed
- 2 tablespoons extra-virgin olive oil
- A small amount of additional olive oil for the bowl and skillet, as needed
Optional finishing ingredients are a little olive oil, dried oregano, or chopped parsley. These are not necessary for the basic bread.
The water adjustment is intentional. Different flours absorb liquid differently, and a soft dough makes a more tender pita than a stiff dough packed with extra flour.
Ingredient Notes
All-purpose flour
All-purpose flour makes a tender flatbread with enough structure for rolling and folding. Measure it lightly rather than pressing it into the cup.
Bread flour can be used, but it may make the pitas chewier and require a little more water. A first batch with all-purpose flour gives a useful baseline.
Whole-wheat flour is not an equal replacement for the entire amount without adjustments. It absorbs water differently and can make the bread denser. If experimenting, begin by replacing only ½ cup of the all-purpose flour.
Instant yeast
Instant yeast mixes directly into the flour. It does not need a separate activation bowl for this method.
Active dry yeast may also work in the same quantity, but follow its package guidance. If dissolving it first, use water already included in the recipe rather than adding another unmeasured amount.
Check storage and freshness if the dough consistently fails to expand. A cool room can also slow rising, so lack of immediate activity does not automatically mean the yeast has failed.
Water
Use lukewarm water, approximately 95–105°F. It should feel comfortably warm rather than hot. Very hot water can damage yeast.
Start with 1 cup, then add more by the tablespoon only if the dough feels dry or cannot gather the flour. The target is soft and slightly tacky, not wet batter.
Olive oil
Olive oil contributes flavor and tenderness. Extra-virgin oil gives a more noticeable savory character, while a milder olive oil keeps the flavor subtle.
Only a thin film is needed in the skillet, if any. This bread is cooked against a hot surface rather than fried in a pool of oil.
Salt and sugar
Salt balances the bread’s flavor. The small quantity of sugar adds mild sweetness without making the pita taste like a sweet roll.
Use fine salt for the listed volume. Coarse salts vary, so do not assume every teaspoon has the same weight or seasoning strength.
Equipment and Preparation
Use a large bowl, sturdy spoon, lightly floured work surface, rolling pin, scraper if available, and a heavy skillet. Cast iron, carbon steel, or another sturdy skillet can work, provided you manage the heat appropriately.
Have a plate and clean kitchen towel ready beside the stove. The towel-covered stack is an important part of keeping the cooked bread soft.
A skillet with a cooking surface large enough for a 6–7-inch round makes handling easier. If yours is small, shape slightly smaller pitas rather than forcing dough up the sides of the pan.
How to Make Greek-Style Skillet Pita
1. Mix the dry ingredients
Stir the flour, instant yeast, sugar, and salt together in the bowl. Mix thoroughly so the yeast and salt are distributed throughout the flour.
Leave enough room in the bowl for mixing and later expansion. A cramped bowl makes both tasks less convenient.
2. Add the water and olive oil
Pour in 1 cup lukewarm water and the 2 tablespoons olive oil. Stir until the mixture forms a rough dough.
If dry flour remains and the dough feels firm, add water 1 tablespoon at a time. Stop when the dough is soft enough to gather into one mass with no dry pockets.
Let it rest for about 5 minutes if it seems difficult to judge. The flour continues absorbing moisture, and a brief pause can make kneading easier.
3. Knead until smooth
Turn the dough onto a lightly floured surface and knead for approximately 6–8 minutes, until smoother, elastic, and slightly tacky. Alternatively, use a stand mixer with a dough hook for about 4–6 minutes, following the appliance’s guidance.
Use only small dustings of flour when needed. A dough that sticks slightly is different from one that cannot be handled at all. Adding flour repeatedly until the surface is completely dry can make the pitas heavy.
The dough should stretch somewhat before tearing and spring back gently when pressed. It does not need to be perfectly shiny.
4. Let the dough rise
Lightly oil the bowl, place the dough inside, and turn it once to coat. Cover and leave in a comfortably warm spot for approximately 60–90 minutes, or until about doubled.
Temperature affects timing. A cool kitchen may require longer. Avoid placing the bowl against a heater or inside a hot oven, where the dough can warm unevenly.
Look for visible expansion and a puffy texture rather than relying only on a timer.
5. Divide and rest
Gently press the dough to release larger gas pockets. Divide into eight similar portions and shape each into a loose ball.
Cover the portions and rest for 15–20 minutes. This relaxes the dough, making it easier to roll without repeated springing back.
Keep the surface covered while you work. A dry skin can make the rounds harder to shape and less even when cooked.
6. Roll evenly
Lightly flour the work surface and roll one portion into a circle about 6–7 inches wide and approximately ⅛–¼ inch thick, aiming toward an even thickness rather than a thick center with thin edges.
If it springs back strongly, set it aside under the cover for another 5 minutes and return to it. Repeatedly forcing a tight dough wider is less effective than letting it relax.
Do not stretch until translucent. This version needs enough thickness to remain tender and slightly fluffy.
For a pocketless style, you may lightly prick the surface a few times with a fork. This can limit large bubbles, although it does not guarantee identical inflation in every round.
7. Preheat the skillet
Heat the skillet over medium heat until evenly hot. Add a very thin film of oil if your pan needs it, wiping away excess.
The pan should be hot enough for the dough to begin setting promptly, but it should not be smoking heavily. Too much heat creates black patches before the center is cooked.
Use the first pita as a guide. Adjust the burner between batches rather than assuming the pan will stay at the same temperature throughout.
8. Cook the first side
Place the shaped dough in the skillet. Cook for approximately 1½–2½ minutes, until bubbles form and the underside has scattered golden-brown spots.
Lift an edge carefully to inspect. If the underside blackens within seconds, reduce the heat and let the skillet cool slightly before continuing.
Avoid pressing firmly on the bread while it cooks. A gentle touch may help a folded edge contact the pan, but repeated flattening can compress the interior.
9. Flip and finish
Flip with tongs or a spatula and cook another 1½–2½ minutes, adjusting the heat as needed. The pita should be cooked through, with no wet or raw dough layer in the center.
Thicker rounds may need a little longer over lower heat. If the surfaces are browned while the center remains doughy, the solution is gentler cooking and a more even thickness for the next round.
Do not judge doneness by bubbles alone. Tear open the first cooked pita after a short rest to check the middle, then use what you learn to guide the rest.
10. Stack and cover
Transfer each cooked pita to the plate and cover with the clean towel. Continue rolling and cooking the remaining portions.
The covered stack traps a little steam and softens the surfaces. If you prefer a slightly drier finish, uncover briefly before serving, but do not leave the whole batch exposed while it cools.
Serve warm with fillings, dips, or a light brushing of olive oil.
Tips for Soft, Fluffy Pita
Start with a soft dough
A stiff dough can resist rolling and bake into a dry flatbread. Add the small water adjustment when needed, and avoid burying the dough in flour during kneading.
Rest before rolling
Relaxed dough is easier to shape evenly. If it keeps shrinking, give it time rather than adding pressure.
Keep the thickness consistent
An even round cooks more predictably. Thin edges can become crisp while a thick center remains underdone.
Adjust the pan as you go
A heavy skillet stores heat. Later pitas may brown faster than the first one, so reduce the burner when needed.
Protect the finished bread
A towel-covered stack preserves warmth and flexibility. This simple step makes a noticeable difference for wraps.
Troubleshooting
| Problem | Likely reason | Adjustment |
|---|---|---|
| Dough is dry and hard to knead | Packed flour or insufficient water | Add water gradually and measure flour lightly |
| Dough springs back while rolling | Gluten needs more relaxation | Cover and rest another 5–10 minutes |
| Pita is dense | Underproofed dough, excess flour, or too much thickness | Let dough expand, keep it soft, and roll evenly |
| Surface burns before center cooks | Pan too hot | Lower heat and allow more cooking time |
| Bread is pale and dry | Pan too cool or cooking too long | Increase heat moderately and check sooner |
| Edges become crisp | Rolled too thin or left exposed | Shape evenly and cover cooked rounds |
| Bread tears around filling | Too much filling, dry bread, or a thin weak spot | Warm gently and use a modest filling amount |
| Full pocket does not form | This is a pocketless-style method | Use for folding and dipping rather than expecting pita pockets |
Variations
Oregano olive oil finish
Brush the cooked warm pitas lightly with olive oil and sprinkle with a little dried oregano. This adds flavor without changing the dough structure.
Garlic butter finish
Mix softened or melted butter with a small amount of garlic powder and brush lightly over the warm bread. This changes the dairy-free nature of the base recipe.
Part whole-wheat pita
Replace ½ cup all-purpose flour with whole-wheat flour. Expect slightly different water needs and a heartier crumb. Let the dough hydrate before adding more flour or water.
Smaller appetizer rounds
Divide the dough into 12 portions and roll smaller rounds. Cooking time may be shorter, so use the same visual cues rather than the original timing automatically.
Grilled finish
Cooked pitas can be warmed briefly on a grill for a little additional flavor. Watch carefully, as already cooked bread can dry quickly over direct heat.
Additions are optional. For a first attempt, the plain dough makes it easier to judge hydration, proofing, and skillet temperature.
Serving Ideas
Fill a warm pita with grilled chicken, chopped tomato, cucumber, onion, and a little tzatziki. Keep sauces moderate so the bread remains easy to fold and hold.
For a vegetarian option, use roasted vegetables, chickpeas, or grilled cheese suitable for the preparation. A spoonful of hummus adds flavor and helps hold smaller fillings in place.
Cut pitas into wedges for dips, or serve whole beside a Greek-inspired salad. They are also useful for wiping up stew or a tomato-based sauce.
For a simple snack, warm a pita and add olive oil and herbs. The bread does not need a complicated filling to be enjoyable.
Make-Ahead Guidance
The most predictable make-ahead method is to cook the pitas, cool them, and freeze in portions. This lets you warm only what you need.
If preparing dough ahead, a refrigerated rise requires attention to yeast activity and temperature. This article’s timing describes a same-day room-temperature rise, not an overnight counter method. Do not simply leave the dough warm all night and expect the same result.
You can divide the cooked batch into small stacks with parchment between them. That makes weekday wraps and side dishes easy without repeating the dough preparation.
Storage and Reheating
Room temperature
Cool the pitas, then store airtight for about 1–2 days in a cool, dry environment. Avoid sealing them while releasing heavy steam, which can create excessive condensation.
Homemade bread has no added commercial preservatives, and storage conditions matter. Freeze early if you will not use the batch soon.
Freezer
Separate cooled pitas with parchment and seal in a freezer-safe bag. Freeze for up to 2–3 months for best quality.
Remove only the amount you need. Thaw while covered or warm gently from frozen, allowing the center to soften before trying to fold.
Skillet reheating
Warm in a skillet over medium-low heat, turning as needed. A few drops of water beside the bread and a brief cover can help soften a refrigerated or thawed pita; avoid soaking it.
Microwave reheating
Wrap a pita loosely in a lightly damp paper towel and heat in short intervals. Serve promptly, since long heating can make it tough as it cools.
Oven reheating
Wrap a small stack in foil and warm in a 325°F oven until heated through. Keeping them enclosed helps limit drying.
Filled pitas need storage guidance based on their fillings. Meat, dairy sauces, and prepared vegetables should not be treated like plain bread kept on the counter.
Nutrition Notes
For eight pitas, a broad estimate is approximately 195–225 calories per pita before optional finishing oil, butter, sauces, or fillings. Protein may be around 5–7 grams per pita, depending on the flour.
These figures are estimates. Calculate from your ingredient labels and actual portion count for greater precision, including any oil absorbed from the skillet.
The basic dough contains wheat and is not gluten-free. It contains no eggs or dairy as written, but check the ingredients used in optional finishes and fillings.
Frequently Asked Questions
Does Greek-style pita need a pocket?
This version is intended for folding around fillings and serving with dips. A full pocket is not required, and the method does not guarantee one.
Can I use a stand mixer?
Yes. Use a dough hook and mix until the dough is smooth and elastic, following your appliance’s instructions. Avoid adding extra flour just because the dough sticks slightly to the bowl.
Can I skip kneading?
Not without changing the method. This suggested recipe uses a short kneading step for structure and handling. A no-knead version would need an adapted schedule and hydration.
Why does the dough shrink when I roll it?
It needs more time to relax. Cover it and return after several minutes rather than repeatedly forcing it wider.
Can I use self-rising flour?
It is not a direct replacement here because it contains chemical leavening and salt. Use ordinary all-purpose flour for the stated yeast formula.
Can I make the bread without oil?
Removing the dough oil changes tenderness and handling. For the intended soft texture, keep the listed amount. The skillet itself may need very little additional oil if it releases well.
Can I cook two at once?
Only if both fit flat without touching or folding. A crowded pan makes even cooking and flipping more difficult.
Why are my pitas stiff?
Possible causes include too much flour, very thin rolling, overcooking, or leaving them uncovered. Warm them gently and keep the finished stack covered.
Should I add more yeast for a fluffy result?
More yeast does not solve dry dough, insufficient proofing, or excessive cooking. Start with the listed quantity and focus on the dough and heat cues.
Recipe Card
Soft & Fluffy Greek-Style Skillet Pita Bread
A suggested yeast flatbread with olive oil, a tender interior, and lightly browned skillet spots. Intended for folding and dipping rather than guaranteed pockets.
Yield: 8 pitas, approximately 6–7 inches across
Active prep: 25–30 minutes
First rise: 60–90 minutes
Divided rest: 15–20 minutes
Cook: 25–35 minutes in batches
Total: Approximately 2–3 hours
Ingredients
- 3 cups all-purpose flour, spooned and leveled
- 2¼ teaspoons instant yeast
- 1 teaspoon sugar
- 1 teaspoon fine salt
- 1 cup lukewarm water, plus 1–3 tablespoons if needed
- 2 tablespoons olive oil
- Additional flour and oil for handling and cooking, sparingly
Instructions
- Stir flour, yeast, sugar, and salt together. Add 1 cup water and olive oil. Mix into a soft dough, adding extra water by the tablespoon if dry.
- Knead on a lightly floured surface for 6–8 minutes, until smoother and elastic. Keep the dough slightly tacky.
- Place in a lightly oiled bowl, cover, and rise approximately 60–90 minutes, until about doubled.
- Divide into eight portions, shape into balls, cover, and rest 15–20 minutes.
- Roll each into an even 6–7-inch round, approximately ⅛–¼ inch thick. Rest longer if the dough resists rolling. Prick lightly with a fork if desired.
- Heat a heavy skillet over medium heat. Apply a thin oil film if needed.
- Cook each pita approximately 1½–2½ minutes per side, adjusting heat to brown lightly while cooking the center fully. Test the first one for a raw dough line and adjust thickness or heat as needed.
- Stack under a clean towel as they finish. Serve warm with fillings or dips.
Storage: Keep cooled pitas airtight for 1–2 days in a cool, dry place, or freeze for up to 2–3 months for best quality. Warm covered or briefly in a skillet to soften.
Little tip: If the dough keeps springing back, stop rolling and let it rest. Relaxed dough and moderate skillet heat are two simple ways to improve both softness and even cooking.
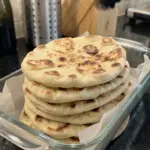
Soft & Fluffy Greek-Style Skillet Pita Bread
Description
A suggested yeast flatbread with olive oil, a tender interior, and lightly browned skillet spots. Intended for folding and dipping rather than guaranteed pockets.
Yield: 8 pitas, approximately 6–7 inches across
Active prep: 25–30 minutes
First rise: 60–90 minutes
Divided rest: 15–20 minutes
Cook: 25–35 minutes in batches
Total: Approximately 2–3 hours
Ingredients
- 3 cups all-purpose flour, spooned and leveled
- 2¼ teaspoons instant yeast
- 1 teaspoon sugar
- 1 teaspoon fine salt
- 1 cup lukewarm water, plus 1–3 tablespoons if needed
- 2 tablespoons olive oil
- Additional flour and oil for handling and cooking, sparingly
Instructions
- Stir flour, yeast, sugar, and salt together. Add 1 cup water and olive oil. Mix into a soft dough, adding extra water by the tablespoon if dry.
- Knead on a lightly floured surface for 6–8 minutes, until smoother and elastic. Keep the dough slightly tacky.
- Place in a lightly oiled bowl, cover, and rise approximately 60–90 minutes, until about doubled.
- Divide into eight portions, shape into balls, cover, and rest 15–20 minutes.
- Roll each into an even 6–7-inch round, approximately ⅛–¼ inch thick. Rest longer if the dough resists rolling. Prick lightly with a fork if desired.
- Heat a heavy skillet over medium heat. Apply a thin oil film if needed.
- Cook each pita approximately 1½–2½ minutes per side, adjusting heat to brown lightly while cooking the center fully. Test the first one for a raw dough line and adjust thickness or heat as needed.
- Stack under a clean towel as they finish. Serve warm with fillings or dips.
Storage: Keep cooled pitas airtight for 1–2 days in a cool, dry place, or freeze for up to 2–3 months for best quality. Warm covered or briefly in a skillet to soften.
Little tip: If the dough keeps springing back, stop rolling and let it rest. Relaxed dough and moderate skillet heat are two simple ways to improve both softness and even cooking.