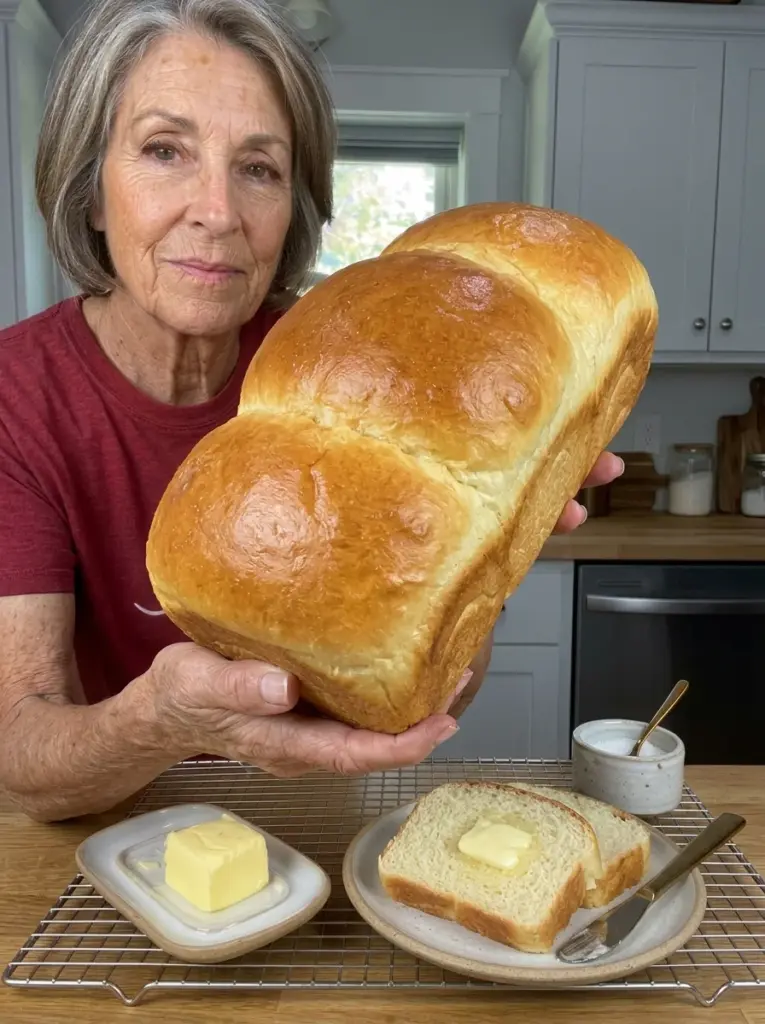
A soft homemade milk loaf makes everyday sandwiches, morning toast, and simple butter-and-jam breakfasts feel a little more special. This recipe combines warm milk, an egg, a little sugar, and melted butter in a dough that bakes into a gently rounded loaf with a tender crumb and a lightly golden crust.
The dough needs kneading and two rises, but the steps are straightforward. Most of the time is hands-off while the yeast works. A standard loaf pan supports the dough as it rises, giving you slices that are easy to use for grilled cheese, lunchbox sandwiches, or French toast.
The sweetness is mild enough for savory fillings, and a brush of butter after baking helps soften the crust. Let the loaf cool before slicing so the interior can set; the reward is a neat slice with a soft, springy center.
This article expands the supplied recipe with dough cues, shaping instructions, and troubleshooting. Rising and baking times are guides rather than guarantees, and the formula has not been independently kitchen-tested for this article.
What to Expect
This is an enriched yeast bread made with milk, butter, and egg. Expect a close, tender crumb that holds sandwich fillings rather than the large holes of a rustic bread. Bread flour can give the slices a little more structure and chew, while all-purpose flour generally produces a more delicate texture.
It is a straightforward milk loaf without a cooked flour paste or tangzhong step. The softness comes from the enriched dough, sufficient kneading, proper proofing, and avoiding excess flour or overbaking.
The base recipe uses granulated sugar. Honey is an optional variation, rather than an ingredient you need for the standard loaf.
Recipe at a Glance
- Yield: 1 loaf in a 9 × 5-inch loaf pan
- Servings: 12 slices, or 10 thicker slices
- Active preparation: About 20–25 minutes
- First rise: About 60–90 minutes
- Second rise: About 30–60 minutes
- Bake time: About 30–40 minutes
- Cooling: About 1–1½ hours
- Total time: Approximately 3 hours to 4 hours 45 minutes, including cooling
- Oven temperature: 350°F
A cool kitchen can extend either rise. Plan around how the dough looks and feels, especially during the second rise, rather than trying to keep every stage on an exact schedule.
Why This Milk Loaf Works
Milk contributes flavor and helps create a tender crumb. Whole milk adds a little more richness, although 2% milk is also suitable. The sugar provides gentle sweetness, while butter enriches the dough and gives the finished bread its buttery aroma.
The egg adds richness and structure. Kneading develops the gluten that supports the loaf as fermentation fills the dough with gas. During shaping, rolling the dough into a snug log helps create an even interior without large tunnels.
The final rise matters just as much as the first. A loaf that goes into the oven too early may split dramatically or feel heavy. A loaf left too long can become fragile and collapse. A puffy loaf with a slow, partial response to a gentle fingertip press is a better guide than elapsed minutes alone.
Ingredients
For the Loaf
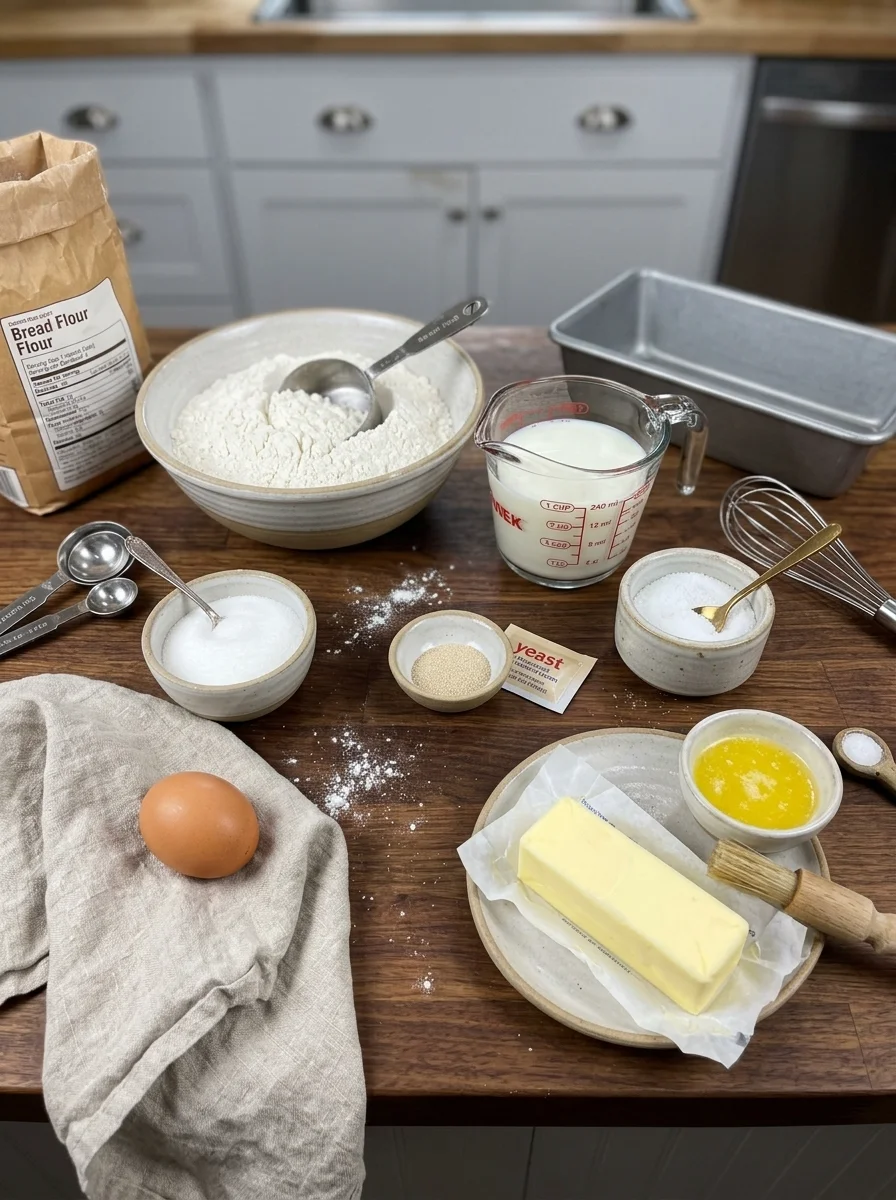
- 3½ cups all-purpose flour or bread flour, spooned into the measuring cup and leveled, plus a little more only if needed
- 1 cup whole milk or 2% milk, warmed to about 105–110°F
- 2¼ teaspoons instant yeast, equivalent to one standard packet
- 3 tablespoons granulated sugar
- 1 large egg, at room temperature
- 3 tablespoons unsalted butter, melted and cooled until just warm
- 1 teaspoon fine salt
For the Pan and Finish
- A little butter or neutral oil, for greasing
- 1 tablespoon milk, optional, for brushing before baking
- 1 tablespoon melted butter, optional, for brushing after baking
The milk wash and butter finish serve different purposes. You can use either, both, or neither. If you use both, measure them separately from the milk and butter in the dough.
Ingredient Notes
Measure the flour lightly. Scooping a cup directly into the flour bag can pack in more flour than intended. Stir the flour, spoon it into the cup, and level the top. Adding too much flour is one of the easiest ways to turn a tender dough into a stiff loaf.
Start with warm milk, not hot milk. The milk should feel comfortably warm. A thermometer makes this easier to judge. Allow melted butter to cool before combining it with the egg and yeast mixture.
Use instant yeast for the main method. It can be mixed into the flour without a separate activation step. If you choose to check the yeast in warm milk first, that mixture replaces the separate milk, yeast, and sugar additions; do not add those ingredients twice.
Choose unsalted butter for consistency. Salted butter can work, but its salt content varies. Keep the measured salt modestly reduced if you use it and remember that a teaspoon of fine salt and a teaspoon of coarse kosher salt do not contain identical amounts of salt.
Keep the dough supple. Flour brands, measuring methods, and egg size affect the dough. The goal is a soft dough that feels slightly tacky, not a dry ball that never touches your fingers. If it feels dry from the beginning, work in milk a teaspoon at a time before assuming it needs more flour.
Equipment
You will need a large mixing bowl, measuring cups and spoons, a sturdy spoon or spatula, a 9 × 5-inch loaf pan, and a wire rack. A stand mixer with a dough hook is helpful but optional.
An instant-read thermometer helps check the milk and finished loaf. A bench scraper makes handling tacky dough easier without dusting the counter with extra flour. Use a clean towel, reusable cover, or lightly greased plastic wrap to keep the dough from drying during its rises.
A metal loaf pan is a practical choice for even browning. Glass, ceramic, and dark-coated pans can bake differently, so keep an eye on the crust and check the center before removing the loaf.
How to Make Soft & Fluffy Homemade Milk Loaf
1. Prepare the Ingredients
Warm the milk to about 105–110°F. Melt the butter and let it cool until just warm. Have the egg ready at room temperature so it does not chill the dough unnecessarily.
Lightly grease a mixing bowl for the first rise. You can grease the loaf pan now or while the dough is rising.
2. Mix the Dough
In a large bowl, stir together the flour, instant yeast, sugar, and salt. Add the warm milk, egg, and melted butter. Stir until the ingredients form a shaggy dough and no large pockets of dry flour remain.
Scrape down the bowl and give the dough a few minutes to hydrate if it seems sticky. Flour absorbs moisture gradually, so a brief pause can make the dough easier to handle without changing the formula.
If you checked the yeast in milk beforehand, add that entire milk-yeast-sugar mixture to the flour and salt, followed by the egg and butter. Do not add another packet of yeast or a second portion of sugar.
3. Knead Until Smooth and Elastic
For hand kneading, transfer the dough to a lightly floured surface. Push it forward with the heel of your hand, fold it back, turn it, and repeat for about 8–12 minutes. Use a scraper if it sticks to the work surface.
For a mixer, use the dough hook at the speed recommended by the manufacturer for bread dough. Knead for about 5–8 minutes, pausing to scrape the bowl if necessary. The dough may cling a little at the bottom even when it is developing well.
Look for a smoother surface and an elastic feel. A small piece should stretch into a thin membrane before tearing, although all-purpose flour may give a less dramatic result than bread flour. The dough should feel soft and slightly tacky.
If the dough remains wet enough to smear heavily after several minutes of kneading, add flour one tablespoon at a time. Stop as soon as it becomes manageable. If it is stiff, cracks when folded, or resists stretching, work in a small splash of milk instead.
4. Let the Dough Rise
Place the dough in the greased bowl and turn it once so the surface is lightly coated. Cover and leave it in a comfortably warm, draft-free place until roughly doubled, usually 60–90 minutes.
A cooler room may take longer. Avoid direct heat or an oven that is too warm; gentle, steady warmth is enough. The dough should look expanded and feel aerated when the first rise is complete.
If you use an oven as a proofing space, keep it switched off and make sure it is not hot. Remove the dough before preheating for baking.
5. Shape a Snug Loaf
Grease a 9 × 5-inch loaf pan. Turn the risen dough onto a lightly floured surface and gently press it into a rectangle about 8 inches wide. Press out unusually large bubbles without flattening the dough aggressively.
Starting at a short end, roll the rectangle into a snug log. Use your fingertips to keep the roll reasonably tight, then pinch the final seam closed. Tuck the ends if needed so the loaf fits the pan.
Place the log seam-side down. A snug shape supports an even rise; an overly loose roll can leave a spiral gap through the center. Avoid trapping a heavy layer of flour inside the rolled dough.
6. Allow the Second Rise
Cover the pan loosely and let the loaf rise for about 30–60 minutes. It should become visibly puffy, with the center approaching or rising a little above the rim. The exact height depends on the pan and the dough, so use the overall appearance as well as the rim.
Lightly press the side of the dough with a floured fingertip. If the indentation springs back immediately, give it a little more time. If it returns slowly and partly, the loaf is generally ready. If the dough feels fragile and the indentation does not recover, it may have risen too far.
Preheat the oven to 350°F near the end of this rise. Position a rack so the loaf sits around the middle of the oven with enough room for its domed top.
7. Brush and Bake
If desired, gently brush the surface with the tablespoon of milk. Use a light touch so you do not deflate the proofed dough.
Bake for about 30–40 minutes, beginning to check near 28–30 minutes. The loaf should be golden, the sides should look set, and the center should reach approximately 190–200°F. Insert the thermometer into the center rather than stopping close to the crust.
If the top colors before the center is ready, loosely tent it with foil and continue baking. A golden surface alone does not establish that the interior is fully baked, especially with milk and sugar encouraging browning.
8. Remove from the Pan and Cool
Let the loaf rest in the pan for 5–10 minutes, then turn it out onto a wire rack. Brush the top with melted butter if you want a softer crust and a buttery finish.
Cool for about 1–1½ hours, or until the loaf is no longer warm through the center. A larger or deeper loaf may need longer. Leaving it in the pan for the entire cooling period can trap moisture around the sides and bottom.
9. Slice and Serve
Use a serrated bread knife and a gentle sawing motion. Cut 12 regular slices for sandwiches or 10 thicker slices for toast. Avoid pressing down on the soft dome as you slice.
If you want warm bread, rewarm individual slices after the loaf has cooled and set. This gives you the warmth without compressing a freshly baked interior.
Tips for a Tender, Even Crumb
Keep additional flour to a minimum. Lightly flour your hands and use a scraper before repeatedly dusting the dough. A manageable tackiness is normal in enriched bread.
Knead until the dough becomes elastic rather than stopping solely because a timer rings. Dough that has not developed enough structure can spread, tear, or feel dense even when the yeast is active.
Use visible changes to judge fermentation. A room that feels comfortable to you may still produce a slower rise than a warm proofing area. Extra yeast is not the first solution to a cool kitchen; allowing more time is often enough.
Shape with light, consistent tension. Press out large air pockets and roll a snug log, but avoid tearing the dough surface. Let a stubborn rectangle rest for 5 minutes if it keeps springing back while you shape it.
Finally, give cooling its own place in the schedule. Cutting early releases steam and can squash the soft crumb, creating a gummy-looking line even in a loaf that has baked properly.
Troubleshooting
| Problem | Likely cause | What to adjust |
|---|---|---|
| Dough feels stiff or cracks | Too much flour or insufficient liquid | Add milk in small amounts and measure flour more lightly next time. |
| Dough sticks heavily after kneading | Extra moisture, incomplete development, or very warm dough | Rest briefly, continue kneading, then add flour sparingly only if needed. |
| First rise is slow | Cool dough or weak yeast | Allow more time in gentle warmth; check yeast freshness if there is little activity. |
| Loaf is dense | Stiff dough, insufficient kneading, or short proofing | Keep the dough supple and judge both rises by expansion. |
| Top splits sharply along one side | Loaf may have been underproofed or shaped unevenly | Allow a fuller second rise and keep the log evenly shaped. |
| Loaf sinks or wrinkles deeply | Overproofing or an underbaked center | Shorten the final rise next time and check the center before removing it. |
| A tunnel runs through the loaf | Loose shaping or trapped flour | Roll the log snugly and brush away excess flour before rolling. |
| Crust is dark but center is not ready | Fast surface browning | Tent with foil and finish baking; check oven accuracy if it repeats. |
| Slices look gummy | Early slicing or incomplete baking | Cool fully and verify the center temperature next time. |
Small wrinkles after a butter finish can be normal as a soft crust cools. Judge the loaf by its overall structure rather than expecting a crisp, rigid shell.
Variations
Honey milk loaf: Replace the sugar with 2 tablespoons honey for a lightly sweet variation. Honey contributes some moisture and its own flavor, so assess the dough before adding extra milk or flour. This substitution has not been tested here.
Vanilla breakfast loaf: Add ½ teaspoon vanilla extract with the wet ingredients. The loaf will still be only mildly sweet and works well with jam or cinnamon butter.
Raisin milk bread: Knead in about ½ cup raisins near the end of mixing. If you soak them first, drain and dry them thoroughly. Additions can change the rise and baking time, so keep using the dough and doneness cues.
Seeded top: Brush with milk and add a light sprinkle of sesame seeds before baking. Seeds are an additional ingredient and may brown more quickly than the crust.
Part whole-wheat: Begin by replacing ½ cup of the all-purpose flour with whole-wheat flour. Expect a slightly heartier crumb and possibly a small increase in milk. Replacing all the flour would require a more substantial formula adjustment.
Serving Ideas
For breakfast, toast a slice and add butter, jam, or a thin layer of nut butter. The mild flavor also works with scrambled eggs, cheddar, or avocado.
For lunch, use cooled slices for turkey sandwiches, tuna salad, or grilled cheese. Thicker slices hold up well in a skillet, while thinner slices are easier to pack.
Day-old milk bread makes good French toast because it absorbs the egg mixture without being as delicate as a hot loaf. Slightly dry slices can also become croutons, breadcrumbs, or bread pudding. Store any finished dishes according to their added ingredients.
Storage and Freezing
At Room Temperature
Let the loaf cool completely, then store it in an airtight bread bag or container for about 2–3 days in a cool, dry kitchen. The crust will soften in a sealed bag, which suits this style of bread.
Do not seal a warm loaf. Trapped steam can make the crust damp and encourage spoilage. Warm or humid conditions can shorten the useful storage time.
Refrigeration
Refrigeration often makes ordinary bread stale faster. For a plain loaf you will eat soon, room-temperature storage is usually the better texture choice. Freeze what you will not use within a few days.
Adding perishable fillings or toppings changes storage needs. The guidance for the plain baked loaf does not apply to an assembled sandwich with meat, eggs, or a creamy filling.
Freezing
Slice the cooled loaf, wrap it well, and place it in a freezer-safe bag for up to 2–3 months for best quality. Press out excess air and label the bag. Parchment between slices makes individual portions easier to remove.
Thaw slices covered at room temperature or toast them from frozen. Brief microwave warming can soften a slice, but prolonged heating can make it chewy as it cools.
If the loaf develops mold, discard the whole loaf rather than trimming around a spot.
Nutrition Estimate
With whole milk and the optional milk wash and butter finish, a rough estimate is 180–205 calories and 5–6 grams of protein per slice when cut into 12 slices. Cutting the loaf into 10 thicker slices raises the amount per slice to roughly 215–245 calories.
These are illustrative estimates rather than a calculated nutrition label. Flour measurements, milk type, optional butter, and slice size affect the result. Jam, sandwich fillings, and other toppings are additional.
Frequently Asked Questions
Can I use active dry yeast?
Yes, but follow its package directions. You can dissolve 2¼ teaspoons in the warm milk with a little of the measured sugar before mixing. Add that entire mixture to the remaining ingredients, without adding the milk or yeast again. Rising times may differ.
Do I have to activate instant yeast?
No. The main method mixes it directly into the flour. A separate check can help assess an old packet, but it is not required for fresh instant yeast.
Is this a no-knead recipe?
No. This version uses kneading to develop its soft, structured crumb. Simply omitting that stage would change the method and may affect the result.
Can I use low-fat milk?
Yes. Whole milk gives a richer result, but 2% milk is a practical alternative. Skim milk may produce a slightly less rich loaf. Unsweetened plant milks can behave differently and are not tested substitutions here.
Can I make it without the egg?
The egg contributes both moisture and structure, so leaving it out without adjustment changes the formula. Use an egg-free milk bread recipe if you need a dependable egg-free result.
Why is my dough rising more slowly than the recipe says?
Room temperature, starting dough temperature, and yeast condition all matter. If the dough is expanding gradually, it may simply need longer. Do not put it in strong heat to force the schedule.
Can I use an 8½ × 4½-inch pan?
A smaller pan produces a taller loaf and can change the proofing and baking time. Leave space for expansion and monitor carefully. The recipe is written for a 9 × 5-inch pan.
Can I slice it warm?
A slightly warm loaf is tempting, but cooling fully gives cleaner slices and a better-set crumb. Rewarm a slice after cutting if you want the fresh, warm-bread experience.
Printable Recipe Card
Soft & Fluffy Homemade Milk Loaf
A mildly sweet, buttery yeast loaf for sandwiches, toast, and French toast.
Yield: 1 loaf, 12 slices
Pan: 9 × 5 inches
Prep: 20–25 minutes
Rising: 1½–2½ hours
Baking: 30–40 minutes
Cooling: 1–1½ hours
Total: About 3–4¾ hours
Ingredients
- 3½ cups all-purpose flour or bread flour, spooned and leveled
- 1 cup milk, warmed to 105–110°F
- 2¼ teaspoons instant yeast
- 3 tablespoons granulated sugar
- 1 large egg, at room temperature
- 3 tablespoons unsalted butter, melted and cooled slightly
- 1 teaspoon fine salt
- Butter or oil, for greasing
- 1 tablespoon milk, optional, for brushing before baking
- 1 tablespoon melted butter, optional, for finishing
Instructions
- Combine the flour, instant yeast, sugar, and salt in a large bowl. Add warm milk, egg, and melted butter. Stir into a shaggy dough.
- Knead by hand for about 8–12 minutes or with a dough hook for about 5–8 minutes, until smooth and elastic. Keep the dough soft and slightly tacky; add extra flour only sparingly.
- Place in a lightly greased bowl, cover, and let rise until roughly doubled, about 60–90 minutes or longer in a cool room.
- Grease a 9 × 5-inch loaf pan. Gently press the dough into a rectangle about 8 inches wide. Roll into a snug log, pinch the seam, and place seam-side down in the pan.
- Cover loosely and let rise for about 30–60 minutes, until puffy and near or a little above the rim. A gentle indentation should recover slowly and partly. Preheat the oven to 350°F.
- Brush lightly with milk if desired. Bake for about 30–40 minutes, checking from 28–30 minutes, until golden and the center reaches approximately 190–200°F. Tent with foil if needed.
- Rest in the pan for 5–10 minutes, then transfer to a rack. Brush with melted butter if desired. Cool for about 1–1½ hours, until no longer warm in the center, before slicing.
Storage: Keep the cooled, plain loaf airtight at room temperature for about 2–3 days, or freeze slices for up to 2–3 months for best quality.
Estimated nutrition: About 180–205 calories per slice at 12 slices, including optional finishes. Brands and portion sizes vary.
Recipe note: Instant yeast does not require separate activation. If checking it in milk first, use the measured milk, yeast, and sugar only once. Rise according to the dough’s appearance rather than the clock.
Print
Soft & Fluffy Homemade Milk Loaf
Description
A mildly sweet, buttery yeast loaf for sandwiches, toast, and French toast.
Yield: 1 loaf, 12 slices
Pan: 9 × 5 inches
Prep: 20–25 minutes
Rising: 1½–2½ hours
Baking: 30–40 minutes
Cooling: 1–1½ hours
Total: About 3–4¾ hours
Ingredients
- 3½ cups all-purpose flour or bread flour, spooned and leveled
- 1 cup milk, warmed to 105–110°F
- 2¼ teaspoons instant yeast
- 3 tablespoons granulated sugar
- 1 large egg, at room temperature
- 3 tablespoons unsalted butter, melted and cooled slightly
- 1 teaspoon fine salt
- Butter or oil, for greasing
- 1 tablespoon milk, optional, for brushing before baking
- 1 tablespoon melted butter, optional, for finishing
Instructions
- Combine the flour, instant yeast, sugar, and salt in a large bowl. Add warm milk, egg, and melted butter. Stir into a shaggy dough.
- Knead by hand for about 8–12 minutes or with a dough hook for about 5–8 minutes, until smooth and elastic. Keep the dough soft and slightly tacky; add extra flour only sparingly.
- Place in a lightly greased bowl, cover, and let rise until roughly doubled, about 60–90 minutes or longer in a cool room.
- Grease a 9 × 5-inch loaf pan. Gently press the dough into a rectangle about 8 inches wide. Roll into a snug log, pinch the seam, and place seam-side down in the pan.
- Cover loosely and let rise for about 30–60 minutes, until puffy and near or a little above the rim. A gentle indentation should recover slowly and partly. Preheat the oven to 350°F.
- Brush lightly with milk if desired. Bake for about 30–40 minutes, checking from 28–30 minutes, until golden and the center reaches approximately 190–200°F. Tent with foil if needed.
- Rest in the pan for 5–10 minutes, then transfer to a rack. Brush with melted butter if desired. Cool for about 1–1½ hours, until no longer warm in the center, before slicing.
Storage: Keep the cooled, plain loaf airtight at room temperature for about 2–3 days, or freeze slices for up to 2–3 months for best quality.
Estimated nutrition: About 180–205 calories per slice at 12 slices, including optional finishes. Brands and portion sizes vary.
Recipe note: Instant yeast does not require separate activation. If checking it in milk first, use the measured milk, yeast, and sugar only once. Rise according to the dough’s appearance rather than the clock.