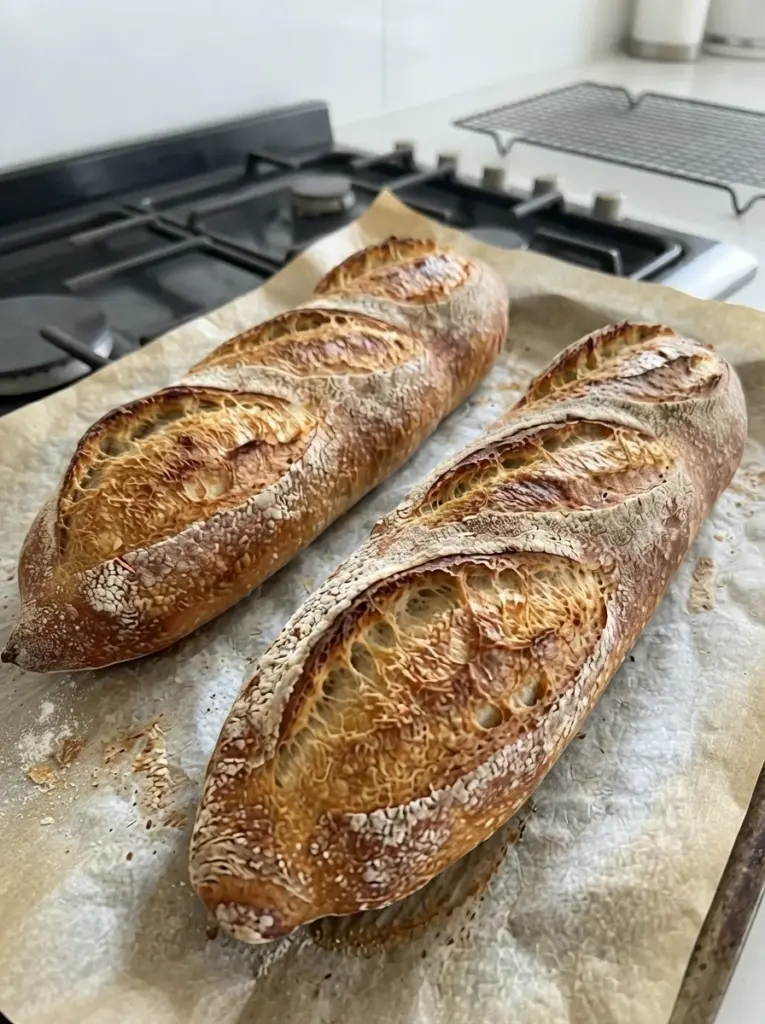
A golden crust, a soft but chewy center, and a gentle sourdough flavor make French-style bread a useful addition to almost any meal. This Easy Sourdough French Bread uses an active starter instead of commercial yeast and is shaped into two manageable loaves that fit on a home baking sheet.
The ingredient list is short: flour, water, starter, and salt. A few sets of folds build structure, a generous fermentation period develops flavor, and careful shaping helps the dough hold its form in the oven. There is no need for a baguette pan or a stand mixer.
Serve the loaves with soup, slice them for sandwiches, or turn leftovers into garlic bread. The crust is crispest on baking day and softens somewhat during storage. A short oven refresh can restore some of that fresh-baked texture.
This is a suggested home-baking formula, not a kitchen-tested recipe. Starter strength, flour, dough temperature, and shaping skill affect the result. Use the dough cues throughout the method rather than treating fermentation times as guarantees.
Recipe at a Glance
- Yield: 2 French-style loaves, about 13–15 inches long
- Hands-on time: About 35–45 minutes, spread across the process
- Bulk fermentation: Approximately 4–7 hours at a dough temperature near 75–78°F
- Final proof: Approximately 1–3 hours
- Baking: About 25–35 minutes
- Cooling: At least 1 hour
- Total: Plan roughly 7–12 hours after the starter is ready
- Starter preparation: Additional time, depending on your starter and feeding schedule
A cool kitchen can extend the process considerably. This is a same-day option only when the starter is strong and conditions support timely fermentation; an overnight finish may be more practical in some kitchens.
What Kind of Bread Is This?
These are French-style sourdough loaves for a home oven. They have a lean dough without butter, eggs, or added sugar, and a shape suited to slicing or splitting lengthwise.
They are wider and easier to handle than very thin traditional baguettes. The dough hydration is moderate, which makes shaping more approachable while still allowing a chewy crumb.
The finished interior will depend on fermentation and handling. Small to medium irregular holes are a useful target for sandwiches. A dramatically open crumb is neither required nor guaranteed.
Ingredients
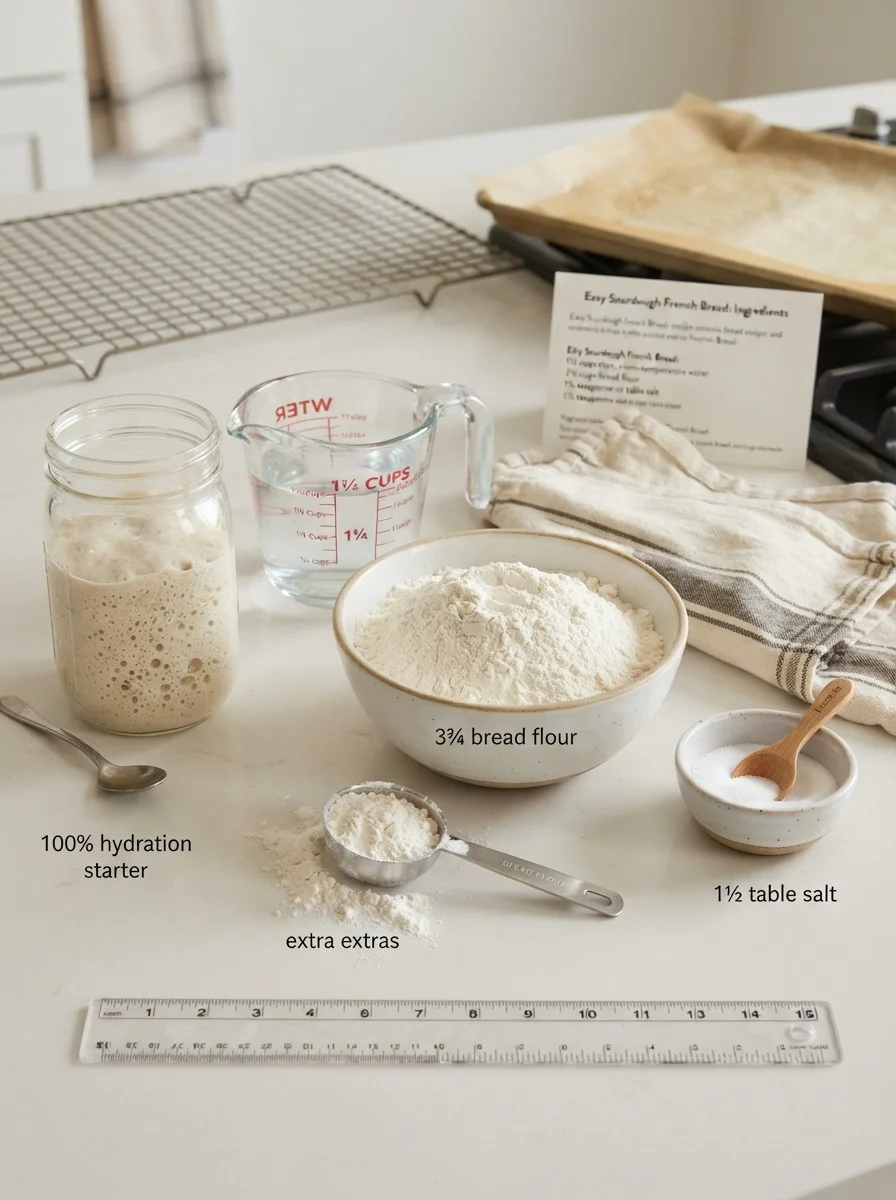
- 3¾ cups bread flour, spooned and leveled, plus a little for shaping
- 1¼ cups water, room temperature or slightly warm as needed
- ½ cup ripe, active sourdough starter at 100% hydration, stirred down before measuring
- 1½ teaspoons fine table salt
Optional
- A little rice flour or additional bread flour for the proofing surface
- A little oil for the bulk-fermentation container
Volume measurements are convenient but less consistent than weighing, especially for flour and bubbly starter. Stir the starter down gently before measuring, and spoon and level the flour rather than packing the cups. Add no extra water initially; assess the dough after its first rest.
Understanding the Starter
Use a mature starter that reliably rises after feeding. A newly mixed starter or a weak culture that barely expands is not a dependable leavener for this recipe.
A 100% hydration starter is maintained with equal weights of flour and water, even though this article uses US volume measures for the dough ingredients. Equal cups of flour and water do not make a 100% hydration starter because those ingredients have different densities.
At mixing time, the starter should be expanded, bubbly throughout, and near its peak or just beginning to flatten at the top. A predictable rise after feeding is more useful than relying on a float test alone.
Discard from an unfed jar is not an equivalent substitute. It can contribute flavor, but it may lack the strength to raise these loaves on the stated schedule.
Ingredient Notes
Bread Flour
Bread flour helps the dough hold its shape and gives a pleasant chew. All-purpose flour can work, but brands vary in strength and absorption, so the dough may feel softer.
Measure carefully. Excess flour can make shaping feel easy while producing a tight, heavy crumb. Keep added bench flour modest and use a scraper to manage stickiness.
This formula is written for mostly white wheat flour. A substantial whole-grain substitution changes absorption and fermentation behavior, and gluten-free flour requires a different structure altogether.
Water
Choose the water temperature according to the room and flour temperature. Slightly warm water can help in a cool kitchen, while cool water can slow the dough in hot weather.
Avoid hot water. The aim is a comfortable dough temperature, not maximum warmth. Around 75–78°F offers a practical reference for the fermentation range in this article.
Salt
Fine table salt is specified because coarse kosher salts differ substantially by volume. Salt contributes flavor and influences dough strength and fermentation.
If using another type, follow a reliable conversion for that product rather than assuming the same teaspoon volume gives the same result.
Equipment
Use a mixing bowl, covered straight-sided container if available, spatula or dough scraper, baking sheet, parchment rated for the baking temperature, clean towel, and wire rack. A sharp scoring blade is helpful for making clean cuts.
A food thermometer can help monitor dough temperature and baked doneness. A clear container makes expansion easier to assess; mark the starting level after mixing.
A baking stone or steel is optional. The method below works on a suitable baking sheet. Avoid creating steam by pouring water onto oven glass or using glass cookware for a steam tray. If your oven manufacturer discourages added water or steam, bake without that step.
How to Make Sourdough French Bread
1. Prepare the Starter
Feed your starter early enough that it will be ripe when you mix the dough. The time depends on the starter, feeding ratio, and temperature, so follow its observed rise rather than an arbitrary number of hours.
Measure ½ cup after gently stirring it down. Leave enough starter behind to maintain separately for future baking.
2. Mix the Dough
Combine the water and starter in a bowl, stirring to distribute the starter. Add the flour and salt.
Mix until all the flour is moistened and the dough forms a cohesive, shaggy mass. Scrape around the bowl to pick up dry pockets. Cover and rest for 30 minutes; this rest is part of bulk fermentation, which begins when the starter enters the dough.
The dough should feel soft and a little tacky rather than fluid. Flour absorption varies, so wait until after resting before making small corrections.
3. Build Strength with Folds
With damp hands, lift one side of the dough until you feel resistance, then fold it over the center. Turn the bowl and repeat on the other sides. Avoid tearing the dough by stretching too far.
Repeat this set twice more at roughly 30-minute intervals. These three sets help organize the gluten without a prolonged kneading session.
The dough should gradually feel smoother and hold its shape better. If it remains weak, one additional gentle set may help. Do not add flour repeatedly just to eliminate tackiness.
4. Complete Bulk Fermentation
Keep the dough covered and allow it to ferment until noticeably expanded, aerated, and slightly domed. At about 75–78°F, the total bulk period may be approximately 4–7 hours from mixing, including the rests and folds.
A rise of roughly 50–75% is a useful starting cue for this same-day method, alongside bubbles at the edges and a lighter feel. The dough should jiggle somewhat when the container moves and release more readily from its sides.
Do not wait for a fixed clock time if the dough is already ready. Conversely, an unexpanded, heavy dough needs more time even if the scheduled hours have passed.
5. Divide and Preshape
Turn the dough onto a lightly floured surface. Divide into two equal portions with a dough scraper.
Gently gather each portion into a short oval, using enough tension to organize the surface without squeezing out every bubble. Cover and rest for about 20 minutes so the dough relaxes before final shaping.
6. Shape the Loaves
Working with one portion at a time, pat gently into a short rectangle. Fold the upper edge toward the center and press lightly to secure. Fold the lower portion upward, then bring the dough together lengthwise and pinch the seam closed.
Roll gently from the center toward the ends to create a loaf about 13–15 inches long. Keep the ends slightly tapered and leave enough width for a manageable home-style loaf.
If the dough resists lengthening, let it rest briefly rather than forcing it. Repeated tearing weakens the surface and makes shaping harder.
7. Arrange and Proof
Place seam-side down on parchment on a baking sheet, leaving several inches between loaves. If the dough is too slack to hold its form, proof on a floured folded towel with supported sides, then transfer carefully to parchment before baking.
Cover without pressing on the dough. Let rise until puffy and lighter, often about 1–3 hours in gentle warmth.
A light touch should leave an impression that slowly starts to recover. This test is only one clue: visible expansion, a softer feel, and an aerated appearance matter too. A tight loaf that rebounds instantly may need more time; a very fragile loaf that deflates may have proofed too far.
8. Preheat the Oven
Near the end of proofing, preheat to 450°F. Allow enough time for the oven to stabilize, and follow any stone or steel manufacturer’s preheating instructions if using one.
For optional steam, place an oven-safe metal tray on a lower rack only if your oven permits this method. Have hot water ready and use dry oven mitts. Steam can burn, so keep your face and hands clear when opening the door.
A loaf baked without added steam may have a somewhat firmer early crust and less sheen, but it can still be enjoyable.
9. Score and Bake
Uncover the loaves. Make three or four diagonal cuts along each, angling the blade slightly and keeping the cuts about ¼ inch deep. Avoid sawing repeatedly through the same spot.
Place the sheet in the oven. If using the permitted steam-tray method, carefully add about ½ cup hot water to the hot metal tray and close the door promptly. Never pour water onto the oven floor or glass.
Bake at 450°F for about 10 minutes, then reduce to 425°F. Continue for about 15–25 minutes, until deeply golden and baked through. If water remains in a steam tray, leave it in place rather than carrying a hot tray of water; opening the door briefly releases some moisture.
A center temperature near 205–210°F is a useful doneness guide for these lean loaves. Consider color, structure, and the absence of a doughy center as well. Baking time varies with loaf thickness and the oven.
10. Cool Before Cutting
Transfer to a wire rack and cool for at least an hour, longer if the center remains hot. Air circulation helps preserve the crust and prevents a damp bottom.
Cutting immediately can compress the interior and make it seem gummy. If you want warm bread, cut after cooling and briefly reheat individual portions.
Sample Same-Day Schedule
This example assumes the starter is ready at 8 a.m. and the dough stays near 75–78°F. Adjust according to the dough rather than following it rigidly.
| Approximate time | Task |
|---|---|
| 8 a.m. | Mix dough and cover. |
| 8:30–9:30 a.m. | Complete three fold sets at half-hour intervals. |
| Late morning to early afternoon | Continue bulk fermentation until the dough is expanded and aerated. |
| Early to mid-afternoon | Divide, rest, shape, and begin final proof. |
| Later afternoon or evening | Score and bake when proofing cues indicate readiness. |
| At least an hour after baking | Slice once sufficiently cooled. |
At 68°F, the same dough can take substantially longer. Plan flexibility into the day and avoid promising fresh bread at an exact hour until you know how your starter performs.
Troubleshooting
| Problem | Possible cause | Helpful adjustment |
|---|---|---|
| Dough rises very slowly | Weak starter or cool dough | Use a reliably active starter and allow more time in gentle warmth. |
| Loaves spread sideways | Weak structure, excess hydration, or overproofing | Build strength with folds and assess fermentation; use supported proofing if needed. |
| Crumb is tight and heavy | Insufficient fermentation or excess flour | Follow expansion cues and measure flour lightly. |
| Large tunnel under the crust | Shaping issue or uneven fermentation | Shape evenly and assess the whole dough rather than surface bubbles alone. |
| Interior seems gummy | Underbaking or slicing hot | Bake through and cool before cutting. |
| Cuts do not open well | Shallow scoring, dry skin, or proofing imbalance | Cover during proofing and score confidently just before baking. |
Tips for Better Results
Use a strong starter rather than relying on extra waiting to rescue a consistently weak one. Note the room temperature and how much the dough expands so future batches become easier to plan.
Build surface tension while shaping, but avoid squeezing the loaves flat. Small irregular holes are useful; a very open crumb is not necessary for bread intended for sandwiches.
Keep the proofing cover from sticking to the surface. A torn skin can distort the loaf when uncovered.
Do not judge the bake only by a pale golden top. Lean sourdough benefits from sufficient baking to develop flavor and set the center.
Serving Ideas
Slice for soup, stew, or a simple bread basket. Split sections lengthwise for sandwiches, keeping fillings moderate so the crumb does not become saturated.
Day-old bread is useful for garlic bread or toasted crostini. Brush slices lightly with oil, toast, and add toppings afterward.
For French toast, use slightly thicker slices that can absorb the egg mixture without falling apart. Dry ends can become breadcrumbs or croutons.
Storage and Reheating
Cool completely before storing. A paper bag helps preserve crust for a short period, while an airtight bag keeps the interior softer but softens the crust. Enjoy within about 2 days at room temperature in a cool kitchen.
Freeze portions or slices in a well-sealed freezer bag for up to 3 months for best quality. Freeze while the bread is still fresh rather than waiting until it has become stale.
Refresh a thawed loaf in a 350°F oven for about 8–12 minutes, checking so it does not dry out. Toast slices directly from frozen if convenient.
Refrigeration generally speeds bread staling, so freezing is more useful for longer storage. Discard bread with visible mold rather than trimming only the affected surface.
Frequently Asked Questions
Can I use sourdough discard?
Not as a direct substitute for ripe starter in this naturally leavened method. Discard may not raise the dough predictably. A discard recipe with commercial yeast is a different formula.
Is there commercial yeast in this recipe?
No. Fermentation comes from the active sourdough starter. That is why starter strength and dough temperature matter so much to timing.
Can I make one large loaf?
A large loaf changes shaping, proofing, and baking time and may not fit well on a home sheet. Two smaller loaves are the intended format.
Can I refrigerate the dough overnight?
Refrigeration can be part of sourdough scheduling, but it does not stop fermentation immediately. For a first attempt, follow the same-day method so you can observe the dough. An overnight schedule needs adjustments based on the stage of fermentation and refrigerator temperature.
Does sourdough French bread taste very sour?
Not necessarily. Starter maintenance, fermentation time, and temperature influence acidity. This method aims for a balanced flavor rather than maximum tang.
Do I need a baguette pan?
No. A baking sheet works for these wider French-style loaves. A towel with folds can provide support during proofing if needed.
Can I skip steam?
Yes. Follow the oven manufacturer’s guidance. Added steam can affect crust expansion and appearance, but it is optional and should not be improvised with unsuitable cookware.
Why does the recipe explain starter hydration?
The starter contributes both flour and water. A very stiff or very liquid starter changes the dough balance, so the formula assumes an equal-weight flour-and-water starter.
Recipe Card
Easy Sourdough French Bread
Two lean French-style loaves made with active sourdough starter. Suggested formula; not kitchen-tested here.
Yield: 2 loaves | Total: Roughly 7–12 hours after the starter is ready, including cooling; longer in cool conditions
Ingredients
- 3¾ cups bread flour, spooned and leveled
- 1¼ cups water
- ½ cup ripe 100% hydration sourdough starter, stirred down before measuring
- 1½ teaspoons fine table salt
- A little flour for shaping and optional oil for the container
Instructions
- Mix starter and water, then add flour and salt. Stir until fully moistened. Cover for 30 minutes.
- Perform three gentle sets of folds at approximately 30-minute intervals.
- Continue bulk fermentation until expanded roughly 50–75%, aerated, and lighter. Allow about 4–7 hours total from mixing near 75–78°F, adjusting to the dough.
- Divide into two portions, gently preshape, cover, and rest 20 minutes.
- Shape into 13–15-inch loaves. Place seam-side down on parchment with space between them, or use a supported towel for proofing before transferring.
- Cover and proof until puffy, usually about 1–3 hours. Preheat the oven to 450°F near the end.
- Make three or four diagonal scores per loaf. Bake 10 minutes at 450°F, then reduce to 425°F and bake another 15–25 minutes until deeply golden and baked through. Optional steam should be used only with suitable metal cookware and an oven that permits it.
- Cool on a rack at least 1 hour before slicing.
Storage: Enjoy within about 2 days at room temperature, or freeze for up to 3 months for best quality.
Estimated nutrition: Approximately 100–120 calories per slice if the batch yields 18 slices. Flour measurement and slice size change the total. The bread contains wheat and is not gluten-free.
Print
Easy Sourdough French Bread
Description
Two lean French-style loaves made with active sourdough starter. Suggested formula; not kitchen-tested here.
Yield: 2 loaves | Total: Roughly 7–12 hours after the starter is ready, including cooling; longer in cool conditions
Ingredients
- 3¾ cups bread flour, spooned and leveled
- 1¼ cups water
- ½ cup ripe 100% hydration sourdough starter, stirred down before measuring
- 1½ teaspoons fine table salt
- A little flour for shaping and optional oil for the container
Instructions
- Mix starter and water, then add flour and salt. Stir until fully moistened. Cover for 30 minutes.
- Perform three gentle sets of folds at approximately 30-minute intervals.
- Continue bulk fermentation until expanded roughly 50–75%, aerated, and lighter. Allow about 4–7 hours total from mixing near 75–78°F, adjusting to the dough.
- Divide into two portions, gently preshape, cover, and rest 20 minutes.
- Shape into 13–15-inch loaves. Place seam-side down on parchment with space between them, or use a supported towel for proofing before transferring.
- Cover and proof until puffy, usually about 1–3 hours. Preheat the oven to 450°F near the end.
- Make three or four diagonal scores per loaf. Bake 10 minutes at 450°F, then reduce to 425°F and bake another 15–25 minutes until deeply golden and baked through. Optional steam should be used only with suitable metal cookware and an oven that permits it.
- Cool on a rack at least 1 hour before slicing.
Storage: Enjoy within about 2 days at room temperature, or freeze for up to 3 months for best quality.
Estimated nutrition: Approximately 100–120 calories per slice if the batch yields 18 slices. Flour measurement and slice size change the total. The bread contains wheat and is not gluten-free.