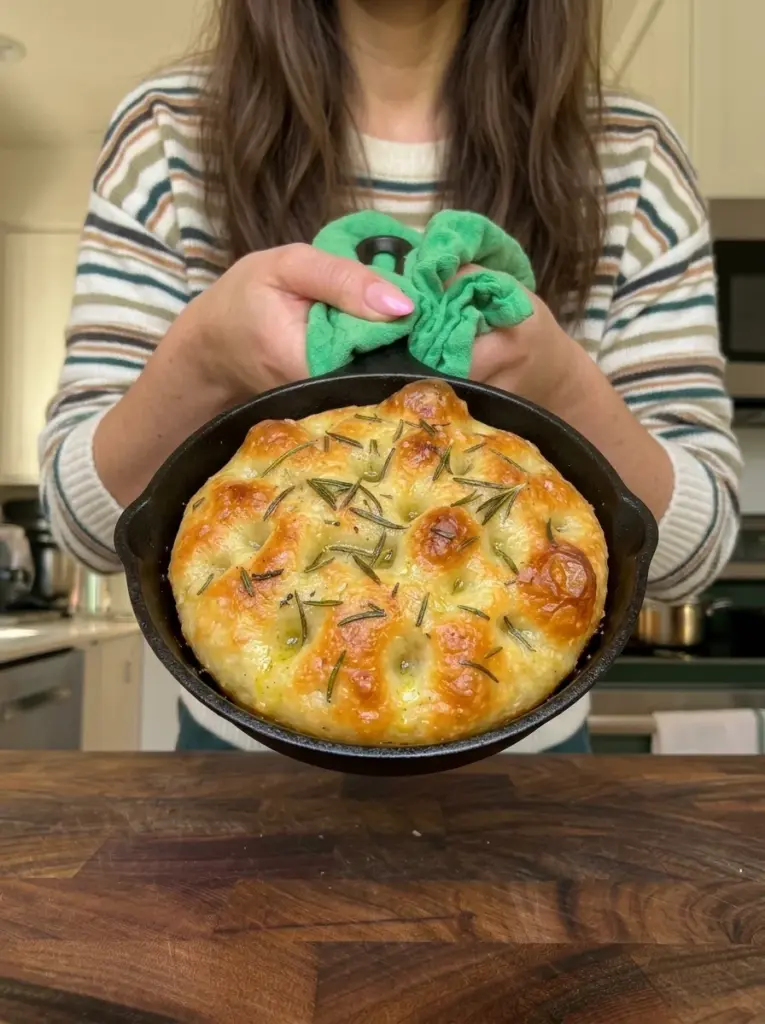
Sometimes, all you want is a warm piece of homemade bread without the commitment of baking an entire loaf. You want something golden and crispy on the outside, soft and airy in the middle, and full of that delicious olive oil flavor that makes fresh focaccia so irresistible. That’s exactly what this Easy Skillet Focaccia for One delivers.
This small-batch focaccia is made with simple pantry ingredients, requires no kneading, and bakes beautifully in a 6-inch cast-iron skillet. The dough comes together in just a few minutes, then rests until it becomes soft, bubbly, and full of air. A generous coating of olive oil, a little butter, flaky sea salt, and aromatic herbs transforms it into a golden, bakery-style bread with crisp edges and a fluffy, chewy center.
Unlike traditional focaccia recipes that fill an entire sheet pan, this version makes one perfectly portioned bread. It’s ideal for a solo lunch, a cozy dinner, or those moments when you’re craving fresh bread but don’t want leftovers sitting on the counter for days.
The best part is that you don’t need a stand mixer, bread machine, or any complicated bread-making skills. A bowl, a spoon, a small skillet, and a little patience are all you need.
This guide covers everything from choosing the right ingredients and mixing the dough to achieving a golden crust, creating the signature focaccia dimples, experimenting with toppings, troubleshooting common problems, and storing leftovers.
Why You’ll Love This Easy Skillet Focaccia for One
This recipe combines the flavor and texture of traditional Italian focaccia with the convenience of a small-batch bread recipe.
Perfectly portioned for one. Instead of baking a large pan of focaccia, you get one personal-sized bread that’s ideal for enjoying fresh from the oven.
No kneading required. The dough develops its structure during the rising process, so there’s no need to knead it by hand or use a stand mixer.
Made with pantry staples. Flour, yeast, salt, honey, water, and olive oil form the base of the recipe. The remaining ingredients add flavor and help create a beautiful crust.
Crispy edges and a fluffy center. Baking the dough in a buttered, olive-oil-coated cast-iron skillet creates golden, slightly crisp edges while keeping the inside soft and chewy.
Minimal hands-on preparation. Although the dough needs time to rise, most of the preparation is completely hands-off.
Delicious garlic and herb flavor. Italian seasoning, garlic powder, flaky sea salt, and optional rosemary give the bread a savory, aromatic finish.
No special bread-making experience needed. This is a forgiving recipe that’s approachable for beginners, especially because the dough doesn’t require shaping into a traditional loaf.
Versatile enough for any meal. Enjoy it plain, dip it in olive oil, serve it alongside soup, or slice it for a small sandwich.
Easy to customize. You can experiment with different herbs, cheeses, garlic, olives, and other toppings without changing the basic dough.
What Makes Skillet Focaccia Different From Traditional Focaccia?
Focaccia is a traditional Italian flatbread known for its olive oil-rich dough, airy interior, golden crust, and signature dimpled surface.
Most traditional focaccia recipes are prepared in large baking pans and make enough bread for several people. This skillet version uses the same basic principles but reduces the ingredients to create a smaller portion.
The most noticeable difference is the baking vessel.
Instead of using a rectangular sheet pan, this recipe uses a 6-inch cast-iron skillet. Cast iron retains heat exceptionally well, helping the bottom and edges of the focaccia develop a golden crust.
The skillet also gives the bread a naturally round shape and helps maintain its thickness as it rises.
Another important feature is the dough’s moisture content.
Focaccia dough is generally wetter and stickier than ordinary sandwich bread dough. This higher hydration allows the dough to develop a soft, airy interior as moisture turns to steam during baking.
The olive oil also plays an essential role.
It adds flavor, prevents sticking, and helps the bottom and edges become crisp as the bread bakes.
Finally, the distinctive dimples pressed into the surface create small pockets that hold olive oil, flaky salt, and herbs.
These flavorful pockets are part of what makes focaccia different from ordinary flatbread.
The result is a small, round bread with the familiar qualities of classic focaccia: a golden surface, crispy edges, soft center, and rich olive oil flavor.
Ingredients for Easy Skillet Focaccia for One
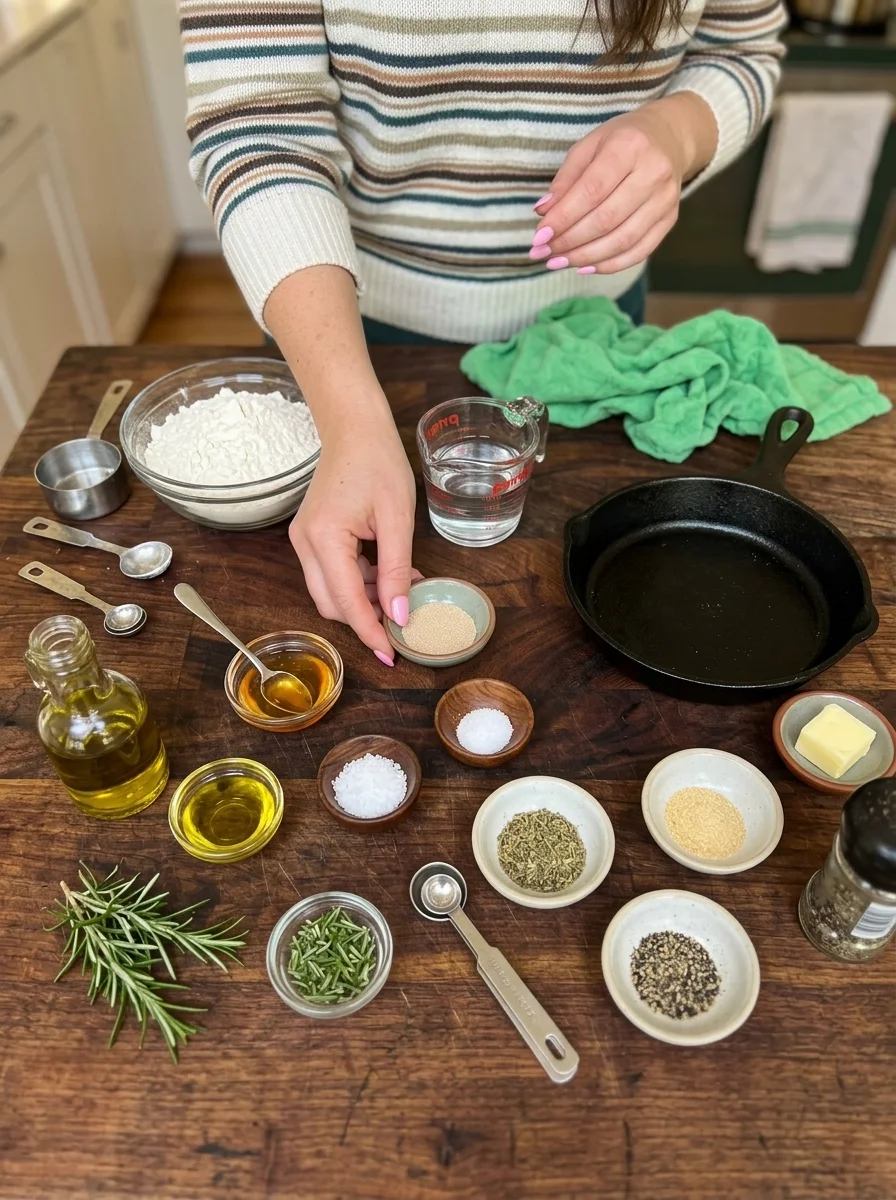
This recipe uses a handful of basic ingredients, with a few simple seasonings to give the finished bread extra flavor.
For the Focaccia Dough
-
1/2 cup plus 2 tablespoons all-purpose flour
-
1/4 teaspoon instant yeast
-
1/4 teaspoon kosher salt
-
1/4 teaspoon honey
-
1/4 cup plus 1 tablespoon lukewarm water
-
2 teaspoons extra-virgin olive oil, plus more for the pan
-
1 teaspoon butter, for greasing
For the Topping
-
1 teaspoon extra-virgin olive oil
-
1/4 teaspoon flaky sea salt
-
1/4 teaspoon Italian seasoning
-
1/4 teaspoon garlic powder
-
1 teaspoon fresh rosemary, chopped, optional
-
Freshly cracked black pepper, optional
Ingredient Notes
All-purpose flour: All-purpose flour works beautifully for this small focaccia recipe. It provides enough gluten to create a soft, chewy structure without making the bread overly tough. Bread flour can also be used, although it may produce a slightly chewier texture and may absorb water differently.
Instant yeast: Instant yeast helps the dough rise and creates the airy interior. It can be mixed directly into the dry ingredients without requiring a separate activation step. Make sure your yeast is fresh and hasn’t expired.
Kosher salt: Salt enhances the flavor of the bread and helps regulate yeast activity. Without enough salt, homemade focaccia can taste bland. Different brands of kosher salt have different crystal sizes, so measurements may vary slightly by brand.
Honey: A small amount of honey adds subtle sweetness and contributes to the flavor of the dough. The quantity is small enough that the finished bread won’t taste sweet. Sugar can be substituted if preferred.
Lukewarm water: Water hydrates the flour and activates the yeast. Use water that feels comfortably warm rather than hot. Water around 100–110°F works well for this recipe, while excessively hot water can damage the yeast.
Extra-virgin olive oil: Olive oil is one of the most important ingredients in focaccia. It contributes flavor, moisture, and a beautifully golden crust. Use an extra-virgin olive oil you enjoy because its flavor will be noticeable in the finished bread.
Butter: Butter is used to grease the skillet and adds richness to the crust. Combining butter with olive oil helps coat the pan and gives the bread a flavorful base.
Flaky sea salt: Flaky salt adds little bursts of seasoning across the surface. Its larger crystals provide a pleasant contrast to the soft bread. If using fine salt instead, reduce the quantity to avoid oversalting.
Italian seasoning: Italian seasoning typically contains a blend of herbs such as oregano, basil, thyme, and rosemary. It gives the bread a savory, Mediterranean-inspired flavor.
Garlic powder: Garlic powder adds a gentle garlic flavor without the risk of fresh garlic pieces burning during baking.
Fresh rosemary: Rosemary is a classic focaccia topping. Its fragrant, slightly pine-like flavor pairs especially well with olive oil and flaky sea salt.
Black pepper: Freshly cracked black pepper adds a subtle warmth and makes the savory topping more flavorful.
How to Make Easy Skillet Focaccia for One
Making this personal-sized focaccia is simple, but allowing the dough enough time to rise is essential for achieving a soft, airy interior.
Step 1: Mix the Dry Ingredients
Add the all-purpose flour, instant yeast, and kosher salt to a small mixing bowl.
Stir everything together with a spoon until the yeast and salt are evenly distributed throughout the flour.
This helps ensure the dough rises consistently and the seasoning is balanced.
Because the recipe uses a small amount of flour, take care when measuring. Spoon the flour into the measuring cup and level it rather than packing it tightly.
Too much flour can make the dough stiff and prevent the focaccia from developing its characteristic airy texture.
Step 2: Add the Wet Ingredients
Pour the lukewarm water into the bowl with the dry ingredients.
Add the honey and 2 teaspoons of extra-virgin olive oil.
Using a spoon or small spatula, stir until the ingredients come together into a soft, sticky dough.
Continue mixing until no dry flour remains at the bottom of the bowl.
The dough should look slightly shaggy and feel sticky.
This is completely normal.
Avoid adding extra flour simply because the dough sticks to the spoon. Focaccia dough is supposed to be softer and wetter than ordinary bread dough.
There’s no need to knead it.
Once everything is combined, the dough is ready for its first rise.
Step 3: Let the Dough Rise
Cover the bowl with plastic wrap, a reusable cover, or a clean kitchen towel.
Place it somewhere warm and free from drafts.
Allow the dough to rise for approximately 1 1/2–2 hours.
During this time, the yeast will produce gas that creates bubbles throughout the dough.
The dough should become noticeably larger, softer, and puffier.
You may also see small bubbles forming on the surface.
The exact rising time depends on your kitchen temperature.
In a warmer kitchen, the dough may rise more quickly. In a cooler environment, it may need additional time.
Rather than relying only on the clock, look for a dough that appears airy and bubbly.
Step 4: Prepare the Cast-Iron Skillet
Once the dough has completed its first rise, prepare a 6-inch cast-iron skillet.
Add 1 teaspoon of butter to the skillet and spread it across the bottom and sides.
Drizzle in a little extra-virgin olive oil and coat the pan evenly.
Make sure the bottom and lower sides are well coated.
This layer of fat helps prevent sticking and contributes to the crispy, golden crust.
If your skillet is not well seasoned, take extra care to grease it thoroughly.
A small oven-safe baking dish can also work, although the crust may turn out slightly different from one baked in cast iron.
Step 5: Transfer the Dough Into the Skillet
Lightly coat your hands with olive oil to prevent the sticky dough from clinging to your fingers.
Gently lift the risen dough from the mixing bowl and place it in the prepared skillet.
Fold the dough over itself once or twice to give it a little structure.
Be gentle during this process.
You want to preserve as much of the air inside the dough as possible.
Carefully stretch the dough toward the edges of the skillet.
If it resists stretching or springs back, allow it to rest for 5–10 minutes before trying again.
Avoid pressing the dough flat or squeezing out the bubbles.
The dough doesn’t need to reach every edge immediately because it will continue relaxing and expanding during the second rise.
Step 6: Let the Dough Rise Again
Cover the skillet loosely and place it in a warm location.
Allow the dough to rise for another 45–60 minutes.
During this second rise, the dough should become soft, airy, and noticeably puffy.
It may spread farther toward the edges of the skillet as it relaxes.
This step helps create the light interior that makes focaccia so enjoyable.
Don’t rush the second rise.
If the dough hasn’t become puffy after 45 minutes, give it a little more time.
A properly risen dough should look soft and slightly jiggly when the skillet is moved gently.
Step 7: Preheat the Oven
Toward the end of the second rise, preheat your oven to 425°F.
Allow the oven to reach the correct temperature before baking.
A properly preheated oven helps the focaccia rise quickly during the first few minutes of baking and encourages the surface to develop a golden crust.
Place an oven rack near the middle of the oven for even baking.
Step 8: Dimple the Dough
Once the dough is puffy and ready to bake, drizzle 1 teaspoon of extra-virgin olive oil over the surface.
Lightly oil your fingertips.
Gently press your fingertips into the dough to create deep dimples across the top.
Press firmly enough to make visible indentations, but avoid tearing through the dough.
The dimples should create small pockets that hold olive oil and seasonings.
Work carefully so you don’t completely deflate the dough.
A little deflation is normal during dimpling, but the dough should retain most of its airy structure.
Step 9: Add the Seasonings
Sprinkle the flaky sea salt evenly over the dimpled dough.
Add the Italian seasoning and garlic powder.
If using fresh rosemary, scatter the chopped leaves across the surface.
Finish with a little freshly cracked black pepper if desired.
Try to distribute the seasonings evenly so every bite has a balanced flavor.
The olive oil on the surface will help the herbs and seasonings adhere to the dough.
Step 10: Bake the Focaccia
Carefully transfer the skillet to the preheated oven.
Bake at 425°F for approximately 18–22 minutes.
As the bread bakes, the dough will expand slightly and the top will begin turning golden.
The olive oil around the edges helps create a crisp crust.
The focaccia is ready when the surface is golden brown, the edges look crisp, and the center appears fully baked.
If the bread still looks pale after 18 minutes, continue baking for a few more minutes while watching closely.
Because this is a small focaccia, it can brown quickly near the end of baking.
Avoid leaving it in the oven longer than necessary, as overbaking can dry out the center.
Step 11: Cool Slightly and Serve
Remove the skillet from the oven and place it on a heat-safe surface.
Allow the focaccia to cool in the skillet for approximately 5 minutes.
This short cooling period helps the bread settle and makes it easier to remove.
Carefully loosen the edges with a spatula if needed.
Lift the focaccia out of the skillet and transfer it to a cutting board or cooling rack.
The bottom should be golden, while the inside remains soft and chewy.
Serve warm.
You can tear it apart with your hands, cut it into wedges, or slice it horizontally to make a small sandwich.
Time and Yield
-
Prep Time: Approximately 10 minutes
-
First Rise: 1 1/2–2 hours
-
Second Rise: 45–60 minutes
-
Total Rise Time: 2 hours 15 minutes to 3 hours
-
Cook Time: 18–22 minutes
-
Cooling Time: 5 minutes
-
Total Time: Approximately 2 hours 50 minutes to 3 hours 40 minutes
-
Yield: 1 personal-sized focaccia
-
Servings: 1
-
Calories: Approximately 390, depending on the amount of oil used and ingredient brands
Most of the total time is hands-off rising, so the actual work involved is minimal. The calorie estimate is approximate; the exact amount will depend particularly on how much additional olive oil is used to grease the skillet.
Tips for the Best Easy Skillet Focaccia
A few simple techniques can help you achieve the ideal combination of crispy edges, a golden surface, and a fluffy center.
Measure the flour carefully. Because this is a small recipe, even a little extra flour can change the dough’s texture. Avoid packing flour into the measuring cup.
Keep the dough sticky. Focaccia dough should be soft and slightly wet. Adding too much flour can make the finished bread dense and dry.
Use fresh yeast. Old or inactive yeast may prevent the dough from rising properly. Check the expiration date before starting.
Choose lukewarm water. Water that’s too hot can damage the yeast, while cold water slows the rising process.
Allow enough rising time. The dough should look noticeably puffy and bubbly before moving to the next step. Don’t rush the process simply to follow the clock.
Use a well-greased skillet. The combination of butter and olive oil helps create a flavorful, golden crust and makes the focaccia easier to remove.
Handle the risen dough gently. Avoid squeezing or aggressively stretching the dough after the first rise. Preserving the air bubbles helps create a lighter interior.
Don’t skip the second rise. This resting period allows the dough to relax and expand in the skillet, improving the final texture.
Oil your fingers before dimpling. This prevents sticking and makes it easier to create the classic focaccia indentations.
Use flaky salt for the topping. Flaky sea salt adds texture and little bursts of flavor that complement the olive oil.
Preheat the oven fully. A hot oven encourages good oven spring and helps the crust brown properly.
Let the bread cool briefly. Cutting or tearing into the focaccia immediately after baking can compress the soft interior. A five-minute rest is usually enough.
Topping Ideas and Variations
The basic skillet focaccia is delicious with olive oil, salt, and herbs, but it also works as a blank canvas for different flavors.
Classic Rosemary and Sea Salt Focaccia
For a traditional flavor, keep the topping simple.
Use extra-virgin olive oil, fresh rosemary, and flaky sea salt.
The rosemary becomes fragrant as the bread bakes, while the salt enhances the richness of the olive oil.
This version is especially good for dipping into olive oil or serving alongside Italian-inspired meals.
Garlic Parmesan Skillet Focaccia
Add a light sprinkle of finely grated Parmesan cheese to the top before baking.
The cheese adds a savory, nutty flavor and creates lightly crisp spots on the surface.
For a stronger garlic flavor, increase the garlic powder slightly or brush the finished bread with a small amount of garlic-infused olive oil.
Avoid adding too much cheese because it can weigh down the small dough.
Cheddar Herb Focaccia
Sprinkle a small amount of shredded cheddar cheese over the dough after dimpling.
Add Italian seasoning and black pepper.
As the bread bakes, the cheese melts and creates savory, golden patches on top.
This version works particularly well as a side for soup or chili.
Olive and Rosemary Focaccia
Press a few sliced black or green olives into the dimples before baking.
Add fresh rosemary and flaky sea salt.
The olives provide a briny flavor that pairs naturally with the olive oil-rich bread.
Be mindful of the salt because olives are already salty.
Cherry Tomato Focaccia
Cut a few cherry tomatoes in half and gently press them into the surface of the dough.
Drizzle with olive oil and sprinkle with Italian seasoning.
The tomatoes soften and become slightly jammy as the bread bakes.
Avoid using too many because their moisture can affect the texture of the small focaccia.
Everything Seasoning Focaccia
Replace the Italian seasoning with a small sprinkle of everything bagel seasoning.
The mixture of sesame seeds, dried garlic, dried onion, and salt gives the bread a savory, crunchy topping.
Reduce the additional flaky salt if your seasoning blend already contains salt.
Spicy Garlic Focaccia
Add a pinch of crushed red pepper flakes to the topping.
Combine with garlic powder, Italian seasoning, and olive oil.
This creates a slightly spicy version that’s especially good with pasta dishes or tomato soup.
Lemon and Thyme Focaccia
Add a little fresh lemon zest and chopped thyme to the surface before baking.
The citrus brightens the rich olive oil flavor, while thyme adds a delicate herbal note.
This variation pairs particularly well with chicken, fish, or vegetable dishes.
What to Serve With Easy Skillet Focaccia for One
This personal-sized focaccia is versatile enough to enjoy as a snack, a side dish, or part of a complete meal.
Olive oil and balsamic vinegar: Serve warm focaccia with a small dish of extra-virgin olive oil and balsamic vinegar for dipping. The bread’s airy interior absorbs the flavorful oil beautifully.
Tomato soup: Crispy focaccia is excellent for dipping into creamy tomato soup. The savory herbs and garlic complement the bright tomato flavor.
Minestrone: Serve the bread alongside a bowl of vegetable-packed minestrone for a comforting lunch or dinner.
Pasta dishes: Focaccia pairs naturally with pasta, especially dishes featuring tomato sauce, garlic, olive oil, or creamy sauces.
Fresh salads: A small focaccia can turn a simple green salad, Greek salad, or Caprese salad into a more satisfying meal.
Grilled chicken: Serve it alongside grilled or roasted chicken and vegetables for a simple dinner.
Eggs for breakfast: Warm focaccia is delicious with scrambled eggs, fried eggs, or an omelet.
As sandwich bread: Slice the focaccia horizontally and fill it with mozzarella, tomatoes, roasted vegetables, or your favorite sandwich ingredients.
Cheese and charcuterie: Cut the focaccia into small pieces and serve it with cheese, olives, and other savory snacks.
Plain and warm: Sometimes the best way to enjoy fresh focaccia is simply to tear off a piece while it’s still warm and appreciate the crispy crust and soft interior.
Troubleshooting Common Problems
Homemade focaccia is relatively forgiving, but small changes in ingredients, temperature, and handling can affect the final result.
My Focaccia Dough Didn’t Rise
If the dough hasn’t become puffy after the recommended rising time, the yeast may be inactive or the kitchen may be too cold.
Check the expiration date on your yeast.
Make sure the water used to mix the dough wasn’t excessively hot.
If your kitchen is cool, move the covered bowl to a slightly warmer location and allow more time.
The dough should show visible signs of rising before you continue.
My Focaccia Is Dense Instead of Fluffy
Dense focaccia is often caused by insufficient rising time, too much flour, or rough handling.
Make sure the dough becomes noticeably puffy during both rises.
Avoid adding extra flour to make the dough easier to handle.
When transferring it to the skillet, use gentle movements to preserve the air bubbles.
My Dough Is Too Sticky
Sticky dough is normal for focaccia.
Instead of adding more flour, lightly coat your hands and spatula with olive oil.
This makes the dough easier to handle without changing its hydration.
If the dough is extremely liquid and cannot hold any shape, double-check your flour and water measurements.
My Dough Keeps Springing Back
If the dough resists stretching toward the edges of the skillet, the gluten may need more time to relax.
Let it rest for another 5–10 minutes.
Then gently stretch it again.
Avoid forcing the dough because aggressive stretching can tear it or squeeze out the trapped air.
My Focaccia Isn’t Crispy on the Bottom
A soft bottom may result from insufficient olive oil, a poorly preheated oven, or a baking dish that doesn’t conduct heat as efficiently as cast iron.
Make sure the skillet is well coated with butter and olive oil.
Use a properly preheated oven and bake until the edges are golden.
A cast-iron skillet generally produces a crispier bottom than a glass baking dish.
My Focaccia Is Browning Too Quickly
If the top becomes dark before the center is fully baked, your oven may run hotter than expected.
Move the skillet to a slightly lower oven rack or loosely cover the top with foil for the remaining baking time.
Check the bread a few minutes before the recommended baking time ends.
My Focaccia Is Dry
Dry focaccia can result from too much flour or excessive baking.
Measure the flour carefully and avoid adding extra flour during mixing.
Bake only until the top is golden and the center is cooked through.
Because the recipe makes a small bread, it can dry out more quickly than a large pan of focaccia.
My Focaccia Sticks to the Skillet
Sticking can happen if the skillet isn’t adequately greased or if its seasoning is worn.
Coat the bottom and sides with butter and olive oil before adding the dough.
After baking, let the bread rest for approximately five minutes before attempting to remove it.
Use a thin spatula to loosen the edges gently.
My Focaccia Has Large Uneven Bubbles
Large bubbles are normal in focaccia and contribute to its characteristic airy texture.
However, if one section rises dramatically while another stays flat, the dough may not have been distributed evenly in the skillet.
Gently stretch it toward the edges before the second rise and dimple the surface evenly before baking.
My Focaccia Tastes Too Salty
This can happen if the dough salt and topping salt are both measured generously.
Use the recommended quantities and remember that flaky sea salt has a different texture from fine salt.
If adding salty toppings such as olives, Parmesan, or everything seasoning, reduce the additional salt accordingly.
Storage and Reheating
This small skillet focaccia tastes best on the day it’s baked, when the crust is crisp and the center is soft.
However, leftovers can be stored and reheated successfully.
Room Temperature Storage
Allow the focaccia to cool completely.
Transfer it to an airtight container or wrap it tightly.
Store at room temperature for up to 1 day.
Avoid leaving it uncovered because the bread can dry out quickly.
Refrigerator Storage
For slightly longer storage, place the cooled focaccia in an airtight container and refrigerate for up to 3 days.
Refrigeration can make bread firmer and accelerate staling, so reheating is recommended before serving.
Freezer Storage
To freeze the focaccia, allow it to cool completely.
Wrap it tightly in plastic wrap or freezer-safe packaging.
Place it in a freezer bag or airtight container.
Freeze for up to 1 month for best quality.
Thaw at room temperature or reheat directly from frozen, allowing additional heating time as needed.
How to Reheat Skillet Focaccia
Preheat your oven to 350°F.
Place the focaccia on a baking sheet or in an oven-safe skillet.
Warm for approximately 5–8 minutes, or until heated through and the edges become crisp again.
For frozen focaccia, additional time may be needed.
Avoid overheating because the bread can become dry.
A toaster oven also works well for reheating small portions.
Microwaving is possible, but it tends to soften the crust rather than restore its crisp texture.
Frequently Asked Questions
Can I Make Skillet Focaccia Without Kneading?
Yes. This recipe is completely no-knead.
The dough develops its structure during the rising process, so you don’t need to knead it by hand or use a mixer.
Simply stir the ingredients together until combined and allow the dough to rise.
What Size Skillet Should I Use?
A 6-inch cast-iron skillet is ideal for this recipe.
It provides enough room for the dough to spread while maintaining a thick, fluffy center.
A larger skillet may produce thinner focaccia, while a smaller skillet may create a thicker bread that needs additional baking time.
Can I Use a Regular Baking Dish Instead of Cast Iron?
Yes. A small oven-safe baking dish can be used.
However, cast iron retains heat well and helps produce a particularly crisp bottom.
If using a different baking dish, monitor the bread closely because baking times and browning may vary.
Can I Use Active Dry Yeast Instead of Instant Yeast?
Yes.
You can substitute active dry yeast for instant yeast.
For reliable results, dissolve the active dry yeast in the lukewarm water with the honey and let it sit for approximately 5–10 minutes before adding it to the flour.
The rising time may be slightly longer.
Can I Use Bread Flour Instead of All-Purpose Flour?
Yes.
Bread flour contains more protein and can create a slightly chewier texture.
It may also absorb more water, so the dough could feel a little different.
For the original soft and fluffy texture, all-purpose flour works very well.
Why Is My Focaccia Dough So Sticky?
Focaccia dough contains a relatively high proportion of water compared with many traditional bread doughs.
This moisture helps create the soft, airy interior.
The dough should be sticky rather than firm.
Use lightly oiled hands when handling it instead of adding unnecessary flour.
Can I Make This Focaccia Without Honey?
Yes.
You can replace the honey with a small amount of granulated sugar or omit it.
The yeast can still ferment the flour without added honey, although rising time and flavor may vary slightly.
Can I Use Regular Olive Oil Instead of Extra-Virgin Olive Oil?
Yes.
Regular olive oil will work for both the dough and the topping.
Extra-virgin olive oil is recommended for its richer flavor, but either type can produce good results.
Can I Use Dried Rosemary Instead of Fresh Rosemary?
Yes.
Dried rosemary can be substituted, but it has a more concentrated flavor.
Use a smaller quantity and crush it lightly before sprinkling it over the dough.
Can I Add Cheese to the Dough?
Yes.
You can sprinkle a small amount of shredded or grated cheese over the surface before baking.
Parmesan, cheddar, and mozzarella are all options.
Avoid adding too much cheese because it can weigh down the small dough and affect the texture.
Can I Add Garlic to Skillet Focaccia?
Absolutely.
Garlic powder is already included in the topping, but you can add a little more if you prefer a stronger garlic flavor.
You can also brush the baked focaccia with garlic-infused olive oil.
If using fresh garlic, be careful because small pieces can burn at high baking temperatures.
How Do I Know When the Dough Has Risen Enough?
Look for a noticeable increase in volume, a soft and puffy appearance, and small bubbles on the surface.
The dough should feel airy rather than dense.
Rising times vary with temperature, so visual cues are more reliable than the clock alone.
Can I Let the Dough Rise Overnight?
Yes, with some adjustments.
For an overnight rise, you can refrigerate the covered dough rather than leaving it at room temperature for an extended period.
A cold rise slows yeast activity and allows flavor to develop gradually.
Because this recipe uses a small amount of dough, you may need to experiment with yeast quantity and rising time to avoid overproofing.
Allow the chilled dough time to become puffy in the skillet before baking.
Can I Double This Recipe?
Yes.
Double the ingredients to make a larger batch.
Use a larger skillet or baking dish so the dough has enough room to spread.
Baking time may need adjustment depending on the thickness of the bread.
Why Do You Dimple Focaccia Dough?
Dimples are a signature feature of focaccia.
They create small pockets that hold olive oil, salt, and herbs.
They also help distribute the dough across the pan and give the bread its recognizable surface texture.
Can I Make Focaccia Without a Cast-Iron Skillet?
Yes.
You can use another oven-safe skillet or a small metal baking pan.
The final crust may vary depending on the material and thickness of the pan.
A metal pan generally produces a crispier bottom than a glass dish.
Can I Cook This Focaccia on the Stovetop?
This particular recipe is designed for oven baking.
Cooking it entirely on the stovetop may cause the bottom to brown before the center is fully cooked.
For the most reliable results, bake it in a preheated oven as directed.
Why Is My Focaccia Pale?
Pale focaccia may result from insufficient baking time, an oven that isn’t fully preheated, or too little olive oil on the surface.
Make sure the oven reaches 425°F before baking.
Allow the bread to bake until the top develops a golden color.
A light drizzle of olive oil helps encourage browning.
Can I Use Whole Wheat Flour?
Yes, but whole wheat flour absorbs more water and produces a denser texture.
For a first attempt, replace only a portion of the all-purpose flour with whole wheat flour.
You may need to adjust the water slightly to maintain a soft, sticky dough.
Is Skillet Focaccia the Same as Pizza Dough?
Focaccia and pizza dough share several basic ingredients, including flour, water, yeast, salt, and olive oil.
However, focaccia dough is generally wetter and contains more olive oil.
It is also baked thicker, creating a softer, more airy interior.
Pizza dough is typically stretched thinner and baked to create a different crust texture.
Can I Use This Focaccia for Sandwiches?
Yes.
Once the bread has cooled slightly, slice it horizontally and fill it with your favorite ingredients.
Mozzarella, tomatoes, grilled vegetables, chicken, and deli meats all work well.
The focaccia’s soft center and flavorful crust make it excellent for small sandwiches.
How Long Does Homemade Skillet Focaccia Stay Fresh?
It tastes best on the day it’s baked.
At room temperature, store it in an airtight container for up to 1 day.
For longer storage, refrigerate for up to 3 days or freeze for up to 1 month.
Reheating in the oven helps restore some of the original crispness.
Can I Make This Recipe Vegan?
Yes, with a few substitutions.
Replace the honey with sugar or another suitable vegan sweetener.
Use plant-based butter or additional olive oil instead of regular butter.
The remaining basic dough ingredients are plant-based.
Can I Make This Recipe Gluten-Free?
A direct substitution with gluten-free flour may not produce the same result because gluten helps create focaccia’s chewy, airy structure.
You would need a gluten-free flour blend designed for yeast breads, and the water quantity or preparation method may require adjustments.
For reliable results, use a recipe specifically developed for gluten-free focaccia.
Final Thoughts
Easy Skillet Focaccia for One is the perfect solution when you’re craving homemade bread but don’t want to bake an entire loaf. With a handful of simple ingredients, a small cast-iron skillet, and a little patience while the dough rises, you can make a golden, flavorful focaccia with crispy edges and a soft, fluffy center.
The no-knead method makes this recipe approachable even if you don’t have much experience baking bread. All you need to do is mix the dough, allow it to rise, gently transfer it to the skillet, and finish it with olive oil and your favorite seasonings.
The combination of butter, extra-virgin olive oil, flaky sea salt, garlic, and herbs gives the bread a rich, savory flavor that’s delicious on its own or paired with soups, salads, pasta, and other meals.
One of the best things about this recipe is its versatility. Keep it simple with rosemary and sea salt, add Parmesan for a cheesy variation, or experiment with olives, cherry tomatoes, and different herbs.
Whether you’re making it for a quiet lunch, a cozy dinner, or simply because you want warm bread straight from the oven, this personal-sized focaccia delivers the comfort of homemade baking without the need for a large batch.
Once you’ve experienced the crispy golden crust, airy interior, and wonderful olive oil flavor, this easy skillet focaccia may become your favorite way to satisfy a fresh bread craving.
Print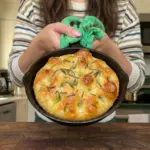
Easy Skillet Focaccia for One
Ingredients
This recipe uses a handful of basic ingredients, with a few simple seasonings to give the finished bread extra flavor.
For the Focaccia Dough
1/2 cup plus 2 tablespoons all-purpose flour
1/4 teaspoon instant yeast
1/4 teaspoon kosher salt
1/4 teaspoon honey
1/4 cup plus 1 tablespoon lukewarm water
2 teaspoons extra-virgin olive oil, plus more for the pan
1 teaspoon butter, for greasing
For the Topping
1 teaspoon extra-virgin olive oil
1/4 teaspoon flaky sea salt
1/4 teaspoon Italian seasoning
1/4 teaspoon garlic powder
1 teaspoon fresh rosemary, chopped, optional
Freshly cracked black pepper, optional
Instructions
Making this personal-sized focaccia is simple, but allowing the dough enough time to rise is essential for achieving a soft, airy interior.
Step 1: Mix the Dry Ingredients
Add the all-purpose flour, instant yeast, and kosher salt to a small mixing bowl.
Stir everything together with a spoon until the yeast and salt are evenly distributed throughout the flour.
This helps ensure the dough rises consistently and the seasoning is balanced.
Because the recipe uses a small amount of flour, take care when measuring. Spoon the flour into the measuring cup and level it rather than packing it tightly.
Too much flour can make the dough stiff and prevent the focaccia from developing its characteristic airy texture.
Step 2: Add the Wet Ingredients
Pour the lukewarm water into the bowl with the dry ingredients.
Add the honey and 2 teaspoons of extra-virgin olive oil.
Using a spoon or small spatula, stir until the ingredients come together into a soft, sticky dough.
Continue mixing until no dry flour remains at the bottom of the bowl.
The dough should look slightly shaggy and feel sticky.
This is completely normal.
Avoid adding extra flour simply because the dough sticks to the spoon. Focaccia dough is supposed to be softer and wetter than ordinary bread dough.
There’s no need to knead it.
Once everything is combined, the dough is ready for its first rise.
Step 3: Let the Dough Rise
Cover the bowl with plastic wrap, a reusable cover, or a clean kitchen towel.
Place it somewhere warm and free from drafts.
Allow the dough to rise for approximately 1 1/2–2 hours.
During this time, the yeast will produce gas that creates bubbles throughout the dough.
The dough should become noticeably larger, softer, and puffier.
You may also see small bubbles forming on the surface.
The exact rising time depends on your kitchen temperature.
In a warmer kitchen, the dough may rise more quickly. In a cooler environment, it may need additional time.
Rather than relying only on the clock, look for a dough that appears airy and bubbly.
Step 4: Prepare the Cast-Iron Skillet
Once the dough has completed its first rise, prepare a 6-inch cast-iron skillet.
Add 1 teaspoon of butter to the skillet and spread it across the bottom and sides.
Drizzle in a little extra-virgin olive oil and coat the pan evenly.
Make sure the bottom and lower sides are well coated.
This layer of fat helps prevent sticking and contributes to the crispy, golden crust.
If your skillet is not well seasoned, take extra care to grease it thoroughly.
A small oven-safe baking dish can also work, although the crust may turn out slightly different from one baked in cast iron.
Step 5: Transfer the Dough Into the Skillet
Lightly coat your hands with olive oil to prevent the sticky dough from clinging to your fingers.
Gently lift the risen dough from the mixing bowl and place it in the prepared skillet.
Fold the dough over itself once or twice to give it a little structure.
Be gentle during this process.
You want to preserve as much of the air inside the dough as possible.
Carefully stretch the dough toward the edges of the skillet.
If it resists stretching or springs back, allow it to rest for 5–10 minutes before trying again.
Avoid pressing the dough flat or squeezing out the bubbles.
The dough doesn’t need to reach every edge immediately because it will continue relaxing and expanding during the second rise.
Step 6: Let the Dough Rise Again
Cover the skillet loosely and place it in a warm location.
Allow the dough to rise for another 45–60 minutes.
During this second rise, the dough should become soft, airy, and noticeably puffy.
It may spread farther toward the edges of the skillet as it relaxes.
This step helps create the light interior that makes focaccia so enjoyable.
Don’t rush the second rise.
If the dough hasn’t become puffy after 45 minutes, give it a little more time.
A properly risen dough should look soft and slightly jiggly when the skillet is moved gently.
Step 7: Preheat the Oven
Toward the end of the second rise, preheat your oven to 425°F.
Allow the oven to reach the correct temperature before baking.
A properly preheated oven helps the focaccia rise quickly during the first few minutes of baking and encourages the surface to develop a golden crust.
Place an oven rack near the middle of the oven for even baking.
Step 8: Dimple the Dough
Once the dough is puffy and ready to bake, drizzle 1 teaspoon of extra-virgin olive oil over the surface.
Lightly oil your fingertips.
Gently press your fingertips into the dough to create deep dimples across the top.
Press firmly enough to make visible indentations, but avoid tearing through the dough.
The dimples should create small pockets that hold olive oil and seasonings.
Work carefully so you don’t completely deflate the dough.
A little deflation is normal during dimpling, but the dough should retain most of its airy structure.
Step 9: Add the Seasonings
Sprinkle the flaky sea salt evenly over the dimpled dough.
Add the Italian seasoning and garlic powder.
If using fresh rosemary, scatter the chopped leaves across the surface.
Finish with a little freshly cracked black pepper if desired.
Try to distribute the seasonings evenly so every bite has a balanced flavor.
The olive oil on the surface will help the herbs and seasonings adhere to the dough.
Step 10: Bake the Focaccia
Carefully transfer the skillet to the preheated oven.
Bake at 425°F for approximately 18–22 minutes.
As the bread bakes, the dough will expand slightly and the top will begin turning golden.
The olive oil around the edges helps create a crisp crust.
The focaccia is ready when the surface is golden brown, the edges look crisp, and the center appears fully baked.
If the bread still looks pale after 18 minutes, continue baking for a few more minutes while watching closely.
Because this is a small focaccia, it can brown quickly near the end of baking.
Avoid leaving it in the oven longer than necessary, as overbaking can dry out the center.
Step 11: Cool Slightly and Serve
Remove the skillet from the oven and place it on a heat-safe surface.
Allow the focaccia to cool in the skillet for approximately 5 minutes.
This short cooling period helps the bread settle and makes it easier to remove.
Carefully loosen the edges with a spatula if needed.
Lift the focaccia out of the skillet and transfer it to a cutting board or cooling rack.
The bottom should be golden, while the inside remains soft and chewy.
Serve warm.
You can tear it apart with your hands, cut it into wedges, or slice it horizontally to make a small sandwich