
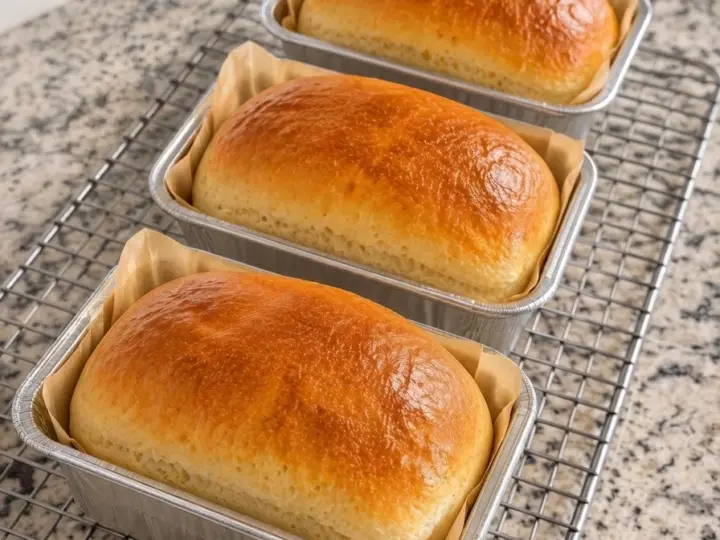
These No-Knead Mini Milk Bread Loaves have golden, buttery tops and soft, tender centers that slice beautifully once cooled. Whole milk enriches the dough, a little sugar adds gentle sweetness, and melted butter gives the bread a comforting homemade flavor.
The dough comes together in one bowl with a sturdy spoon. After mixing, it needs two rises: one in the bowl and another in the mini loaf pans. There’s no countertop kneading or detailed shaping, making this a manageable recipe for a relaxed baking day.
Each batch makes three small loaves, perfect for breakfast toast, little sandwiches, or slices served alongside dinner. Enjoy one fresh and freeze the others for later.
A final brushing of melted butter softens the golden crusts and adds flavor. Give the loaves enough time to cool before slicing so their delicate centers can finish setting.
Yield: 3 mini loaves
Prep Time: 15 minutes
First Rise: 60–90 minutes
Second Rise: 35–50 minutes
Bake Time: 25–30 minutes
Cooling Time: Approximately 45 minutes
Total Time: Approximately 3 hours–3 hours 50 minutes
What Are No-Knead Mini Milk Bread Loaves?
These are small, milk-enriched yeast loaves made with a soft dough that you stir rather than knead.
Mixing hydrates the flour and begins developing the dough’s structure. During the first rise, the dough becomes airy and more cohesive. The loaf pans then support it through the second rise and baking.
Milk, butter, and sugar give the bread a tender texture and mild flavor. This recipe uses a straightforward mixing method rather than the cooked flour paste found in some styles of milk bread.
Expect a soft everyday bread with a fine, slightly irregular crumb. The loaves are easy to slice for toast and small sandwiches once completely cooled.
Why You’ll Love This Recipe
- No kneading required: Mix with a spoon and portion with a spatula.
- Three convenient loaves: Keep one fresh and save the others.
- Soft, tender texture: Whole milk and butter enrich the crumb.
- Simple ingredients: The dough uses familiar baking staples.
- Minimal shaping: Divide the sticky dough directly among the pans.
- Versatile flavor: Pair with sweet spreads, savory fillings, or dinner.
Ingredients 🛒
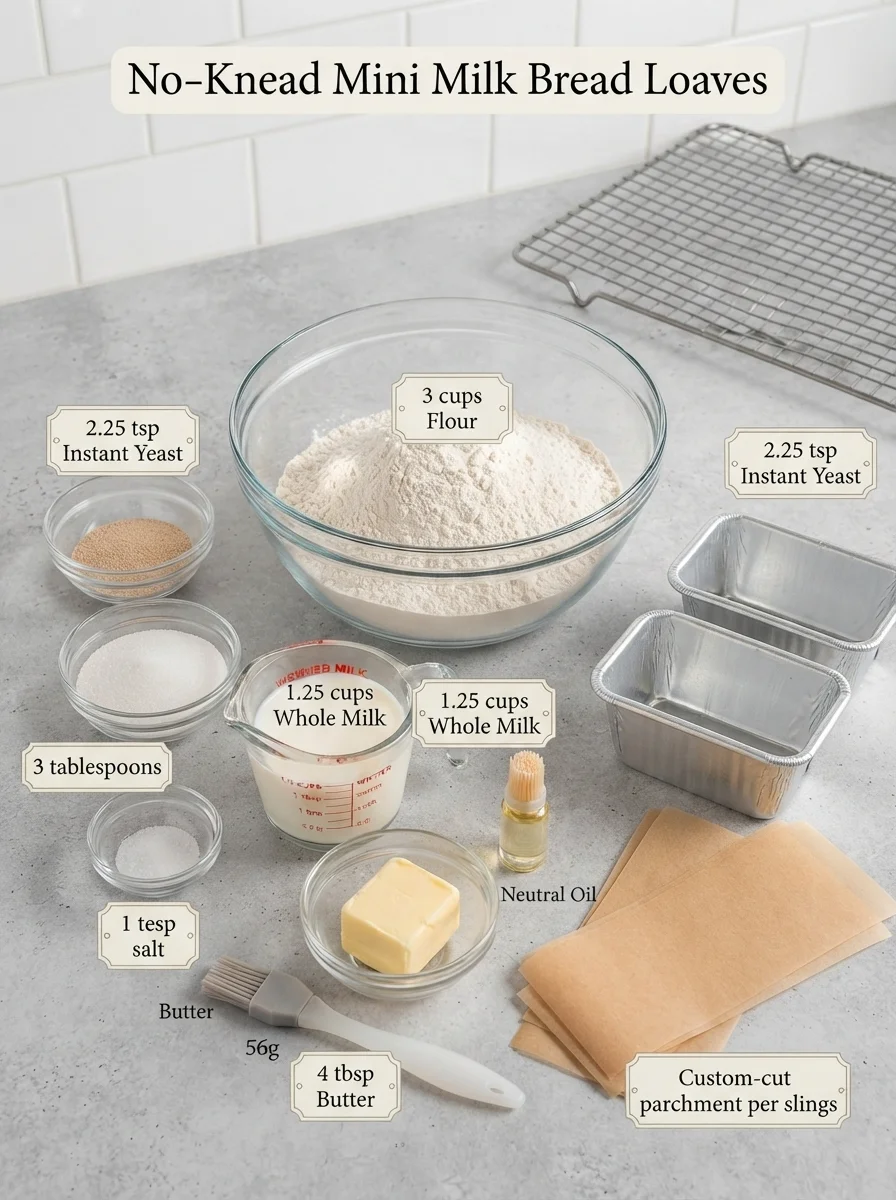
- 3 cups (360 g) all-purpose flour, spooned and leveled
- 2¼ teaspoons (7 g) instant yeast
- 3 tablespoons (38 g) granulated sugar
- 1 teaspoon (6 g) fine salt
- 1¼ cups (300 ml) whole milk, warmed to 100–110°F (38–43°C)
- 4 tablespoons (56 g) unsalted butter, divided: 3 tablespoons melted for the dough and 1 tablespoon melted for finishing
- 1 teaspoon neutral oil, for greasing the pans
Equipment: Three mini loaf pans approximately 5¾ × 3 × 2 inches each, parchment paper, a large bowl, a sturdy spoon, a silicone spatula, a baking sheet, and a wire rack.
Ingredient Notes
All-Purpose Flour
All-purpose flour provides structure while keeping the bread tender.
For consistent results, weigh the flour. If using measuring cups, fluff the flour, spoon it into the cup, and level the top. Scooping directly from the bag can pack in extra flour and produce heavier loaves.
Instant Yeast
Instant yeast mixes directly with the dry ingredients, so there’s no separate activation step.
Use yeast stored according to its package instructions. If it has lost activity, the dough may rise slowly or fail to expand.
Whole Milk
Whole milk contributes richness, tenderness, and browning.
Warm it gently to 100–110°F (38–43°C). If it becomes too hot, allow it to cool before adding it to the flour mixture.
Butter
Three tablespoons go into the dough, while the remaining tablespoon is reserved for brushing the baked loaves.
Let the dough butter cool until lukewarm after melting. It should still be liquid but no longer hot.
Sugar and Salt
The sugar adds mild sweetness and helps the crust develop color. Salt balances that sweetness and seasons the bread.
Use fine salt for the stated teaspoon measurement; coarse varieties can differ considerably in weight.
How to Make No-Knead Mini Milk Bread Loaves
1. Prepare the Pans
Lightly grease three 5¾ × 3 × 2-inch mini loaf pans with the neutral oil.
Line each with a parchment sling, leaving enough overhang on two sides to lift out the baked bread.
Keep the paper from folding inward over the dough. Matching pans help the loaves rise and bake at similar rates.
2. Combine the Dry Ingredients
Stir the flour, instant yeast, sugar, and salt together in a large bowl.
Mix thoroughly so the yeast and seasonings are distributed throughout the flour. Choose a bowl with enough space for the dough to double.
3. Stir the Dough
Add the warm milk and 3 tablespoons melted, lukewarm butter.
Stir firmly with a sturdy spoon for 2–3 minutes, scraping the bottom and sides of the bowl. Continue until no dry flour remains.
The dough should be very soft, sticky, and somewhat rough. It won’t look like a smooth, kneaded dough ball.
Avoid adding flour simply to make it easier to handle. The soft consistency is part of this method.
4. Allow the First Rise
Cover the bowl and place it in a warm, draft-free spot.
Let rise for 60–90 minutes, until approximately doubled and visibly airy. Look for expansion and small bubbles rather than relying entirely on the clock.
A cool kitchen may require additional time. Let the dough reach the right appearance before portioning it.
5. Divide Among the Pans
Stir the risen dough briefly to release the largest air pockets.
Scrape equal portions into the prepared pans, approximately 250 g per pan. Depending on measuring and bowl losses, the exact portion weight may vary slightly.
Use a silicone spatula to spread the dough into the corners and smooth the tops. Lightly moistening the spatula with water can help prevent sticking.
6. Let the Loaves Rise Again
Cover loosely, leaving room for expansion.
Let rise for 35–50 minutes, until puffy and approaching the pan rims. The dough should look noticeably fuller than when it first entered the pans.
Meanwhile, preheat the oven to 350°F (175°C).
7. Bake Until Golden
Place the pans on a baking sheet with space between them.
Bake on the middle rack for 25–30 minutes, until golden brown and the centers register approximately 190–195°F (88–91°C).
If the tops brown before the centers are ready, cover loosely with foil and continue baking.
8. Brush with Butter
Remove the pans from the oven.
Brush the warm tops with the remaining 1 tablespoon melted butter, dividing it among the three loaves.
The butter gives the crust a gentle sheen and helps keep it soft.
9. Cool Before Slicing
Let the loaves stand in their pans for 5 minutes.
Lift out using the parchment slings, remove the paper, and transfer to a wire rack. Cool for approximately 40 more minutes, or longer if the centers still feel hot.
Slice with a serrated knife once the bread is cool enough to cut cleanly.
Tips for Soft, Light Loaves 💡
Keep the Dough Sticky
Use a spatula to manage the dough rather than working extra flour into it. Too much flour can make the finished crumb dense.
Mix Thoroughly
Although there’s no kneading, the initial stirring matters. Scrape the bowl well and mix until the flour is fully incorporated.
Watch the Dough During Both Rises
Temperature affects fermentation. A warm room speeds the rise, while a cool room slows it.
Check Pan Dimensions
“Mini loaf pan” can describe several sizes. Larger pans produce shorter loaves, while smaller ones may require less dough and a shorter baking time.
Don’t Rush Cooling
Warm bread can compress under the knife and seem gummy. Cooling helps the crumb settle and makes neat slices easier.
Remove the Parchment After Baking
Leaving the paper wrapped around the cooling loaves can trap moisture against their sides. A bare wire rack allows air to circulate.
Easy Variations
Cinnamon Milk Bread
Add ½ teaspoon ground cinnamon to the dry ingredients for a lightly spiced loaf. Serve toasted with butter or apple preserves.
Vanilla Breakfast Loaves
Add ½ teaspoon vanilla extract with the milk. This gives the bread a subtle sweet aroma without changing the basic method.
Herb Milk Bread
Add 1 teaspoon dried Italian seasoning to the flour mixture. The resulting loaves pair well with soup, eggs, and cheese sandwiches.
Sesame-Topped Loaves
Just before baking, brush the risen dough gently with a little milk and sprinkle with sesame seeds. Take care not to press down the dough.
Bread Flour Variation
Replace the all-purpose flour with an equal weight of bread flour for a slightly chewier texture. It may absorb liquid differently, so judge the dough by its soft, sticky consistency.
Serving Suggestions 🍽️
Breakfast Toast
Toast slices lightly and add butter, jam, honey, or peanut butter.
Small Sandwiches
Use fully cooled bread for egg salad, chicken salad, turkey and cheese, or cucumber and cream cheese sandwiches.
Alongside Dinner
Serve with tomato soup, vegetable stew, roasted chicken, or a simple salad.
French Toast
Slightly older slices work well for French toast. Their tender texture absorbs the egg mixture readily, so dip briefly and handle gently.
Grilled Cheese
Cut moderately thick slices, fill with your favorite melting cheese, and cook over gentle heat until golden.
Storage and Freezing 🧊
Room Temperature
Cool completely before wrapping.
Store airtight at cool room temperature for up to 2–3 days. In a warm or humid kitchen, freeze the extra loaves sooner.
Freezing
Wrap whole loaves tightly, then place in freezer bags. Freeze for up to 3 months.
You can also freeze individual slices. Separate portions with parchment if you want to remove only a few at a time.
Thawing
Thaw wrapped loaves at room temperature. Keeping them wrapped during thawing helps prevent the surface from drying out.
Frozen slices can go directly into the toaster.
Warming
To refresh a thawed loaf, wrap loosely in foil and warm at 300°F (150°C) for approximately 10–15 minutes.
Make Ahead
For a predictable schedule, bake and cool all three loaves, then freeze what you won’t use soon. This avoids adjusting the recipe’s fermentation times.
Troubleshooting
The Dough Feels Dry
The flour may have been overmeasured. Before the first rise, add warm milk a teaspoon at a time only if needed to achieve a very soft, sticky dough.
The Dough Isn’t Rising
Give it more time if the room is cool. Check that the yeast is within date and that the milk wasn’t excessively hot.
The Loaves Are Dense
Common causes include excess flour, insufficient rising, or inactive yeast. Measure carefully and let both rises develop fully.
The Tops Brown Too Quickly
Milk and sugar encourage browning. Tent with foil and continue baking until the centers are ready.
The Center Seems Gummy
The bread may be underbaked or sliced while too warm. Check the internal temperature and allow adequate cooling.
The Loaves Sink
The dough may have overproofed or the centers may need more baking. Bake when the dough is puffy and approaching the rims, before it becomes fragile or begins to collapse.
Frequently Asked Questions ❓
1. Do I need a mixer?
No. A sturdy spoon and silicone spatula are sufficient.
2. Is the dough supposed to be sticky?
Yes. It should be very soft and sticky rather than easy to shape by hand.
3. Can I use active dry yeast?
Yes. Follow the package’s hydration guidance, using some of the recipe’s milk rather than adding extra liquid. Rising may take longer.
4. Can I use 2% milk?
Yes. The loaves may be slightly less rich, but the method remains the same.
5. Can I use plant-based milk?
An unsweetened, unflavored alternative may work, though flavor, browning, and texture can differ. Whole dairy milk gives the intended result.
6. Can I replace all the flour with whole-wheat flour?
A full substitution needs adjustments to liquid and rising time. Start with a modest partial replacement and expect a denser crumb.
7. Can I skip the butter finish?
Yes. The tops will be less buttery and may have a slightly firmer crust.
8. Should I score the loaves?
Scoring isn’t necessary for this soft, pan-supported dough.
9. Can I use one large loaf pan?
That changes the proofing height and baking time. Use the three specified mini pans for the intended result.
10. How many slices does each loaf make?
Approximately 8–10 small slices, depending on thickness.
11. Can I slice the bread while hot?
Wait until it has cooled enough to hold its structure. Hot slices can compress and appear gummy.
12. Can I double the recipe?
Yes. Use six matching mini pans and a sufficiently large bowl. Allow space around the pans in the oven and check each loaf for doneness.
Easy No-Knead Mini White Bread Loaves
Description
Yield: 3 mini loaves
Prep: 15 minutes
First Rise: 60–90 minutes
Second Rise: 35–50 minutes
Bake: 25–30 minutes
Cool: Approximately 45 minutes
Total: Approximately 3 hours–3 hours 50 minutes
Ingredients
Ingredients
- 3 cups (360 g) all-purpose flour, spooned and leveled
- 2¼ teaspoons (7 g) instant yeast
- 3 tablespoons (38 g) granulated sugar
- 1 teaspoon (6 g) fine salt
- 1¼ cups (300 ml) whole milk, warmed to 100–110°F (38–43°C)
- 4 tablespoons (56 g) unsalted butter, divided
- 1 teaspoon neutral oil, for greasing
Instructions
Instructions
- Grease three mini loaf pans approximately 5¾ × 3 × 2 inches each. Line with parchment slings.
- Stir together flour, instant yeast, sugar, and salt.
- Add warm milk and 3 tablespoons melted, lukewarm butter. Stir firmly for 2–3 minutes, until no dry flour remains.
- Cover and rise for 60–90 minutes, until approximately doubled and airy.
- Stir briefly to release large bubbles. Divide evenly among the pans, approximately 250 g each. Smooth with a silicone spatula.
- Cover loosely and rise for 35–50 minutes, until puffy and approaching the rims. Preheat the oven to 350°F (175°C).
- Place pans on a baking sheet with space between them. Bake for 25–30 minutes, until golden and approximately 190–195°F (88–91°C) in the centers.
- Brush with the remaining 1 tablespoon melted butter.
- Cool in the pans for 5 minutes, then remove the loaves and parchment. Cool on a rack for approximately 40 more minutes before slicing.