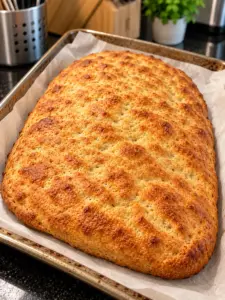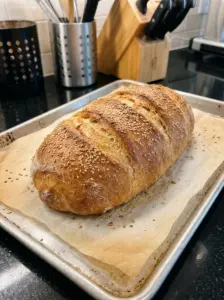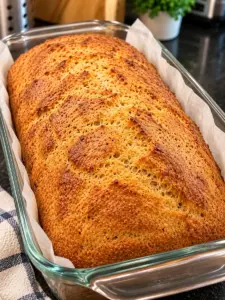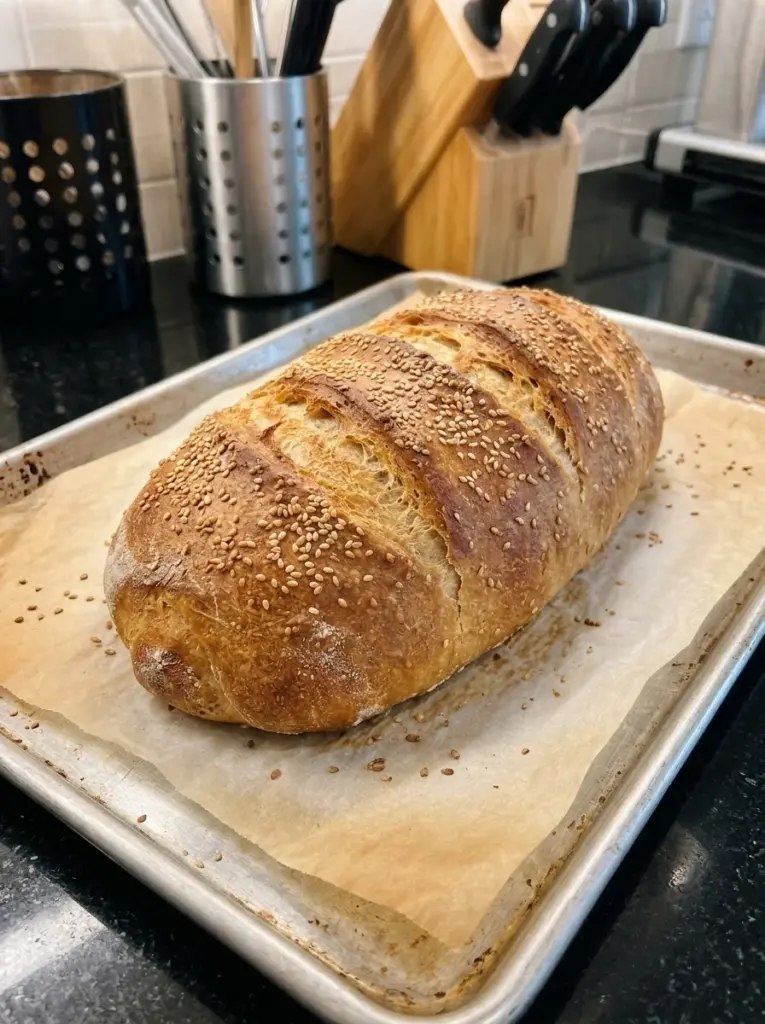
A golden homemade loaf, a tender center, and the aroma of fresh bread can make a simple dinner feel special. This Easy Homemade Italian Bread Loaf uses flour, yeast, water, salt, sugar, and olive oil to create a versatile bread for soups, pasta, sandwiches, and toast. Shape it into a long oval, score the top, and bake it on a sheet pan—no specialty bread pan is required.
Olive oil adds flavor and tenderness, while kneading develops the structure needed to hold the loaf’s shape. Two rises give the dough time to expand before baking. The finished crust is lightly crisp when fresh and softens somewhat during storage, especially if you choose the optional milk wash.
This is an Italian-inspired home loaf rather than a claim to one specific regional bread. It is a practical everyday recipe with a mild flavor that works with both savory meals and a simple spread of butter.
Recipe note: This supplied recipe has not been independently tested. Flour absorption, measuring technique, kitchen temperature, and shaping all affect the dough and finished loaf. Use the texture and rising cues below rather than relying only on the clock.
Why You’ll Love This Loaf
- It uses familiar pantry ingredients.
- The loaf bakes on a standard baking sheet.
- Olive oil gives the crumb a little richness and tenderness.
- The mild flavor suits sandwiches, toast, and dinner sides.
- Cooled slices freeze well for later meals.
Recipe at a Glance
- Hands-on preparation: About 20 minutes
- Yeast activation: 5–10 minutes, which may overlap with preparation
- First rise: 60–90 minutes
- Second rise: 30–45 minutes
- Bake time: 25–35 minutes
- Cooling time: At least 30 minutes, preferably until no longer warm inside
- Total time including cooling: Approximately 2 hours 45 minutes to 3 hours 50 minutes, depending on overlaps and rising conditions
- Yield: 1 large oval loaf
- Servings: Approximately 12 slices
Ingredients
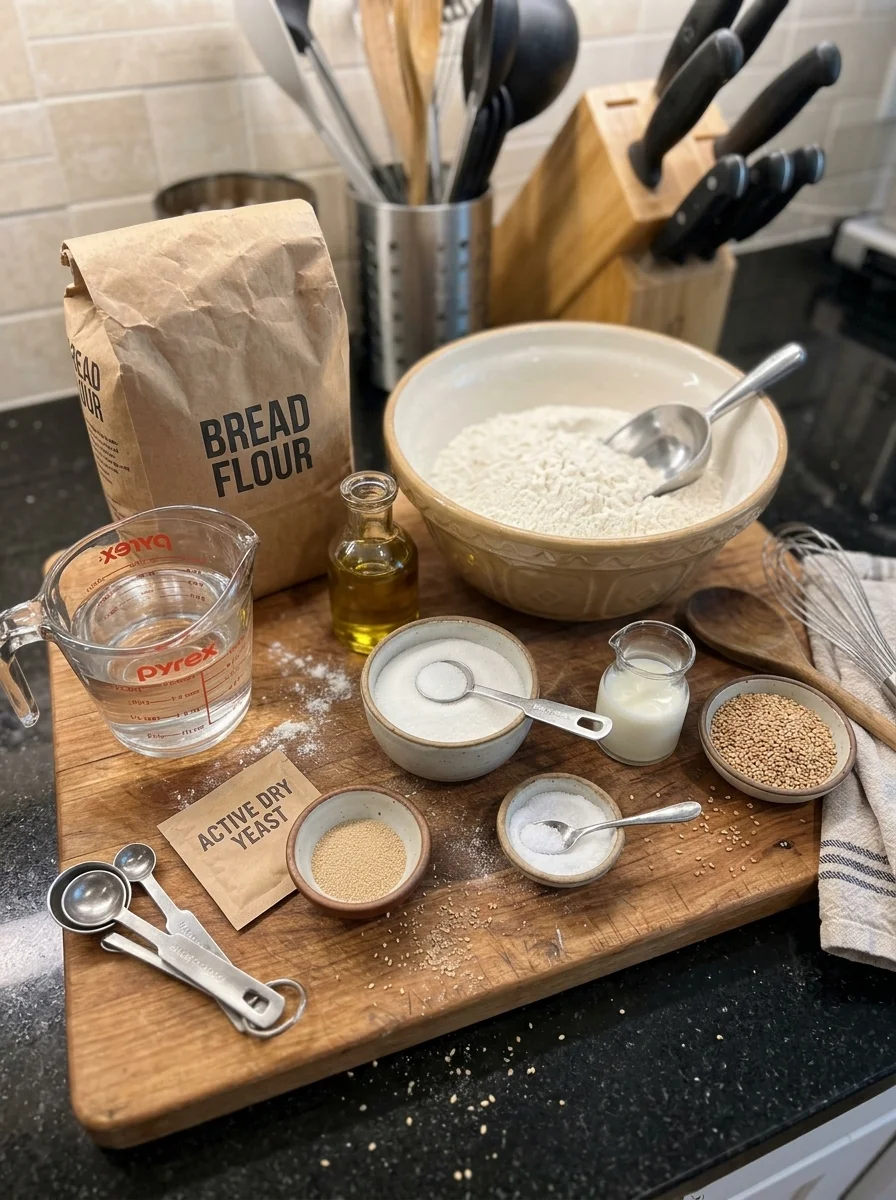
- 4 cups all-purpose flour or bread flour, spooned and leveled, plus a little for handling if needed
- 1 1/2 cups warm water, about 105–110°F
- 2 1/4 teaspoons active dry yeast
- 1 tablespoon granulated sugar
- 1 1/2 teaspoons salt
- 2 tablespoons olive oil, plus a little for the rising bowl
- 1 tablespoon milk, optional, for brushing
- 1 teaspoon sesame seeds, optional
Ingredient Notes
Flour
Both all-purpose flour and bread flour can work, but their doughs may feel different. Bread flour generally absorbs a little more liquid and develops a stronger, chewier structure. All-purpose flour tends toward a more tender crumb.
Measure flour carefully by spooning it into the cup and leveling the top. The original formula uses about 17 ounces of flour in total. Cup measurements can vary considerably if flour is packed, so avoid scooping a tightly filled cup directly from the bag.
The listed water makes a fairly soft, moist dough. This is not intended to be a dry dough that leaves your hands perfectly clean from the beginning. Holding back 1/2 cup flour helps you mix gradually, but most or all of the listed flour may be needed. Do not assume 3 1/2 cups will always be enough for a freestanding loaf.
Water
Use warm water around 105–110°F for the active dry yeast, following the yeast package directions if they differ. An instant-read thermometer removes the guesswork. Water that is too hot can damage yeast, while cool water slows the rise.
Do not heat the water merely until it feels hot. The yeast does not need high heat to work, and a gently warm dough is easier to manage than one overheated at the start.
Active Dry Yeast
One standard packet commonly contains 2 1/4 teaspoons. Check the package date and storage instructions. Dissolving it in the warm water with sugar gives you a chance to observe activity before adding the flour.
Instant yeast can usually be mixed directly into the flour instead. Use the same listed quantity unless the manufacturer specifies otherwise, and watch the dough because rising times may change.
Sugar
The tablespoon of sugar provides a mild sweetness and supports browning. The loaf should not taste like a sweet breakfast bread. Stir it into the warm water before adding the active dry yeast so it dissolves readily.
Salt
Salt is important for flavor and dough behavior. Use fine salt for a predictable teaspoon measurement. Coarse kosher salt varies in density, so a teaspoon of one brand may not match another. Avoid omitting salt simply because the dough will still rise; the flavor will be noticeably different.
Olive Oil
Olive oil contributes a mild savory note and helps tenderize the crumb. Use an oil you enjoy, since a strongly flavored extra-virgin oil can be noticeable in plain bread. A small additional amount coats the rising bowl and prevents sticking.
Milk and Sesame Seeds
The optional milk wash encourages surface color and gives the seeds something to cling to. It can also make the crust a little softer. Leave it off if you prefer a simpler flour-and-water-style exterior.
Sesame seeds are optional. If using them, sprinkle lightly and avoid pressing down hard on the risen dough. Omit them when serving someone who needs to avoid sesame.
Equipment
You will need a large mixing bowl, a spoon or spatula, a baking sheet, parchment suitable for the baking temperature, and a wire cooling rack. A stand mixer with a dough hook is convenient but not necessary.
A dough scraper helps handle a soft dough without adding large amounts of flour. A bread lame or very sharp knife makes the scoring step easier. An instant-read thermometer is useful for checking the yeast water and the baked center.
How to Make Easy Homemade Italian Bread
1. Activate the Yeast
Combine the warm water, sugar, and active dry yeast in a large bowl. Stir gently and leave for 5–10 minutes. Look for foam or clear signs of activity on the surface.
If there is no activity, check the yeast date and water temperature. Start again with fresh yeast if you suspect the yeast is inactive rather than adding the flour and hoping the dough will rise later.
2. Mix a Soft Dough
Add the olive oil, salt, and 3 1/2 cups flour. Stir until the mixture becomes shaggy and no large dry pockets remain. Add the remaining flour gradually as needed to form a cohesive, soft dough.
At this stage, the dough may be quite sticky. Letting it rest for 5–10 minutes can help the flour absorb water before you decide it needs more. If it is soupy or cannot hold together at all, check the measurements; a soft dough is expected, but a pourable batter is not.
3. Knead Until Elastic
Turn the dough onto a lightly floured surface and knead for approximately 8–10 minutes, using a scraper if needed. Alternatively, use a dough hook for about 5–7 minutes at a speed recommended by your mixer’s manufacturer.
The dough should become smoother and more elastic, though it can remain tacky. It should stretch somewhat before tearing and begin holding its shape. Add flour sparingly—enough to make handling possible, not enough to make the dough stiff.
If kneading by hand is difficult because the dough sticks, pause for a short rest, then continue. A few gentle folds during the first rise can also help a soft dough gain strength. Avoid aggressive handling or adding flour repeatedly without giving the dough time to absorb it.
4. Let It Rise
Lightly oil a large bowl. Place the dough inside and turn once to coat. Cover and leave in a warm, draft-free place for about 60–90 minutes, until approximately doubled.
A cool kitchen may require longer. An excessively hot spot is not helpful and can cause uneven rising. Look for a dough that is visibly inflated rather than following the time exactly.
5. Shape the Oval Loaf
Line a baking sheet with parchment. Turn the risen dough onto a lightly floured surface and gently press out large pockets of gas. Pat it into a rough rectangle without crushing it flat.
Fold the sides inward and roll from one long edge into a snug log. Pinch the seam and ends closed, then place seam-side down on the sheet. Aim for a compact oval that holds some height rather than stretching it into an extremely thin loaf.
If the dough spreads immediately and feels very slack, give it a few minutes to rest and gently tighten the shape again. The moisture level and dough strength affect how well a freestanding loaf holds its form.
6. Let It Rise Again
Cover loosely and let rise for 30–45 minutes, or until puffy. Preheat the oven to 400°F during this stage so it is fully heated when the loaf is ready.
The shaped loaf does not need to double dramatically. It should look lighter and expanded. A lightly floured fingertip pressed gently into the surface should leave an indentation that returns slowly; a deep mark that stays with a fragile, collapsing dough can indicate it has gone too far.
7. Brush and Score
If using milk and sesame seeds, brush the loaf very gently with milk and sprinkle the seeds over it. Make 3–4 shallow diagonal cuts across the top using a sharp blade. Use quick, controlled movements rather than dragging a dull knife through the dough.
Scoring gives expanding dough an intended place to open. Handle the loaf gently at this stage so you do not deflate it before baking.
8. Bake Until Golden
Bake for approximately 25–35 minutes, until the crust is golden and the loaf is baked through. Check earlier if your oven browns quickly. If the top becomes dark before the center is done, loosely tent with foil and continue baking.
A hollow sound when tapped can be a useful clue, but it is not the only test. An instant-read thermometer inserted into the center should generally read around 195–205°F for this style of loaf. The center should feel set, not wet or doughy.
9. Cool Before Slicing
Transfer the loaf to a wire rack. Allow at least 30 minutes of cooling; a large loaf may need an hour or longer to cool fully. Slicing too early releases steam and can compress the crumb into a gummy layer.
Use a serrated knife and gentle strokes. Cut thick slices for soup or thinner slices for toast and sandwiches, depending on how well the loaf has cooled and set.
Crust Options and Steam
The loaf can be baked successfully without adding steam. At 400°F, it should develop a golden crust, with the oil and optional milk producing a somewhat softer result than a lean artisan loaf baked in a very hot covered vessel.
If you choose to use steam, follow your oven manufacturer’s instructions. Use only suitable metal equipment and handle hot water carefully. Do not pour water onto the oven floor, heating elements, or hot glass, and do not use an improvised method that conflicts with the appliance guidance. Steam can cause burns when the door opens.
A separate pan containing a little hot water during the early bake is optional, not essential. Avoid removing a sloshing hot pan halfway through baking merely to meet a ten-minute timer. For a straightforward first attempt, skip added steam and focus on dough strength, proofing, and complete baking.
Tips for a Better Loaf
Watch Texture Rather Than Chasing a Dry Dough
This formula is fairly moist. Some tackiness is expected, particularly with all-purpose flour. Resting and kneading can improve handling without repeated additions of flour. Too much flour can make the crumb heavy.
Build Strength Before Shaping
A freestanding loaf needs enough structure to hold height. Knead until elastic and shape with gentle tension. If the dough is exceptionally loose, check measurements rather than assuming every flour behaves the same.
Give the Oven Time
A fully preheated oven helps the loaf begin baking promptly. Start heating during the second rise, allowing additional time if your oven preheats slowly. An oven thermometer can help if results repeatedly brown too fast or too slowly.
Cool on a Rack
A rack lets moisture escape from the bottom. Leaving the hot loaf flat on the sheet for a long time can soften the underside. Do not seal it in a bag until fully cool.
Overnight Dough Option
After kneading, place the dough in a lightly oiled bowl with plenty of room to expand. Cover and refrigerate promptly for an overnight rise, approximately 8–12 hours. The full packet of yeast may still produce substantial expansion, so check that the bowl has enough space and keep the dough cold.
The next day, inspect the dough rather than assuming the refrigerator prevented rising. If well expanded, gently shape while cool or after a short rest if it resists handling. Let the shaped loaf rise until puffy before baking; cold dough can take longer than the same-day 30–45 minute estimate.
Do not add the full same-day room-temperature rise before an overnight refrigerator rest unless you are deliberately adjusting the schedule. The goal is to replace the first rise with a cold rise, not add many extra fermentation hours without checking the dough.
Serving Ideas and Variations
Serve slices with tomato soup, vegetable stew, spaghetti, or lasagna. For sandwiches, let the loaf cool completely before slicing and choose fillings that will not soak through the crumb immediately.
For garlic toast, brush baked slices with a little garlic butter and toast briefly until the edges are crisp. This keeps fresh garlic out of the dough and makes it easier to control the flavor. Prepare only the amount you intend to serve, and refrigerate any homemade fresh-garlic topping promptly.
For an herb variation, add a small amount of dried Italian herbs to the flour. Start modestly so the loaf remains versatile. Sesame seeds can be omitted or replaced with a light sprinkling of another suitable seed topping.
You can divide the dough into two smaller oval loaves. They may bake faster, so begin checking earlier and use the center temperature and crust as guides. The total dough yield stays the same, but the slice count changes.
Storage and Reheating
Room temperature: Cool completely, then store for up to 2 days for best quality. A paper bag preserves the crust better but allows more drying; a sealed bag keeps the crumb softer while softening the crust. Choose according to how you plan to use it.
Refrigerator: Refrigeration tends to make plain bread stale faster and is usually unnecessary for short-term storage. Bread with perishable fillings or fresh dairy and meat toppings needs different handling from this plain loaf.
Freezer: Wrap the cooled loaf or separated slices well and freeze for up to 3 months for best quality. Remove as much air as practical. Slices are convenient to toast directly from frozen.
Refresh: Warm a thawed loaf in a 350°F oven for about 5–10 minutes, checking that it does not dry out. Toast slices as needed. If there is mold, discard the bread rather than cutting away only the visible spot.
Troubleshooting
The Dough Is Too Sticky
Let it rest briefly, then knead with a lightly floured surface and a scraper. Add flour gradually only if needed. Check that the water and flour quantities were measured correctly; this dough should be soft but cohesive.
The Loaf Spread Sideways
The dough may have lacked strength, the shape may have been loose, or the second rise may have gone too far. Knead sufficiently, create gentle surface tension, and bake once puffy rather than waiting for a fragile, overexpanded loaf.
The Bread Is Dense
Too much flour, inactive yeast, insufficient rising, or underbaking can contribute. Watch the dough’s expansion and check the baked center. Do not judge the crumb while the loaf is still very hot.
The Crust Is Too Soft
Oil, milk wash, and sealed storage all soften crust. Skip the milk for a less soft exterior and refresh the cooled bread briefly in the oven. This recipe will not necessarily have the same crackly crust as a lean Dutch-oven loaf.
The Center Is Gummy
It may be underbaked or cut too soon. Bake until the center is set, then cool on a rack before slicing. A browned surface alone does not prove the interior has finished baking.
Frequently Asked Questions
Can I Use Instant Yeast?
Yes. Mix it with the flour and add the water and other ingredients as directed, following package guidance. Watch rising progress because it may work faster than active dry yeast.
Do I Need a Loaf Pan?
No. This method makes a freestanding oval on a baking sheet. A pan would change the shape and potentially the baking time, so it should be treated as a variation.
Can I Use Only All-Purpose Flour?
Yes, but it may absorb less water and feel softer than bread flour. Measure carefully, allow a short rest, and develop the dough well before shaping. Expect some differences in height and chew.
Is This a No-Knead Recipe?
No. The supplied method includes kneading to build structure. An overnight no-knead loaf would require a different schedule and usually a different yeast approach.
How Many Calories Are in a Slice?
The supplied estimate of 175 calories can be plausible if the loaf is cut into 12 equal slices, but flour measurements, optional toppings, and slice size affect the figure. Calculate from the exact ingredients and divide by the number of portions you cut. The figure is an estimate, not verified nutrition data.
Print
Easy Homemade Italian Bread Loaf
Description
Hands-on prep: About 20 minutes
First rise: 60–90 minutes
Second rise: 30–45 minutes
Bake: 25–35 minutes
Cooling: At least 30 minutes
Yield: 1 large loaf, approximately 12 slices
Ingredients
- 4 cups all-purpose or bread flour, spooned and leveled
- 1 1/2 cups warm water, about 105–110°F
- 2 1/4 teaspoons active dry yeast
- 1 tablespoon sugar
- 1 1/2 teaspoons fine salt
- 2 tablespoons olive oil, plus a little for the bowl
- 1 tablespoon milk, optional
- 1 teaspoon sesame seeds, optional
Instructions
- Stir water, sugar, and active dry yeast in a large bowl. Rest 5–10 minutes, until active and foamy.
- Add oil, salt, and 3 1/2 cups flour. Mix, then add remaining flour gradually as needed for a soft, cohesive dough. Rest briefly if very sticky before adding more flour.
- Knead by hand about 8–10 minutes or with a dough hook about 5–7 minutes, until smoother and elastic. The dough may remain tacky.
- Place in an oiled bowl, cover, and rise 60–90 minutes, until approximately doubled.
- Gently release large gas pockets and shape into a snug oval log. Pinch the seam and place seam-side down on a parchment-lined baking sheet.
- Cover and rise 30–45 minutes, until puffy. Preheat oven to 400°F.
- Brush gently with optional milk and add seeds. Make 3–4 shallow diagonal scores with a sharp blade.
- Bake 25–35 minutes, until golden and baked through, generally around 195–205°F in the center. Tent if browning too quickly.
- Cool on a rack for at least 30 minutes, preferably longer for clean slices.
Storage: Keep fully cooled plain bread at room temperature for up to 2 days for quality, or freeze well wrapped for up to 3 months. Toast slices or refresh the loaf briefly at 350°F.