
Tender, buttery, and bursting with bright citrus flavor, these Cranberry Orange Glazed Scones are the kind of homemade breakfast treat that feels special without requiring a complicated baking project.
Each scone has a lightly crisp, golden exterior and a soft, tender center filled with tart dried cranberries and fresh orange zest. Cold butter and heavy cream give the dough its rich texture, while fresh orange juice adds a bright citrus note that balances the sweetness.
Once baked, the scones are finished with a simple fresh orange glaze made from powdered sugar, orange juice, zest, and vanilla. The sweet-tart glaze settles over the buttery scones and gives every bite an extra burst of orange flavor.
Serve them for a cozy weekend breakfast, holiday brunch, afternoon tea, or alongside a hot cup of coffee.
Why You’ll Love These Cranberry Orange Scones
Tender and buttery. Cold butter and heavy cream help create a rich, soft center.
Bright orange flavor. Fresh zest and juice are used in both the scones and glaze.
Sweet-tart cranberries. Dried cranberries provide little bursts of fruity flavor throughout every wedge.
Lightly crisp outside. A hot oven helps create golden edges while keeping the centers tender.
No special equipment required. You can make the dough with a mixing bowl and pastry cutter—or simply use your fingertips.
Easy to shape. Form one round and cut it into eight wedges.
Great for brunch. The cranberry-orange combination works particularly well for fall and winter breakfasts, holiday tables, and special occasions.
Freezer-friendly. Freeze unglazed baked scones and add fresh orange glaze after thawing.
What Makes a Good Scone?
A great scone should have contrast.
The outside should be lightly crisp and golden while the interior remains tender, moist, and slightly flaky.
Three things are particularly important:
Cold fat: Small pieces of cold butter remain throughout the dough. In the oven, the butter melts and releases steam, contributing to the tender, flaky texture.
Gentle mixing: Too much stirring or kneading can develop excess gluten and make scones tough.
High baking temperature: Baking at 400°F helps the exterior set and brown while the interior remains tender.
This recipe also benefits from a short 15–20 minute chill after shaping. Chilling firms the butter again before the scones enter the hot oven.
Ingredients 🍊🫐
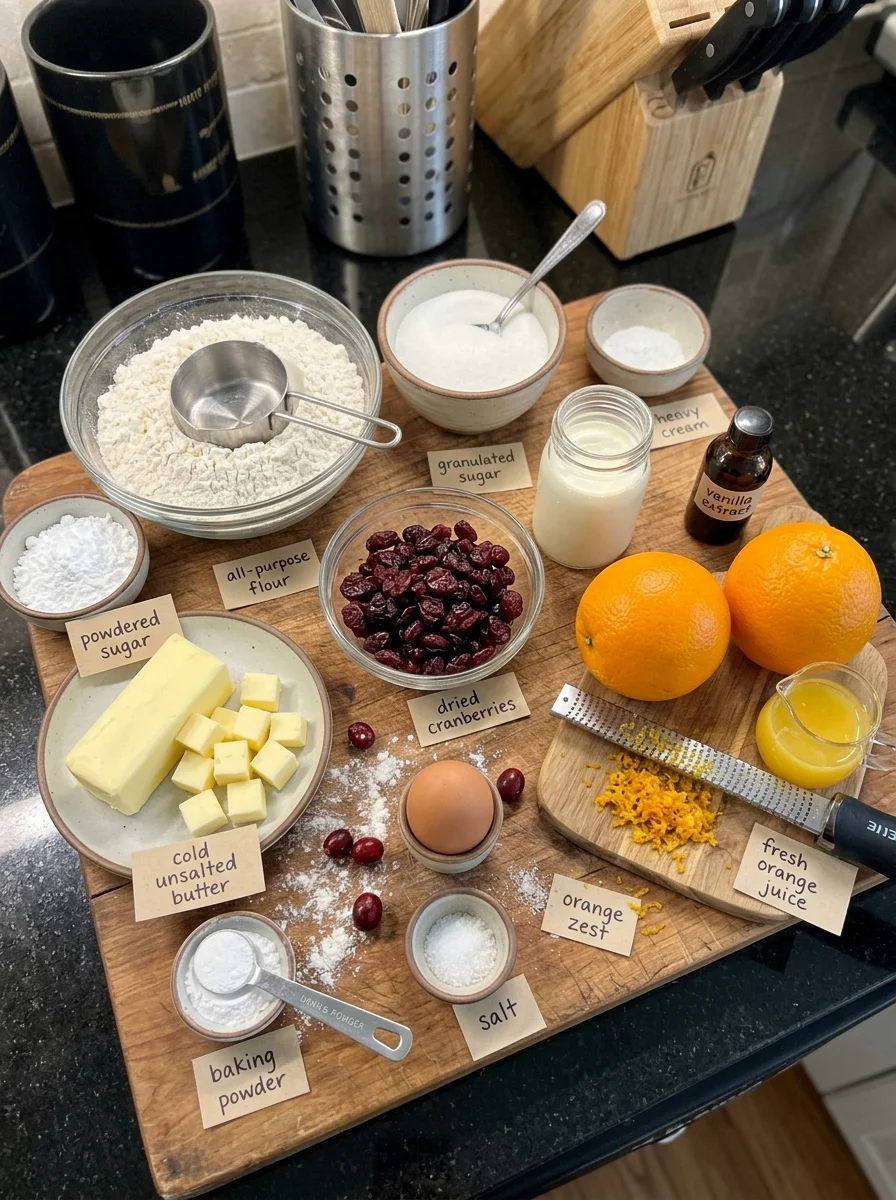
For the Scones
- 2 cups all-purpose flour
- 1/3 cup granulated sugar
- 2 tsp baking powder
- 1/2 tsp salt
- 1 tbsp finely grated orange zest
- 1/2 cup cold unsalted butter, cut into small cubes
- 3/4 cup dried cranberries
- 1 large egg
- 1/2 cup cold heavy cream
- 1 tsp vanilla extract
- 1 tbsp fresh orange juice
For the Orange Glaze 🍊
- 1 cup powdered sugar
- 2 tbsp fresh orange juice
- 1/2 tsp finely grated orange zest
- 1/2 tsp vanilla extract
Ingredient Notes
All-purpose flour: Provides enough structure without making the scones excessively dense.
Granulated sugar: One-third cup gives the dough moderate sweetness while allowing the orange glaze to provide the sweeter finish.
Baking powder: Gives the scones lift and helps create a lighter interior.
Salt: Balances the sweetness and enhances the butter and citrus flavors.
Fresh orange zest: This is one of the most important flavor ingredients. The aromatic oils in the zest provide much more concentrated orange flavor than juice alone.
Cold unsalted butter: Keep it refrigerated until you’re ready to cut it into the flour. Cold butter is essential for a tender, slightly flaky texture.
Dried cranberries: Their chewy, sweet-tart flavor works particularly well with orange.
Egg: Helps bind the dough while adding richness and structure.
Cold heavy cream: Adds moisture and richness while helping produce a tender crumb.
Vanilla: Softens and rounds out the sharper citrus notes.
Fresh orange juice: Adds another layer of citrus flavor to both the dough and glaze.
Powdered sugar: Creates a smooth glaze that sets nicely over the cooled scones.
How to Make Cranberry Orange Glazed Scones
Step 1: Preheat the Oven 🔥
Preheat your oven to 400°F.
Line a large baking sheet with parchment paper.
Set it aside while you prepare the dough.
Step 2: Combine the Dry Ingredients
In a large mixing bowl, whisk together:
- 2 cups all-purpose flour
- 1/3 cup granulated sugar
- 2 teaspoons baking powder
- 1/2 teaspoon salt
- 1 tablespoon finely grated orange zest
Whisk thoroughly so the baking powder, salt, sugar, and zest are evenly distributed.
How to Get More Flavor from Orange Zest
For an even more fragrant dough, rub the orange zest into the granulated sugar with your fingertips before combining it with the flour.
The friction helps release some of the fragrant oils from the zest into the sugar.
It’s an optional step, but it’s an easy way to make the orange aroma more noticeable.
Step 3: Cut in the Cold Butter 🧈
Add 1/2 cup cold cubed unsalted butter.
Using a pastry cutter, work the butter into the flour mixture.
You can also use your fingertips, but work quickly so the warmth from your hands doesn’t soften the butter too much.
Stop when the mixture resembles coarse crumbs with some visible pea-sized pieces of butter remaining.
Don’t try to completely blend the butter into the flour.
Those small pieces are desirable.
Step 4: Add the Dried Cranberries 🫐
Add 3/4 cup dried cranberries.
Stir gently until they’re evenly distributed throughout the flour mixture.
Separating the cranberries at this stage helps prevent them from clustering together in one section of the dough.
Step 5: Mix the Wet Ingredients
In a separate small bowl or measuring cup, whisk together:
- 1 large egg
- 1/2 cup cold heavy cream
- 1 teaspoon vanilla extract
- 1 tablespoon fresh orange juice
Whisk until the egg is fully incorporated.
Keep this mixture cold until you’re ready to combine it with the dry ingredients.
Step 6: Form the Dough
Pour the wet mixture over the dry ingredients.
Using a fork or spatula, gently stir until a soft, shaggy dough begins forming.
Stop mixing once most of the flour has been incorporated.
The dough doesn’t need to look perfectly smooth.
In fact, a slightly rough dough is preferable to an overworked one.
Don’t Overmix Scone Dough
This is one of the most important rules when making homemade scones.
Once liquid is added to flour, gluten begins developing.
Some gluten is necessary for structure, but excessive mixing can create scones that are:
- Tough
- Dense
- Chewy
- Less tender
Stir only until the dough comes together.
A few floury-looking areas can be incorporated gently while shaping.
Step 7: Turn Out the Dough
Lightly flour your work surface.
Transfer the shaggy dough onto it.
Use your hands to gently bring the loose pieces together.
Avoid traditional kneading.
You’re simply pressing the dough together enough for it to hold its shape.
Step 8: Shape Into a Round
Gently pat the dough into a round approximately 1 inch thick.
Try to maintain relatively even thickness from the center to the edges.
Avoid aggressively compressing the dough.
Step 9: Cut Into 8 Wedges
Using a sharp knife or bench scraper, cut the round in half.
Cut each half in half again, then divide each quarter into two wedges.
You should have 8 scones.
A sharp downward cut works better than sawing repeatedly through the dough.
Step 10: Transfer to the Baking Sheet
Arrange the wedges on the parchment-lined baking sheet.
Leave some space between them so hot air can circulate and the edges can brown.
Step 11: Chill the Scones ❄️
For the best texture, refrigerate the shaped scones for approximately 15–20 minutes.
This step is especially useful if your kitchen is warm or the butter softened while you were working.
Chilling helps firm the butter again before baking.
Why Chill Scones Before Baking?
Temperature matters enormously in scone dough.
You want the butter to remain relatively solid until the scones enter the hot oven.
Once baking begins, the cold butter melts and creates small pockets throughout the dough.
If the butter melts before the scones enter the oven, those distinct pockets are reduced and the scones can spread more.
A short refrigerator rest helps prevent that.
Step 12: Bake
Transfer the chilled scones directly into the 400°F oven.
Bake for approximately 18–22 minutes.
They’re ready when:
- The tops look set
- The edges are lightly golden
- The bottoms are baked through
- The centers no longer appear wet or doughy
Avoid overbaking.
A few extra minutes can noticeably dry out a scone.
Step 13: Cool
Remove the baking sheet from the oven.
Allow the scones to cool on the pan for approximately 10 minutes.
Then carefully transfer them to a wire rack.
You can glaze them while they’re slightly warm for a thinner glaze that melts into the surface, or wait until they’re completely cool for a thicker, more defined glaze.
How to Make the Orange Glaze 🍊
Step 14: Combine the Glaze Ingredients
In a small bowl, combine:
- 1 cup powdered sugar
- 2 tablespoons fresh orange juice
- 1/2 teaspoon finely grated orange zest
- 1/2 teaspoon vanilla extract
Whisk until completely smooth.
Step 15: Adjust the Consistency
For a thicker glaze, add a little additional powdered sugar.
For a thinner glaze, add orange juice a few drops at a time.
Small amounts of liquid can change powdered-sugar glaze surprisingly quickly, so add extra juice gradually.
Step 16: Glaze the Scones
Drizzle the glaze over the cooled or slightly warm scones.
You can use a spoon for a rustic drizzle or transfer the glaze to a small piping bag for thinner, more controlled lines.
Allow the glaze to sit for several minutes before serving.
Recipe Information ⏱️
Prep Time: 20 minutes
Chill Time: 15 minutes
Bake Time: approximately 20 minutes
Total Time: approximately 55 minutes
Yield: 8 scones
Serving Size: 1 scone
Estimated Calories: approximately 330 calories per scone
The exact calories will vary depending on the butter, cream, cranberries, amount of glaze used, and exact portion size.
Tips for Tender, Flaky Cranberry Orange Scones
Keep everything cold. Cold butter and cold heavy cream are important.
Use fresh orange zest. It’s responsible for much of the citrus aroma.
Don’t completely blend the butter into the flour. Leave some pea-sized pieces.
Don’t overmix. Stop once a shaggy dough has formed.
Don’t knead like bread dough. Simply bring the dough together gently.
Keep the round thick. Approximately 1 inch produces substantial, tender scones.
Use a sharp knife. Clean cuts help preserve the shape of the wedges.
Chill before baking. Fifteen to twenty minutes helps firm the butter.
Bake in a fully preheated oven. The initial blast of heat helps the scones rise and set.
Watch the final few minutes. Remove the scones once lightly golden rather than deeply browning them.
Cool before adding a thick glaze. Warm scones will cause the glaze to melt and become more transparent.
The Secret to Soft Scone Centers
Scones sometimes get a reputation for being dry, but properly made scones should be tender inside.
The biggest factors are moisture, fat, mixing, and baking time.
Heavy cream and butter provide both fat and moisture.
The egg adds additional richness and structure.
The dough is handled minimally so excessive gluten doesn’t develop.
Finally, the scones are removed once baked through rather than being left in the oven until they’re deeply browned and dry.
The result should be a center that’s tender rather than crumbly and dusty.
Why Cold Butter Matters 🧈
Cold butter behaves differently from softened butter.
When small cold butter pieces enter a hot oven, the butter begins melting and its water content produces steam.
That contributes to the small pockets and tender layers throughout the scone.
If your butter becomes very soft while you’re mixing and shaping, place the shaped scones in the refrigerator before baking.
You can even chill them slightly longer than 15 minutes if necessary.
Can You Use Frozen Butter?
Yes.
For an especially easy method, freeze the butter briefly and grate it using the large holes of a box grater.
Toss the grated butter directly into the flour mixture.
Work quickly to distribute it without allowing it to soften.
This can make it easier to create small, evenly distributed butter pieces.
Serving Ideas ☕🍊
With Coffee
Cranberry-orange scones are excellent with hot coffee, cappuccino, or café au lait.
With Tea
Serve them with black tea, Earl Grey, chai, or a citrus herbal tea.
Holiday Breakfast
Arrange the glazed scones on a platter with fresh orange slices, berries, and other breakfast pastries.
Brunch Board
Serve alongside:
- Fresh fruit
- Yogurt
- Jam
- Honey
- Butter
- Eggs
- Breakfast meats
Afternoon Tea
Pair smaller scones with tea, fruit preserves, and whipped or clotted cream.
With Orange Marmalade
For even more citrus flavor, split a warm scone and spread it with orange marmalade.
With Butter
An unglazed or lightly glazed scone is especially good sliced and spread with softened salted butter.
Easy Variations
Cranberry Lemon Scones 🍋
Replace the orange zest and juice with fresh lemon zest and juice.
White Chocolate Cranberry Orange Scones
Add 1/2 cup white chocolate chips with the dried cranberries.
Cranberry Almond Scones
Add a small amount of almond extract and sprinkle sliced almonds over the tops before baking.
Orange Chocolate Chip Scones
Replace some or all of the cranberries with semisweet or dark chocolate chips.
Fresh Cranberry Orange Scones
You can experiment with chopped fresh cranberries instead of dried cranberries, but because fresh cranberries contain considerably more moisture and tartness, the texture and sweetness will differ from the original recipe.
Cinnamon Cranberry Scones
Add approximately 1/2 teaspoon ground cinnamon to the dry ingredients for a warmer flavor.
Orange Pecan Scones
Add chopped toasted pecans with the dried cranberries.
Extra-Orange Scones
Rub the orange zest into the sugar before adding the flour and add a little extra zest to the glaze.
Can I Use Fresh Cranberries Instead of Dried?
You can, but they don’t behave exactly the same.
Dried cranberries are concentrated, chewy, and relatively low in moisture.
Fresh cranberries contain considerably more water and have a sharper tartness.
If you substitute fresh berries, chop them roughly so large berries don’t create excessively wet pockets in the dough.
Expect the flavor and texture to be somewhat different from the dried-cranberry version.
For the recipe as written, dried cranberries provide the most predictable result.
Can I Use Milk Instead of Heavy Cream?
Heavy cream contributes significant fat and richness, which helps produce the tender texture.
Milk contains less fat, so a direct substitution can change the crumb and dough consistency.
If you want the texture described in this recipe, heavy cream is the preferred choice.
Make-Ahead Instructions
There are several ways to prepare these scones ahead.
Prepare the Dry Ingredients
Combine the flour, sugar, baking powder, salt, and orange zest ahead of time.
Keep covered until you’re ready to finish the dough.
Shape and Refrigerate
Prepare and shape the wedges, then cover and refrigerate them for a short period before baking.
Bake directly from cold.
Freeze Unbaked Scones
For longer make-ahead storage, place shaped wedges on a parchment-lined baking sheet and freeze until solid.
Transfer the frozen wedges to a freezer-safe bag or container.
When ready to bake, arrange them on a baking sheet and bake from frozen, allowing additional baking time as necessary.
Watch for visual doneness cues rather than relying only on the original baking time.
Storage Information 🧊
Store completely cooled, glazed scones in an airtight container at room temperature for up to 2 days.
For longer storage, refrigerate them for up to 5 days.
Because refrigeration can make baked goods feel firmer, allow a refrigerated scone to come toward room temperature or warm it gently before serving.
Keep the container tightly sealed to prevent the scones from drying out.
Freezer Instructions ❄️
For the best freezer results, freeze the scones without glaze.
Allow baked scones to cool completely.
Arrange them in a freezer-safe container or bag, using parchment between layers if necessary.
Freeze for up to 3 months.
Thaw at room temperature.
Once thawed, prepare a fresh batch of orange glaze and drizzle it over the scones before serving.
How to Reheat Scones
Oven
For a freshly baked texture, warm an unglazed scone in a low oven for several minutes until heated through.
Microwave
Microwave an individual scone very briefly.
Avoid overheating because the texture can become tough.
If the scone is already glazed, remember that warming will cause the glaze to soften or melt.
Troubleshooting
Why are my scones dry?
The most common causes are too much flour, overmixing, or overbaking.
Measure the flour carefully, handle the dough gently, and remove the scones once they’re baked through and lightly golden.
Why are my scones tough?
The dough was probably overworked.
Once the wet and dry ingredients meet, stir only until a shaggy dough forms.
Why did my scones spread?
The butter may have become too warm before baking.
Chill the shaped wedges for 15–20 minutes before placing them in the oven.
Why didn’t my scones rise?
Old baking powder can reduce lift.
The dough may also have been overworked or pressed too thin.
Make sure the shaped round is approximately 1 inch thick.
Why are there dry flour pockets?
The dough may not have been brought together enough during shaping.
Mix gently but make sure no large areas of completely dry flour remain.
Why did my cranberries burn?
Cranberries sitting directly on the exterior can darken more quickly.
When shaping, gently press exposed pieces into the dough if necessary.
Why is my glaze too runny?
Too much orange juice was added.
Whisk in additional powdered sugar until it reaches the desired consistency.
Why is my glaze too thick?
Add fresh orange juice a few drops at a time.
Why did the glaze disappear into the scones?
The scones were probably too hot when glazed.
For a thick white glaze that remains visible, allow them to cool completely first.
Why is my dough sticky?
A slightly tacky dough is normal.
If it’s extremely sticky, lightly flour your hands and work surface rather than adding large quantities of flour directly to the dough.
Frequently Asked Questions
What makes scones flaky?
Small pieces of cold butter distributed through the dough help create pockets and tender layers as the butter melts in the hot oven.
Should scone dough be sticky?
It can be slightly tacky, but it should still be possible to gently shape it with lightly floured hands.
Do I need to knead scone dough?
No. Avoid kneading it like bread dough. Gently bring the shaggy mixture together and shape it.
Why should the butter be cold?
Cold butter stays in small pieces until baking, helping create a tender, slightly flaky texture.
Can I skip chilling the shaped scones?
You can, but the short chill is recommended, particularly if the butter has softened while you were shaping the dough.
What temperature should I bake scones?
This recipe bakes at 400°F.
How thick should the dough be?
Shape it into a round approximately 1 inch thick.
How many scones does this recipe make?
It makes 8 scones.
Can I use dried cranberries?
Yes. The recipe is specifically designed for dried cranberries.
Can I make them without the glaze?
Absolutely. The scones are flavorful enough to serve without glaze, especially with butter or marmalade.
Should I glaze warm or cool scones?
Either works, depending on the result you want. Slightly warm scones create a thinner glaze, while completely cooled scones keep the glaze thicker and more visible.
How long do cranberry orange scones last?
Store them airtight at room temperature for up to 2 days or refrigerate for up to 5 days.
Can I freeze them?
Yes. Unglazed baked scones can be frozen for up to 3 months.
Can I freeze unbaked scones?
Yes. Freeze the shaped wedges until solid, then transfer them to a freezer-safe container and bake from frozen when needed, allowing extra baking time.
What should I serve with cranberry orange scones?
Coffee, tea, hot chocolate, butter, marmalade, fruit preserves, and fresh fruit all pair beautifully with them.
Final Thoughts
These Cranberry Orange Glazed Scones bring together buttery pastry, tart cranberries, and fresh citrus in a simple homemade breakfast treat.
The key to their texture is keeping the butter and cream cold, handling the dough gently, leaving small pieces of butter intact, and chilling the shaped wedges before baking.
Once the scones emerge golden from the oven, a fresh orange glaze adds another layer of sweet citrus flavor without hiding the buttery cranberry-filled center.
Serve them with coffee or tea for breakfast, add them to a holiday brunch spread, or enjoy one as an afternoon treat.
And because the unglazed scones freeze well, you can keep a batch ready to thaw and finish with fresh orange glaze whenever you’re craving a bakery-style cranberry-orange scone at home.
Print
Cranberry Orange Glazed Scones
Ingredients
For the Scones
- 2 cups all-purpose flour
- 1/3 cup granulated sugar
- 2 tsp baking powder
- 1/2 tsp salt
- 1 tbsp finely grated orange zest
- 1/2 cup cold unsalted butter, cut into small cubes
- 3/4 cup dried cranberries
- 1 large egg
- 1/2 cup cold heavy cream
- 1 tsp vanilla extract
- 1 tbsp fresh orange juice
For the Orange Glaze 🍊
- 1 cup powdered sugar
- 2 tbsp fresh orange juice
- 1/2 tsp finely grated orange zest
- 1/2 tsp vanilla extract
Instructions
Step 1: Preheat the Oven 🔥
Preheat your oven to 400°F.
Line a large baking sheet with parchment paper.
Set it aside while you prepare the dough.
Step 2: Combine the Dry Ingredients
In a large mixing bowl, whisk together:
- 2 cups all-purpose flour
- 1/3 cup granulated sugar
- 2 teaspoons baking powder
- 1/2 teaspoon salt
- 1 tablespoon finely grated orange zest
Whisk thoroughly so the baking powder, salt, sugar, and zest are evenly distributed.
How to Get More Flavor from Orange Zest
For an even more fragrant dough, rub the orange zest into the granulated sugar with your fingertips before combining it with the flour.
The friction helps release some of the fragrant oils from the zest into the sugar.
It’s an optional step, but it’s an easy way to make the orange aroma more noticeable.
Step 3: Cut in the Cold Butter 🧈
Add 1/2 cup cold cubed unsalted butter.
Using a pastry cutter, work the butter into the flour mixture.
You can also use your fingertips, but work quickly so the warmth from your hands doesn’t soften the butter too much.
Stop when the mixture resembles coarse crumbs with some visible pea-sized pieces of butter remaining.
Don’t try to completely blend the butter into the flour.
Those small pieces are desirable.
Step 4: Add the Dried Cranberries 🫐
Add 3/4 cup dried cranberries.
Stir gently until they’re evenly distributed throughout the flour mixture.
Separating the cranberries at this stage helps prevent them from clustering together in one section of the dough.
Step 5: Mix the Wet Ingredients
In a separate small bowl or measuring cup, whisk together:
- 1 large egg
- 1/2 cup cold heavy cream
- 1 teaspoon vanilla extract
- 1 tablespoon fresh orange juice
Whisk until the egg is fully incorporated.
Keep this mixture cold until you’re ready to combine it with the dry ingredients.
Step 6: Form the Dough
Pour the wet mixture over the dry ingredients.
Using a fork or spatula, gently stir until a soft, shaggy dough begins forming.
Stop mixing once most of the flour has been incorporated.
The dough doesn’t need to look perfectly smooth.
In fact, a slightly rough dough is preferable to an overworked one.
Don’t Overmix Scone Dough
This is one of the most important rules when making homemade scones.
Once liquid is added to flour, gluten begins developing.
Some gluten is necessary for structure, but excessive mixing can create scones that are:
- Tough
- Dense
- Chewy
- Less tender
Stir only until the dough comes together.
A few floury-looking areas can be incorporated gently while shaping.
Step 7: Turn Out the Dough
Lightly flour your work surface.
Transfer the shaggy dough onto it.
Use your hands to gently bring the loose pieces together.
Avoid traditional kneading.
You’re simply pressing the dough together enough for it to hold its shape.
Step 8: Shape Into a Round
Gently pat the dough into a round approximately 1 inch thick.
Try to maintain relatively even thickness from the center to the edges.
Avoid aggressively compressing the dough.
Step 9: Cut Into 8 Wedges
Using a sharp knife or bench scraper, cut the round in half.
Cut each half in half again, then divide each quarter into two wedges.
You should have 8 scones.
A sharp downward cut works better than sawing repeatedly through the dough.
Step 10: Transfer to the Baking Sheet
Arrange the wedges on the parchment-lined baking sheet.
Leave some space between them so hot air can circulate and the edges can brown.
Step 11: Chill the Scones ❄️
For the best texture, refrigerate the shaped scones for approximately 15–20 minutes.
This step is especially useful if your kitchen is warm or the butter softened while you were working.
Chilling helps firm the butter again before baking.
Why Chill Scones Before Baking?
Temperature matters enormously in scone dough.
You want the butter to remain relatively solid until the scones enter the hot oven.
Once baking begins, the cold butter melts and creates small pockets throughout the dough.
If the butter melts before the scones enter the oven, those distinct pockets are reduced and the scones can spread more.
A short refrigerator rest helps prevent that.
Step 12: Bake
Transfer the chilled scones directly into the 400°F oven.
Bake for approximately 18–22 minutes.
They’re ready when:
- The tops look set
- The edges are lightly golden
- The bottoms are baked through
- The centers no longer appear wet or doughy
Avoid overbaking.
A few extra minutes can noticeably dry out a scone.
Step 13: Cool
Remove the baking sheet from the oven.
Allow the scones to cool on the pan for approximately 10 minutes.
Then carefully transfer them to a wire rack.
You can glaze them while they’re slightly warm for a thinner glaze that melts into the surface, or wait until they’re completely cool for a thicker, more defined glaze.
How to Make the Orange Glaze 🍊
Step 14: Combine the Glaze Ingredients
In a small bowl, combine:
- 1 cup powdered sugar
- 2 tablespoons fresh orange juice
- 1/2 teaspoon finely grated orange zest
- 1/2 teaspoon vanilla extract
Whisk until completely smooth.
Step 15: Adjust the Consistency
For a thicker glaze, add a little additional powdered sugar.
For a thinner glaze, add orange juice a few drops at a time.
Small amounts of liquid can change powdered-sugar glaze surprisingly quickly, so add extra juice gradually.
Step 16: Glaze the Scones
Drizzle the glaze over the cooled or slightly warm scones.
You can use a spoon for a rustic drizzle or transfer the glaze to a small piping bag for thinner, more controlled lines.
Allow the glaze to sit for several minutes before serving.