
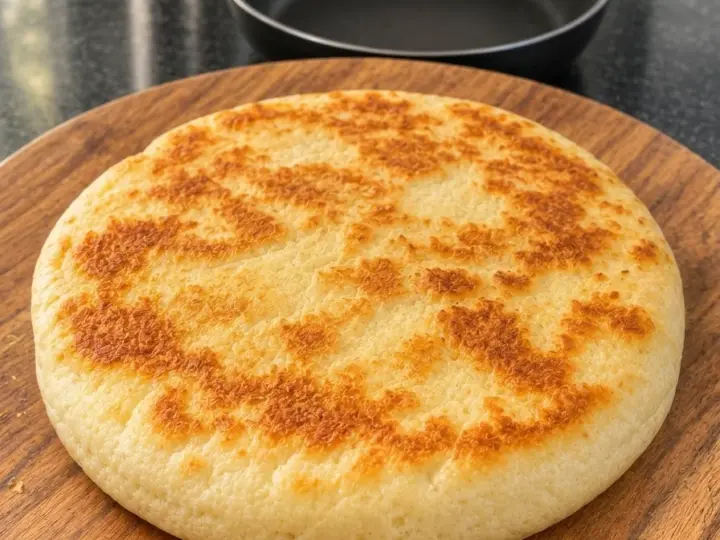
This 3-Ingredient Soft Skillet Rice Bread turns rice flour, eggs, and plain yogurt into a small, tender round cooked entirely on the stovetop. The outside develops a lightly golden surface, while the center stays soft and close-textured.
Beaten egg whites provide gentle lift without yeast or baking powder. Yogurt adds moisture and a mild tang, and rice flour gives the bread its structure. The result is a simple skillet bread that works well served warm with sweet spreads or savory accompaniments.
This is a small, egg-based bread rather than a traditional kneaded loaf. Expect a tender texture with a gentle spring, not a chewy crumb or large air pockets. Cutting it into wedges makes it easy to serve alongside breakfast, soup, or a light lunch.
The method requires a little care when whipping the whites and controlling the heat, but there is no lengthy rising time. Below, you will find ingredient explanations, detailed instructions, troubleshooting tips, serving ideas, and a complete recipe card.
What Is Soft Skillet Rice Bread?
Soft skillet rice bread is a quick stovetop bread made from a thick batter rather than kneaded dough.
The egg yolks, yogurt, and rice flour form the base. Separately beaten egg whites are folded in to introduce air, which expands gently during cooking. A covered skillet helps the heat reach the center before the underside becomes too dark.
Because there is no gluten, the batter does not develop the stretchy structure found in wheat bread. The eggs help hold it together, while the yogurt keeps the texture tender.
This recipe makes one small round approximately 6 inches across. It is suitable for two modest servings or four small side portions.
It is best enjoyed warm, shortly after cooking, when the surface is lightly toasted and the center is at its softest.
Why You’ll Love This Recipe
It uses only three ingredients. Rice flour, eggs, and plain yogurt make the complete batter.
There is no oven required. A covered nonstick skillet handles the cooking.
There is no yeast or proofing. Beaten egg whites provide the lift.
It makes a manageable small batch. One round is convenient when you do not need a full loaf.
The flavor is mild. Pair it with butter, jam, cheese, or other toppings.
There is no kneading involved. Mixing, whipping, and folding replace traditional dough preparation.
It contains no added oil. A reliable nonstick skillet allows the bread to cook without greasing.
Ingredient Breakdown
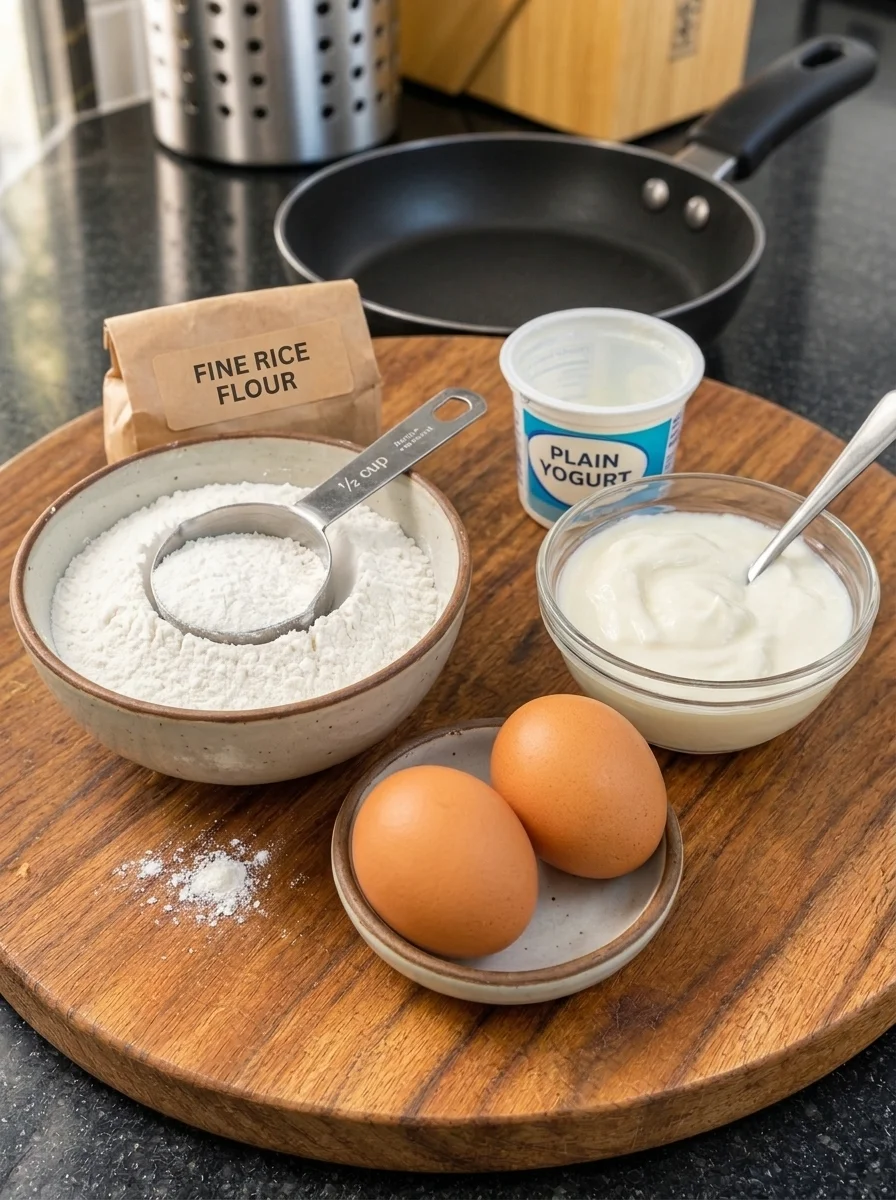
Fine White Rice Flour — ½ Cup, About 70 Grams
Use regular fine white rice flour.
A fine grind produces a smoother batter and a more tender crumb than coarse flour. Weighing is preferable because rice flour can pack differently in measuring cups.
Do not substitute sweet rice flour, also called glutinous rice flour. It behaves differently and creates a stickier, more elastic texture.
Brown rice flour also changes the flavor, liquid absorption, and texture, so it is not the best choice for reproducing this particular recipe.
Large Eggs — 2, Separated
The yolks enrich the base, while the beaten whites supply the air that helps the bread rise.
Separate the eggs carefully. Even a small amount of yolk in the whites can make them harder to whip properly.
Use large eggs for the listed flour and yogurt quantities. Significantly different egg sizes change the batter’s moisture balance.
Plain Whole-Milk Yogurt — ¼ Cup, About 60 Grams
Use regular plain yogurt rather than thick Greek yogurt.
Regular yogurt provides enough moisture to combine with the rice flour and yolks. Greek yogurt is more concentrated and can make the base too stiff.
Stir the yogurt before measuring if it has separated slightly. Avoid flavored or sweetened varieties unless you intentionally want to change the bread’s flavor.
Whole-milk yogurt gives the intended richness, although the exact consistency still varies by brand.
Equipment You’ll Need
- A nonstick skillet with a cooking surface approximately 6 inches across
- A well-fitting lid
- Two mixing bowls
- An electric hand mixer
- A whisk
- A flexible silicone spatula
- A heatproof plate for turning
- Oven mitts
- A toothpick or thin skewer
Measure the skillet’s flat cooking surface rather than the widest point across its rim. A much wider pan spreads the batter thinly, while a much narrower one creates a deeper center that takes longer to cook.
The nonstick surface matters because the recipe contains no added oil.
How to Make 3-Ingredient Soft Skillet Rice Bread
Step 1: Separate the Eggs
Place the yolks in one bowl and the whites in a second clean, dry bowl.
Check the whites for traces of yolk before starting. Make sure the mixer beaters are also clean and dry.
Step 2: Make the Rice-Flour Base
Whisk the yogurt into the egg yolks until evenly combined.
Add the rice flour and stir until smooth, scraping around the bottom of the bowl to incorporate dry pockets.
Let stand for 5 minutes. This gives the flour time to hydrate and helps reduce a gritty texture.
Step 3: Beat the Egg Whites
Beat the whites with an electric mixer until they form firm peaks.
When you lift the beaters, the peaks should hold their shape. The whites should still look smooth rather than dry, grainy, or clumpy.
Stop once they reach this stage. Overbeaten whites are harder to fold evenly into the thick base.
Step 4: Loosen the Base
Stir approximately one-third of the beaten whites into the rice-flour mixture.
This first addition lightens the base, making it easier to fold in the remaining whites without losing as much air.
Step 5: Fold Gently
Add the remaining whites in two additions.
Use a spatula to cut down through the center, sweep along the bottom, and lift the batter over itself. Rotate the bowl as you work.
Stop when the batter is mostly uniform, with no large pockets of plain egg white. It should be thick, airy, and spoonable.
Step 6: Warm the Skillet
Place the nonstick skillet over low heat for approximately 1 minute.
Avoid heating it aggressively. The bread needs time to set through the middle before the surface browns too much.
Step 7: Cook the First Side
Spoon the batter into the skillet and gently spread into an even round.
Cover and cook over low heat for 8–10 minutes.
The edges should become set, the underside should turn golden, and the top should look mostly set rather than loose or liquid.
If needed, continue cooking before attempting to turn.
Step 8: Turn Carefully
Loosen the edges and underside with a silicone spatula.
Remove the skillet from the heat. Wearing oven mitts, place a heatproof plate over the skillet and carefully invert the bread onto it.
Slide the bread back into the skillet with the uncooked side facing down. Return to low heat.
Step 9: Finish Cooking
Cover and cook for another 4–5 minutes.
The second side should be golden, and the center should be fully set. A toothpick inserted into the middle should come out without wet batter.
Extend cooking gently if the middle still needs time.
Step 10: Rest and Serve
Transfer to a board and rest for 5 minutes.
Cut into wedges and serve warm.
Tips for Soft Bread and Gentle Lift
Use the right flour. Fine regular white rice flour gives the intended texture.
Measure accurately. Extra flour can make the base heavy and difficult to fold.
Keep yolk out of the whites. Careful separation helps the whites reach firm peaks.
Avoid overbeating. Smooth, firm whites incorporate more easily than dry clumps.
Include the first loosening addition. Stirring in a portion of whites makes the remaining folding gentler.
Cook promptly after folding. The batter relies on trapped air rather than a chemical leavener.
Keep the heat low. A dark underside with a wet center usually means the pan is too hot.
Keep the bread even. A thick central mound takes longer to set.
Wait before turning. Mostly set batter is much easier to invert without damage.
Allow a little settling. Some reduction in height after cooking is normal for an egg-aerated bread.
Serving Ideas
The bread has no added salt or sugar, so its flavor is intentionally mild.
Savory Accompaniments
Serve warm wedges with:
- Butter and a small pinch of salt
- Cream cheese
- Sliced cheese
- Scrambled eggs
- Avocado
- Tomato salad
- A bowl of soup
Keep wet toppings separate until eating so the bread does not become soggy.
Sweet Accompaniments
Try:
- Jam or preserves
- Honey
- Nut butter
- Sliced banana
- Yogurt and berries
These are serving additions rather than ingredients required for the bread itself.
Light Sandwiches
Once cooled slightly, cut the round into wedges and split carefully if thick enough.
Use modest fillings and support the bread while eating. Its tender structure is more delicate than a conventional sandwich loaf.
Small Flavor Variations
The base recipe contains exactly three ingredients. These optional additions create different versions.
Garlic Herb Bread
Add ¼ teaspoon garlic powder and a small pinch of dried herbs to the yolk-yogurt mixture.
Crush larger herb pieces before adding.
Lightly Salted Version
Add a small pinch of fine salt to the base.
This is useful if you plan to serve the bread with mild savory toppings.
Cinnamon Version
Add ¼ teaspoon ground cinnamon to the flour.
Serve with fruit or a little honey after cooking.
Lemon-Zest Version
Add ½ teaspoon finely grated lemon zest to the base.
Avoid adding a large amount of juice, which changes the batter’s liquid balance.
Cheese Finish
After turning, scatter a small amount of finely grated cheese over the top and cover while the second side cooks.
Keep the addition light so the bread retains its gentle lift.
Storage and Reheating
Best Served Fresh
This bread has its softest texture shortly after cooking.
Rice-flour bread can become firmer as it cools, so make it close to serving when possible.
Refrigerator
Cool, then place in an airtight container and refrigerate for up to 3 days.
Refrigerate within 2 hours of cooking.
Skillet Reheating
Warm wedges in a covered nonstick skillet over low heat.
Turn once and heat gently until hot throughout. Avoid prolonged cooking, which dries the edges.
Microwave Reheating
Cover loosely and warm in short intervals.
This can soften the center, but overheating may make the egg-based crumb rubbery.
Freezing
Freeze cooled wedges, separated with parchment, for up to 1 month for best quality.
Thaw in the refrigerator and reheat gently. Expect some texture change.
Preparing Ahead
Measure the flour and yogurt in advance if helpful, but whip the whites and fold the batter immediately before cooking.
The assembled batter is not suitable for a long rest because the trapped air gradually escapes.
Frequently Asked Questions
Is this a yeast bread?
No. Beaten egg whites provide the lift, so there is no yeast or proofing period.
Can I use glutinous rice flour?
Not for the same result. Sweet or glutinous rice flour produces a stickier texture and is not a direct substitute.
Can I use Greek yogurt?
Regular yogurt is preferred. Greek yogurt can make the base too thick, and replacing it would require a moisture adjustment.
Why is my bread dense?
The whites may have been underbeaten, overbeaten, or deflated during folding. Extra flour can also weigh down the batter.
Why did it brown before the center cooked?
The heat was likely too high, or the batter was spread unevenly. Use low heat and keep the skillet covered.
Can I skip separating the eggs?
Not if you want the intended lift. Simply whisking whole eggs into the batter gives a flatter, denser result.
Why did it stick?
The nonstick surface may be worn, or the bread may have been turned before it set. This oil-free method depends on a reliable pan.
Can I use a larger skillet?
A larger cooking surface produces a thinner round that cooks faster. Watch carefully rather than relying on the full timing.
Does it taste like eggs?
It has a mild egg flavor because eggs are a substantial part of the recipe. Savory or sweet accompaniments can complement it.
Can I double the recipe?
Make two separate rounds for more predictable cooking. Doubling the batter in the same small skillet creates a much deeper center that is harder to set evenly.
Is it gluten-free?
The ingredients are naturally free of wheat, but check product labels and preparation surfaces if you need to avoid gluten cross-contact.
How do I know the middle is ready?
The center should feel set, with no wet batter on a toothpick. If the top still moves like loose batter, continue cooking gently before turning.
3-Ingredient Soft Skillet Rice Bread
Description
A small stovetop bread with a golden surface and tender center, gently lifted with beaten egg whites.
- Prep time: Approximately 10 minutes
- Flour hydration: 5 minutes, overlapping preparation
- Cook time: 12–15 minutes, or longer as needed
- Rest time: 5 minutes
- Total time: Approximately 30 minutes
- Yield: One 6-inch round
- Servings: 2 modest servings or 4 small side portions
- Difficulty: Easy to moderate
Ingredients
Ingredients
- ½ cup (70 g) fine white rice flour
- 2 large eggs, separated
- ¼ cup (60 g) plain whole-milk yogurt, regular rather than Greek
Instructions
Instructions
- Whisk egg yolks and yogurt until combined.
- Stir in rice flour until smooth. Rest for 5 minutes.
- Beat egg whites in a clean, dry bowl until firm peaks form.
- Stir one-third of the whites into the base.
- Gently fold in the remaining whites in two additions.
- Warm a reliable nonstick skillet with a 6-inch cooking surface over low heat for 1 minute.
- Spoon in the batter and spread evenly. Cover.
- Cook for 8–10 minutes, until the edges and most of the top are set.
- Loosen carefully, remove from heat, and invert onto a heatproof plate using oven mitts.
- Slide back into the skillet, uncooked side down.
- Cover and cook for another 4–5 minutes, until golden and fully set.
- Rest for 5 minutes before cutting.