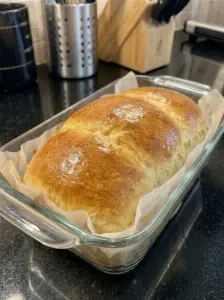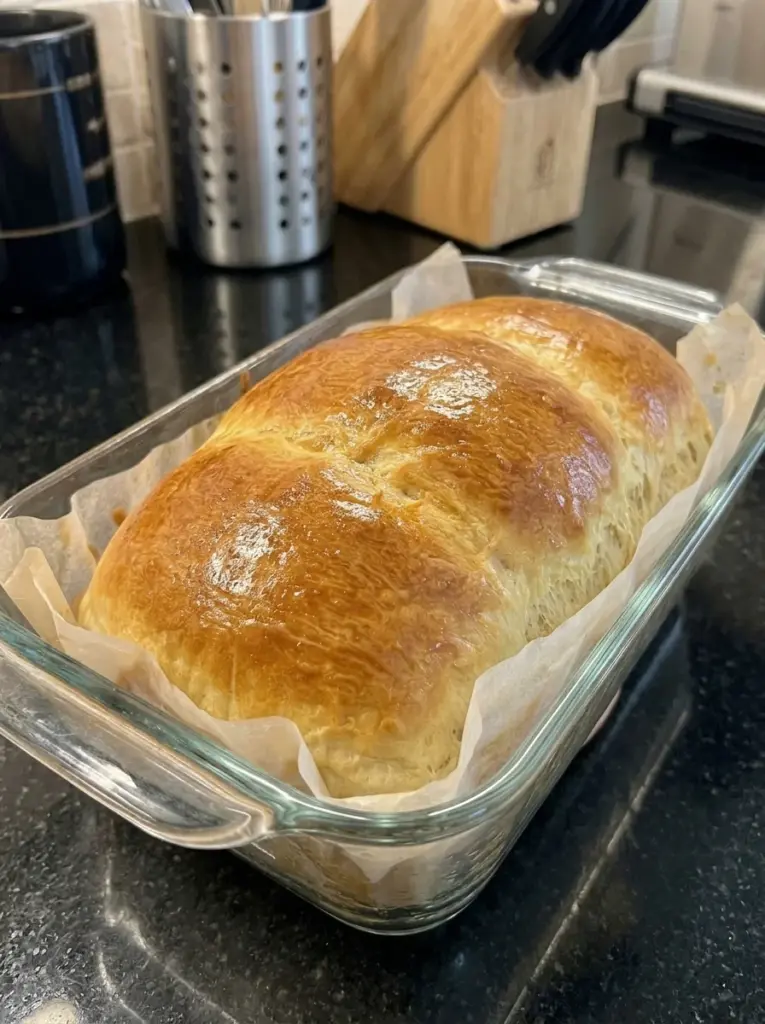
A golden loaf cooling on the counter can make even an ordinary day feel a little more comforting. This soft and fluffy no-knead milk bread has a tender crumb, a lightly sweet flavor, and a buttery finish that works just as well with strawberry jam as it does with a savory sandwich filling.
Whole milk, an egg, and melted butter enrich the dough, while a generous mixing with a sturdy spoon brings everything together. There is no stand mixer required and no lengthy kneading session. The dough rests and rises before you gently shape it into a loaf, let it become puffy again, and bake until golden.
The most useful skill here is learning what the dough should look and feel like. It should be soft and sticky after mixing, noticeably expanded after the first rise, and airy before baking. Give it the time it needs, handle it gently, and let the baked loaf cool before slicing for a tender sandwich bread you can use throughout the week.
Recipe at a Glance
- Hands-on preparation: About 15 minutes
- First rise: About 60–90 minutes
- Second rise: About 30–45 minutes
- Bake time: 30–40 minutes
- Cooling time: About 1 hour, or until no longer warm in the center
- Total time: About 3¼–4 hours, including cooling; rising may take longer in a cool kitchen
- Yield: One 9 × 5-inch loaf, about 10–12 slices
- Equipment: Large mixing bowl, sturdy spoon, loaf pan, clean cover, wire rack, and optional instant-read thermometer
Why You’ll Love This Milk Bread
- No mixer needed: Mix the dough with a spoon and shape it by hand.
- Soft, tender slices: Milk, butter, and egg create an enriched loaf suited to sandwiches and toast.
- A gently sweet flavor: A modest amount of sugar complements both sweet and savory toppings.
- Everyday ingredients: You do not need specialty bread improvers or a cooked flour paste.
- Freezer-friendly portions: Slice the cooled loaf and freeze what you will not use soon.
- A soft crust option: Brushing the baked loaf with butter gives the crust a more tender finish.
What Makes This a No-Knead Milk Bread?
Milk bread is a broad description for bread enriched with milk. This version is a simple enriched sandwich loaf. It does not use tangzhong or yudane, the cooked or scalded flour preparations used in some other milk bread recipes, so expect its own tender texture rather than an identical result to those styles.
No-knead means you do not repeatedly stretch and work the dough by hand. You still need to mix it thoroughly. Stirring distributes the ingredients and begins forming the dough structure, while the resting periods allow the flour to hydrate and the yeast to raise the loaf.
The dough will feel softer than a firm, hand-kneaded sandwich dough. That softness is useful: adding a large quantity of flour to make it completely dry to the touch can lead to a heavier loaf.
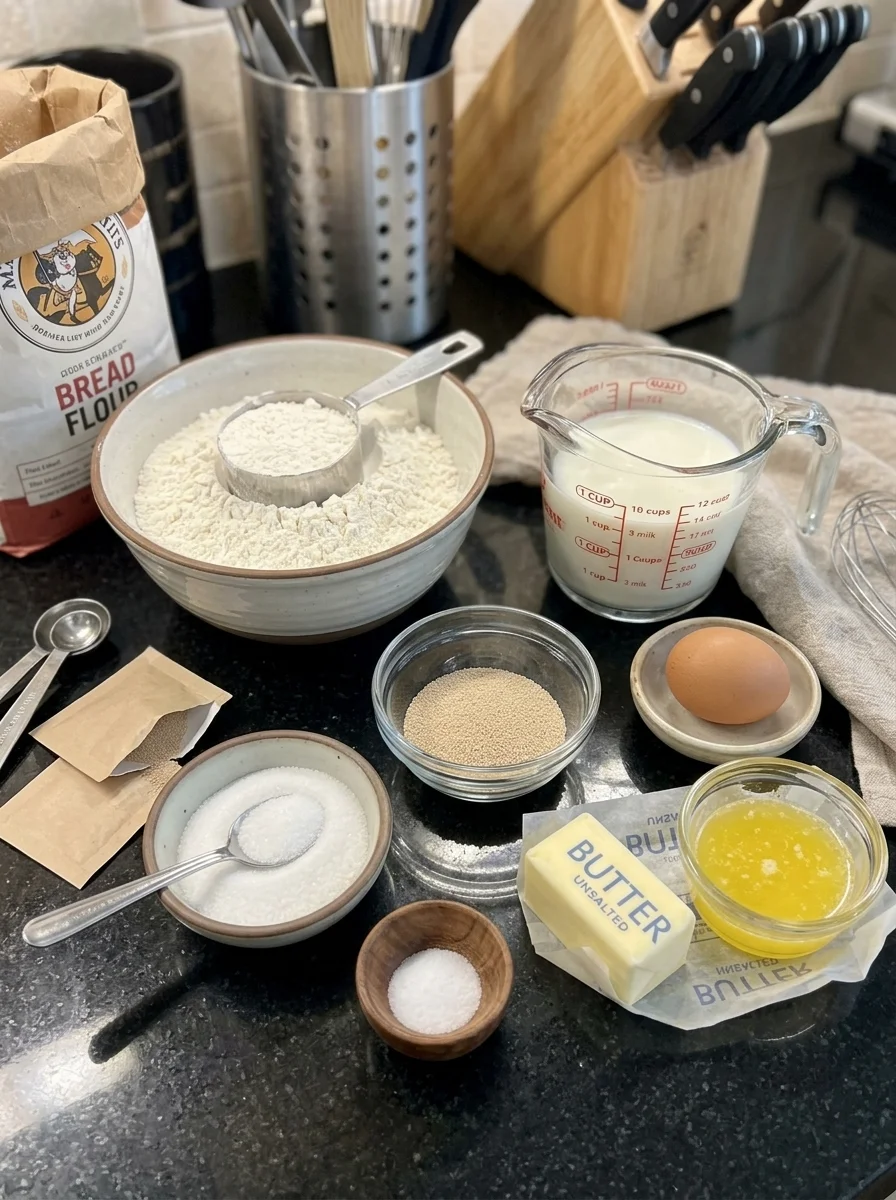
Ingredients
For the Dough
- 3 cups all-purpose flour or bread flour, spooned into the measuring cup and leveled
- 1 cup whole milk, lukewarm
- 2¼ teaspoons instant yeast, one standard packet
- 3 tablespoons granulated sugar
- 1 teaspoon salt
- 1 large egg, at room temperature
- 3 tablespoons unsalted butter, melted and slightly cooled
Optional Finishing Ingredients
- 1 tablespoon milk, for brushing before baking
- 1 tablespoon melted butter, for brushing after baking
- A little butter or cooking spray, for the pan
- A little flour, for shaping
Ingredient Notes
Flour: All-purpose flour gives a tender result, while bread flour generally produces a little more chew and structure. Use either, but expect some variation in how much moisture it absorbs. Spoon flour into the cup and level the top rather than scooping firmly from the bag. Packed cups can add more flour than intended.
Whole milk: Whole milk contributes flavor and richness. Warm it only until lukewarm, roughly 90–100°F, or follow the yeast manufacturer’s temperature guidance. Hot milk can damage yeast. Milk that is cool will usually make the rise slower rather than ruining the dough.
Instant yeast: Instant yeast can be mixed directly into the dough. It does not require a separate foaming step in this recipe. Check that it is within its usable date and has been stored according to the package. If using active dry yeast, follow its package directions for dissolving and expect the rise to vary.
Sugar: Three tablespoons give a lightly sweet loaf. Sugar also helps the crust brown, so check the color near the end of baking and tent with foil if needed. Substituting honey changes both the liquid balance and browning; granulated sugar is the simplest choice for this formula.
Salt: Salt balances the sweetness and supports a more rounded bread flavor. Measure it rather than adding a casual large pinch. Fine salt and coarse kosher salt do not occupy the same volume consistently, so use the same salt type when repeating a batch.
Egg: A large egg contributes richness and structure. Let it lose its refrigerator chill while you prepare the other ingredients. A cold egg may cool the dough and extend the rise.
Butter: Melt the butter and let it cool until just warm. Very hot butter should not be poured into the yeast mixture. Unsalted butter makes it easier to control the salt in the loaf.
How to Make Soft & Fluffy No-Knead Milk Bread
1. Combine the Wet Ingredients
In a large bowl, whisk the lukewarm milk, instant yeast, sugar, egg, and cooled melted butter until combined. Make sure there are no large streaks of egg remaining.
The bowl needs enough space for the dough to expand during its first rise. If your kitchen is cool, use a comfortably warm place for proofing, away from direct heat.
2. Mix in the Flour and Salt
Add the flour and salt. Stir with a sturdy spoon until no dry flour remains, scraping the bottom and sides of the bowl. Continue stirring firmly for another minute or so to make an evenly mixed, thick dough.
It should look sticky and cohesive rather than pour like cake batter. Depending on your flour and how it was measured, it may be too sticky to handle neatly at this stage. Avoid adding flour immediately just to make it feel like a firm dough.
If it seems unusually loose, let it rest for 10 minutes before reassessing. Flour absorbs moisture as it sits. If genuinely necessary, add a small amount of flour, one tablespoon at a time, stopping while the dough is still soft.
3. Let the Dough Rise
Cover the bowl and let it stand for about 60–90 minutes, until roughly doubled. A reusable cover or lightly greased plastic wrap helps prevent the surface from drying out.
Use the dough’s expansion as your guide. In a cool kitchen, enriched dough may take longer than the suggested time. A straight-sided bowl or a small mark at the starting level can make the change easier to judge.
4. Prepare the Pan
Grease a 9 × 5-inch loaf pan. Lightly flour a work surface and your hands. Use a flexible spatula or scraper to help ease the dough out of the bowl.
A different pan size changes the loaf’s height and baking behavior. A 9 × 5-inch pan is the intended size for these instructions, and the dough may produce a modestly domed loaf rather than a very tall one.
5. Shape Gently
Pat the dough into a rough rectangle with a short side about as wide as the pan. Gently roll it into a log, pinch the seam closed, and tuck the ends underneath if needed.
Place it seam-side down in the pan. Use only enough flour to keep it manageable. You do not need to work the dough until its surface is perfectly smooth.
If the dough is very soft, use a scraper to help roll and lift it. Rough but gentle shaping is preferable to incorporating a large quantity of extra flour.
6. Let It Rise Again
Cover the pan loosely and let the dough rise for about 30–45 minutes, or until visibly expanded and puffy. It should approach the rim of the pan, though the exact height depends on your pan and dough.
A gentle fingertip press should leave an indentation that slowly springs back partway. If it springs back immediately, the dough may need more time. If the surface looks fragile and begins to sink, it may have risen too far; bake promptly and handle it carefully.
Meanwhile, preheat the oven to 350°F with a rack near the center.
7. Brush and Bake
If desired, brush the top very gently with milk. Bake for 30–40 minutes, until golden brown and baked through. Check toward the earlier end of the range because ovens and pans vary.
If the top is browning faster than the interior is baking, loosely tent it with foil. An instant-read thermometer inserted into the center should read approximately 190–200°F as a doneness guide for this enriched loaf. Use that along with a set structure and baked appearance rather than crust color alone.
8. Add the Butter Finish
Remove the pan from the oven. Brush the hot loaf with the optional melted butter for a softer, buttery crust.
Let the bread stand in the pan for about 10 minutes, then carefully remove it to a wire rack. Leaving it in the pan too long can trap steam around the sides and bottom.
9. Cool Before Slicing
Allow about an hour of cooling, or until the center is no longer warm. A large loaf may need longer. Although an early warm slice is tempting, slicing too soon can compress the crumb and leave the interior looking gummy.
Use a serrated bread knife and a gentle sawing motion rather than pressing downward. Slice as needed for the freshest texture, or cut the entire cooled loaf if preparing freezer portions.
Tips for a Tender Loaf
Keep the dough soft. Extra flour is one of the easiest ways to make this bread heavier. Lightly flour your hands and work surface rather than repeatedly dusting the entire dough.
Mix thoroughly at the start. No-knead does not mean barely mixed. Make sure all the flour is hydrated and the dough forms one cohesive mass.
Let the rises follow the dough. The times are estimates. Milk, butter, and egg create an enriched dough that may rise more slowly when the ingredients or room are cool.
Avoid a hot proofing spot. Direct heat can warm the outside unevenly and encourage the dough to rise faster than you can judge it. A mild, draft-free place is easier to manage.
Treat the second rise gently. Once puffy, avoid bumping the pan or brushing aggressively. The dough contains the gas that helps create the loaf’s structure.
Cool completely for sandwiches. A fully cooled loaf gives cleaner slices and better support for fillings. You can warm individual slices afterward.
Troubleshooting
| Problem | Likely reason | What to change |
|---|---|---|
| Dough is very sticky | Soft enriched dough, lightly measured flour, or incomplete hydration | Let it rest briefly; use lightly floured hands and a scraper before adding more flour. |
| Dough rises slowly | Cool ingredients, cool room, or weak yeast | Give it more time in a mildly warm spot and check yeast freshness for the next batch. |
| Loaf is dense | Too much flour, insufficient rise, or weak dough development | Measure flour carefully, mix thoroughly, and let the dough expand before baking. |
| Top sinks | Dough rose too far or center was not fully baked | Watch the second rise and check doneness before removing the loaf. |
| Crust browns too quickly | Enriched dough browning before the center sets | Tent loosely with foil and continue baking. |
| Center seems gummy | Underbaking or slicing while hot | Check the center during baking and allow a longer cooling period. |
| Loaf is shorter than expected | Pan size, limited proofing, or soft dough structure | Use the stated pan, judge expansion visually, and avoid expecting identical height from every flour. |
| Bread dries out quickly | Excess flour, overbaking, or loose storage | Keep the dough soft, check doneness promptly, and wrap only after cooling. |
Variations
Lightly Sweet Breakfast Loaf
Keep the dough as written and serve with jam, honey, or cinnamon butter. Adding sweetness at serving time preserves the loaf’s usefulness for sandwiches.
Sesame-Topped Milk Bread
Brush the proofed loaf lightly with milk and sprinkle with a small amount of sesame seeds before baking. Apply gently so you do not deflate the dough.
Savory Serving Style
Toast slices and serve with eggs, sliced tomatoes, or cheese. The bread is lightly sweet, but that sweetness pairs well with savory fillings.
Small Dinner Rolls
The dough can be divided into small portions and shaped as rolls, but pan arrangement, proofing, and bake time will differ. Treat this as a separate variation and begin checking earlier than for a full loaf; do not use the loaf’s bake time unchanged.
Whole-Wheat Experiment
A small substitution of whole-wheat flour will make the loaf heartier, but it can also change liquid needs and reduce its lightness. An all-whole-wheat substitution is not a direct equivalent to this recipe.
Ways to Serve Milk Bread
Use thin slices for turkey sandwiches, peanut butter and jelly, or grilled cheese. Slightly thicker slices work well for breakfast toast, especially with salted butter and fruit preserves.
Day-old slices are useful for French toast because they absorb the custard while holding their shape. Cubed leftovers can also become bread pudding or toasted croutons.
For a simple snack, lightly toast a slice and add butter and honey. Toasting refreshes the surface of bread that has lost a little of its first-day softness.
Storage, Freezing, and Reheating
Let the loaf cool completely before putting it in a bread bag or airtight container. Warm bread releases moisture that can collect inside the packaging and make the crust damp.
Keep the cooled loaf at room temperature for up to about 3 days in a cool, dry kitchen. Storage life varies with humidity and handling, so freeze it sooner if you will not finish it. The presence of baked-in milk and egg does not mean this fully baked loaf should be treated like an unbaked dairy mixture.
Refrigeration tends to speed bread staling, so freezing is generally a better choice for longer storage. Slice the loaf, wrap well, and freeze for up to 2 months for best quality. Separate slices with parchment if you want to remove them individually.
Toast slices straight from frozen, or let wrapped portions thaw at room temperature. Warm a thawed slice briefly in a toaster oven if you prefer a softer center and lightly crisp edges. Repeated warming can dry bread out, so heat only what you plan to eat.
If mold develops, discard the loaf rather than cutting away only the visible spot.
Frequently Asked Questions
Is this the same as Japanese milk bread?
It is an enriched milk-based sandwich loaf, but it does not use a tangzhong or yudane preparation. Its method and final texture differ from milk breads made with those techniques.
Can I use bread flour instead of all-purpose flour?
Yes. Bread flour generally gives more chew and structure and may absorb a little more liquid. Keep the dough soft rather than adding flour until it feels dry.
Can I substitute active dry yeast?
You can use active dry yeast, following the package directions for preparation. If the manufacturer recommends dissolving it, use some of the recipe’s milk rather than adding extra liquid. The rising time may change.
Why does my dough need longer to rise?
Room temperature, ingredient temperature, yeast condition, and flour all affect fermentation. Use noticeable expansion rather than the clock alone. A cool dough may simply need more time.
Do I have to knead when shaping?
No. Patting and rolling the dough into a log is shaping, not a kneading session. A little gentle handling is enough to form the loaf.
Can I omit the egg or replace the milk?
Those changes affect liquid balance, richness, and structure. This formula is written for milk and egg; removing them without further adjustments may produce a different loaf. A recipe designed for an egg-free or dairy-free result is a more predictable starting point.
Can I slice it after 30 minutes?
The outside may feel cool while the center is still warm. Wait until the loaf has cooled through for the cleanest slices. About an hour is a more useful starting point, with extra time for a loaf that still feels warm.
How many calories are in each slice?
The whole loaf contains roughly 2,000 calories before the optional finishing butter, using typical ingredient values. That works out to approximately 165–200 calories when cut into 12–10 slices. This is a rough estimate; flour measurement, milk, butter, and slice size change the total. Calculate from your ingredient labels if you need a more precise number.
Recipe Card
Soft & Fluffy No-Knead Milk Bread
A tender, lightly sweet sandwich loaf made with milk, egg, and butter, mixed by hand without a stand mixer or traditional kneading.
Prep: 15 minutes | Rise: 1½–2¼ hours | Bake: 30–40 minutes | Cool: About 1 hour
Total: About 3¼–4 hours, including cooling
Yield: One 9 × 5-inch loaf, about 10–12 slices
Ingredients
- 3 cups all-purpose flour or bread flour, spooned and leveled
- 1 cup lukewarm whole milk
- 2¼ teaspoons instant yeast
- 3 tablespoons granulated sugar
- 1 teaspoon salt
- 1 large egg, at room temperature
- 3 tablespoons unsalted butter, melted and slightly cooled
- 1 tablespoon milk, optional, for brushing before baking
- 1 tablespoon melted butter, optional, for brushing after baking
- Butter or cooking spray, for greasing
- A little flour, for shaping
Instructions
- Whisk the lukewarm milk, yeast, sugar, egg, and cooled melted butter in a large bowl.
- Stir in the flour and salt until no dry flour remains. Mix firmly for another minute or so, forming a cohesive, soft, sticky dough.
- Cover and let rise for about 60–90 minutes, or until roughly doubled. Allow more time if needed.
- Grease a 9 × 5-inch loaf pan. Turn the dough onto a lightly floured surface and gently pat into a rectangle.
- Roll into a log, pinch the seam closed, and place seam-side down in the pan.
- Cover loosely and let rise for about 30–45 minutes, until expanded and puffy. Preheat the oven to 350°F.
- Brush gently with optional milk. Bake for 30–40 minutes, tenting with foil if the top browns too quickly. The center should be set and read approximately 190–200°F.
- Brush with optional melted butter. Rest in the pan for 10 minutes, then transfer to a wire rack.
- Cool for about an hour, or until no longer warm in the center, before slicing.
Notes
- Rising times are estimates; judge the dough by its expansion and texture.
- Add extra flour sparingly to avoid a dense loaf.
- Whole milk and a large egg are the intended ingredients for this formula.
- Store fully cooled bread wrapped at room temperature for up to about 3 days, or freeze slices for up to 2 months for best quality.
- Nutrition is approximate: roughly 165–200 calories per slice for 12–10 slices, before optional finishing butter.
Final Thoughts
This loaf rewards a soft dough, patient rising, and a thorough cooling period. With a spoon, a bowl, and a little attention to those details, you can make a tender milk bread for sandwiches, toast, and simple buttered slices. The optional butter finish adds the final touch to a loaf built around everyday ingredients.
Print
Soft & Fluffy No-Knead Milk Bread
Ingredients
For the Dough
- 3 cups all-purpose flour or bread flour, spooned into the measuring cup and leveled
- 1 cup whole milk, lukewarm
- 2¼ teaspoons instant yeast, one standard packet
- 3 tablespoons granulated sugar
- 1 teaspoon salt
- 1 large egg, at room temperature
- 3 tablespoons unsalted butter, melted and slightly cooled
Optional Finishing Ingredients
- 1 tablespoon milk, for brushing before baking
- 1 tablespoon melted butter, for brushing after baking
- A little butter or cooking spray, for the pan
- A little flour, for shaping
Instructions
- Whisk the lukewarm milk, yeast, sugar, egg, and cooled melted butter in a large bowl.
- Stir in the flour and salt until no dry flour remains. Mix firmly for another minute or so, forming a cohesive, soft, sticky dough.
- Cover and let rise for about 60–90 minutes, or until roughly doubled. Allow more time if needed.
- Grease a 9 × 5-inch loaf pan. Turn the dough onto a lightly floured surface and gently pat into a rectangle.
- Roll into a log, pinch the seam closed, and place seam-side down in the pan.
- Cover loosely and let rise for about 30–45 minutes, until expanded and puffy. Preheat the oven to 350°F.
- Brush gently with optional milk. Bake for 30–40 minutes, tenting with foil if the top browns too quickly. The center should be set and read approximately 190–200°F.
- Brush with optional melted butter. Rest in the pan for 10 minutes, then transfer to a wire rack.
- Cool for about an hour, or until no longer warm in the center, before slicing.