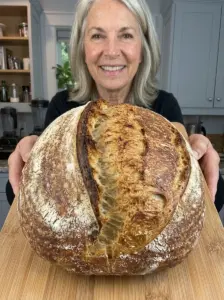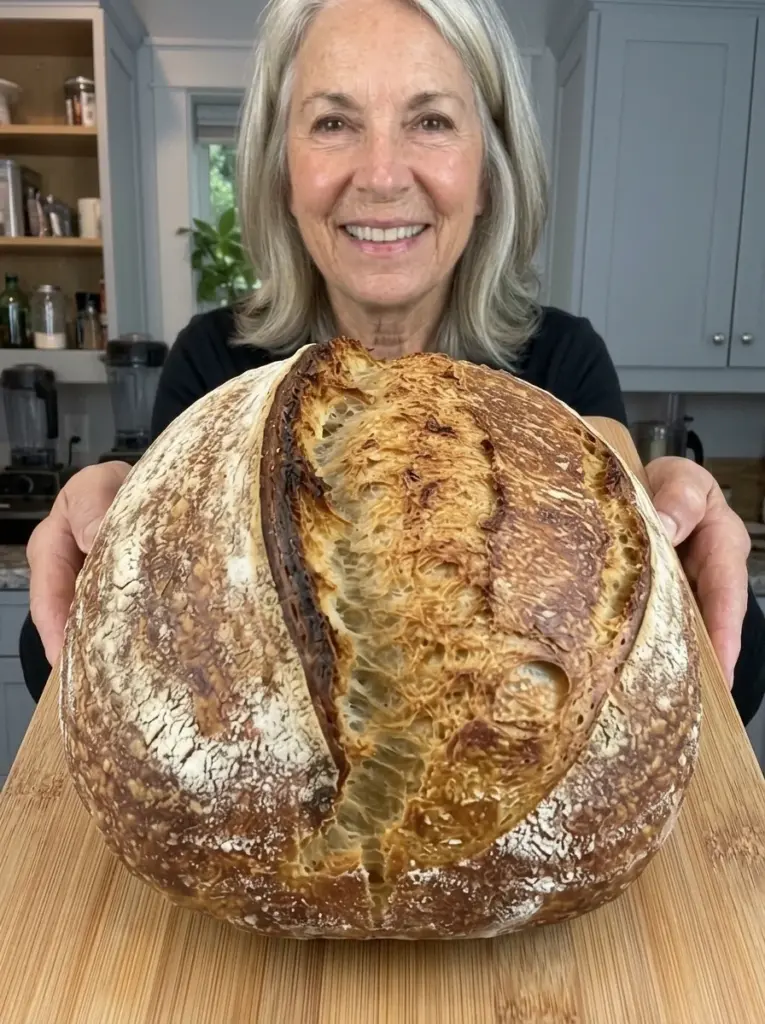
A crisp golden crust, a chewy interior, and a lightly wheaty flavor make Rustic Country Bread a useful loaf for everyday meals. This version uses a little whole-wheat flour alongside bread flour and a small amount of yeast for an overnight rise. The dough is mixed in a bowl and baked as a round loaf in a covered Dutch oven.
The preparation is simple, but the dough needs time. An overnight rest lets the flour hydrate and fermentation develop flavor without a long kneading session. A short shaping step and final rise prepare it for the oven, where the covered pot helps retain moisture released by the dough during the first part of baking.
Slice it for toast, serve wedges with soup, or use the next day’s bread for grilled sandwiches. The crust is crispest on the day it is baked and softens during storage. A brief oven refresh can bring back some crispness.
This is a suggested home-baking formula rather than a kitchen-tested recipe. Flour absorption, room temperature, and cookware affect the result. Use the dough cues below to guide your timing.
Recipe at a Glance
- Hands-on preparation: About 20 minutes, spread across the process
- First rise: Approximately 12–16 hours in a cool room around 68–72°F
- Final rise: About 45–75 minutes
- Baking: About 40–50 minutes
- Cooling: At least 1½–2 hours
- Total: Approximately 15½–20½ hours, mostly unattended
- Yield: One medium round loaf
- Servings: Approximately 12 slices
This recipe uses commercial yeast rather than sourdough starter. The overnight schedule is intended for a cool room; a warmer kitchen may require substantially less time.
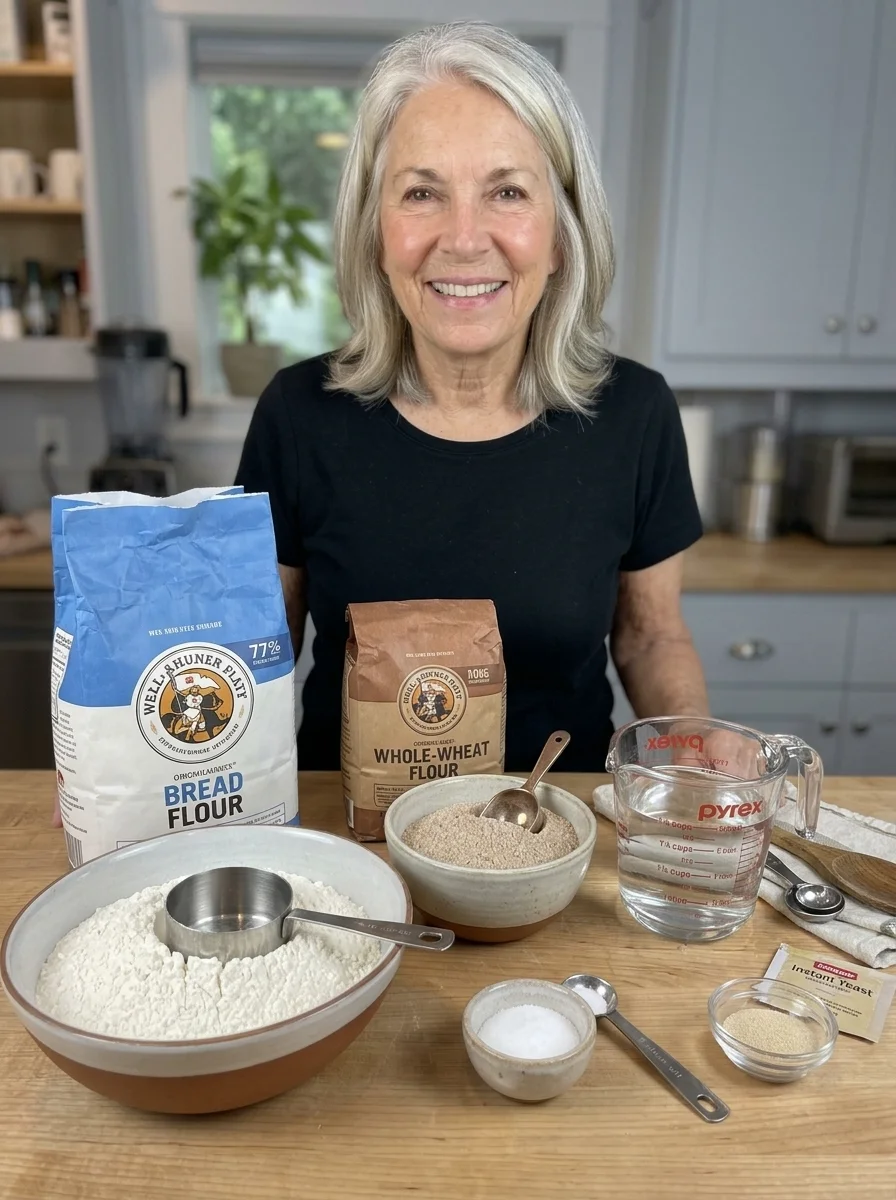
Ingredients
- 2¾ cups bread flour, spooned and leveled
- ¼ cup whole-wheat flour, spooned and leveled
- 1¼ teaspoons fine table salt
- ¼ teaspoon instant yeast
- 1¼ cups water, plus 1–2 tablespoons only if needed
- A little additional flour for shaping and dusting
The loaf contains no added sugar, oil, eggs, or dairy. Optional butter and sandwich fillings are separate serving ingredients.
What Makes This a Country-Style Loaf?
Country bread is a broad description rather than one fixed formula. Here it means a round, crusty loaf with a simple lean dough and a small whole-wheat component for flavor.
The interior should be chewy and somewhat irregular, but it does not need enormous holes. A moderately open crumb is useful for holding butter, jam, or sandwich fillings.
The whole-wheat flour is deliberately modest. It adds a little nutty flavor without making the dough as demanding as a loaf with a large percentage of whole grain.
Ingredient Notes
Bread Flour
Bread flour provides strength and chew. All-purpose flour can be tried, but brands differ in protein content and absorption, so the dough may feel softer.
Measure by spooning flour into the cup and leveling the top. Packing the cups can make the dough dry, reducing expansion and producing a heavier loaf.
Whole-Wheat Flour
A quarter cup contributes flavor and color. Replacing much more of the bread flour changes water needs, dough strength, and fermentation behavior.
For a first attempt, follow the small whole-wheat amount before experimenting with a heartier version.
Salt
Fine table salt is specified because coarse kosher salts vary substantially in density. Use an appropriate conversion for a different product rather than assuming equal teaspoon volumes.
Salt gives flavor and influences fermentation and dough strength. Omitting it changes how the dough behaves, not just how the loaf tastes.
Instant Yeast
The small yeast amount suits the long first rise. Do not substitute a full packet while keeping the overnight schedule; that could cause the dough to overferment.
Use yeast that has been stored according to its package instructions. A culture or sourdough starter is not an equivalent volume-for-volume substitute.
Water
Begin with room-temperature water, especially if the dough will rest overnight. Very warm water can accelerate fermentation beyond the intended schedule.
The dough should be sticky and shaggy after mixing, with no dry flour. Add an extra tablespoon only if the mixture remains dry after thorough stirring. You may not need both optional tablespoons.
Equipment
Use a large bowl, sturdy spoon, dough scraper or spatula, clean towel, wire rack, and a covered Dutch oven appropriate for bread baking. A 4–6-quart pot is a practical size for this loaf.
Read the cookware manufacturer’s instructions. The pot, lid, and knob must tolerate the baking temperature, and not all enameled cookware permits empty preheating. If your pot does not allow it, use an established cold-pot method specifically suited to that cookware rather than applying the preheated-pot instructions below.
If using parchment, choose a product rated for the intended oven temperature. Do not use wax paper. Keep paper clear of heating elements and avoid excessive overhang outside the pot.
A kitchen thermometer is useful for the baked center, while a sharp scoring blade helps control where the loaf opens.
How to Make Rustic Country Bread
1. Combine the Dry Ingredients
Stir both flours, salt, and instant yeast together in a large bowl. Distribute the small amount of yeast throughout the flour.
Choose a bowl with enough room for the dough to expand. A clear straight-sided container makes the rise easier to measure, but an ordinary bowl works too.
2. Add Water and Mix Thoroughly
Pour in the measured water. Stir until every dry pocket is incorporated, scraping the bottom and sides.
The dough should form a sticky, shaggy mass. It should not be a dry ball or a pourable batter. If it remains crumbly despite thorough mixing, add one extra tablespoon of water and reassess.
Cover with a lid or wrap that prevents the surface from drying. A towel alone may allow a dry skin to form during a long rest in a dry room.
3. Allow the Overnight Rise
Leave at approximately 68–72°F for about 12–16 hours, adjusting to the dough’s condition. It should expand substantially, become bubbly, and look aerated rather than dense.
A gently domed surface or a top just beginning to level is useful. Do not deliberately wait for the dough to collapse into a thin, exhausted mixture.
At a warmer room temperature, begin checking sooner. A very cool kitchen may require longer. The overnight range is a planning guide, not a rule that overrides visible fermentation.
4. Gather and Preshape
Lightly flour the work surface and your hands. Scrape the dough out gently, preserving some air.
Fold the edges toward the center to gather it into a rough round. Cover and rest about 15 minutes so it relaxes before final shaping.
Use a scraper to manage stickiness instead of working large amounts of flour into the dough. Surface dusting is different from adding flour throughout the loaf.
5. Shape the Round
Turn the dough seam-side down and gently draw it toward you with a scraper or your hands to create light surface tension. Rotate and repeat a few times as needed.
Stop before the skin tears. The aim is a coherent round that holds its form, not a tight ball with every bubble squeezed out.
Place seam-side down on suitable parchment for proofing, or seam-side up in a well-floured towel-lined bowl if you plan to invert it before baking.
6. Final Proof
Cover and let rise about 45–75 minutes, or until puffy and lighter. It may not double again.
A gentle indentation should recover slowly rather than immediately springing flat. Look at the whole dough as well: a tight, heavy round needs more time, while a fragile dough that deflates may have gone too far.
7. Preheat Suitable Cookware
If your Dutch oven explicitly permits empty preheating, place it with its lid in the oven and heat to 450°F. Allow it to heat thoroughly according to manufacturer guidance, often about 30 minutes once the oven is hot.
Use dry, substantial oven mitts and a clear heat-safe landing area. The lid and handles remain hot even when they look ordinary.
Coordinate preheating with the final proof rather than waiting until the dough is overexpanded. If your equipment does not permit this method, use different suitable cookware or a separately developed method.
8. Score and Load
Score the loaf about ¼–½ inch deep with a sharp blade. One confident slash or a simple cross is enough for this rustic shape.
Carefully transfer to the hot pot using temperature-rated parchment if using it. Keep hands clear of the sides and replace the lid.
No water needs to be poured into the Dutch oven. The dough releases moisture beneath the lid during the covered bake.
9. Bake Covered, Then Uncovered
Bake covered for about 25–30 minutes. Remove the lid carefully, keeping your face and hands away from the escaping steam.
Continue uncovered for about 15–20 minutes, until the crust is a deep golden brown. Total baking time is generally about 40–50 minutes, depending on the pot and oven.
A center temperature near 205–210°F is a useful supporting guide for this lean loaf. Combine it with crust color and a set structure rather than relying only on one reading.
If the bottom darkens excessively in your setup, adjust the rack or use an appropriate heat-buffering strategy on a future bake. Do not remove an obviously underbaked loaf simply to preserve a pale crust.
10. Cool on a Rack
Remove the loaf from the pot and place it on a wire rack. Let it cool at least 1½–2 hours, longer if the center remains hot.
A crackling crust can occur as it cools. Avoid wrapping while warm, which traps steam and softens the surface.
Cutting immediately can compress the crumb and make it seem gummy. For warm bread, reheat a cooled slice after cutting.
Sample Schedule
| Time | Task |
|---|---|
| Evening | Mix dough and cover. |
| Next morning | Check expansion and bubbles; continue only when the dough is ready. |
| After bulk fermentation | Preshape, rest briefly, then shape. |
| During final proof | Preheat suitable Dutch oven and oven. |
| When puffy | Score and bake. |
| Later that day | Slice after thorough cooling. |
The schedule is intentionally flexible. If the kitchen is warmer or cooler than the reference range, fermentation can shift by several hours.
Tips for a Better Loaf
Measure flour lightly. Extra flour changes the dough’s ability to hydrate and expand.
Respect the temperature. A small amount of yeast can still overferment given enough warmth and time.
Keep the surface covered. A dry skin interferes with expansion and shaping.
Build tension gently. Shaping is about organizing the dough, not kneading it into a dense ball.
Use suitable cookware. Temperature limits and empty-preheating guidance differ among products.
Cool fully. The long bake needs a meaningful cooling period before the crumb is ready for clean slicing.
Troubleshooting
| Problem | Possible cause | Helpful adjustment |
|---|---|---|
| Dough barely expands | Old yeast or a very cool room | Check yeast condition and allow more time in gentle warmth. |
| Dough collapses before shaping | Excess fermentation | Shorten the rise in warmer conditions and follow volume cues. |
| Loaf spreads flat | Weak shaping, very wet dough, or overproofing | Measure carefully and build gentle tension before the final proof. |
| Crumb is dense | Insufficient fermentation or excess flour | Follow expansion cues and spoon and level flour. |
| Interior seems gummy | Underbaking or slicing hot | Bake until set and cool thoroughly. |
| Crust softens in storage | Moisture moves from crumb to crust | Refresh briefly in the oven before serving. |
Variations
Rosemary Country Bread
Add a modest amount of finely chopped rosemary to the dry ingredients. Begin lightly so the herb does not overwhelm the wheat flavor.
Seeded Surface
Lightly moisten the shaped loaf and add a small quantity of sesame seeds before proofing. Keep seeds away from the pot’s bare surface, where loose ones can scorch.
All-White Loaf
Replace the quarter cup whole-wheat flour with bread flour. The flavor will be milder and absorption may differ slightly.
More Whole Grain
A larger whole-wheat substitution needs reassessment of water and fermentation. Start modestly rather than replacing most of the flour on the first attempt.
These variations are not kitchen-tested here. Keep notes on changes if you want to reproduce a result.
Serving Ideas
Cut thick slices for soup or stew, or toast thinner slices for breakfast. The chewy crumb and sturdy crust work well with butter, jam, or a little olive oil.
For sandwiches, allow the loaf to cool completely and use a serrated knife. Very large holes can let wet fillings leak, so a moderately open crumb is practical.
Day-old bread makes good grilled cheese, crostini, or garlic toast. Dry pieces can become breadcrumbs or croutons.
Storage and Freezing
Keep the fully cooled loaf at room temperature in a cool kitchen for about 2 days. A paper bag preserves crust better for a short period, while an airtight bag keeps the interior softer but softens the exterior.
Freeze slices or sections in a well-sealed freezer bag for up to 3 months for best quality. Freeze while fresh rather than waiting until the loaf is stale.
Toast slices from frozen, or thaw a section and refresh in a 350°F oven for about 8–12 minutes, adjusting for size. Avoid prolonged heating that dries the crumb.
Refrigeration generally accelerates bread staling, so freezing is more useful for longer storage. Discard bread with visible mold rather than trimming away only the spot.
Nutrition Notes
With the loaf divided into twelve slices, a reasonable illustrative estimate is approximately 110–130 calories per slice. Flour brands, cup measurements, and slice size change the total.
The bread contains wheat and is not gluten-free. It has no dairy or eggs as written, but serving additions may introduce them.
For closer numbers, add the values for your measured flour and other ingredients and divide by the actual number of portions. No nutritional estimate can make twelve uneven slices identical.
Frequently Asked Questions
Is this sourdough?
No. It uses instant yeast. Sourdough requires an active starter and a different formula and fermentation assessment.
Do I need to knead?
No prolonged kneading is required. Thorough initial mixing, the long rest, and gentle shaping are the intended method.
Can I use a full packet of yeast?
Not while keeping the overnight room-temperature schedule. More yeast requires a different timeline.
Can I use active dry yeast?
Follow its package instructions. If dissolving first, use part of the measured water rather than additional water. Fermentation timing can differ.
What if my room is very warm?
Check the dough much sooner. A different refrigerated or reduced-yeast schedule may be more suitable, but do not leave visibly finished dough out simply to reach the stated hours.
Can I bake without a Dutch oven?
Yes, with a method designed for your pan and oven. This article provides the covered-pot approach; an uncovered loaf has different support, steam, and crust conditions.
Should I add oil?
The base is a lean dough and does not require it. Oil changes texture and crust, so it would be a separate variation.
Can I double it?
Divide into two loaves and bake in appropriately sized cookware, checking each independently. A single oversized loaf needs different baking and cooling times.
Recipe Card
Rustic Country Bread
A lean, lightly whole-wheat overnight yeast loaf with a crisp crust. Suggested formula; not kitchen-tested here.
Yield: 1 round loaf, about 12 slices | Total: Approximately 15½–20½ hours, mostly unattended
Ingredients
- 2¾ cups bread flour, spooned and leveled
- ¼ cup whole-wheat flour
- 1¼ teaspoons fine table salt
- ¼ teaspoon instant yeast
- 1¼ cups room-temperature water, plus 1–2 tablespoons only if needed
- A little flour for shaping
Instructions
- Mix flours, salt, and yeast. Add water and stir thoroughly until no dry flour remains. Add optional water only if dry and crumbly.
- Cover and rise about 12–16 hours near 68–72°F, or until substantially expanded and bubbly. Check earlier in warmer conditions.
- Turn onto a lightly floured surface, gather into a round, cover, and rest 15 minutes.
- Shape gently with light surface tension. Cover and proof 45–75 minutes, until puffy.
- If the cookware permits empty preheating, heat the covered Dutch oven at 450°F according to its manufacturer guidance during the final proof.
- Score and carefully transfer the loaf to the hot pot. Cover and bake 25–30 minutes.
- Remove the lid and bake another 15–20 minutes until deeply golden and baked through. A center reading around 205–210°F is a useful guide.
- Cool on a rack at least 1½–2 hours before slicing.
Storage: Keep cooled bread at room temperature about 2 days or freeze up to 3 months for best quality.
Estimated calories: Approximately 110–130 per one-twelfth loaf, before serving additions.
Print
Rustic Country Bread
Description
A lean, lightly whole-wheat overnight yeast loaf with a crisp crust. Suggested formula; not kitchen-tested here.
Yield: 1 round loaf, about 12 slices | Total: Approximately 15½–20½ hours, mostly unattended
Ingredients
- 2¾ cups bread flour, spooned and leveled
- ¼ cup whole-wheat flour
- 1¼ teaspoons fine table salt
- ¼ teaspoon instant yeast
- 1¼ cups room-temperature water, plus 1–2 tablespoons only if needed
- A little flour for shaping
Instructions
- Mix flours, salt, and yeast. Add water and stir thoroughly until no dry flour remains. Add optional water only if dry and crumbly.
- Cover and rise about 12–16 hours near 68–72°F, or until substantially expanded and bubbly. Check earlier in warmer conditions.
- Turn onto a lightly floured surface, gather into a round, cover, and rest 15 minutes.
- Shape gently with light surface tension. Cover and proof 45–75 minutes, until puffy.
- If the cookware permits empty preheating, heat the covered Dutch oven at 450°F according to its manufacturer guidance during the final proof.
- Score and carefully transfer the loaf to the hot pot. Cover and bake 25–30 minutes.
- Remove the lid and bake another 15–20 minutes until deeply golden and baked through. A center reading around 205–210°F is a useful guide.
- Cool on a rack at least 1½–2 hours before slicing.
Storage: Keep cooled bread at room temperature about 2 days or freeze up to 3 months for best quality.
Estimated calories: Approximately 110–130 per one-twelfth loaf, before serving additions.