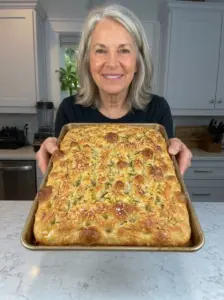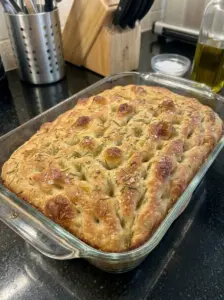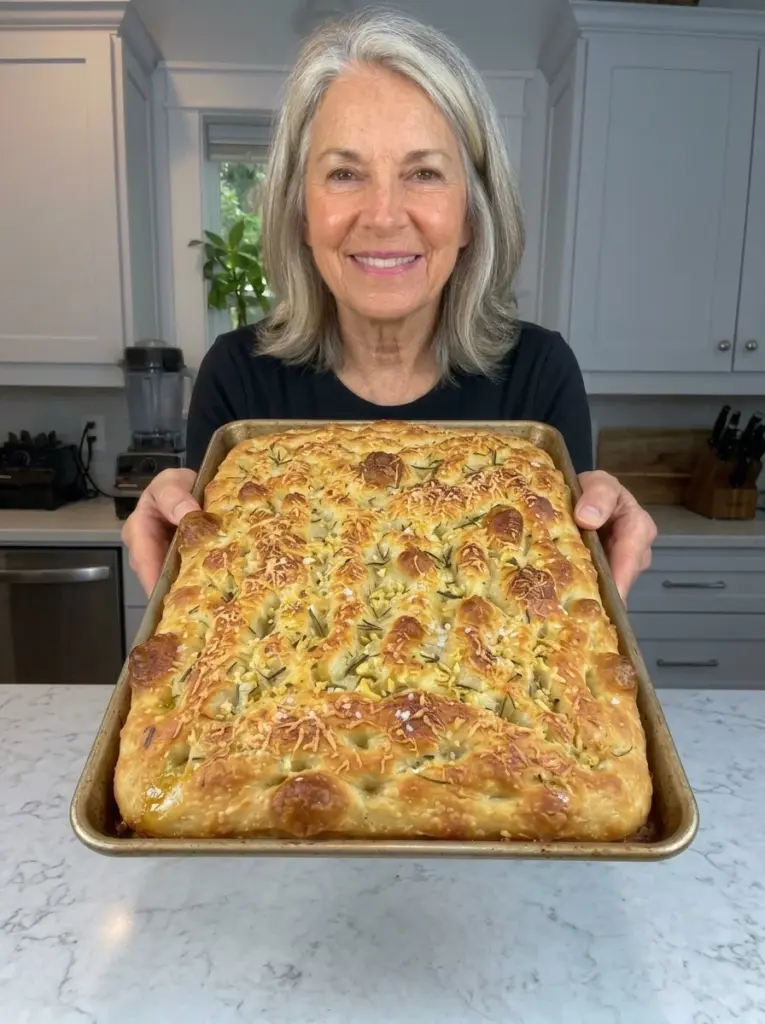
Soft, airy, deeply golden, and loaded with savory garlic and Parmesan flavor, this No-Knead Garlic Parmesan Focaccia is an easy homemade bread that looks and tastes bakery-worthy. 🧄🧀🍞
The dough requires no traditional kneading. Instead, a wet, sticky dough develops structure and flavor as it slowly rises until bubbly and pillowy. Plenty of extra-virgin olive oil creates beautifully crisp edges, while a garlic-infused oil, finely grated Parmesan, fresh rosemary, flaky sea salt, and black pepper turn the top into an irresistible savory crust.
Serve this focaccia warm with soup or pasta, use thick pieces for sandwiches, add it to a charcuterie board, or simply tear off a piece and enjoy it while the Parmesan crust is still warm and crisp.
Why You’ll Love This Garlic Parmesan Focaccia
No kneading required. Time and fermentation do most of the work.
Soft and airy inside. The wet dough creates a tender crumb filled with irregular bubbles.
Crispy golden edges. Olive oil and a hot pan give the exterior wonderful texture.
Loaded with garlic. Fresh garlic infuses directly into the olive oil before going over the dough.
Parmesan crust. Finely grated Parmesan melts and browns across the surface.
Beginner-friendly. You don’t need a stand mixer or complicated shaping technique.
Perfect for dipping. Serve it with olive oil, marinara, soup, or your favorite savory dip.
Versatile. It works as an appetizer, side dish, sandwich bread, or snack.
What Is No-Knead Garlic Parmesan Focaccia?
Focaccia is a flat, olive-oil-rich bread known for its golden crust, soft interior, and characteristic deep dimples.
This version builds on that classic style with a generous savory topping made from:
Garlic + extra-virgin olive oil + Parmesan + rosemary + flaky salt + black pepper.
The dough itself is intentionally wet.
Instead of kneading it until smooth like traditional sandwich bread, you stir everything together and allow fermentation to develop the structure.
After the first rise, the dough goes directly into a generously greased skillet or baking pan.
A second rise makes it pillowy again before it’s covered with garlic oil, dimpled, topped with Parmesan, and baked until golden.
Ingredients
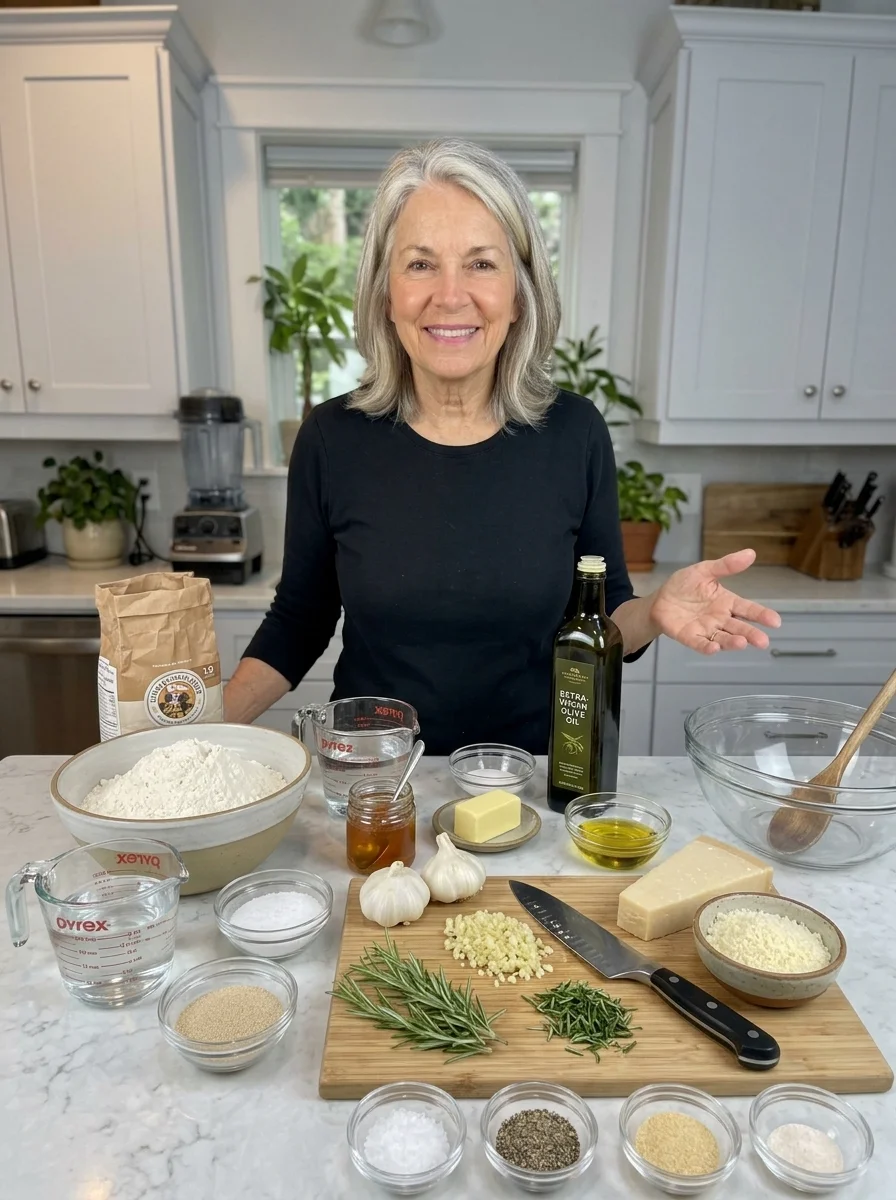
For the Focaccia
- 3 cups all-purpose flour
- 2 1/4 tsp instant yeast
- 1 1/2 tsp kosher salt
- 1 tbsp honey
- 1 1/2 cups lukewarm water
- 3 tbsp extra-virgin olive oil, divided
- 1 tbsp butter, for greasing the pan
Garlic Parmesan Topping 🧀
- 3 tbsp extra-virgin olive oil
- 3 garlic cloves, finely minced
- 1/2 cup finely grated Parmesan cheese
- 1 tsp fresh rosemary, chopped
- 1/2 tsp flaky sea salt
- 1/4 tsp black pepper
- 1/4 tsp garlic powder, optional
Ingredient Notes
All-Purpose Flour
Regular all-purpose flour works beautifully for this easy focaccia.
It provides enough gluten-forming protein to trap the gas produced during fermentation while still creating a tender crumb.
Measure carefully.
If using measuring cups, spoon the flour lightly into the cup and level it rather than packing it down.
Too much flour is one of the easiest ways to turn airy focaccia into dense bread.
Instant Yeast
You’ll need 2 1/4 teaspoons instant yeast, approximately one standard packet.
Instant yeast is convenient because it can be mixed directly with the flour.
There’s no need to activate it separately first.
Kosher Salt
Salt seasons the dough and balances the honey and rich olive oil.
Remember that Parmesan and flaky sea salt will also add saltiness to the finished bread.
Honey 🍯
A tablespoon of honey gives the yeast an easily available sugar source while adding a subtle background sweetness.
The focaccia won’t taste like sweet bread.
Lukewarm Water
Use lukewarm rather than hot water.
Approximately 100–110°F is a useful target range.
Very hot water can damage the yeast.
Extra-Virgin Olive Oil 🫒
Olive oil is essential to great focaccia.
It’s used both in and around the dough and provides:
- Rich flavor
- Moisture
- Crisp edges
- Golden browning
- A tender crumb
- The characteristic focaccia crust
Use an extra-virgin olive oil you enjoy because its flavor will be noticeable.
Butter 🧈
Butter is used to grease the skillet or baking pan.
It adds another layer of flavor and helps prevent sticking.
Fresh Garlic 🧄
Freshly minced garlic is allowed to sit in olive oil before being spread over the dough.
This gives the oil time to pick up some of the garlic’s aroma and flavor.
Finely mince the cloves so large pieces aren’t exposed to the oven’s high heat.
Parmesan Cheese 🧀
Use finely grated Parmesan so it distributes evenly over the focaccia.
As it bakes, the cheese melts and browns, creating savory, slightly crisp areas across the surface.
Freshly grated Parmesan generally gives the best flavor.
Rosemary 🌿
Fresh rosemary gives the bread a fragrant herbal note that pairs especially well with garlic, Parmesan, and olive oil.
Chop it finely so you don’t end up with large woody pieces.
Flaky Sea Salt
Flaky salt creates little bursts of saltiness on top.
Because Parmesan is already salty, don’t overdo it.
Black Pepper
A small amount adds gentle warmth and complements the Parmesan.
Garlic Powder
This is optional.
Fresh garlic gives you aromatic garlic flavor, while a little garlic powder can make the overall garlic character more evenly distributed.
How to Make No-Knead Garlic Parmesan Focaccia
Step 1: Mix the Dough
In a large mixing bowl, combine:
- 3 cups all-purpose flour
- 2 1/4 teaspoons instant yeast
- 1 1/2 teaspoons kosher salt
Add:
- 1 tablespoon honey
- 1 1/2 cups lukewarm water
- 2 tablespoons extra-virgin olive oil
Stir with a wooden spoon or sturdy spatula until everything comes together.
The dough will be very wet, sticky, and shaggy.
That’s exactly how it should look.
Don’t Add Extra Flour Because the Dough Looks Wet
This is important.
Focaccia dough isn’t supposed to resemble a firm sandwich-bread dough.
Its high moisture level helps create the soft, open crumb and large irregular bubbles associated with good focaccia.
If you keep adding flour until the dough becomes easy to handle, you can end up with a much denser bread.
Embrace the sticky dough.
Use olive oil on your hands when you need to touch it.
Step 2: Add the Remaining Olive Oil
Drizzle the remaining 1 tablespoon olive oil over the dough.
Gently fold the dough over itself a few times.
You don’t need to knead vigorously.
The goal is simply to coat the dough and give it a little structure.
Step 3: First Rise
Cover the bowl tightly.
Let the dough rise at room temperature for approximately 2–3 hours.
The exact time depends on the temperature of your kitchen and the activity of your yeast.
Instead of relying entirely on the clock, watch the dough.
It’s ready when it looks:
Puffy + bubbly + airy + approximately doubled in volume.
You should see obvious fermentation activity.
How to Tell When Focaccia Dough Has Risen Enough
Look at the dough rather than only watching the timer.
Properly risen dough should appear dramatically puffier than when you mixed it.
You may notice:
- Bubbles underneath the surface
- Bubbles around the edges of the bowl
- A soft, jiggly texture
- Considerable increase in volume
If your kitchen is cool, the rise may take longer than three hours.
Give the yeast the time it needs.
Step 4: Prepare the Pan
Generously butter a 9-inch cast-iron skillet or 9×9-inch baking pan.
Add a drizzle of olive oil and spread it across the bottom.
The combination of butter and olive oil adds flavor and helps create beautifully crisp edges.
Make sure the corners and sides are well coated.
Step 5: Transfer the Dough
Gently scrape the risen dough into the prepared pan.
Avoid punching it down.
Using lightly oiled fingertips, gently stretch the dough toward the edges.
Don’t worry if it immediately springs back.
That’s normal.
If the dough strongly resists stretching, leave it alone for 10–15 minutes.
Then return and gently stretch it again.
The gluten will relax during the rest, making the dough much easier to spread.
Step 6: Second Rise
Cover the pan loosely.
Let the dough rise for another 45–60 minutes.
The dough should become noticeably:
- Softer
- Puffier
- Airier
- More relaxed
You may see large bubbles forming across the surface.
Try not to pop them unnecessarily.
Why Focaccia Needs a Second Rise
Some gas is inevitably lost when you transfer and stretch the dough.
The second rise gives the yeast another opportunity to inflate the dough before baking.
This is one of the keys to achieving a pillowy interior rather than a flat, dense focaccia.
Step 7: Make the Garlic-Infused Olive Oil
While the dough completes its second rise, combine:
- 3 tablespoons extra-virgin olive oil
- 3 finely minced garlic cloves
Let the mixture sit for at least 10 minutes.
This allows the fresh garlic to infuse the oil.
How to Prevent Garlic from Burning
Fresh garlic can burn in a 425°F oven if large pieces sit exposed on the surface.
Finely mincing it helps.
When you pour the garlic oil over the dough, distribute the garlic evenly and allow some of it to settle into the dimples rather than leaving large clumps on top.
Keep an eye on the focaccia near the end of baking.
If the Parmesan and garlic are becoming too dark before the bread is done, loosely tent the top with foil.
Step 8: Preheat the Oven
Preheat your oven to 425°F.
Allow it to become fully heated before baking.
A hot oven gives the focaccia good oven spring and helps create the deeply golden crust.
Step 9: Add the Garlic Oil
Pour the garlic-infused olive oil evenly over the risen dough.
Use the back of a spoon or your fingertips to distribute it gently if necessary.
Let the oil naturally settle across the surface.
Step 10: Dimple the Focaccia
Lightly oil your fingertips.
Spread your fingers apart and press deeply into the dough.
Continue dimpling across the entire surface.
Press nearly to the bottom without intentionally tearing through the dough.
The garlic-infused olive oil should collect inside some of the dimples.
Why Are Focaccia Dimples Important?
Those famous dimples aren’t merely decorative.
They help:
- Hold olive oil
- Distribute garlic
- Trap herbs and seasonings
- Create varied surface texture
- Produce little crisp and tender areas
Deep dimples give focaccia its unmistakable appearance.
Step 11: Add the Parmesan and Seasonings
Sprinkle 1/2 cup finely grated Parmesan evenly over the dough.
Finish with:
- 1 teaspoon chopped fresh rosemary
- 1/2 teaspoon flaky sea salt
- 1/4 teaspoon black pepper
- 1/4 teaspoon garlic powder, if desired
Try to distribute everything evenly so each slice gets garlic, Parmesan, rosemary, and salt.
Step 12: Bake
Bake at 425°F for approximately 25–30 minutes.
The focaccia should become:
Deeply golden + puffed + crisp around the edges + browned underneath.
The Parmesan should melt into the surface and develop golden toasted areas.
Step 13: Watch the Parmesan
Parmesan can brown faster than plain focaccia.
Start checking the bread toward the lower end of the baking range.
If the cheese is becoming deeply browned while the bread still needs additional baking time, loosely tent the top with aluminum foil.
Continue baking until the bread itself is done.
Step 14: Cool Briefly
Remove the focaccia from the oven.
Let it cool in the pan for approximately 10 minutes.
This allows the interior structure to set.
Step 15: Remove from the Pan
Carefully loosen the edges and transfer the bread to a cutting board or cooling rack.
Removing it from the pan prevents trapped steam from gradually softening that crisp bottom crust.
Step 16: Finish and Serve
For an extra-rich finish, brush or drizzle the warm surface with a little additional extra-virgin olive oil.
Slice into approximately 8 generous pieces.
Serve warm.
Recipe Information ⏱️
Prep Time: 15 minutes
First Rise: 2–3 hours
Second Rise: 45–60 minutes
Cook Time: approximately 28 minutes
Total Time: approximately 3 hours 45 minutes, depending on rise time
Servings: 8
Estimated Calories: approximately 290 calories per serving
Nutrition is an estimate and can vary depending on the exact flour, Parmesan, butter, olive oil, and serving size.
What Does Garlic Parmesan Focaccia Taste Like?
This bread has several layers of savory flavor.
The dough itself is mild, slightly fermented, and rich with olive oil.
Fresh garlic gives the topping its aromatic punch.
Parmesan adds salty, nutty, deeply savory flavor.
Rosemary contributes a fresh herbal note.
Flaky sea salt provides occasional salty bursts.
Black pepper adds gentle warmth.
The overall combination is:
Garlicky + cheesy + savory + herbaceous + olive-oil-rich + lightly salty.
What Should the Texture Be Like?
The ideal focaccia has a strong contrast between the crust and crumb.
The surface should be golden with crisp Parmesan-covered areas.
The edges should become especially crunchy where the dough meets the olive-oiled pan.
The bottom should be browned and sturdy.
Inside, however, the bread should remain:
Soft + airy + moist + slightly chewy + full of irregular holes.
The Secret to Airy No-Knead Focaccia
Keep the Dough Wet
High hydration encourages an open, bubbly crumb.
Don’t Add Unnecessary Flour
Sticky dough is expected.
Give It Enough Time
Fermentation needs time to create gas and develop structure.
Handle It Gently
Don’t aggressively punch down the dough after the first rise.
Let It Rise Twice
The second rise restores volume after the dough has been transferred.
Don’t Over-Dimple
Press deeply, but don’t aggressively crush every bubble.
Bake in a Hot Oven
A fully preheated 425°F oven helps the dough expand rapidly.
Why Is My Focaccia Dough So Sticky?
Because it should be.
Wet dough can feel strange if you’re used to making firmer breads.
Instead of trying to make it less sticky with flour, coat your hands lightly with olive oil.
A silicone spatula or dough scraper is also useful for transferring the dough.
Do I Need a Stand Mixer?
No.
That’s one of the advantages of this recipe.
A wooden spoon or sturdy spatula is enough to mix the dough.
Time and fermentation handle much of the gluten development.
Do I Need to Knead the Dough?
No traditional kneading is required.
A few gentle folds are enough for this method.
As the flour hydrates and the dough rests, gluten develops naturally.
Why Won’t My Dough Stretch Across the Pan?
The gluten is probably tight.
Don’t force it.
Stretch gently until you feel resistance.
Then stop and allow the dough to rest for approximately 10–15 minutes.
When you return, it should stretch much more easily.
This technique is much better than aggressively pulling or tearing the dough.
Cast Iron vs. Baking Pan
Both work well, but they produce slightly different results.
Cast-Iron Skillet
Cast iron retains heat extremely well.
It can create particularly:
- Crisp edges
- Deeply browned bottom
- Rustic appearance
9×9-Inch Baking Pan
A square metal pan produces:
- More uniform pieces
- Straight edges
- Easy slicing
- Consistent thickness
Either is a good choice.
Why This Focaccia Is Thicker
Using a 9-inch skillet or 9×9-inch pan with three cups of flour creates a relatively thick, pillowy focaccia.
That makes it particularly good for:
- Dipping
- Sandwiches
- Serving with soup
- Cutting into substantial appetizer pieces
If you spread the same dough into a substantially larger pan, it will naturally bake thinner.
How to Get a Crispy Bottom
For that irresistible crisp focaccia base:
Grease generously. Use both butter and olive oil.
Use metal or cast iron. These materials transfer heat efficiently.
Fully preheat the oven.
Bake until genuinely golden. Don’t remove the bread while the bottom is still pale.
Remove from the pan after a short cooling period. Otherwise steam can soften the crust.
How to Get Bigger Air Bubbles
Large bubbles come from a combination of hydration, fermentation, and gentle handling.
For the best chance of getting them:
- Measure flour accurately.
- Keep the dough wet.
- Allow the first rise to finish fully.
- Don’t punch down the dough.
- Transfer gently.
- Stretch rather than press aggressively.
- Complete the second rise.
- Dimple carefully.
- Bake in a fully heated oven.
Should I Pop Large Focaccia Bubbles?
Usually, no.
Those bubbles are part of focaccia’s rustic character.
However, if one bubble becomes enormous and looks likely to create a giant hollow dome, you can gently deflate that particular bubble.
Leave the smaller bubbles intact.
Why Parmesan Works So Well on Focaccia
Parmesan contains concentrated savory flavor and browns beautifully.
When finely grated over an olive-oil-coated focaccia, it creates thin toasted areas rather than a thick layer of melted cheese.
That means you still get the characteristic focaccia surface while adding plenty of cheese flavor.
Freshly Grated vs. Pre-Grated Parmesan
Freshly grated Parmesan is generally preferable.
It has better flavor and tends to melt and brown more naturally.
Very finely grated Parmesan is ideal because it distributes easily across the bread.
Can I Use More Parmesan?
Yes, but don’t completely bury the dough under a thick cheese layer.
Too much cheese can:
- Add excessive salt
- Release additional oil
- Brown before the bread finishes
- Hide the focaccia’s characteristic texture
If you’re a serious cheese lover, add a little more after baking or serve grated Parmesan alongside.
Can I Add Mozzarella?
Yes.
For a cheesier variation, add a modest amount of shredded low-moisture mozzarella.
Keep in mind that mozzarella creates a very different topping from Parmesan—it will be softer, stretchier, and more pizza-like.
Can I Add Roasted Garlic?
Absolutely.
Roasted garlic is excellent on focaccia because it’s mellow, sweet, and less likely to burn.
Press small pieces of roasted garlic into some of the dimples before baking.
Easy Garlic Parmesan Focaccia Variations
Extra Garlic Focaccia 🧄
Add the optional garlic powder along with the fresh garlic.
You can also brush the finished bread with garlic-infused olive oil.
Roasted Garlic Parmesan Focaccia
Add soft roasted garlic cloves or pieces to the dimples.
Garlic Parmesan & Tomato Focaccia 🍅
Press halved cherry tomatoes into the dough before baking.
Garlic Parmesan Olive Focaccia 🫒
Add sliced Kalamata or green olives.
Garlic Parmesan Jalapeño Focaccia 🌶️
Scatter thinly sliced jalapeños across the surface.
Garlic Parmesan Herb Focaccia 🌿
Combine rosemary with fresh thyme or oregano.
Garlic Parmesan Onion Focaccia 🧅
Add thinly sliced or caramelized onions.
Three-Cheese Focaccia 🧀
Combine Parmesan with a modest amount of mozzarella and Asiago.
Spicy Garlic Parmesan Focaccia
Add crushed red pepper flakes to the topping.
Everything Garlic Parmesan Focaccia
Add everything bagel seasoning, but reduce the flaky salt because the seasoning usually already contains salt.
What to Serve with Garlic Parmesan Focaccia
Tomato Soup 🍅🍲
The garlicky Parmesan bread is perfect for dipping.
Pasta 🍝
Serve it with spaghetti, baked ziti, lasagna, Alfredo, or marinara-based dishes.
Italian-Style Soups
Try it alongside minestrone, sausage soup, white bean soup, or tomato basil soup.
Stews
Use thick pieces to soak up a rich broth.
Salad 🥗
Pair warm focaccia with Caesar salad, Italian salad, or a simple green salad.
Olive Oil Dip 🫒
Serve it with extra-virgin olive oil, cracked black pepper, herbs, and optional balsamic vinegar.
Marinara
Warm marinara makes an easy dipping sauce.
Whipped Ricotta
Creamy ricotta with olive oil and herbs pairs beautifully with crispy focaccia.
Use It for Sandwiches 🥪
This thicker focaccia is particularly good for sandwiches.
Allow it to cool before slicing horizontally.
Try fillings such as:
- Turkey, provolone, and pesto
- Chicken, mozzarella, and tomato
- Italian deli meats and cheese
- Roasted vegetables and mozzarella
- Chicken Caesar
- Turkey and roasted peppers
- Fresh mozzarella, tomato, and basil
You can also toast the cut sides for extra texture.
Make Garlic Parmesan Focaccia Croutons
Leftover focaccia makes incredibly flavorful croutons.
Cut it into cubes.
Bake until dry and crisp.
Because the bread already contains olive oil, garlic, rosemary, and Parmesan, very little additional seasoning is necessary.
Use the croutons on soups or salads.
Can I Make the Dough Ahead?
Yes.
You can use a slower refrigerator fermentation.
Mix the dough, cover it tightly, and refrigerate it overnight.
The next day, transfer it to your prepared pan and allow enough time for it to warm, relax, and become puffy.
Cold dough will usually require more time for the final proof than room-temperature dough.
Use the dough’s appearance rather than a strict timer.
Why Try an Overnight Rise?
Longer cold fermentation can develop deeper flavor.
It also makes the recipe convenient if you want fresh focaccia the following day.
Mix the dough at night, refrigerate it, then finish the bread the next day.
Can I Make It Without Rosemary?
Absolutely.
Rosemary complements the garlic and Parmesan but isn’t mandatory.
You can omit it or substitute:
- Thyme
- Oregano
- Basil
- Italian seasoning
Fresh herbs and dried herbs differ in strength, so adjust accordingly.
Can I Use Active Dry Yeast?
Yes, but this recipe is specifically written for instant yeast.
Active dry yeast may work more slowly and is often dissolved in liquid before mixing, depending on the product instructions.
Your rise times may therefore change.
Can I Use Bread Flour?
Yes.
Bread flour contains more protein than typical all-purpose flour and can create a chewier crumb with stronger gluten structure.
All-purpose flour produces excellent results and is the intended flour for this recipe.
Storage Information 🥖
Allow the focaccia to cool completely before storing.
Keep it in an airtight container or wrap it tightly.
Store at room temperature for up to 2 days.
Focaccia is best the day it’s baked, particularly while the edges and Parmesan topping are still crisp.
Should Focaccia Be Refrigerated?
Usually not for short-term storage.
Refrigeration can cause bread to firm and stale more quickly.
For longer storage, freezing is generally a better option.
How to Reheat Garlic Parmesan Focaccia
For the best texture, preheat your oven to 350°F.
Place the focaccia on a baking sheet.
Warm for approximately 5–8 minutes.
This helps restore the crispy edges and warm the Parmesan topping.
You can lightly drizzle the bread with olive oil before reheating if desired.
Can I Microwave It?
Yes, but the crust won’t stay as crisp.
Microwave individual pieces only briefly until warm.
For the best focaccia texture, use the oven or toaster oven instead.
How to Freeze Focaccia
Allow the bread to cool completely.
Cut it into individual portions.
Wrap each portion tightly and transfer the pieces to a freezer-safe bag or container.
Freeze for up to approximately 1 month for best quality.
How to Reheat Frozen Focaccia
Thaw at room temperature.
Then warm in a 350°F oven for 5–8 minutes, or until heated through and crisp around the edges.
Troubleshooting
Why Is My Dough Extremely Sticky?
That’s expected.
This is a high-moisture focaccia dough.
Use oiled fingers rather than adding lots of flour.
Why Didn’t My Dough Rise?
Your yeast may be inactive, your room may be cold, or the water may have been too hot.
Give dough in a cool kitchen additional time.
Why Is My Focaccia Dense?
Common causes include:
- Too much flour
- Insufficient rise time
- Inactive yeast
- Aggressive handling
- Skipping or shortening the second rise
Why Is My Focaccia Dry?
You may have added too much flour or baked it too long.
Why Did My Garlic Burn?
The garlic pieces may have been too large or too exposed.
Mince them finely and distribute them through the oil.
If necessary, tent the bread loosely with foil toward the end.
Why Did My Parmesan Burn?
Parmesan browns quickly at high temperatures.
Start checking the bread before the full baking time has elapsed.
Tent loosely with foil if the cheese becomes dark too soon.
Why Isn’t the Bottom Crispy?
Possible causes include:
- Too little oil
- A pan that browns slowly
- Insufficient baking time
- Removing the bread before the bottom browned
- Leaving the baked focaccia in the pan too long
Why Won’t the Dough Reach the Corners?
The gluten needs to relax.
Wait 10–15 minutes and stretch again.
Why Is My Focaccia Flat?
It may not have proofed long enough, or the dough may have been heavily deflated during transfer and shaping.
Why Did My Focaccia Collapse?
The dough may have overproofed.
Once it’s clearly airy and puffy after the second rise, proceed with dimpling and baking.
Why Is It Too Salty?
Parmesan, kosher salt, and flaky salt all contribute sodium.
Measure carefully, especially if your Parmesan is particularly salty.
Why Is the Cheese Greasy?
Cheese naturally releases some fat as it melts.
Using finely grated Parmesan in a moderate amount helps prevent the surface from becoming excessively oily.
Frequently Asked Questions
Does this focaccia really require no kneading?
Yes. Mixing, resting, fermentation, and a few gentle folds develop enough structure for this recipe.
Why is the dough so wet?
The high hydration helps produce a soft, airy crumb.
Should I add more flour?
Generally, no. The dough is intentionally sticky.
What size pan should I use?
A 9-inch cast-iron skillet or 9×9-inch baking pan works well.
Can I use a 9×13-inch pan?
You can, but the focaccia will be thinner and may bake faster.
What temperature should I bake it at?
425°F.
How long should it bake?
Approximately 25–30 minutes.
Can I use fresh garlic?
Yes. This recipe specifically uses fresh minced garlic.
Can I use only garlic powder?
You can, but you’ll lose some of the fresh garlic character.
Can I add more cheese?
Yes, within reason. Too much cheese can make the surface overly salty and cause it to brown too quickly.
Can I use Pecorino Romano?
Yes, but Pecorino is typically saltier and sharper than Parmesan, so reduce the finishing salt accordingly.
Can I use mozzarella?
Yes, but it creates a softer, meltier, more pizza-like topping.
Can I make this overnight?
Yes. Refrigerating the dough overnight can deepen the flavor.
How do I know when the dough has risen enough?
Look for a significant increase in volume, visible bubbles, and a soft, airy texture.
Why do I need a second rise?
It allows the dough to become airy again after being transferred and stretched.
Why do I dimple focaccia?
The dimples hold olive oil and toppings while creating focaccia’s classic surface texture.
Can I freeze it?
Yes. Freeze individual portions for up to approximately 1 month for best quality.
What’s the best way to reheat it?
A 350°F oven for 5–8 minutes restores the texture particularly well.
Final Thoughts
This No-Knead Garlic Parmesan Focaccia combines one of the easiest homemade bread methods with some of the best savory flavors: fresh garlic, Parmesan cheese, rosemary, flaky sea salt, and plenty of extra-virgin olive oil. 🧄🧀🍞
The key is resisting the urge to add extra flour. The sticky, high-moisture dough is what eventually becomes that beautifully soft, bubbly interior.
Give the dough enough time to rise until visibly airy, transfer it gently, let it become pillowy again, then cover the surface with garlic-infused olive oil and press in those signature deep focaccia dimples.
A generous layer of Parmesan transforms into a savory golden crust in the oven while the buttered, olive-oiled pan creates crispy edges and a beautifully browned bottom.
Serve it warm beside pasta or soup, dip it into marinara or olive oil, or slice the thick pieces horizontally for an incredible homemade sandwich.
It’s simple enough for a beginner but delivers the airy center, crispy crust, garlic-rich flavor, and golden Parmesan topping you’d expect from a much more complicated bread recipe.
Print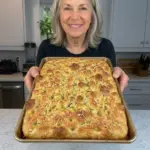
No-Knead Garlic Parmesan Focaccia
Ingredients
For the Focaccia
- 3 cups all-purpose flour
- 2 1/4 tsp instant yeast
- 1 1/2 tsp kosher salt
- 1 tbsp honey
- 1 1/2 cups lukewarm water
- 3 tbsp extra-virgin olive oil, divided
- 1 tbsp butter, for greasing the pan
Garlic Parmesan Topping 🧀
- 3 tbsp extra-virgin olive oil
- 3 garlic cloves, finely minced
- 1/2 cup finely grated Parmesan cheese
- 1 tsp fresh rosemary, chopped
- 1/2 tsp flaky sea salt
- 1/4 tsp black pepper
- 1/4 tsp garlic powder, optional
Instructions
Step 1: Mix the Dough
In a large mixing bowl, combine:
- 3 cups all-purpose flour
- 2 1/4 teaspoons instant yeast
- 1 1/2 teaspoons kosher salt
Add:
- 1 tablespoon honey
- 1 1/2 cups lukewarm water
- 2 tablespoons extra-virgin olive oil
Stir with a wooden spoon or sturdy spatula until everything comes together.
The dough will be very wet, sticky, and shaggy.
That’s exactly how it should look.
Don’t Add Extra Flour Because the Dough Looks Wet
This is important.
Focaccia dough isn’t supposed to resemble a firm sandwich-bread dough.
Its high moisture level helps create the soft, open crumb and large irregular bubbles associated with good focaccia.
If you keep adding flour until the dough becomes easy to handle, you can end up with a much denser bread.
Embrace the sticky dough.
Use olive oil on your hands when you need to touch it.
Step 2: Add the Remaining Olive Oil
Drizzle the remaining 1 tablespoon olive oil over the dough.
Gently fold the dough over itself a few times.
You don’t need to knead vigorously.
The goal is simply to coat the dough and give it a little structure.
Step 3: First Rise
Cover the bowl tightly.
Let the dough rise at room temperature for approximately 2–3 hours.
The exact time depends on the temperature of your kitchen and the activity of your yeast.
Instead of relying entirely on the clock, watch the dough.
It’s ready when it looks:
Puffy + bubbly + airy + approximately doubled in volume.
You should see obvious fermentation activity.
How to Tell When Focaccia Dough Has Risen Enough
Look at the dough rather than only watching the timer.
Properly risen dough should appear dramatically puffier than when you mixed it.
You may notice:
- Bubbles underneath the surface
- Bubbles around the edges of the bowl
- A soft, jiggly texture
- Considerable increase in volume
If your kitchen is cool, the rise may take longer than three hours.
Give the yeast the time it needs.
Step 4: Prepare the Pan
Generously butter a 9-inch cast-iron skillet or 9×9-inch baking pan.
Add a drizzle of olive oil and spread it across the bottom.
The combination of butter and olive oil adds flavor and helps create beautifully crisp edges.
Make sure the corners and sides are well coated.
Step 5: Transfer the Dough
Gently scrape the risen dough into the prepared pan.
Avoid punching it down.
Using lightly oiled fingertips, gently stretch the dough toward the edges.
Don’t worry if it immediately springs back.
That’s normal.
If the dough strongly resists stretching, leave it alone for 10–15 minutes.
Then return and gently stretch it again.
The gluten will relax during the rest, making the dough much easier to spread.
Step 6: Second Rise
Cover the pan loosely.
Let the dough rise for another 45–60 minutes.
The dough should become noticeably:
- Softer
- Puffier
- Airier
- More relaxed
You may see large bubbles forming across the surface.
Try not to pop them unnecessarily.
Why Focaccia Needs a Second Rise
Some gas is inevitably lost when you transfer and stretch the dough.
The second rise gives the yeast another opportunity to inflate the dough before baking.
This is one of the keys to achieving a pillowy interior rather than a flat, dense focaccia.
Step 7: Make the Garlic-Infused Olive Oil
While the dough completes its second rise, combine:
- 3 tablespoons extra-virgin olive oil
- 3 finely minced garlic cloves
Let the mixture sit for at least 10 minutes.
This allows the fresh garlic to infuse the oil.
How to Prevent Garlic from Burning
Fresh garlic can burn in a 425°F oven if large pieces sit exposed on the surface.
Finely mincing it helps.
When you pour the garlic oil over the dough, distribute the garlic evenly and allow some of it to settle into the dimples rather than leaving large clumps on top.
Keep an eye on the focaccia near the end of baking.
If the Parmesan and garlic are becoming too dark before the bread is done, loosely tent the top with foil.
Step 8: Preheat the Oven
Preheat your oven to 425°F.
Allow it to become fully heated before baking.
A hot oven gives the focaccia good oven spring and helps create the deeply golden crust.
Step 9: Add the Garlic Oil
Pour the garlic-infused olive oil evenly over the risen dough.
Use the back of a spoon or your fingertips to distribute it gently if necessary.
Let the oil naturally settle across the surface.
Step 10: Dimple the Focaccia
Lightly oil your fingertips.
Spread your fingers apart and press deeply into the dough.
Continue dimpling across the entire surface.
Press nearly to the bottom without intentionally tearing through the dough.
The garlic-infused olive oil should collect inside some of the dimples.
Why Are Focaccia Dimples Important?
Those famous dimples aren’t merely decorative.
They help:
- Hold olive oil
- Distribute garlic
- Trap herbs and seasonings
- Create varied surface texture
- Produce little crisp and tender areas
Deep dimples give focaccia its unmistakable appearance.
Step 11: Add the Parmesan and Seasonings
Sprinkle 1/2 cup finely grated Parmesan evenly over the dough.
Finish with:
- 1 teaspoon chopped fresh rosemary
- 1/2 teaspoon flaky sea salt
- 1/4 teaspoon black pepper
- 1/4 teaspoon garlic powder, if desired
Try to distribute everything evenly so each slice gets garlic, Parmesan, rosemary, and salt.
Step 12: Bake
Bake at 425°F for approximately 25–30 minutes.
The focaccia should become:
Deeply golden + puffed + crisp around the edges + browned underneath.
The Parmesan should melt into the surface and develop golden toasted areas.
Step 13: Watch the Parmesan
Parmesan can brown faster than plain focaccia.
Start checking the bread toward the lower end of the baking range.
If the cheese is becoming deeply browned while the bread still needs additional baking time, loosely tent the top with aluminum foil.
Continue baking until the bread itself is done.
Step 14: Cool Briefly
Remove the focaccia from the oven.
Let it cool in the pan for approximately 10 minutes.
This allows the interior structure to set.
Step 15: Remove from the Pan
Carefully loosen the edges and transfer the bread to a cutting board or cooling rack.
Removing it from the pan prevents trapped steam from gradually softening that crisp bottom crust.
Step 16: Finish and Serve
For an extra-rich finish, brush or drizzle the warm surface with a little additional extra-virgin olive oil.
Slice into approximately 8 generous pieces.
Serve warm.