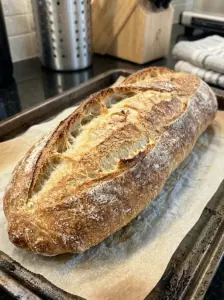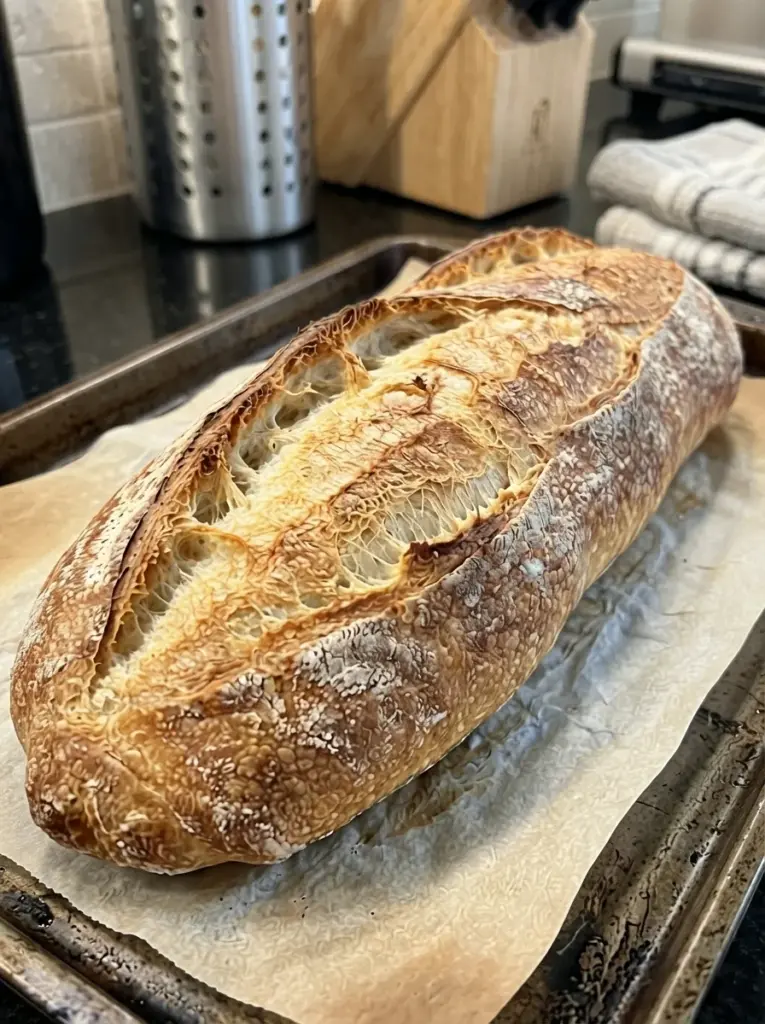
Easy Homemade French Loaf Bread is a simple yeast bread with a golden crust, tender center, and mild flavor that works with almost any meal. Shape the dough into one generous loaf, slash the top, and bake it on a sheet pan—no Dutch oven or specialty bread pan required.
Serve thick slices with soup, turn them into garlic bread, or split the loaf for sandwiches. The dough uses flour, water, yeast, and salt, with a small amount of sugar and oil for a slightly softer everyday loaf.
This is a French-style home loaf rather than a traditional baguette formula. Expect a broader shape and a more tender crumb, with a crust that is lightly crisp when fresh and softens during storage.
The formula below is a suggested recipe and has not been kitchen-tested. Flour absorption, room temperature, and oven performance vary, so follow the dough and doneness cues as well as the approximate times.
Recipe at a Glance
- Yield: 1 large loaf, approximately 12 slices
- Active preparation: Approximately 25 minutes
- First rise: Approximately 60–90 minutes
- Second rise: Approximately 30–45 minutes
- Baking: Approximately 25–30 minutes
- Cooling: Approximately 1 hour
- Total: Approximately 3½–4¼ hours, including cooling
- Oven: 425°F
- Equipment: Mixing bowl and rimmed baking sheet
Why You’ll Love This Loaf
- Simple ingredients: Everyday pantry staples form the dough.
- No specialty pan: A sturdy baking sheet supports the shaped loaf.
- Useful size: One loaf is easy to slice for dinner or sandwiches.
- Flexible serving: Enjoy plain, toasted, or made into garlic bread.
- A manageable method: Mix, knead, rise, shape, and bake.
What Makes This French-Style Bread?
The long shape, diagonal slashes, and relatively simple dough give this bread a French-style appearance. The small additions of sugar and oil make it a practical, slightly softer home loaf rather than a strict traditional baguette.
It is also wider than a baguette, making it easier to use for toast, sandwiches, and thick slices alongside dinner. You do not need large holes throughout the crumb for a successful result; a reasonably even, tender interior is useful for these purposes.
The recipe includes kneading. It is not a no-knead dough, and skipping that step changes how the loaf develops structure.
Ingredients
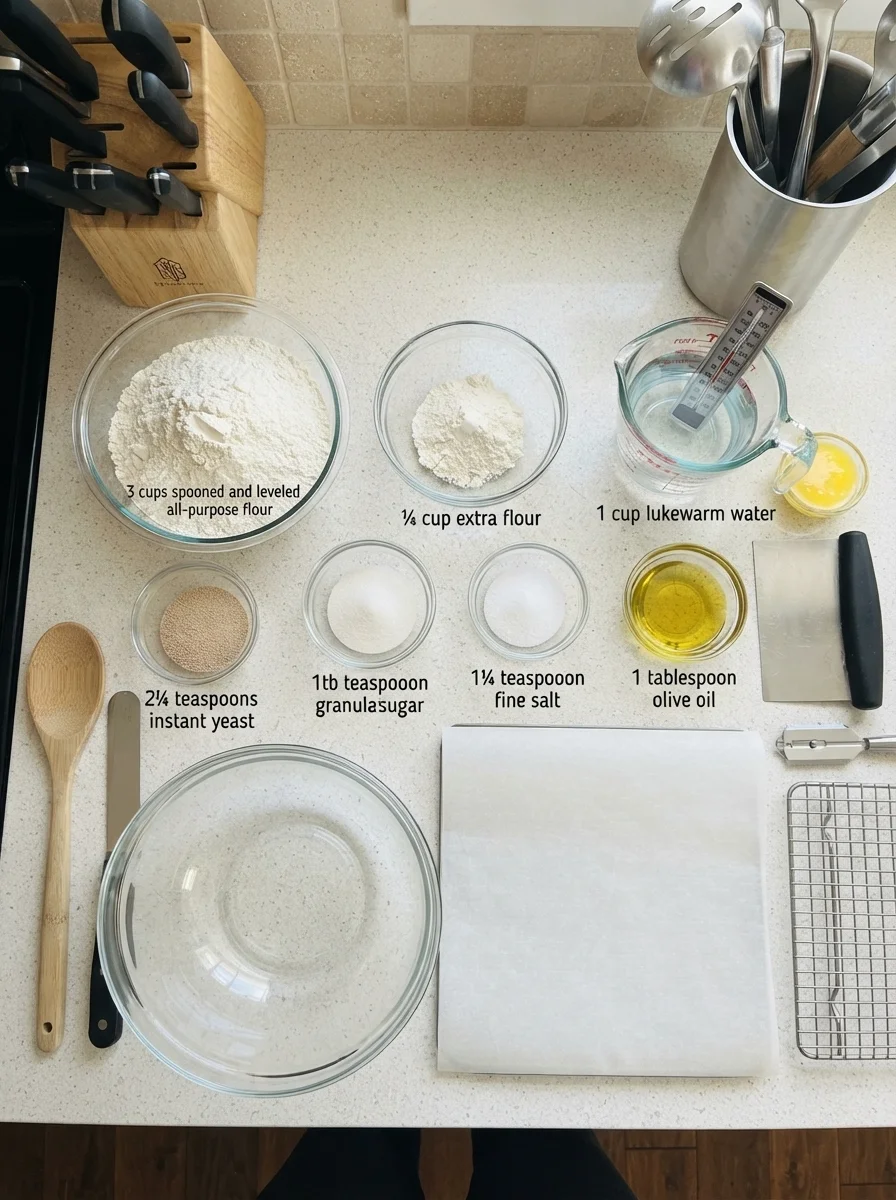
- 3 cups all-purpose flour, spooned and leveled, plus up to approximately ¼ cup more only if needed
- 1 cup lukewarm water
- 2¼ teaspoons instant yeast, or 1 standard packet
- 1 tablespoon granulated sugar
- 1¼ teaspoons fine salt
- 1 tablespoon olive oil or neutral oil, plus a little for the bowl
- A little additional flour for shaping
Optional Softer Finish
- 1 tablespoon melted butter, for brushing after baking
The butter is optional. Leave it off if you prefer the freshly baked crust to stay less soft.
Ingredient Notes
Flour
All-purpose flour gives a tender loaf with enough structure for shaping. Bread flour is an alternative for a chewier result and may need a small water adjustment.
Measure by spooning flour into the cup and leveling the top. Scooping directly from a packed bag can add too much flour and make the loaf heavy.
Start with 3 cups. The extra allowance is for adjusting the dough after mixing and resting; it is not an automatic addition. Self-rising flour is not suitable because it contains added leavening and salt.
Water
Use comfortably lukewarm water, approximately 95–105°F. It should not feel hot. Cool water slows fermentation, while excessively hot water can damage yeast.
Instant Yeast
Instant yeast can be mixed directly into the flour. Check its freshness and storage instructions.
If using active dry yeast, follow its package directions for hydration using the recipe’s measured water and a little of the sugar. The rise may take longer.
Sugar
One tablespoon gives a very mild sweetness across the loaf and supports browning. This is not a sweet bread.
A lean dough can be made without added sugar, but removing ingredients changes the intended formula and may alter timing and color. Start with the listed version if you are learning the method.
Oil
A little oil makes the crumb more tender. Olive oil adds a mild flavor, while neutral oil stays in the background.
Salt
Fine salt distributes readily and gives the bread its flavor. Different coarse salts vary by volume, so do not assume every salt measures identically by teaspoon.
Equipment
Use a large bowl, sturdy spoon, spatula, baking sheet, and parchment rated for at least 425°F. A stand mixer with a dough hook is optional. A bench scraper helps manage the dough without adding excess flour.
A sharp bread lame or small sharp blade makes cleaner slashes than a dull knife. A wire rack is useful for cooling, and an instant-read thermometer can help check the center.
This method does not require pouring water into a hot oven or placing ice in hot cookware. It produces a straightforward sheet-pan loaf without a separate steam setup.
How to Make Easy Homemade French Loaf Bread
1. Combine the Dry Ingredients
In a large bowl, stir together the 3 cups flour, instant yeast, sugar, and salt.
Mix thoroughly so the yeast and salt are distributed before adding the water.
2. Add Water and Oil
Pour in the lukewarm water and oil. Stir firmly until a shaggy dough forms and most of the flour is incorporated.
Scrape the bowl and press any dry pockets into the dough. Let it rest for approximately 10 minutes before deciding whether it needs adjustment.
3. Knead
Turn onto a lightly floured surface and knead for approximately 8–10 minutes, or use a suitable mixer on low speed for approximately 5–7 minutes, following its instructions.
The dough should become smoother, elastic, and slightly tacky. It should hold a soft ball rather than smear like batter or break apart as dry crumbs.
If it remains very sticky after kneading, add flour a tablespoon at a time from the allowance. If stiff and dry, add water a teaspoon at a time. Use a scraper and light hand-flouring rather than coating the dough repeatedly with flour.
4. Let Rise Until Expanded
Place in a lightly oiled bowl and cover so the surface does not dry out. Let rise in a comfortably warm, draft-free place until approximately doubled, about 60–90 minutes.
A cool room may require more time. Look for visible expansion rather than moving ahead because a timer sounds.
5. Shape the Loaf
Line the baking sheet with suitable parchment. Turn the risen dough onto a lightly floured surface and gently press into a rectangle approximately 12 inches wide.
Roll the dough into a log, gently tightening as you go without tearing it. Pinch the seam closed and tuck the ends slightly underneath.
Place seam-side down on the baking sheet. Aim for a loaf approximately 12–14 inches long, with enough space around it to expand. A shorter, thicker loaf may require more baking time.
6. Allow the Second Rise
Cover loosely and let rise for approximately 30–45 minutes, until puffy and noticeably expanded. It does not need to double again.
A gentle fingertip indentation should return slowly. If it springs back immediately, allow more time. If the loaf looks fragile or starts to deflate, bake promptly.
During the latter part of proofing, preheat the oven to 425°F with a rack near the center.
7. Score the Top
Remove the cover. Just before baking, make 3–4 diagonal slashes approximately ¼ inch deep across the top with a sharp blade.
Use quick, controlled strokes without pressing the loaf flat. Scoring gives the expanding dough an opening; it is not simply a surface decoration.
8. Bake
Bake for approximately 25–30 minutes, until the loaf is golden brown and the sides feel set. The underside should also be baked rather than pale and soft.
If the top colors quickly while the middle needs more time, tent loosely with foil. A center temperature around 200–205°F is a useful guide for this loaf, alongside crust and crumb doneness.
Shape, oven, and pan differences can change the timing, so allow extra time if needed.
9. Cool
Transfer to a wire rack. Brush with optional melted butter for a softer crust, or leave plain.
Cool for approximately 1 hour, or until the center is no longer warm, before slicing. Cutting immediately can compress the crumb and make it seem gummy.
Tips for Better Shaping and Texture
Keep the dough soft. A dry dough may be easier to handle but can produce a dense loaf.
Knead until elastic. Adequate structure helps the free-standing loaf hold its shape.
Close the seam. A loosely rolled log can open unpredictably during baking.
Avoid overproofing. A very fragile loaf is harder to score and may spread instead of rising well.
Preheat fully. Start baking at the intended temperature rather than putting the dough into a barely warm oven.
Cool on a rack. Airflow prevents moisture from collecting underneath the loaf.
Troubleshooting
| Problem | Possible cause | What to try |
|---|---|---|
| Dough is stiff | Packed flour or excessive additions | Rest briefly and add water in teaspoons if needed. |
| Dough is very sticky | Insufficient kneading or too much water | Knead, then add small flour increments only if necessary. |
| Slow rise | Cool conditions or weak yeast | Allow more time if expansion is steady and check yeast freshness next batch. |
| Loaf spreads wide | Weak shaping, slack dough, or overproofing | Develop the dough, shape with surface tension, and bake before it becomes fragile. |
| Dense interior | Too much flour or insufficient rise | Measure lightly and follow expansion cues. |
| Slashes drag | Dull blade or very soft surface | Use a sharp blade and controlled strokes. |
| Gummy slices | Underbaking or slicing warm | Check the center and cool completely. |
Variations
Garlic Bread
Bake and cool the plain loaf first. Split lengthwise, spread with garlic butter, and toast until hot and lightly browned. This changes the nutrition and serving method without changing the dough.
Herb Loaf
Add 1 teaspoon dried Italian herbs to the flour. Keep additions modest for a first variation.
Sesame Top
Lightly brush the proofed loaf with water and sprinkle with sesame seeds before scoring. For a shinier finish and stronger adhesion, a thin egg wash is another option, but it adds an ingredient.
Two Smaller Loaves
Divide the dough into two portions and shape shorter loaves. They will bake faster, so check early and use doneness cues rather than the full large-loaf timing.
These variations are suggestions and have not been separately tested.
Serving Suggestions
Serve thick slices alongside tomato soup, pasta, or a hearty stew. Use thinner slices for toast or sandwiches.
For a family sandwich, split the cooled loaf lengthwise and fill with turkey, cheese, vegetables, or another favorite combination. Cut into portions after filling and store according to the perishable ingredients used.
Slightly stale bread can become croutons, breadcrumbs, or bread pudding. Freeze extra slices while fresh if you do not plan to use them soon.
Storage and Reheating
Room Temperature
Cool completely before wrapping. Store the plain loaf for approximately 2 days in a cool, dry kitchen. Airtight wrapping keeps the crumb softer but also softens the crust. A paper bag allows more airflow but the bread will dry faster.
Warm or humid conditions shorten keeping quality. Discard the loaf if mold develops.
Refrigerator
Refrigeration can make plain bread stale faster. Freeze extra portions instead for longer storage.
Freezer
Slice or divide the cooled loaf into sections. Wrap well and freeze in a freezer-safe bag for up to 2–3 months for best quality. Separate slices with parchment if you want easy individual portions.
Reheating
Warm a portion in a 350°F oven for approximately 8–12 minutes, checking to avoid drying it out. Wrap loosely in foil for a softer result. Toast slices directly from frozen if desired.
Perishable fillings and toppings need storage appropriate to those ingredients.
Frequently Asked Questions
Is this a traditional baguette?
No. It is a broader French-style home loaf with a little sugar and oil for a tender, everyday result.
Do I need a Dutch oven?
No. This method uses a baking sheet and does not rely on a covered pot.
Can I make it without a mixer?
Yes. Stir by hand, then knead on a lightly floured surface using the texture cues above.
Can I skip kneading?
Not without changing the method. This formula relies on kneading for structure rather than a long no-knead fermentation.
Why did the loaf take longer to rise?
Temperature, yeast activity, and dough stiffness all affect fermentation. Give steadily expanding dough time rather than heating it aggressively.
Why did the crust soften?
Moisture moves outward during cooling and storage. This dough also contains oil, and the optional butter finish softens it further. Oven refreshing restores some firmness.
Can I use whole wheat flour?
A whole wheat version needs adjusted hydration and may rise differently. Do not assume an all-purpose flour swap will produce the same loaf.
Can I prepare the dough overnight?
The suggested schedule is a same-day method. An overnight refrigerated process would need adjusted timing; it is not included as a tested option here.
Recipe Card: Easy Homemade French Loaf Bread
Yield: 1 large loaf, about 12 slices
Preparation: 25 minutes
Rising: Approximately 90–135 minutes
Baking: Approximately 25–30 minutes
Cooling: Approximately 1 hour
Total: Approximately 3½–4¼ hours
Oven: 425°F
Ingredients
- 3 cups all-purpose flour, spooned and leveled
- Up to approximately ¼ cup additional flour, only if needed
- 1 cup lukewarm water
- 2¼ teaspoons instant yeast
- 1 tablespoon sugar
- 1¼ teaspoons fine salt
- 1 tablespoon olive or neutral oil, plus a little for the bowl
- A little flour for shaping
- 1 tablespoon melted butter for finishing, optional
Instructions
- Stir the 3 cups flour, yeast, sugar, and salt together.
- Add water and oil. Mix thoroughly and rest for approximately 10 minutes.
- Knead until smooth and elastic, approximately 8–10 minutes by hand or 5–7 minutes with a suitable mixer. Make small flour or water adjustments only if needed.
- Cover in a lightly oiled bowl and rise until roughly doubled, approximately 60–90 minutes.
- Gently press into a rectangle and roll into a 12–14-inch log. Pinch the seam and place seam-side down on a parchment-lined baking sheet.
- Cover loosely and rise for approximately 30–45 minutes, until puffy. Preheat the oven to 425°F.
- Make 3–4 diagonal slashes approximately ¼ inch deep across the top.
- Bake for approximately 25–30 minutes, until golden and baked through. Around 200–205°F in the center is a useful guide.
- Transfer to a rack, brush with optional butter, and cool for approximately 1 hour before slicing.
Approximate Nutrition
For 12 slices, estimate 125–145 calories and 3–4 grams of protein per slice, before optional finishing butter, spreads, and fillings. Extra flour, brands, and slice size affect the result. These are approximate ingredient-based estimates, not verified nutrition values.
Notes
- This suggested formula has not been kitchen-tested.
- Start with 3 cups flour; do not add the full adjustment allowance automatically.
- Follow rise and doneness cues rather than the clock alone.
- This is a sheet-pan French-style loaf with a tender crumb, not a traditional baguette.
- Cool fully for cleaner slices.
Final Thoughts
A soft, well-developed dough and careful shaping give this French-style loaf its useful everyday texture. Let both rises develop, score just before baking, and allow the center to finish before cooling. Once sliced, it is ready for soup, sandwiches, toast, or a generous layer of garlic butter.
Print
Easy Homemade French Loaf Bread
Description
Yield: 1 large loaf, about 12 slices
Preparation: 25 minutes
Rising: Approximately 90–135 minutes
Baking: Approximately 25–30 minutes
Cooling: Approximately 1 hour
Total: Approximately 3½–4¼ hours
Oven: 425°F
Ingredients
- 3 cups all-purpose flour, spooned and leveled
- Up to approximately ¼ cup additional flour, only if needed
- 1 cup lukewarm water
- 2¼ teaspoons instant yeast
- 1 tablespoon sugar
- 1¼ teaspoons fine salt
- 1 tablespoon olive or neutral oil, plus a little for the bowl
- A little flour for shaping
- 1 tablespoon melted butter for finishing, optional
Instructions
- Stir the 3 cups flour, yeast, sugar, and salt together.
- Add water and oil. Mix thoroughly and rest for approximately 10 minutes.
- Knead until smooth and elastic, approximately 8–10 minutes by hand or 5–7 minutes with a suitable mixer. Make small flour or water adjustments only if needed.
- Cover in a lightly oiled bowl and rise until roughly doubled, approximately 60–90 minutes.
- Gently press into a rectangle and roll into a 12–14-inch log. Pinch the seam and place seam-side down on a parchment-lined baking sheet.
- Cover loosely and rise for approximately 30–45 minutes, until puffy. Preheat the oven to 425°F.
- Make 3–4 diagonal slashes approximately ¼ inch deep across the top.
- Bake for approximately 25–30 minutes, until golden and baked through. Around 200–205°F in the center is a useful guide.
- Transfer to a rack, brush with optional butter, and cool for approximately 1 hour before slicing.