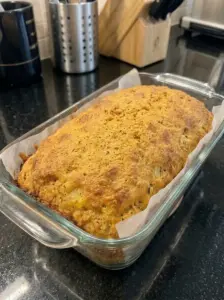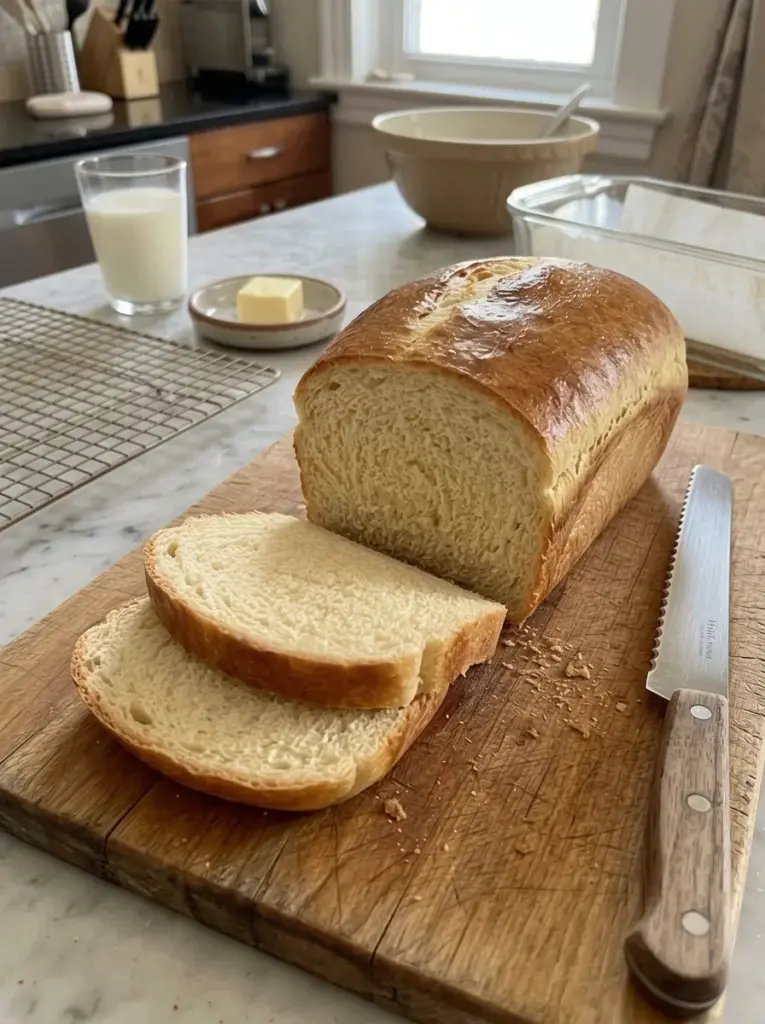
A soft slice of homemade milk bread makes an everyday sandwich feel a little more special. This Easy No-Knead Milk Sandwich Bread uses milk, butter, and a small amount of sugar to create a tender loaf with a lightly golden crust. Mix the dough with a sturdy spoon, let it rise, gently shape it, and bake it in a loaf pan.
There is no mixer or extended kneading session required. The dough is deliberately soft and sticky, so the main challenge is resisting the urge to add too much flour. Give it time to rise, and let the baked loaf cool before cutting it into sandwich slices.
Recipe at a glance: One 9-by-5-inch loaf · about 12–14 slices · 15 minutes active preparation · 1½–2½ hours rising · 35–40 minutes baking · about 2 hours 20 minutes–3 hours 25 minutes total, plus cooling.
Why You’ll Love This Bread
- No kneading: Stirring and resting replace a long session of working the dough.
- Soft, lightly enriched texture: Milk and butter make the loaf suitable for sandwiches and toast.
- Everyday ingredients: Flour, yeast, milk, butter, sugar, and salt are all you need.
- One manageable loaf: Bake enough for several meals and freeze extra slices.
- A useful basic flavor: The modest sweetness works with both savory fillings and jam.
What Makes Milk Sandwich Bread Different?
Milk bread is bread enriched with milk rather than made only with water. Here, butter adds richness, while sugar gives a little sweetness and helps the crust color during baking.
This is a straightforward American-style sandwich loaf. It does not use a cooked flour paste, tangzhong, or the shaping techniques associated with some Japanese milk breads. Expect a tender homemade crumb rather than a promise of the same texture as a commercially produced loaf.
Ingredients
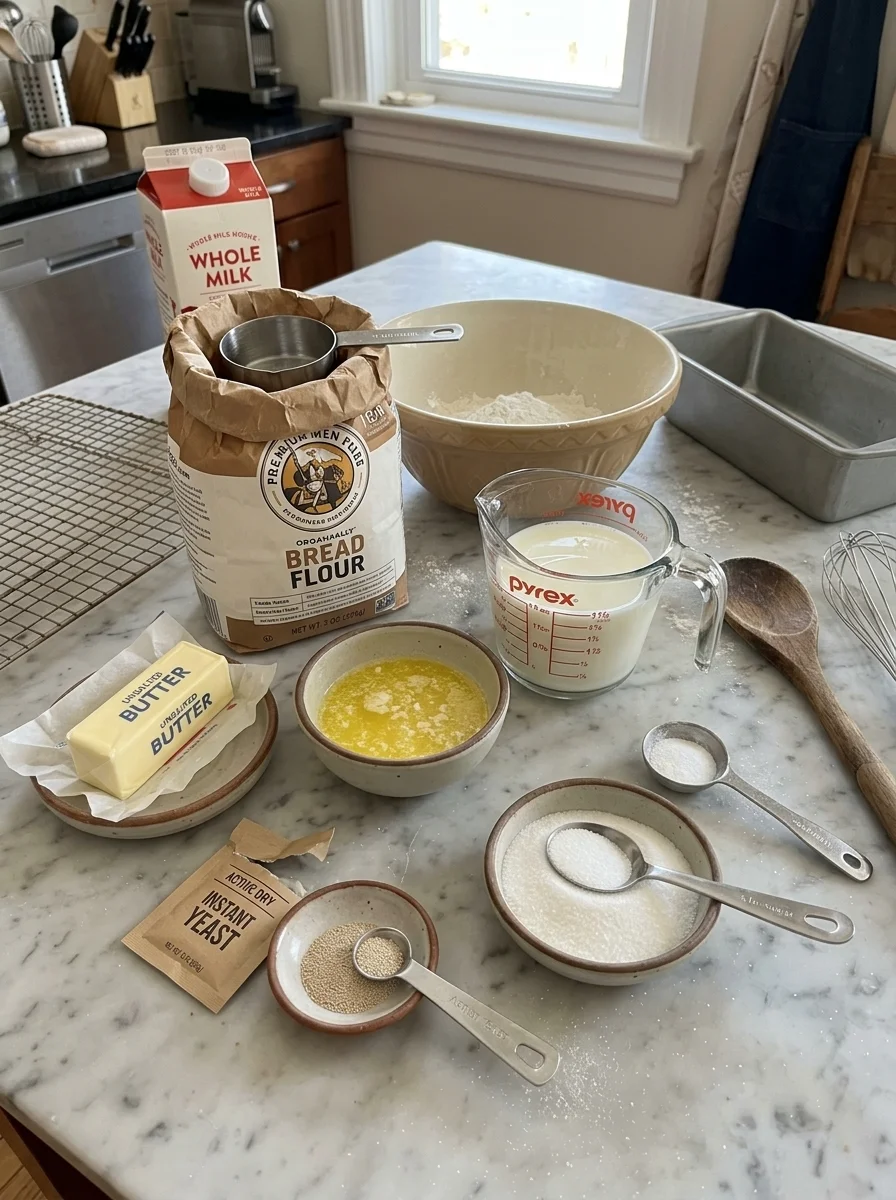
- 3½ cups bread flour, spooned into the measuring cup and leveled
- 2¼ teaspoons instant yeast, one standard ¼-ounce packet
- 2 tablespoons granulated sugar
- 1½ teaspoons fine salt
- 1½ cups whole milk, warmed to approximately 100–110°F
- 3 tablespoons unsalted butter, melted and cooled until lukewarm
- Extra butter for greasing the pan
- 1 tablespoon melted butter for brushing the baked loaf, optional
Ingredient Notes
Bread flour: Its protein content helps a soft dough hold its structure. Spoon flour into the cup and level it rather than scooping directly from the bag, which can pack in too much. All-purpose flour may produce a softer, less structured dough; the consistency cues below matter more than adding flour until the dough feels dry.
Instant yeast: Mix it directly with the dry ingredients. Check the expiration date and store opened yeast as directed on the package. If using active dry yeast, dissolve the same quantity in the warm milk with a little of the measured sugar first, following the yeast manufacturer’s directions. It may take longer to rise.
Whole milk: Provides richness. Two-percent milk is a reasonable alternative, with a slightly less rich result. Warm means comfortably warm, not hot; use a thermometer if possible.
Butter: Let melted butter cool before adding it. Hot butter can overheat the yeast mixture. If using salted butter, reduce the fine salt to about 1¼ teaspoons.
Sugar: The amount is modest, so this is sandwich bread rather than a sweet breakfast loaf. Do not substitute a large quantity of honey or syrup without adjusting the liquid.
Salt: Use fine salt for the stated volume. Coarse kosher salts vary in density and are not interchangeable teaspoon for teaspoon.
How to Make No-Knead Milk Sandwich Bread
1. Mix the dry ingredients
Whisk the flour, instant yeast, sugar, and salt in a large bowl. Breaking up any clumps now helps distribute the yeast and seasoning evenly.
2. Stir in the milk and butter
Add the warm milk and lukewarm melted butter. Stir firmly with a sturdy spoon for 2–3 minutes, scraping the bottom and sides, until no dry flour remains.
The dough should be soft, sticky, and cohesive. It should gather as a loose mass rather than pour like cake batter. If dry flour remains after thorough mixing, add milk one tablespoon at a time. If the dough is genuinely pourable, add flour one tablespoon at a time just until it holds together. Ordinary stickiness does not need correcting.
3. Let the dough rise
Cover the bowl and leave it in a comfortably warm place until roughly doubled, about 60–90 minutes. A cooler kitchen may take longer.
Look for increased volume and a puffy surface. A timer is a guide, not a reason to move on while the dough is still dense. Avoid placing the bowl in a hot oven or directly on a heating surface.
4. Shape gently
Grease a 9-by-5-inch metal loaf pan. Turn the risen dough onto a lightly floured surface, using a scraper to release it. With lightly floured hands, gently press it into a rectangle about 8 inches wide. Roll it into a short log, pinch the seam, and place it seam-side down in the pan.
This brief shaping step is not a kneading session. Do not repeatedly work in flour. If the dough is too sticky to handle neatly, use a dough scraper and lightly oiled hands to guide it into the pan, then smooth the top.
5. Let it rise again
Cover loosely with greased plastic wrap or another cover that will not stick to the dough. Let rise for approximately 30–60 minutes, until the center crowns about ½–1 inch above the rim.
While it rises, preheat the oven to 350°F with a rack near the middle. A gentle fingertip indentation should spring back slowly. If it rebounds immediately, give the loaf more time; if the dough begins to sag, bake promptly.
6. Bake until cooked through
Remove the cover and bake for approximately 35–40 minutes. The top should be golden brown, and the center should reach about 190–195°F on an instant-read thermometer. Insert the probe toward the center without touching the pan.
If the top browns before the center is ready, tent loosely with foil and continue baking. A dark crust alone is not a reliable indication that the interior is done.
7. Cool before slicing
Let the loaf rest in the pan for about 5 minutes, then carefully turn it onto a wire rack. Brush the top with the optional melted butter for a softer crust.
Cool completely, usually at least 1–2 hours, before slicing. Cutting too soon can compress the crumb and make it seem gummy even when properly baked. Use a serrated knife and a gentle sawing motion.
Tips for a Softer, Better-Shaped Loaf
Keep the dough moist. This method relies on a soft dough. Adding flour until it feels like a firm kneaded dough can produce a dry loaf.
Use the specified pan. A smaller pan can overflow; a larger one creates a shorter loaf. Glass pans may brown differently and require adjustments, so a metal pan is the simplest starting point.
Follow the dough rather than the clock. Room temperature, yeast freshness, and milk temperature all affect rising time.
Preheat fully. Put the loaf into an oven that has reached 350°F, not one that is still warming up.
Cool on a rack. Leaving bread in the pan traps moisture along the sides and bottom.
Troubleshooting
| Problem | Likely cause and next step |
|---|---|
| Dough does not rise | The room may be cool, or the yeast may be inactive. Allow more time in a gently warm place. If there is still no activity, check the yeast before starting another batch. |
| Loaf is dense | Too much flour, insufficient rising, or weak yeast can limit expansion. Check measuring technique and rise cues. |
| Center is gummy | The loaf may be underbaked or sliced while warm. Check the center temperature and cool fully. |
| Top collapses | Overproofing or insufficient baking can weaken the structure. Bake once the dough reaches the indicated height. |
| Crust is too dark | Tent with foil and check the oven temperature. |
| Dough sticks during shaping | Use a scraper and lightly oiled or floured hands. Avoid adding large amounts of flour. |
| Loaf is short | A large pan, insufficient proofing, or poorly performing yeast can contribute. |
Simple Variations
Sesame-topped loaf: Lightly brush the risen dough with milk and sprinkle with sesame seeds immediately before baking. Apply gently so you do not deflate it.
Slightly richer crust: Use the optional butter finish after baking. Brushing the hot top is easier than adding extra butter to the dough and changing its consistency.
A little whole wheat: Replace up to ½ cup of the bread flour with whole wheat flour. It may absorb more liquid and give a denser loaf. Add a little milk only if dry flour remains after mixing. Larger substitutions need further recipe adjustment.
Less sweetness: Reduce the sugar to 1 tablespoon. The crust may brown a little less, so use the doneness cues rather than color alone.
These variations change the dough or finish; check texture and timing as you go.
Serving Ideas
Use cooled slices for turkey sandwiches, grilled cheese, peanut butter and jelly, or an egg salad sandwich. The loaf also makes simple buttered toast and a good base for avocado toast.
As the bread becomes less fresh, toast it or use it for French toast, bread pudding, or homemade croutons. For thick fillings, cut slightly sturdier slices rather than pressing a very thin slice flat.
Storage and Freezing
Let the loaf cool completely before wrapping. Store well wrapped at room temperature for about 2–3 days, depending on your kitchen conditions. Homemade bread has no added preservatives, so freeze it early if you will not finish it promptly. Discard the entire loaf if mold appears.
For freezing, slice the cooled loaf and separate portions with parchment if desired. Place in a freezer bag, remove excess air, and freeze for up to 2–3 months for best quality.
Thaw covered slices at room temperature or toast them directly from frozen. To warm several slices, wrap loosely in foil and heat in a 300°F oven until warm, checking after about 10 minutes. Avoid prolonged heating, which dries the crumb.
Refrigeration tends to accelerate bread staling, so room-temperature storage for short use or freezing for longer storage is generally preferable for texture.
Frequently Asked Questions
Is it really no-knead if I shape the dough?
Yes. Stirring combines the ingredients, and a brief rolling or guiding motion forms the loaf. You do not repeatedly stretch and work the dough as you would during kneading.
Can I use all-purpose flour?
You can try it, but flour brands differ, and the dough may be less structured. Bread flour is the recommended starting point for this formula. Keep the dough soft and use the pan for support.
Can I use plant-based milk?
An unsweetened, unflavored plant-based milk may work with a suitable butter substitute, but the flavor, browning, and texture will differ. That adaptation has not been verified for this formula.
Can I make this without yeast?
Not by simply leaving it out or replacing it with baking powder. This is a yeast bread; a quick bread requires a different formula and method.
Can I use a smaller loaf pan?
The recipe is written for a 9-by-5-inch pan. Do not force the entire dough into a smaller pan; it may rise over the sides. Dividing between smaller pans changes proofing height and baking time.
Why should I wait before cutting it?
The crumb continues to set while the loaf cools. Waiting gives you cleaner slices and helps avoid a compressed, sticky interior.
Recipe Card
Easy No-Knead Milk Sandwich Bread
A soft homemade sandwich loaf mixed by hand, with milk and butter and no extended kneading.
Prep: About 15 minutes active
Rise: Approximately 1½–2½ hours
Bake: Approximately 35–40 minutes
Total: Approximately 2 hours 20 minutes–3 hours 25 minutes, plus cooling
Yield: One 9-by-5-inch loaf, about 12–14 slices
Ingredients
- 3½ cups bread flour, spooned and leveled
- 2¼ teaspoons instant yeast
- 2 tablespoons granulated sugar
- 1½ teaspoons fine salt
- 1½ cups whole milk, warmed to approximately 100–110°F
- 3 tablespoons unsalted butter, melted and cooled until lukewarm
- Butter for greasing the pan
- 1 tablespoon melted butter for finishing, optional
Instructions
- Whisk flour, yeast, sugar, and salt in a large bowl.
- Add warm milk and lukewarm butter. Stir firmly for 2–3 minutes until no dry flour remains. The dough should be sticky and cohesive, not pourable.
- Cover and let rise for approximately 60–90 minutes, or until roughly doubled.
- Grease a 9-by-5-inch metal loaf pan. Gently shape the dough into an 8-inch-wide rectangle, roll into a log, and place seam-side down in the pan. Use minimal extra flour.
- Cover loosely and rise for approximately 30–60 minutes, until the center is about ½–1 inch above the rim. Preheat the oven to 350°F.
- Uncover and bake for approximately 35–40 minutes, until golden and the center reaches about 190–195°F. Tent with foil if browning too quickly.
- Rest in the pan for 5 minutes, then transfer to a rack. Brush with optional butter and cool completely before slicing.
Notes
- Rise and baking times are estimates. Use dough volume, loaf height, and doneness cues.
- Flour measurement affects this soft dough considerably; spoon and level rather than packing the cups.
- This recipe contains wheat and dairy.
- Nutrition values are not provided because the formula has not been nutritionally calculated.
Final Thoughts
The most useful habits for this loaf are simple: keep the dough soft, give each rise enough time, and let the baked bread cool before slicing. With those details in place, milk sandwich bread can become a practical addition to everyday lunches, toast, and family breakfasts.
Easy No-Knead Milk Sandwich Bread
Ingredients
- 3½ cups bread flour, spooned and leveled
- 2¼ teaspoons instant yeast
- 2 tablespoons granulated sugar
- 1½ teaspoons fine salt
- 1½ cups whole milk, warmed to approximately 100–110°F
- 3 tablespoons unsalted butter, melted and cooled until lukewarm
- Butter for greasing the pan
- 1 tablespoon melted butter for finishing, optional
Instructions
- Whisk flour, yeast, sugar, and salt in a large bowl.
- Add warm milk and lukewarm butter. Stir firmly for 2–3 minutes until no dry flour remains. The dough should be sticky and cohesive, not pourable.
- Cover and let rise for approximately 60–90 minutes, or until roughly doubled.
- Grease a 9-by-5-inch metal loaf pan. Gently shape the dough into an 8-inch-wide rectangle, roll into a log, and place seam-side down in the pan. Use minimal extra flour.
- Cover loosely and rise for approximately 30–60 minutes, until the center is about ½–1 inch above the rim. Preheat the oven to 350°F.
- Uncover and bake for approximately 35–40 minutes, until golden and the center reaches about 190–195°F. Tent with foil if browning too quickly.
- Rest in the pan for 5 minutes, then transfer to a rack. Brush with optional butter and cool completely before slicing.
Notes
- Rise and baking times are estimates. Use dough volume, loaf height, and doneness cues.
- Flour measurement affects this soft dough considerably; spoon and level rather than packing the cups.
- This recipe contains wheat and dairy.
- Nutrition values are not provided because the formula has not been nutritionally calculated.