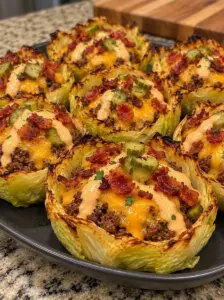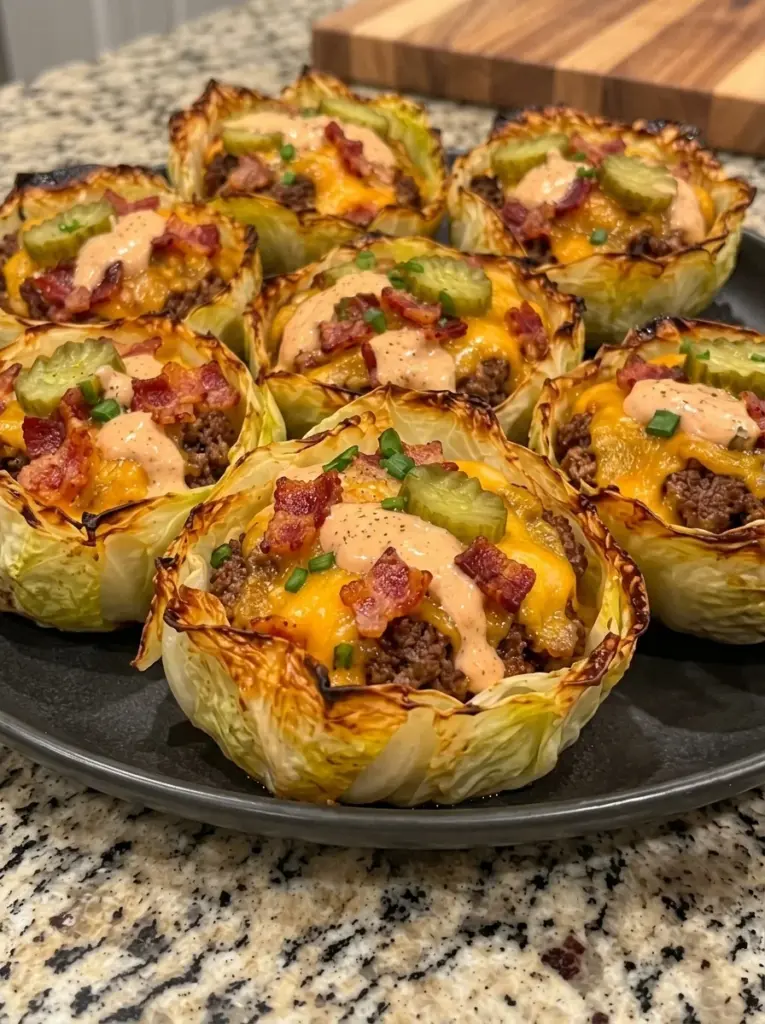
These Crispy Bacon Cheeseburger Cabbage Skillet Cups tuck seasoned beef, smoky bacon, melted cheddar, and tangy pickle relish into tender cabbage leaves. A short oven bake melts the cheese and browns the exposed cabbage edges, bringing familiar burger flavors to a fork-and-knife dinner without a bread bun.
The filling cooks on the stovetop before the cups go into the oven. That keeps the process straightforward: blanch the leaves, prepare the cheeseburger mixture, assemble, and bake. Add fresh pickles, green onions, or burger sauce just before serving.
Expect tender cabbage with lightly browned edges, rather than a crunchy shell all the way through. Drying the leaves thoroughly and draining the filling give the cups their best chance to brown instead of collecting excess liquid.
Recipe at a glance: 8 cups · 4 servings · approximately 45–60 minutes total, depending on bacon preparation and pan arrangement.
Why You’ll Love This Recipe
- Cheeseburger flavor in each cup: Mustard, ketchup, relish, beef, and cheddar season the filling.
- A cabbage base: The leaves hold the mixture without a bun.
- A simple oven finish: Cooked filling needs only a short bake with the cheese topping.
- Flexible toppings: Add crunchy pickles or sauce at the table.
- Useful make-ahead filling: Cook it in advance and assemble close to dinner.
What Are Cabbage Skillet Cups?
These are open, filled cabbage leaves arranged in an oven-safe skillet. They are not tightly wrapped cabbage rolls. The open tops expose the cheese and leaf edges to the oven heat.
Although a skillet is used, the assembled cups finish in the oven. A stovetop-only method would require a different cooking plan and would not brown the exposed edges in the same way.
Skipping the bread bun makes this a different carbohydrate profile from a conventional burger, but exact values depend on ketchup, relish, portions, and toppings. No uncalculated net-carb or calorie numbers are presented here.
Ingredients
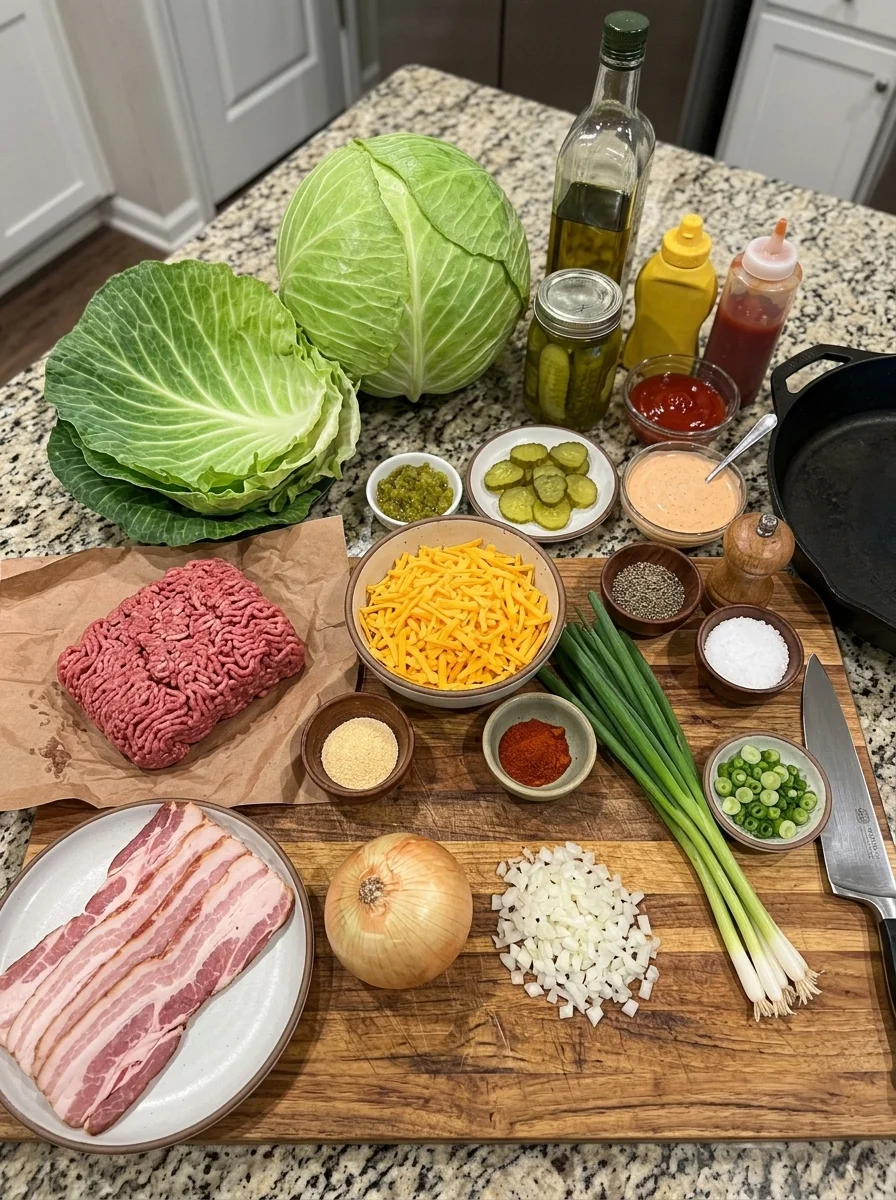
Cabbage Cups
- 8 large green cabbage leaves, plus spare leaves if needed for repairs
- 1 tablespoon olive oil
- ½ teaspoon garlic powder
- Salt and black pepper, to taste
Cheeseburger Filling
- 1 lb ground beef
- 6 slices bacon, cooked crisp and crumbled
- 1 cup shredded cheddar cheese, divided
- ½ small onion, finely diced
- 2 tablespoons dill pickle relish, drained of excess liquid
- 1 tablespoon yellow mustard
- 2 tablespoons ketchup, sugar-free if desired
- ½ teaspoon smoked paprika
- Salt and black pepper, to taste
Optional Toppings
- Diced dill pickles
- Sliced green onions
- Extra shredded cheddar
- Burger sauce or additional ketchup
Ingredient Notes
Cabbage leaves: Use broad, intact green cabbage leaves with enough surface area to hold filling. Shave the thick rib so it bends rather than cutting through the center. If two full leaves are needed per cup, you will need more than the eight listed; spare leaves can also patch small tears.
Ground beef: A relatively lean blend, such as 90/10, helps limit grease in the cups. Drain the filling as needed even when using lean beef.
Bacon: The measured ingredient is cooked bacon. If starting with raw slices, cook them first and allow additional preparation time. A small amount of rendered fat can flavor the beef; drain the rest instead of leaving a deep layer in the skillet.
Cheddar: Fold ½ cup into the cooked filling and put the other ½ cup on top. Freshly grated or packaged shredded cheese works.
Relish: Choose dill rather than sweet relish for the intended tangy flavor. Drain loose liquid before measuring. Ingredient labels matter if you are monitoring added sugar or carbohydrates.
Garlic powder: In this version, the listed ½ teaspoon seasons the cabbage leaves, matching its position in the ingredient list. Do not add a second unlisted amount to the filling unless you want an optional garlic-forward variation.
Salt: Bacon, cheese, relish, and condiments already contribute salt. Taste the cooked filling before adding more.
Choosing the Skillet
Use a large oven-safe skillet, approximately 12 inches across, or a baking dish that supports eight cups without crushing them. Check the handle and cookware temperature rating for 425°F. Broiling requires a separate broiler-safe rating; not every oven-safe pan is suitable.
Leaf size varies, so eight cups may not fit comfortably in one skillet. Use two smaller skillets or an additional dish if needed. Place the cups close enough to support each other, but avoid tightly packing their exposed edges if you want browning.
If you cook the beef in the same skillet used for baking, transfer the filling to a bowl and remove excess liquid before arranging the leaves. The measured olive oil can coat both the leaves and the pan; additional greasing may be needed with a sticky surface.
How to Make Them
1. Preheat and prepare the leaves
Preheat the oven to 425°F. Separate eight large cabbage leaves. If they will not release neatly, core the head and briefly soften the outer layers in simmering water, removing loosened leaves carefully with tongs.
Shave down thick ribs without making holes through the leaves.
2. Blanch and dry
Blanch separated leaves for 2–3 minutes, until flexible. Drain and let them cool enough to handle, then pat both sides thoroughly dry. Water can remain trapped in the folds, so check those areas carefully.
Do not cook the leaves until falling apart. They need flexibility but enough structure to hold the filling.
3. Cook bacon if necessary
If starting with raw bacon, cook according to package directions until crisp. Drain on paper towels and crumble once cool enough. Keep about 1 tablespoon rendered fat in the skillet if desired and remove the remainder.
If your bacon is already cooked, begin with the beef in a suitable skillet. Lean beef may need a little cooking fat if the pan is prone to sticking.
4. Brown the beef and onion
Cook beef and diced onion over medium-high heat for approximately 7–10 minutes, breaking up the meat, until the onion is softened and the beef reaches 160°F on a food thermometer. Drain excess fat and liquid.
Stir in mustard, ketchup, drained relish, and smoked paprika. Taste and add salt and pepper as needed. Remove from heat, then stir in the bacon and ½ cup cheddar.
If you want crisp bacon on top, reserve a small portion of the measured bacon instead of folding it all into the filling.
5. Form the cabbage cups
Lightly brush the dry leaves with olive oil and season with the garlic powder, salt, and pepper. Place in the prepared oven-safe skillet, folding sides upward into open cups.
Overlap trimmed sections or patch tears with spare cabbage. The skillet walls and neighboring cups help support the shapes; do not expect a soft leaf to stand independently like a rigid taco shell.
6. Fill and bake
Divide the warm filling among the eight cups and sprinkle with the remaining cheddar. Keep some cabbage edge exposed above the filling.
Bake for approximately 12–18 minutes, until the cheese melts and the rims are lightly browned. If more color is needed, broil for 1–2 minutes only in approved cookware, watching continuously. Skip broiling if the edges are already dark.
7. Finish and serve
Rest for about 3 minutes so the cups are easier to lift. Use a broad spoon or spatula to support the bases. Add fresh pickles, green onions, reserved bacon, or a light sauce drizzle just before serving.
Serve two cups per person with a fork and knife. Avoid flooding the skillet with sauce if you want to preserve the browned edges.
Tips for Better Texture
Dry the leaves well. Blanching water encourages steaming and dilutes the filling.
Drain the meat mixture. Excess fat and liquid collect inside the cups.
Use pan support. A well-sized skillet keeps the folded sides upright.
Leave exposed rims. Completely covering the cabbage with filling and cheese limits browning.
Add fresh toppings last. Pickles and sauce soften the edges when left sitting.
Troubleshooting
| Problem | Practical adjustment |
|---|---|
| Leaves tear | Soften before separating, trim ribs carefully, and use spare pieces to patch. |
| Cups flatten | Use a smaller supporting pan or split the batch between appropriately sized dishes. |
| Liquid pools in the skillet | Dry the leaves and drain the beef mixture more thoroughly. |
| Cabbage is soft rather than crispy | Tender centers are expected. Exposed dry edges brown best; avoid overselling the texture as a crunchy shell. |
| Edges burn | Stop broiling immediately or shield dark areas loosely with foil during baking. |
| Bacon softens | Keep some for a finishing sprinkle. Bacon in the filling absorbs moisture. |
| Filling tastes salty | Reduce added salt and check condiment labels. |
Variations
Spicy cups: Add minced jalapeño with the onion or use pepper Jack for part of the cheddar.
Turkey filling: Use ground turkey instead of beef and cook to 165°F. Its flavor and fat content differ.
Extra pickle flavor: Fold in a small amount of finely chopped, well-drained dill pickle or add it at serving for crunch.
More garlic: Add another ¼ teaspoon garlic powder to the filling as an optional addition, keeping the listed ½ teaspoon on the cabbage.
Keep wet additions modest so the cups do not become watery or overloaded.
Serving Suggestions
Serve with a crisp salad, roasted vegetables, or a simple cucumber side. If carbohydrate reduction is not your aim, potatoes or fries complement the cheeseburger flavor.
For a casual dinner, place the skillet on a heat-safe surface and offer sauce separately. For a party, make smaller portions and serve with utensils rather than assuming the leaves will function as handheld wrappers.
Make-Ahead Instructions
Prepare filling ahead, refrigerate promptly in a shallow container, and keep blanched, dried leaves separately refrigerated. Assemble close to serving for better texture.
If the filling is cold, reheat it to 165°F before placing it in the leaves and completing the short bake. Alternatively, bake cold assembled cups until the centers reach 165°F, allowing more time and shielding the edges if needed.
Advance preparation does not restart the storage clock for cooked bacon or other previously prepared ingredients.
Storage and Reheating
Refrigerate leftovers within 2 hours, or within 1 hour if the surrounding temperature exceeds 90°F. Store at 40°F or below and use within 3–4 days. Keep sauce and fresh toppings separate.
Freeze the cooled filling separately for up to 2 months for best quality. Assembled cabbage cups soften and can release water after freezing. Thaw filling in the refrigerator.
Reheat cups in a 350°F oven until the centers reach 165°F, covering loosely if the tops darken early. A covered skillet over medium-low heat also works, but its trapped steam softens the cabbage. Microwave reheating is convenient for the filling but does not restore edge crispness.
Add fresh toppings after reheating.
Frequently Asked Questions
Are these cooked entirely in a skillet on the stove?
No. The filling cooks on the stove, and the assembled cups bake in an oven-safe skillet. The oven step melts the topping and browns exposed cabbage.
Can I use a baking dish instead?
Yes. Choose a size that supports the leaves without excessive crowding. Do not broil glass or other cookware unless specifically approved by the manufacturer.
Do I need more than eight leaves?
Eight intact large leaves can make eight cups. Have extras available for patching; using two complete leaves per cup requires sixteen.
Can I skip blanching?
Blanching makes the leaves flexible. Raw leaves are harder to fold and can split along the rib.
Are they low-carb?
They omit a bread bun, but exact carbohydrates depend on ketchup, relish, portions, and toppings. Calculate the version you make if a particular target matters.
Does the beef need to be cooked first?
Yes. Fully cook it to 160°F before assembly. The brief oven finish is not designed to cook raw ground beef.
Recipe Card
Crispy Bacon Cheeseburger Cabbage Skillet Cups
Open cabbage cups with cooked beef, bacon, relish, and cheddar, finished in an oven-safe skillet.
Prep: About 20 minutes
Cook: Approximately 25–40 minutes, depending on bacon preparation and overlapping tasks
Total: Approximately 45–60 minutes
Yield: 8 cups
Servings: 4
Ingredients
Cabbage
- 8 large cabbage leaves, plus spares if needed
- 1 tablespoon olive oil
- ½ teaspoon garlic powder
- Salt and black pepper, to taste
Filling
- 1 lb ground beef
- 6 slices bacon, cooked crisp and crumbled
- 1 cup shredded cheddar, divided
- ½ small onion, finely diced
- 2 tablespoons dill pickle relish, drained of excess liquid
- 1 tablespoon yellow mustard
- 2 tablespoons ketchup, sugar-free if desired
- ½ teaspoon smoked paprika
- Salt and black pepper, to taste
Optional toppings
- Diced dill pickles, sliced green onions, extra cheddar, burger sauce, or ketchup
Instructions
- Preheat the oven to 425°F. Separate cabbage leaves, trim thick ribs, and blanch for 2–3 minutes until flexible. Drain and dry thoroughly.
- If starting with raw bacon, cook until crisp, crumble, and retain only about 1 tablespoon fat in the skillet if desired.
- Cook beef and onion for 7–10 minutes until beef reaches 160°F. Drain excess liquid. Stir in mustard, ketchup, relish, paprika, salt, and pepper. Remove from heat and add bacon and ½ cup cheddar.
- Brush leaves with olive oil and season with garlic powder, salt, and pepper. Arrange in a suitable oven-safe skillet, folding sides upward and patching tears if needed.
- Divide warm filling between cups and top with remaining cheddar. Bake 12–18 minutes until melted and lightly browned. Broil briefly only if needed and only in broiler-safe cookware.
- Rest about 3 minutes, lift carefully, and add optional toppings just before serving.
Notes
- Garlic powder seasons the leaves in this consistent version of the supplied recipe.
- Additional leaves are needed if using two full leaves per cup.
- Starting with pre-cooked bacon shortens preparation.
- Browned cabbage edges surround a tender center; this is not a rigid crunchy shell.
- Exact nutrition has not been calculated, so calorie and net-carbohydrate estimates are not included.
Final Thoughts
Give the leaves enough flexibility to fold, then dry them carefully and support them in the pan. Finish with fresh pickles and a little sauce for a satisfying cheeseburger-style dinner with tender cabbage and golden cheese.
Crispy Bacon Cheeseburger Cabbage Skillet Cups
- Total Time: Approximately 45–60 minutes
- Yield: 8 cups 1x
Ingredients
Cabbage Cups
- 8 large green cabbage leaves, plus spare leaves if needed for repairs
- 1 tablespoon olive oil
- ½ teaspoon garlic powder
- Salt and black pepper, to taste
Cheeseburger Filling
- 1 lb ground beef
- 6 slices bacon, cooked crisp and crumbled
- 1 cup shredded cheddar cheese, divided
- ½ small onion, finely diced
- 2 tablespoons dill pickle relish, drained of excess liquid
- 1 tablespoon yellow mustard
- 2 tablespoons ketchup, sugar-free if desired
- ½ teaspoon smoked paprika
- Salt and black pepper, to taste
Optional Toppings
- Diced dill pickles
- Sliced green onions
- Extra shredded cheddar
- Burger sauce or additional ketchup
Instructions
- Preheat the oven to 425°F. Separate cabbage leaves, trim thick ribs, and blanch for 2–3 minutes until flexible. Drain and dry thoroughly.
- If starting with raw bacon, cook until crisp, crumble, and retain only about 1 tablespoon fat in the skillet if desired.
- Cook beef and onion for 7–10 minutes until beef reaches 160°F. Drain excess liquid. Stir in mustard, ketchup, relish, paprika, salt, and pepper. Remove from heat and add bacon and ½ cup cheddar.
- Brush leaves with olive oil and season with garlic powder, salt, and pepper. Arrange in a suitable oven-safe skillet, folding sides upward and patching tears if needed.
- Divide warm filling between cups and top with remaining cheddar. Bake 12–18 minutes until melted and lightly browned. Broil briefly only if needed and only in broiler-safe cookware.
- Rest about 3 minutes, lift carefully, and add optional toppings just before serving.
Notes
- Garlic powder seasons the leaves in this consistent version of the supplied recipe.
- Additional leaves are needed if using two full leaves per cup.
- Starting with pre-cooked bacon shortens preparation.
- Browned cabbage edges surround a tender center; this is not a rigid crunchy shell.
- Exact nutrition has not been calculated, so calorie and net-carbohydrate estimates are not included.
- Prep Time: About 20 minutes
- Cook Time: Approximately 25–40 minutes, depending on bacon preparation and overlapping tasks
Nutrition
- Serving Size: 4