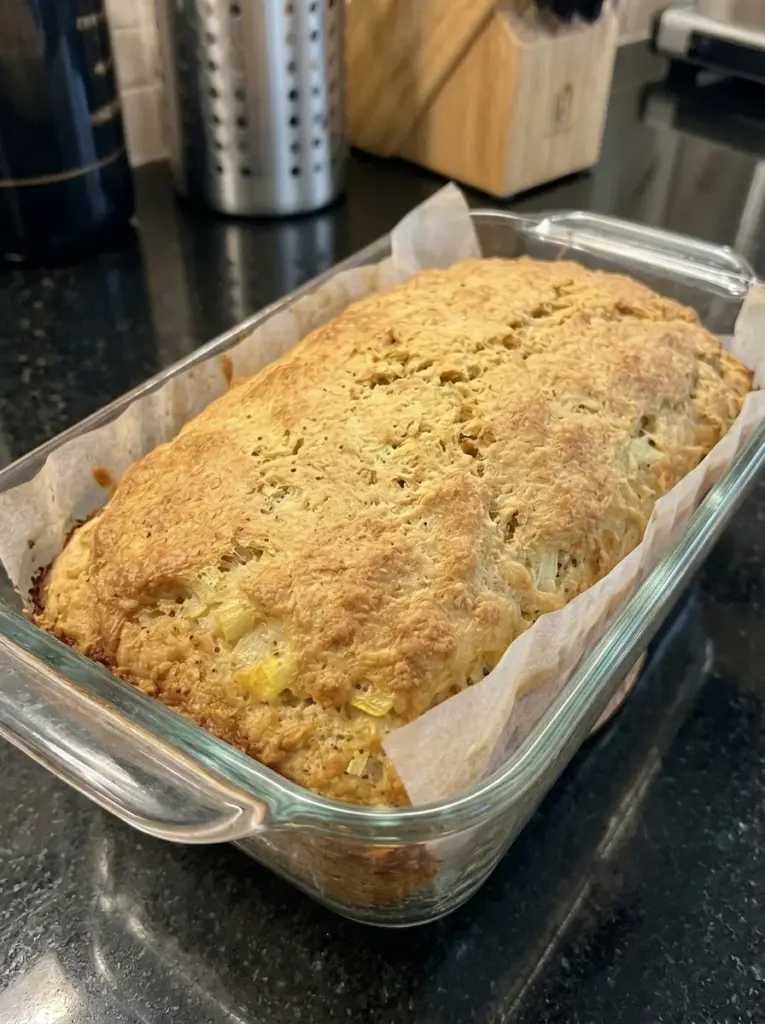
A can of chickpeas, three eggs, and a little baking powder are all you need for this simple, flourless loaf. Blended into a smooth batter and baked in a small pan, the ingredients create a moist, savory bread that you can slice, toast, and serve with your favorite toppings.
There is no yeast, kneading, or rising time. Most of the preparation happens in a food processor, making this a convenient recipe when you want something homemade without handling dough.
The texture is different from traditional sandwich bread. Expect a compact, tender loaf with a mild chickpea flavor and an egg-based structure, rather than an airy or stretchy crumb. Cooling completely—and lightly toasting the slices—makes it easier to use for small sandwiches.
Recipe at a Glance
- Prep time: 10 minutes
- Bake time: 35–45 minutes
- Cooling time: Approximately 45–60 minutes, or until completely cool
- Total time: Approximately 1½–2 hours
- Yield: One small, relatively shallow loaf
- Servings: About 8 slices
- Pan: 8 × 4-inch loaf pan
- Equipment: Food processor or high-powered blender, spatula, parchment paper, and wire rack
Why You’ll Love This Recipe
- Only three ingredients: Canned chickpeas, eggs, and baking powder form the base.
- No flour or yeast: There is no dough to knead or wait on.
- Simple preparation: Drain, blend, pour, and bake.
- Easy to customize: Keep the base plain or add seasonings if you do not mind increasing the ingredient count.
- Useful for toast: Light toasting gives the moist slices firmer edges.
- Freezer-friendly portions: Freeze individual slices for another meal.
What Is Chickpea Sandwich Bread?
This is a blended chickpea-and-egg loaf raised with baking powder. The eggs help bind and set the mixture, while the chickpeas provide body, moisture, and a mild bean flavor.
Because the recipe contains no wheat flour, it does not develop the gluten structure that makes ordinary bread elastic. Baking powder provides some lift, but it cannot create the same crumb as a yeast-raised loaf.
Think of it as a savory, sliceable chickpea loaf that can serve as a bread alternative. It works particularly well toasted and topped, or used for smaller sandwiches with modest amounts of filling.
Ingredients
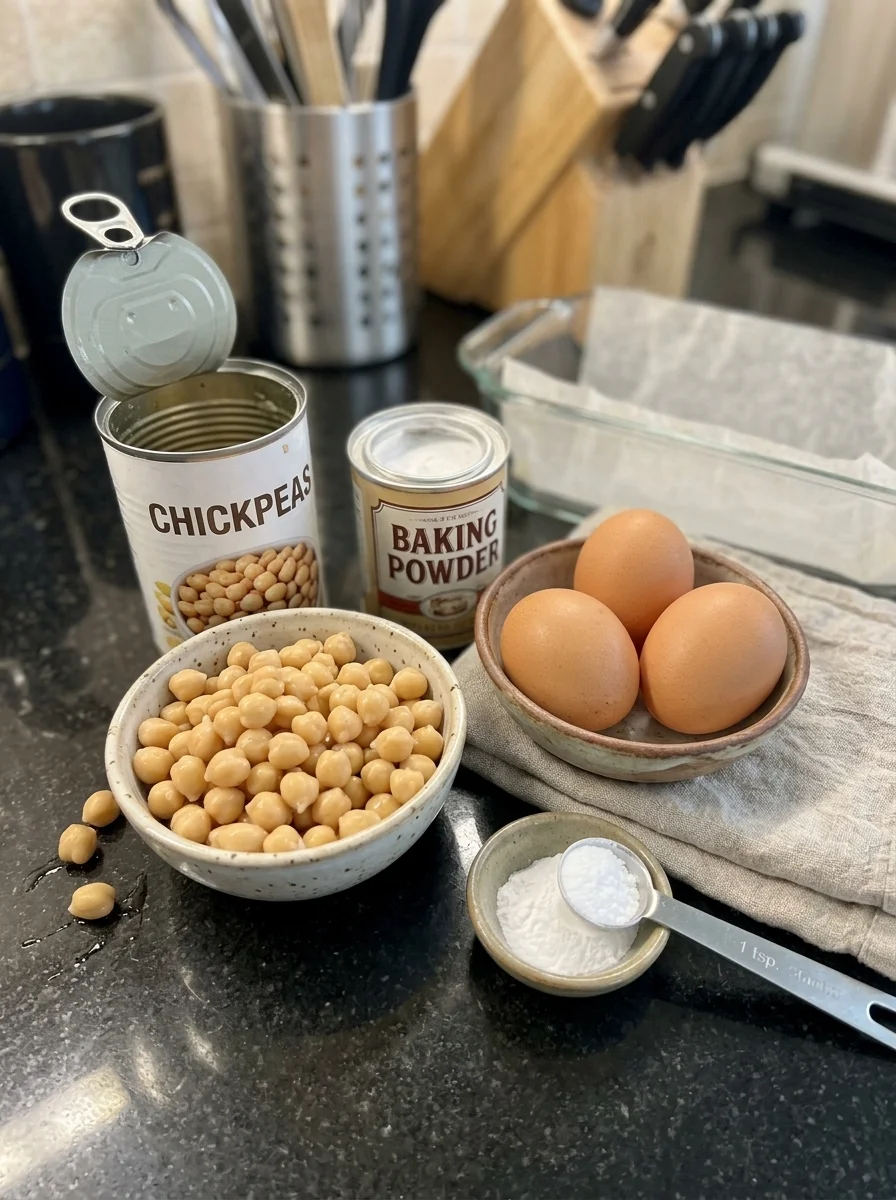
- 1 can chickpeas, 15 oz, drained and rinsed thoroughly
- 3 large eggs
- 1½ teaspoons baking powder
The 15 oz measurement refers to the unopened can, including its packing liquid. Use the drained chickpeas in the batter.
Ingredient Notes
Chickpeas: Canned chickpeas are already cooked and ready to blend after draining and rinsing. Do not substitute uncooked dried chickpeas or merely soaked chickpeas. Those require a different preparation.
Eggs: Three large eggs provide much of the structure. Smaller or unusually large eggs change the moisture balance, so use large eggs for the closest match to the recipe.
Baking powder: Use baking powder, not baking soda. They are not interchangeable in this formula. Check that your baking powder is fresh and measure level teaspoons.
Seasoning: The three-ingredient version has a plain flavor. Depending on the chickpea brand, it may taste lightly salted or quite mild. Salt, herbs, and spices are optional additions rather than part of the basic recipe.
How to Make Chickpea Sandwich Bread
1. Prepare the Oven and Pan
Heat the oven to 350°F with a rack near the center.
Line an 8 × 4-inch loaf pan with parchment paper, leaving an overhang along the long sides. This helps lift out the delicate loaf after its initial cooling period.
The batter makes a small loaf. A larger pan will produce thinner slices and may shorten the baking time.
2. Drain and Dry the Chickpeas
Drain the chickpeas in a colander and rinse thoroughly. Shake off the water, then spread them on a clean kitchen towel and pat dry.
You do not need to dry them until hard or remove every skin. The goal is to remove surface water that would otherwise thin the batter.
3. Blend Until Very Smooth
Add the chickpeas, eggs, and baking powder to a food processor or high-powered blender.
Process until the batter is as smooth as possible, stopping to scrape the sides and bottom. There should be no large chickpea pieces remaining.
A food processor is often easier than a large blender for this thick, relatively small batch. If the mixture stops circulating, switch off the machine and scrape before continuing. Avoid adding water or milk simply to help the blades move; additional liquid can make the baked center wetter.
4. Fill the Pan
Scrape the batter into the lined pan and spread evenly.
Tap the pan gently against the counter once or twice to release large trapped air pockets. Do not repeatedly bang it or leave it standing for a long period before baking.
5. Bake Until Set
Bake for 35–45 minutes, beginning to check near 35 minutes.
The surface should look set and lightly golden, and the center should no longer appear liquid. A toothpick inserted into the middle should come out without wet batter, although a few moist crumbs are normal.
If the surface browns before the middle is ready, cover loosely with foil and continue baking in short increments. Pan material, chickpea moisture, and oven performance can all affect the timing.
6. Cool Completely
Leave the loaf in the pan for 10–15 minutes. Lift carefully using the parchment and transfer to a wire rack.
Allow it to cool completely before cutting. Plan on approximately another 30–45 minutes, allowing longer if the center still feels warm.
This loaf is naturally moist. Cutting it hot can compress the interior and make the slices break apart or look gummy.
7. Slice and Toast
Cut into approximately eight slices using a serrated knife and a gentle sawing motion.
For a firmer surface, toast lightly in a toaster oven or a dry skillet. Very soft or thin slices may be difficult to remove from an upright toaster, so choose a method that supports them.
Tips for the Best Texture
Remove excess water before blending. Wet chickpeas make an already moist batter harder to set.
Blend thoroughly. Large chickpea pieces interrupt the texture and can make slices crumble.
Use the intended pan size. This is a small batch, so do not expect a tall loaf in a large sandwich-bread pan.
Do not expect dramatic rising. The batter may puff during baking and settle somewhat afterward. A compact crumb is normal.
Wait before slicing. Cooling is part of the preparation, not just a serving preference.
Toast for sandwiches. A lightly toasted surface helps support fillings and adds flavor.
Troubleshooting
| Problem | Possible cause | Helpful adjustment |
|---|---|---|
| Center is wet | Excess moisture or insufficient baking | Drain chickpeas thoroughly and continue baking until the center is set. |
| Slices seem gummy | Bread was cut while warm | Cool completely before judging the crumb. |
| Loaf is shallow | Small batter quantity or oversized pan | Use the specified pan and expect a modest loaf. |
| Texture is coarse | Chickpeas were not fully blended | Scrape and process until no large pieces remain. |
| Bread crumbles | Rough slicing, early cutting, or uneven batter | Cool fully, blend smoothly, and use a serrated knife. |
| Flavor seems plain | Base contains no added seasoning | Pair with flavorful toppings or add salt and herbs in a future batch. |
| Loaf settles after baking | Egg-based structure contracts during cooling | Some settling is expected; a wet, collapsed center needs a doneness check. |
Flavor Variations
These additions increase the ingredient count beyond three.
Garlic and Herb
Add a little garlic powder and dried oregano or Italian seasoning. Start modestly so the seasonings complement the chickpeas.
Sesame-Topped Loaf
Sprinkle sesame seeds over the batter before baking. They add texture without introducing much moisture.
Savory Cheese
Fold in a small amount of finely grated Parmesan after blending. Cheese adds salt and changes the nutrition, so account for it separately.
Lightly Salted Version
Add a small pinch of salt to the batter. This is particularly useful with no-salt-added chickpeas.
Avoid large quantities of wet vegetables, sauces, or cheese in the first batch. They change the moisture and structure of a formula that already has very few binding ingredients.
Serving Suggestions
Top a toasted slice with avocado, cottage cheese, hummus, or a cooked egg. Tomatoes and cucumber provide a fresh contrast to the hearty chickpea base.
For sandwiches, use modest layers of turkey, chicken, cheese, or roasted vegetables. Drain watery fillings and add sauces sparingly to keep the slices from becoming soggy.
You can also serve small toasted pieces beside soup or salad. The plain flavor makes it a useful base for stronger savory toppings.
Storage and Freezing
Refrigerate this moist chickpea-and-egg loaf within 2 hours of baking. Let the initial steam escape, then store in a covered container rather than leaving it out overnight.
Keep refrigerated for up to 4 days. Separate slices with parchment if they tend to stick together.
For longer storage, freeze fully cooled slices in a sealed freezer-safe bag or container for up to 2 months for best quality. Remove individual portions as needed.
Warm or toast refrigerated slices before serving. Frozen slices can be heated gently in a toaster oven, allowing enough time for the center to warm without burning the edges.
Frequently Asked Questions
Can I use chickpea flour instead of canned chickpeas?
Not as a direct substitution. Chickpea flour is dry and requires a different balance of liquid and other ingredients. This recipe is written for cooked, drained chickpeas.
Can I use chickpeas cooked from dried?
Cooked chickpeas can be tried, but their moisture and firmness vary. Use a thoroughly cooked, well-drained quantity comparable to the drained contents of the can. Do not substitute raw or merely soaked chickpeas.
Do I need to remove the skins?
No. Thorough blending is more important than peeling each chickpea. Removing skins is optional if your equipment struggles to create a smooth texture.
Can I replace the eggs?
The eggs are a major structural ingredient. An egg-free version needs its own formula; a standard egg substitute should not be assumed to produce the same sliceable loaf.
Is it gluten-free?
The listed ingredients can make a gluten-free loaf when the chickpeas and baking powder are suitable and preparation avoids cross-contact. Check product labels when cooking for someone who must avoid gluten.
Is it low-carb?
Chickpeas contain carbohydrates, so flourless does not automatically mean low-carb. Calculate from the chickpea label and portion size before making a specific claim.
Is it high in protein?
Chickpeas and eggs contribute protein, but each of eight small slices contains a modest amount. For example, if the drained chickpeas provide about 18–21 grams of protein and the eggs contribute about 18 grams, the loaf contains roughly 36–39 grams before minor contributions from other ingredients—about 4½–5 grams per slice.
Are the calories 90–110 per slice?
That estimate may be high for eight equal slices of this particular three-ingredient loaf. If the drained chickpeas contribute roughly 350–400 calories and the eggs about 210, the loaf would provide approximately 70–80 calories per slice, before toppings. Use your can’s nutrition information carefully, including its stated serving basis, for a more accurate calculation.
Recipe Card
3-Ingredient Chickpea Sandwich Bread
A simple flourless chickpea-and-egg loaf with a moist, hearty crumb. Cool completely and toast lightly for firmer slices.
Prep: 10 minutes
Bake: 35–45 minutes
Cool: Approximately 45–60 minutes
Total: Approximately 1½–2 hours
Yield: One small loaf, about 8 slices
Ingredients
- 1 can chickpeas, 15 oz, drained and rinsed
- 3 large eggs
- 1½ teaspoons baking powder
Instructions
- Heat the oven to 350°F. Line an 8 × 4-inch loaf pan with parchment.
- Drain and rinse the chickpeas, then pat away excess surface moisture.
- Blend chickpeas, eggs, and baking powder until very smooth, stopping to scrape as needed.
- Transfer to the pan, smooth the surface, and tap gently to release large air pockets.
- Bake for 35–45 minutes, or until the center is set and a toothpick comes out without wet batter.
- Rest in the pan for 10–15 minutes, then transfer carefully to a rack.
- Cool completely before slicing into eight pieces. Toast lightly if desired.
Notes
- Use cooked canned chickpeas, not raw or soaked dried chickpeas.
- Expect a compact, moist loaf rather than an airy yeast-bread crumb.
- Refrigerate within 2 hours and use within 4 days.
- Freeze cooled slices for up to 2 months for best quality.
- Approximate nutrition may be around 70–80 calories and 4½–5 grams protein per eighth of the loaf, depending on the drained chickpea quantity and egg size. Toppings are additional.
Final Thoughts
Thorough draining, smooth blending, and complete cooling make the biggest difference in this small chickpea loaf. Keep expectations focused on a moist, hearty bread alternative, then toast the slices and add your favorite savory toppings for the best eating texture.
Print
3-Ingredient Chickpea Sandwich Bread
- Total Time: Approximately 1½–2 hours
- Yield: One small loaf, about 8 slices
Ingredients
- 1 can chickpeas, 15 oz, drained and rinsed
- 3 large eggs
- 1½ teaspoons baking powder
Instructions
- Heat the oven to 350°F. Line an 8 × 4-inch loaf pan with parchment.
- Drain and rinse the chickpeas, then pat away excess surface moisture.
- Blend chickpeas, eggs, and baking powder until very smooth, stopping to scrape as needed.
- Transfer to the pan, smooth the surface, and tap gently to release large air pockets.
- Bake for 35–45 minutes, or until the center is set and a toothpick comes out without wet batter.
- Rest in the pan for 10–15 minutes, then transfer carefully to a rack.
- Cool completely before slicing into eight pieces. Toast lightly if desired.
- Prep Time: 10 minutes
- Cook Time: Bake: 35–45 minutes Cool: Approximately 45–60 minutes