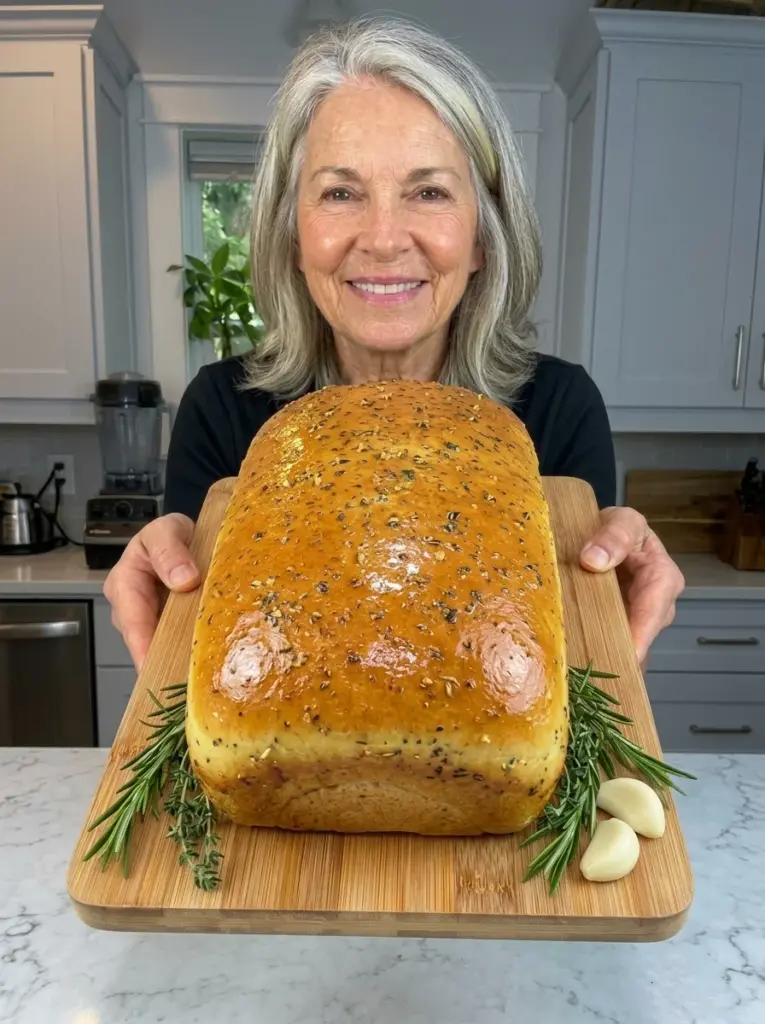
This Soft No-Knead Garlic Herb Sandwich Bread is fluffy, tender, buttery, and packed with savory garlic and herb flavor. 🧄🌿🍞 Fresh garlic, Italian seasoning, parsley, rosemary, thyme, and black pepper transform a simple homemade sandwich loaf into fragrant, savory bread that’s perfect for sandwiches, toast, or serving alongside dinner.
Best of all, there’s absolutely no kneading required. The dough comes together in one bowl with a wooden spoon, then time and yeast do the rest of the work. After the first rise, simply transfer the soft dough to a loaf pan, let it become puffy again, and bake until beautifully golden.
The combination of garlic and dried herbs gives every slice plenty of flavor without making the bread difficult to pair with other ingredients. Use it for grilled chicken sandwiches, deli meats and cheese, breakfast sandwiches, savory toast, or simply spread a warm slice with butter.
A final brush of melted butter softens the golden crust and adds another layer of richness. Once completely cooled, the loaf slices easily with a serrated knife and has a soft crumb that’s ideal for everyday sandwiches.
Why You’ll Love This No-Knead Garlic Herb Sandwich Bread
No kneading required. Simply mix the ingredients together and allow the dough to rise.
Soft sandwich-friendly texture. The finished loaf has a tender crumb that’s easy to slice and use for sandwiches.
Loaded with garlic and herbs. Fresh garlic combines with Italian seasoning, parsley, rosemary, thyme, and black pepper.
Simple one-bowl dough. The dough comes together quickly with a wooden spoon.
Beautiful golden crust. Baking at 375°F creates a nicely browned exterior.
Buttery finish. Brushing the hot loaf with melted butter creates a softer, flavorful crust.
Versatile. Use it for sandwiches, breakfast toast, grilled cheese, or as a savory dinner bread.
Freezer-friendly. Individual slices can be frozen for convenient future meals.
Ingredients You’ll Need
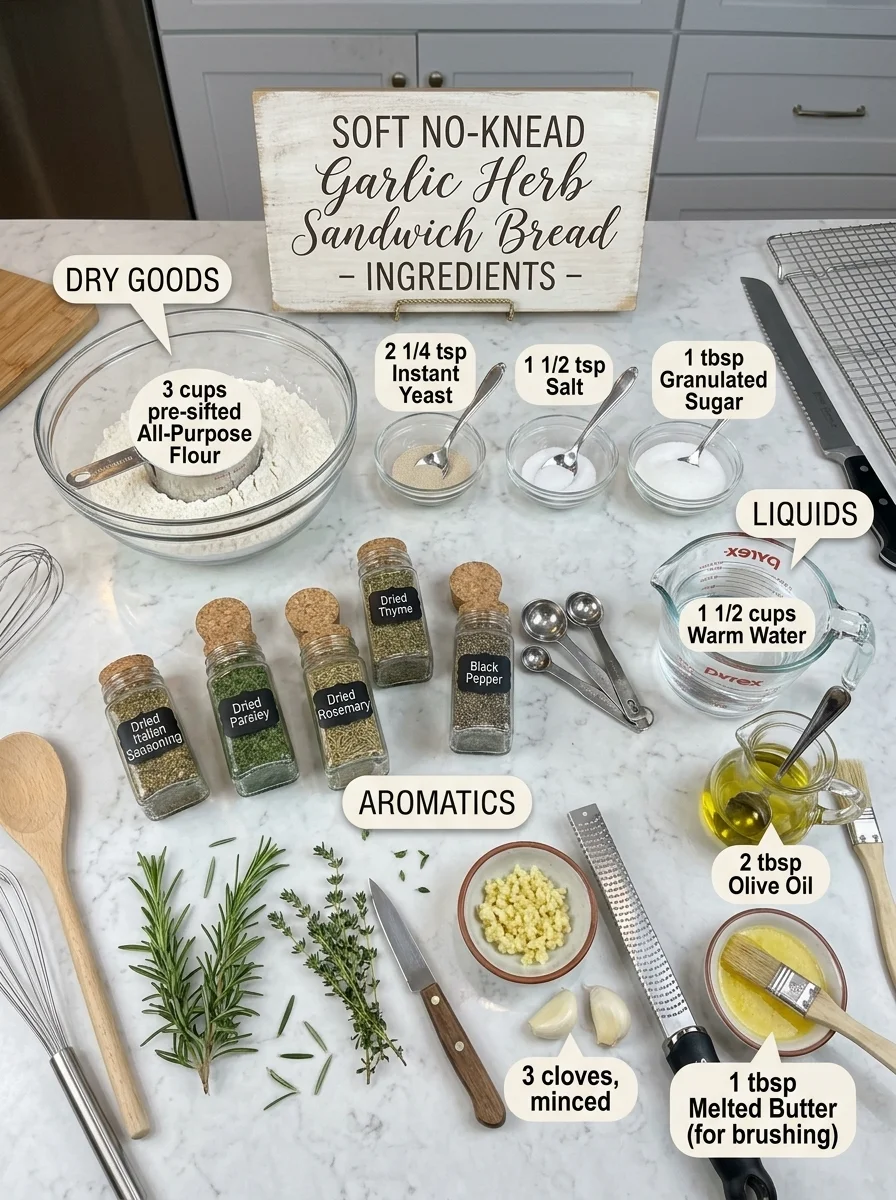
Here’s everything you’ll need to make this easy savory sandwich bread.
- 3 cups all-purpose flour — Provides the structure of the loaf while creating a soft, versatile sandwich crumb.
- 2¼ tsp instant yeast — Gives the dough its rise without requiring a separate yeast-activation step.
- 1½ tsp salt — Seasons the bread and balances the other flavors.
- 1 tbsp granulated sugar — Adds subtle sweetness and balances the savory garlic and herbs.
- 1½ cups warm water — Hydrates the flour and creates the soft, sticky no-knead dough.
- 2 tbsp olive oil or melted butter — Adds moisture and richness to the bread.
- 3 cloves garlic, finely minced — Provide fresh savory garlic flavor throughout the loaf.
- 1 tsp dried Italian seasoning — Adds a convenient blend of classic savory herbs.
- 1 tsp dried parsley — Provides additional mild herbal flavor.
- ½ tsp dried rosemary — Adds a fragrant, woodsy note that pairs especially well with garlic.
- ½ tsp dried thyme — Contributes earthy herbal flavor.
- ¼ tsp black pepper — Adds subtle peppery warmth.
- 1 tbsp melted butter, for brushing — Brushed over the freshly baked loaf for extra flavor and a softer crust.
How to Make Soft No-Knead Garlic Herb Sandwich Bread
This easy loaf requires two rises but very little hands-on work.
Step 1: Combine the Dry Ingredients
Add the all-purpose flour, instant yeast, salt, granulated sugar, Italian seasoning, dried parsley, rosemary, thyme, and black pepper to a large mixing bowl.
Whisk until the yeast, seasonings, and herbs are evenly distributed throughout the flour.
Step 2: Add the Wet Ingredients and Garlic
Pour in the warm water and olive oil or melted butter.
Add the finely minced fresh garlic.
Using a wooden spoon, stir everything together until no dry flour remains.
The dough should look sticky, soft, and shaggy. That’s exactly what you want for this no-knead bread.
Step 3: Let the Dough Rise
Cover the mixing bowl tightly.
Leave the dough at room temperature for approximately 1½–2 hours, or until it looks noticeably puffy and has nearly doubled in size.
The exact rising time can vary depending on the temperature of your kitchen.
Step 4: Prepare the Loaf Pan
Lightly grease a 9×5-inch loaf pan.
Transfer the risen dough into the prepared pan.
Because this is a sticky dough, lightly oil or wet your hands before handling it.
Gently spread the dough into an even layer without aggressively pressing out all of the air.
Step 5: Let the Dough Rise Again
Loosely cover the loaf pan.
Allow the dough to rise for another 30–45 minutes, or until it becomes puffy and rises close to the top of the pan.
Meanwhile, preheat your oven to 375°F (190°C).
Step 6: Bake the Bread
Place the loaf pan in the preheated oven.
Bake for 35–40 minutes, or until the bread is beautifully golden brown.
The finished loaf should sound hollow when gently tapped.
Step 7: Brush with Melted Butter
Remove the bread from the oven.
Immediately brush the surface with 1 tablespoon melted butter.
This adds flavor while helping create a softer, more tender crust.
Step 8: Cool the Bread
Allow the loaf to cool in the pan for approximately 10 minutes.
Carefully remove it from the pan and transfer it to a wire rack.
Let the bread cool completely before slicing.
Cooling is important because the interior crumb continues to set after the loaf comes out of the oven.
Step 9: Slice and Serve
Once completely cooled, slice the loaf using a serrated bread knife.
Serve with butter or use the slices for your favorite sandwiches.
How to Serve Garlic Herb Sandwich Bread
The savory garlic and herbs make this homemade bread especially versatile.
- For deli sandwiches — Layer with turkey, chicken, ham, cheese, lettuce, and your favorite condiments.
- With grilled chicken — The garlic and herbs pair beautifully with sliced grilled chicken.
- For grilled cheese — Use thick slices with your favorite melting cheese.
- With eggs — Toast and serve with scrambled, fried, or poached eggs.
- For breakfast sandwiches — Add eggs, cheese, and your favorite breakfast fillings.
- With butter — Toast a slice and keep things simple with a generous spread of butter.
- Alongside soup — Serve with tomato, vegetable, chicken, or other comforting soups.
- With pasta — Use it as a simple alternative to garlic bread.
- For savory toast — Top toasted slices with avocado, cheese, eggs, or creamy spreads.
Tips for the Best No-Knead Garlic Herb Bread
Don’t add extra flour just because the dough is sticky. No-knead dough is naturally softer and stickier than traditional kneaded sandwich dough.
Use finely minced garlic. Smaller pieces distribute the garlic flavor more evenly throughout the loaf.
Mix the dried herbs with the flour first. This helps distribute the seasonings throughout the entire dough.
Watch the dough rather than only the clock. During the first rise, look for a noticeably puffy dough that’s nearly doubled.
Oil or wet your hands before handling the dough. This makes transferring and shaping sticky dough much easier.
Don’t aggressively deflate the dough. Gently spread it into the loaf pan so you preserve some of the air created during the first rise.
Give it a proper second rise. Allowing the dough to become puffy before baking helps create a lighter loaf.
Brush with butter while hot. The warm crust absorbs some of the melted butter, adding flavor while helping soften the surface.
Cool completely before slicing. Cutting the loaf while it’s still hot can compress the crumb and create uneven slices.
Use a serrated knife. A bread knife makes it easier to cut clean sandwich slices without crushing the loaf.
Storage Information
Allow the Soft No-Knead Garlic Herb Sandwich Bread to cool completely before storing.
Keep it in an airtight container or bread bag at room temperature for up to 3 days.
If desired, refrigerate the bread for up to 5 days. Toasting or gently reheating refrigerated slices can help refresh their texture.
For longer storage, slice the loaf and freeze individual portions for up to 2 months.
Placing parchment paper between slices can make it easier to remove only the amount you need.
Thaw slices before serving or toast them after thawing.
Frequently Asked Questions
Do I really not need to knead this bread?
Correct. The dough is simply stirred together until all the flour is incorporated and then given enough time to rise.
Why is my dough so sticky?
That’s normal. This is a soft no-knead dough with a relatively high amount of moisture. Avoid adding unnecessary flour simply to make it easier to handle.
Can I use olive oil or butter in the dough?
Yes. The recipe works with either 2 tablespoons of olive oil or melted butter. Both add richness, although they provide slightly different flavors.
Do I need to activate the instant yeast first?
No. Instant yeast can be mixed directly with the dry ingredients.
Why does this bread need two rises?
The first rise develops the dough and creates air, while the second rise allows the dough to become puffy again after it’s transferred to the loaf pan.
Can I use this bread for sandwiches?
Absolutely. It’s specifically designed to have a soft, sliceable crumb that works well with deli meats, cheese, grilled chicken, eggs, and other sandwich fillings.
Can I make grilled cheese with it?
Yes. The garlic and herb flavor makes it especially delicious for savory grilled cheese sandwiches.
Why should I brush the loaf with butter after baking?
The melted butter adds flavor and helps soften the freshly baked crust.
How do I know when the bread is done?
The loaf should be golden brown and sound hollow when gently tapped.
Why do I need to cool the bread before slicing?
The crumb continues setting as the loaf cools. Slicing too soon can compress the soft interior and make the bread seem gummy.
Can I freeze Garlic Herb Sandwich Bread?
Yes. Freeze individual slices for up to 2 months so you can thaw only what you need.
Recipe Card
Prep Time: 10 minutes
Rise Time: 2–2½ hours
Cook Time: 35–40 minutes
Total Time: About 3 hours
Servings: 12 slices
Calories: ~185 per slice
This Soft No-Knead Garlic Herb Sandwich Bread combines the ease of no-knead bread with the savory flavors of fresh garlic, rosemary, thyme, parsley, Italian herbs, and butter. The result is a fragrant golden loaf with a soft, tender crumb that’s versatile enough for everyday meals.
Slice it for deli sandwiches, turn it into grilled cheese, toast it for breakfast with eggs, or simply enjoy a warm piece with butter. With minimal hands-on preparation and no kneading required, it’s an easy savory bread you’ll want to bake again and again.
Print
Soft No-Knead Garlic Herb Sandwich Bread
Ingredients
Here’s everything you’ll need to make this easy savory sandwich bread.
- 3 cups all-purpose flour — Provides the structure of the loaf while creating a soft, versatile sandwich crumb.
- 2¼ tsp instant yeast — Gives the dough its rise without requiring a separate yeast-activation step.
- 1½ tsp salt — Seasons the bread and balances the other flavors.
- 1 tbsp granulated sugar — Adds subtle sweetness and balances the savory garlic and herbs.
- 1½ cups warm water — Hydrates the flour and creates the soft, sticky no-knead dough.
- 2 tbsp olive oil or melted butter — Adds moisture and richness to the bread.
- 3 cloves garlic, finely minced — Provide fresh savory garlic flavor throughout the loaf.
- 1 tsp dried Italian seasoning — Adds a convenient blend of classic savory herbs.
- 1 tsp dried parsley — Provides additional mild herbal flavor.
- ½ tsp dried rosemary — Adds a fragrant, woodsy note that pairs especially well with garlic.
- ½ tsp dried thyme — Contributes earthy herbal flavor.
- ¼ tsp black pepper — Adds subtle peppery warmth.
- 1 tbsp melted butter, for brushing — Brushed over the freshly baked loaf for extra flavor and a softer crust.
Instructions
This easy loaf requires two rises but very little hands-on work.
Step 1: Combine the Dry Ingredients
Add the all-purpose flour, instant yeast, salt, granulated sugar, Italian seasoning, dried parsley, rosemary, thyme, and black pepper to a large mixing bowl.
Whisk until the yeast, seasonings, and herbs are evenly distributed throughout the flour.
Step 2: Add the Wet Ingredients and Garlic
Pour in the warm water and olive oil or melted butter.
Add the finely minced fresh garlic.
Using a wooden spoon, stir everything together until no dry flour remains.
The dough should look sticky, soft, and shaggy. That’s exactly what you want for this no-knead bread.
Step 3: Let the Dough Rise
Cover the mixing bowl tightly.
Leave the dough at room temperature for approximately 1½–2 hours, or until it looks noticeably puffy and has nearly doubled in size.
The exact rising time can vary depending on the temperature of your kitchen.
Step 4: Prepare the Loaf Pan
Lightly grease a 9×5-inch loaf pan.
Transfer the risen dough into the prepared pan.
Because this is a sticky dough, lightly oil or wet your hands before handling it.
Gently spread the dough into an even layer without aggressively pressing out all of the air.
Step 5: Let the Dough Rise Again
Loosely cover the loaf pan.
Allow the dough to rise for another 30–45 minutes, or until it becomes puffy and rises close to the top of the pan.
Meanwhile, preheat your oven to 375°F (190°C).
Step 6: Bake the Bread
Place the loaf pan in the preheated oven.
Bake for 35–40 minutes, or until the bread is beautifully golden brown.
The finished loaf should sound hollow when gently tapped.
Step 7: Brush with Melted Butter
Remove the bread from the oven.
Immediately brush the surface with 1 tablespoon melted butter.
This adds flavor while helping create a softer, more tender crust.
Step 8: Cool the Bread
Allow the loaf to cool in the pan for approximately 10 minutes.
Carefully remove it from the pan and transfer it to a wire rack.
Let the bread cool completely before slicing.
Cooling is important because the interior crumb continues to set after the loaf comes out of the oven.
Step 9: Slice and Serve
Once completely cooled, slice the loaf using a serrated bread knife.
Serve with butter or use the slices for your favorite sandwiches.