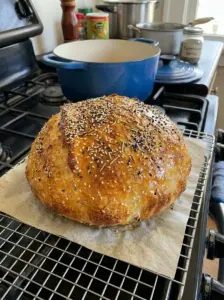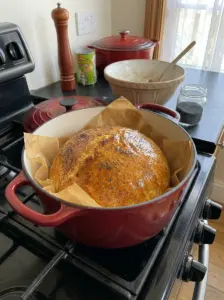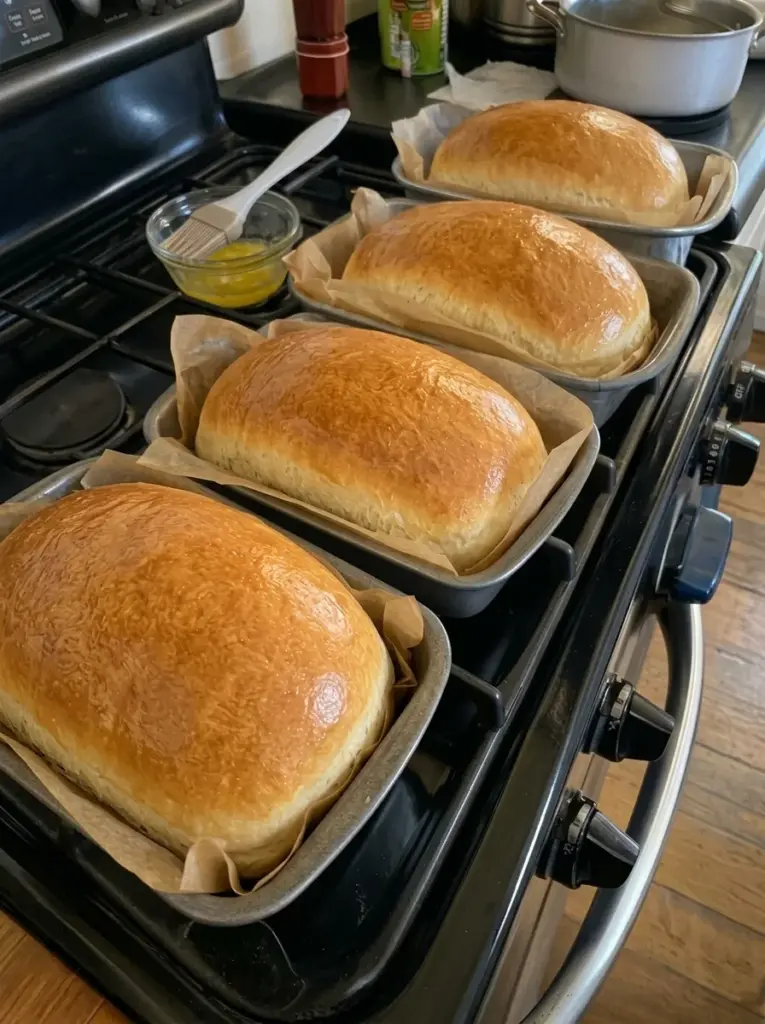
This Simple No-Knead Soft Sandwich Bread is fluffy, tender, buttery, and incredibly easy to make. With a soft golden crust and pillowy interior, it’s the perfect homemade bread for sandwiches, toast, French toast, and everyday breakfasts.
If you love the taste of freshly baked bread but don’t want to spend time kneading dough, this Simple No-Knead Soft Sandwich Bread is exactly what you need. Made with everyday ingredients like all-purpose flour, warm milk, butter, egg, and honey, this loaf develops a wonderfully soft texture without any complicated bread-making techniques.
The secret is allowing the sticky dough plenty of time to rise. Instead of kneading to develop the dough, you simply mix everything together with a spoon or spatula, cover the bowl, and let the yeast do the work. A second rise in the loaf pan gives the bread its tall, airy shape before it goes into the oven.
Once baked, brushing the golden top with a little melted butter keeps the crust soft and adds even more rich flavor. The result is an easy homemade sandwich loaf that’s tender enough for breakfast toast but sturdy enough to hold your favorite sandwich fillings.
Let’s dive into everything you need to know to make this soft and fluffy no-knead sandwich bread at home.
Why You’ll Love This Simple No-Knead Soft Sandwich Bread
There’s so much to love about this easy homemade bread recipe:
No kneading required. Simply mix the ingredients until a sticky dough forms and let the rising time do the rest of the work.
Soft and fluffy texture. Milk, butter, egg, and olive oil help create a tender, pillowy crumb that’s perfect for sandwiches.
Made with simple ingredients. There’s no need for specialty bread flour or complicated equipment.
Perfect for beginners. If you’ve never baked homemade bread before, this straightforward recipe is a great place to start.
Versatile enough for everyday meals. Use the finished loaf for sandwiches, toast, French toast, breakfast, or alongside soups and dinners.
Beautiful buttery crust. Brushing the freshly baked loaf with melted butter gives the top a soft finish and extra flavor.
Ingredients You’ll Need
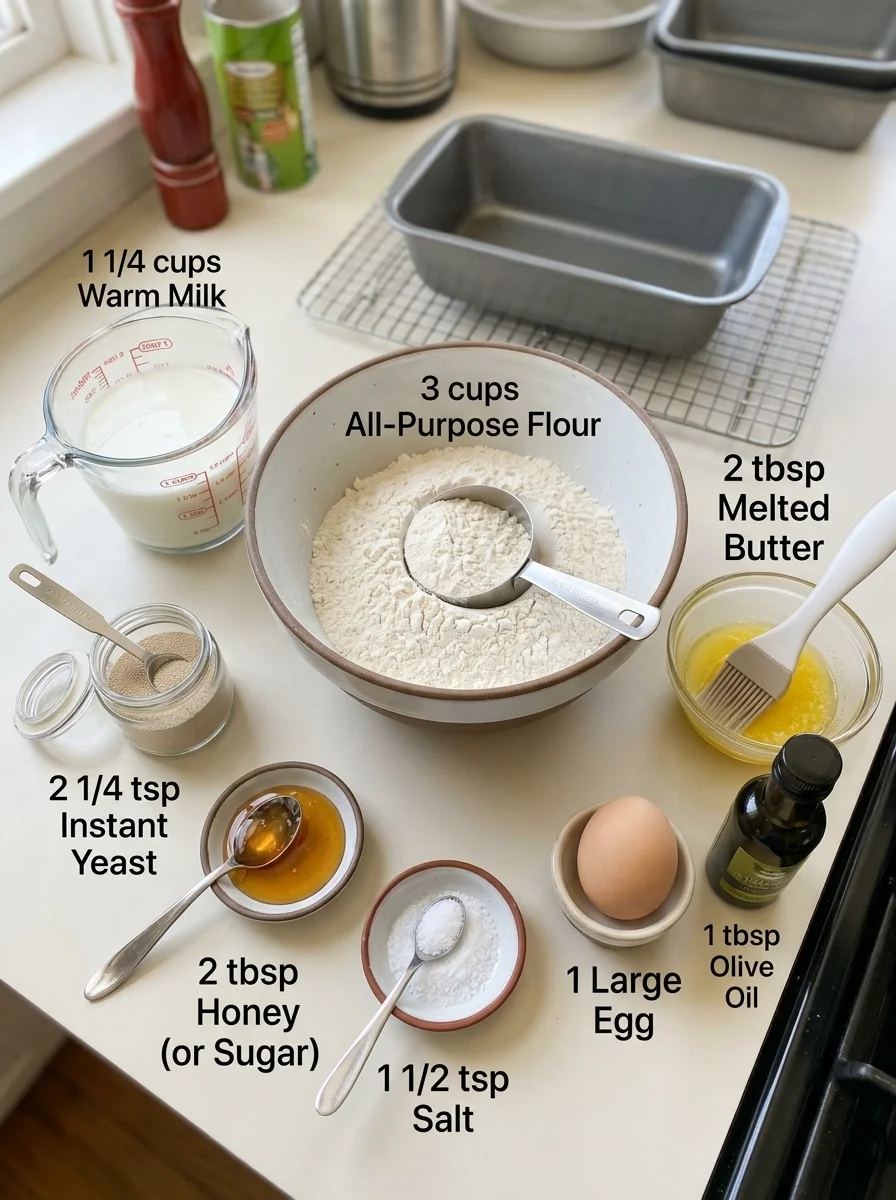
Here’s what goes into this simple no-knead sandwich bread and why each ingredient is important.
- 3 cups all-purpose flour — Provides the structure for the loaf while keeping the crumb soft and tender.
- 1 ¼ cups warm milk — Hydrates the flour and adds richness, helping create a softer bread than water alone.
- 2 ¼ tsp instant yeast — Gives the bread its rise and creates the light, airy interior.
- 2 tbsp honey or sugar — Adds subtle sweetness while complementing the rich milk and butter flavors.
- 1 ½ tsp salt — Balances the sweetness and enhances the overall flavor of the bread.
- 2 tbsp melted butter — Adds richness and helps create a tender, flavorful crumb.
- 1 large egg — Adds structure, richness, and softness to the finished loaf.
- 1 tbsp olive oil — Adds moisture and helps keep the bread tender.
How to Make Simple No-Knead Soft Sandwich Bread
This homemade bread requires only a few minutes of hands-on preparation. Most of the time is simply spent waiting for the dough to rise.
Step 1: Activate the Yeast
In a large mixing bowl, combine the warm milk, honey or sugar, and instant yeast. Let the mixture sit for about 5 minutes.
The milk should be comfortably warm rather than hot, since excessive heat can damage the yeast.
Step 2: Add the Wet Ingredients
Add the egg, melted butter, and olive oil to the yeast mixture.
Stir everything together until well combined.
Step 3: Make the Dough
Add the all-purpose flour and salt.
Using a wooden spoon or sturdy spatula, mix until everything comes together into a soft, sticky dough.
Don’t worry about kneading it—the dough is supposed to remain soft and sticky.
Step 4: Let the Dough Rise
Cover the mixing bowl with plastic wrap or a clean kitchen towel.
Place it somewhere warm and let the dough rise for 1–2 hours, or until approximately doubled in size.
Step 5: Transfer to the Loaf Pan
Lightly grease a 9×5-inch loaf pan.
Gently transfer the risen dough into the prepared pan. Use lightly oiled hands or a spatula to smooth and shape the top.
Try not to aggressively press down on the dough, since you want to preserve some of the air created during the first rise.
Step 6: Let It Rise Again
Loosely cover the loaf pan and allow the dough to rise for another 30–45 minutes.
The dough should rise just above the rim of the pan.
Step 7: Bake the Bread
Preheat the oven to 350°F (175°C).
Bake the loaf for 30–35 minutes, or until the top is beautifully golden brown and the bread sounds hollow when lightly tapped.
Step 8: Brush with Butter
Remove the bread from the oven and immediately brush the top with a little melted butter.
This adds flavor while helping keep the crust soft.
Step 9: Cool Before Slicing
Allow the loaf to cool in the pan for about 10 minutes.
Carefully transfer it to a wire rack and let it cool completely before slicing.
Waiting for the loaf to cool helps the interior finish setting and makes it much easier to cut into clean, even slices.
How to Serve No-Knead Sandwich Bread
This soft homemade bread is incredibly versatile. Try it:
- For sandwiches — Fill slices with your favorite meats, cheeses, vegetables, or sandwich spreads.
- As breakfast toast — Toast until lightly golden and spread with butter, jam, honey, or your favorite topping.
- For French toast — The soft, rich crumb works beautifully for soaking up an egg-and-milk mixture.
- With eggs — Serve toasted slices alongside scrambled, fried, or poached eggs.
- With soups and stews — Use thick slices for dipping into warm soups and hearty stews.
- Simply with butter — Fresh homemade bread with a little butter is hard to beat.
Tips for the Best No-Knead Sandwich Bread
Make sure the milk isn’t too hot. Warm milk encourages yeast activity, but very hot milk can damage the yeast and prevent the bread from rising properly.
Don’t add lots of extra flour. This dough is intentionally soft and sticky. Adding too much additional flour can result in a heavier, drier loaf.
Give the dough enough time to rise. Rather than watching the clock alone, look for the dough to approximately double during the first rise.
Use lightly oiled hands. Because the dough is sticky, a small amount of oil on your hands makes transferring and shaping it much easier.
Don’t over-handle the risen dough. Transfer it gently into the loaf pan so you don’t knock out all the air that developed during the first rise.
Let the second rise finish before baking. Allowing the dough to rise just above the rim of the pan helps create a taller, lighter loaf.
Brush the loaf with butter while it’s warm. This helps create that classic soft sandwich-bread crust.
Cool completely before slicing. Cutting hot bread can compress the soft interior and make the crumb appear gummy.
Storage Information
Allow the bread to cool completely before storing it.
Keep the loaf in an airtight container or bread bag at room temperature for up to 3 days.
For longer storage, slice the cooled loaf and wrap the individual slices before freezing. Freeze for up to 2 months.
When you’re ready to enjoy the bread, thaw the slices at room temperature and toast them before serving if desired.
Frequently Asked Questions
Do I really not need to knead this bread?
Yes. This recipe is specifically designed as a no-knead bread. Simply mix the ingredients with a wooden spoon or spatula until a soft, sticky dough forms, then allow the rising time to do the work.
Why is my dough so sticky?
A soft and sticky dough is normal for this recipe. Resist the temptation to keep adding flour, as too much flour can make the finished loaf dense and dry.
Can I use honey or sugar?
Yes. Either 2 tablespoons of honey or sugar can be used. Honey adds a slightly richer sweetness, while regular sugar keeps the flavor more neutral.
How do I know when the first rise is finished?
The dough should approximately double in size. Depending on the temperature of your kitchen, this can take anywhere from 1–2 hours.
How do I know when the bread is ready to bake?
After transferring the dough to the loaf pan, allow it to rise for another 30–45 minutes. It’s ready for the oven when the dough has risen just above the rim of the pan.
Why should I brush the bread with butter after baking?
Brushing the warm loaf with melted butter adds flavor and helps soften the golden crust, giving the bread that classic soft sandwich-loaf texture.
Why should I wait before slicing homemade bread?
The inside of the loaf continues setting as it cools. Slicing it while it’s still very hot can compress the crumb and make the interior seem gummy.
Can I freeze this sandwich bread?
Yes. Once completely cooled, slice the loaf and wrap the slices before freezing. They can be stored in the freezer for up to 2 months.
Recipe Card
Prep Time: 10 minutes
Rise Time: 2–2 ¾ hours
Cook Time: 30–35 minutes
Total Time: About 3 hours
Servings: 12 slices
Calories: ~175 per serving
This Simple No-Knead Soft Sandwich Bread proves that homemade bread doesn’t have to involve complicated techniques or lengthy kneading. With warm milk, butter, egg, and a little honey or sugar, you can create a beautifully golden loaf with a soft, fluffy interior that’s perfect for everyday meals.
Make a loaf today and enjoy thick, tender slices for sandwiches, buttery toast, French toast, or your favorite breakfast toppings!
Print
Simple No-Knead Soft Sandwich Bread
Ingredients
Here’s what goes into this simple no-knead sandwich bread and why each ingredient is important.
- 3 cups all-purpose flour — Provides the structure for the loaf while keeping the crumb soft and tender.
- 1 ¼ cups warm milk — Hydrates the flour and adds richness, helping create a softer bread than water alone.
- 2 ¼ tsp instant yeast — Gives the bread its rise and creates the light, airy interior.
- 2 tbsp honey or sugar — Adds subtle sweetness while complementing the rich milk and butter flavors.
- 1 ½ tsp salt — Balances the sweetness and enhances the overall flavor of the bread.
- 2 tbsp melted butter — Adds richness and helps create a tender, flavorful crumb.
- 1 large egg — Adds structure, richness, and softness to the finished loaf.
- 1 tbsp olive oil — Adds moisture and helps keep the bread tender.
Instructions
This homemade bread requires only a few minutes of hands-on preparation. Most of the time is simply spent waiting for the dough to rise.
Step 1: Activate the Yeast
In a large mixing bowl, combine the warm milk, honey or sugar, and instant yeast. Let the mixture sit for about 5 minutes.
The milk should be comfortably warm rather than hot, since excessive heat can damage the yeast.
Step 2: Add the Wet Ingredients
Add the egg, melted butter, and olive oil to the yeast mixture.
Stir everything together until well combined.
Step 3: Make the Dough
Add the all-purpose flour and salt.
Using a wooden spoon or sturdy spatula, mix until everything comes together into a soft, sticky dough.
Don’t worry about kneading it—the dough is supposed to remain soft and sticky.
Step 4: Let the Dough Rise
Cover the mixing bowl with plastic wrap or a clean kitchen towel.
Place it somewhere warm and let the dough rise for 1–2 hours, or until approximately doubled in size.
Step 5: Transfer to the Loaf Pan
Lightly grease a 9×5-inch loaf pan.
Gently transfer the risen dough into the prepared pan. Use lightly oiled hands or a spatula to smooth and shape the top.
Try not to aggressively press down on the dough, since you want to preserve some of the air created during the first rise.
Step 6: Let It Rise Again
Loosely cover the loaf pan and allow the dough to rise for another 30–45 minutes.
The dough should rise just above the rim of the pan.
Step 7: Bake the Bread
Preheat the oven to 350°F (175°C).
Bake the loaf for 30–35 minutes, or until the top is beautifully golden brown and the bread sounds hollow when lightly tapped.
Step 8: Brush with Butter
Remove the bread from the oven and immediately brush the top with a little melted butter.
This adds flavor while helping keep the crust soft.
Step 9: Cool Before Slicing
Allow the loaf to cool in the pan for about 10 minutes.
Carefully transfer it to a wire rack and let it cool completely before slicing.
Waiting for the loaf to cool helps the interior finish setting and makes it much easier to cut into clean, even slices.